BABYSTYLE OYSTER Instruction Manual
Hide thumbs
Also See for OYSTER:
- Instruction manual (41 pages) ,
- Instruction manual (10 pages) ,
- Instruction manual (19 pages)

Related Manuals for BABYSTYLE OYSTER


Summary of Contents for BABYSTYLE OYSTER
- Page 1 Instruction manual IMPORTANT – KEEP FOR FUTURE REFERENCE Read the instructions carefully before use and keep them for future reference. Your child’s safety may be affected if you do not follow these instructions.
-
Page 2: Table Of Contents
Removing the seat unit WARRANTY Folding the chassis Babystyle UK Ltd provides a warranty in support of the retailer from Folding the chassis with the seat unit fitted whom you purchased this product. The warranty is effective for 6 Adjusting the seat unit backrest months from the date of purchase for the original purchaser/owner. -
Page 3: Important Safety Information
14. WARNING Always use the crotch strap in combination with the waist working correctly. belt. • If any part of the pushchair is damaged contact your local Babystyle 15. WARNING: Never leave the vehicle without first engaging the parking retailer immediately without using the pushchair. -
Page 4: Primary Features
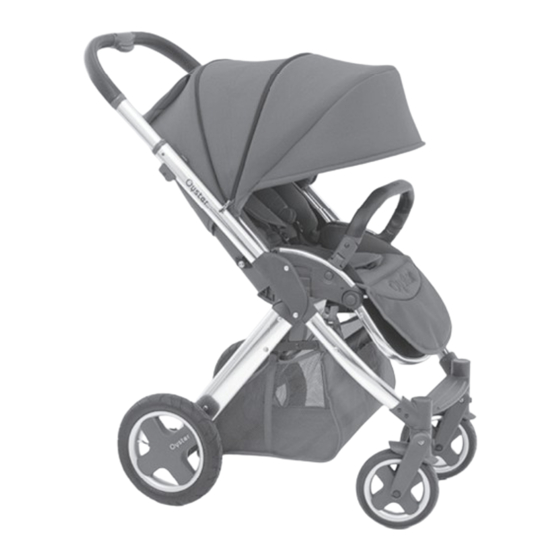
PRIMARY FEATURES FLIP OUT CANOPY The front section of the hood can be flipped out or folded back into the main part of the hood depending choice. To flip out the canopy hold the front part of the canopy and pull forwards. To fold the canopy away push it back into the hood and smooth the fabric. -
Page 5: Fitting And Removing The Rear Wheels
HOOD/SUN CANOPY/INSECT NET engaged before letting go of the handle. To release the brake, with The Oyster has a multi function hood that helps to protect your child your foot press forwards or lift up the brake lever until the wheels from the elements. -
Page 6: Opening The Chassis
REMOVING THE Britax Baby-Safe SHR CAR SEAT FROM THE FITTING THE SEAT UNIT OYSTER CHASSIS. To fit the seat unit to the chassis: hold the seat unit by the seat unit Hold the carry handle of the car seat and press the large side button release handles and lower the seat unit into the attachment devices in with your fingers. -
Page 7: Folding The Chassis With The Seat Unit Fitted
The car seat can not be attached to the chassis until the seat unit or the carrycot has been removed. The Britax Baby Safe SHR does not require adaptors to fit onto the OYSTER chassis. Hold the car seat by the carry handle and lower the car seat onto the chassis so that the fittings below the car seat handle slide into the attachment device on the OYSTER chassis. -
Page 8: Fitting The Carrycot To The Chassis
(model LB321) Push the ends of the bumper bar into the corresponding slots on the Matching Oyster car seat is fitted to the chassis by using the LB321 seat unit until the bumper bar locks into position. To remove the Oyster car seat adaptors.
Need help?
Do you have a question about the OYSTER and is the answer not in the manual?
Questions and answers