Table of Contents
Advertisement
Quick Links
Advertisement
Table of Contents

Subscribe to Our Youtube Channel
Related Manuals for Baumatic BO610.5SS


Summary of Contents for Baumatic BO610.5SS
- Page 1 BO610.5SS 60 cm Gas oven...
- Page 2 User Manual for your Baumatic BO610.5SS 60 cm Gas oven NOTE : This User Instruction Manual contains important information, including safety & installation points, which will enable you to get the most out of your appliance. Please keep it in a safe place so that it is easily available for future reference; for you or any person not familiar with the operation of the appliance.
-
Page 3: Table Of Contents
Contents Environmental note Important safety information 5 – 8 Specifications 9 – 11 Product and aperture dimensions Product specifications Standard accessories Optional extras Electrical details Cooling fan Control panel Using your gas oven 11 - 17 Before first use Switching the gas oven on Switching the gas grill on Removable grill deflector 13 - 14... -
Page 4: Environmental Note
Environmental note o The packaging materials that Baumatic uses are environmentally friendly and can be recycled. o Please discard all packaging material with due regard for the environment. -
Page 5: Important Safety Information
Baumatic Ltd. will invalidate any warranty or liability claim. o Your new appliance is guaranteed against electrical or mechanical defects, subject to certain exclusions that are noted in Baumatic’s Conditions Of G uarantee. The foregoing does not affect your statutory rights. - Page 6 This appliance complies with all current European safety legislation. Baumatic do wish to emphasise that this compliance does not remove the fact that the appliance surfaces will become hot during use and retain heat after operation.
- Page 7 o Oven gloves should be used when placing food in the oven cavity and when removing it. Care should be taken to avoid direct contact with either of the burners in the appliance. o DO NOT LEAVE THE APPLIANCE UNATTENDED WHILST IN USE.
- Page 8 Please see the specific section of this booklet that refers to installation. o Baumatic declines responsibility injury damage, to person or property, as a result of improper use or installation of this appliance. o Heat, steam and moisture will be created during use of the appliance, take care to avoid injury and ensure that the room is adequately ventilated.
-
Page 9: Specifications
Specifications (IMPORTANT: The above drawing does not show the ventilation requirements that are necessary for installing this appliance, please refer to the installation instructions for this information). Product Dimensions Aperture Dimensions Height: 594 mm Height: 595 mm Width: 594 mm Width: 560 mm Depth:... -
Page 10: Optional Extras
Optional extra o BPS2 Pizza stone Electrical details Rated Voltage: 230 Vac 50 Hz Supply Connection: 13 A (double pole switched fused outlet with 3mm contact gap) Fuse rating: 3 amp Mains Supply Lead: 3 x 1.0 mm² Cooling fan o A tangential cooling fan is fitted inside of these appliances, to make the internal temperature of the oven stable and the external surface temperature lower. -
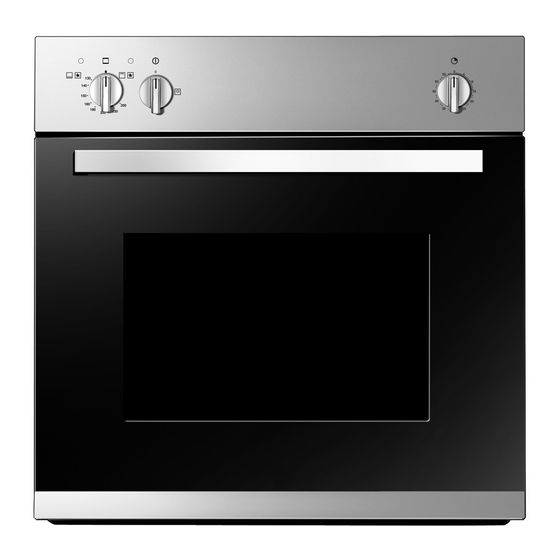
Page 11: Control Panel
Control Panel Using your gas oven Before first use o To remove any residue from the oven that may have been left from the manufacturing process, you should select the gas oven function and set it to its maximum temperature setting. o It is perfectly normal for a smell to be produced during this process. -
Page 12: Switching The Gas Oven On
Switching the gas oven on The oven has automatic ignition, to light it you should do the following:- o Open the door of the appliance. o Push the oven function control knob down slightly and then turn it anticlockwise to the gas oven and ignition symbols. o Whilst it is pointed to the gas oven ignition position, fully push down this knob and hold it down. -
Page 13: Switching The Gas Grill On
Switching the gas grill on The grill has automatic ignition, to light it you should do the following:- o Push the oven function control knob down slightly and then turn it clockwise to the grill and ignition symbols. o Whilst it is pointed to the grill ignition position, fully push down this knob and hold it down. -
Page 14: Oven Operating Lights
Oven operating lights o The operating lights will come on to indicate that the oven / grill are in use. Cooking guidelines o Please refer to the information given on food packaging for guidance on cooking temperatures and times. Once familiar with the performance of your appliance, temperatures and times can be varied to suit personal preference. -
Page 15: Warnings
Warnings o Keep the oven door open when using the grill function. o Do not use aluminium foil to cover the enamelled baking tray or heat items wrapped in aluminium foil under the grill. o You should also never line the base of your oven with aluminium foil. -
Page 16: Using The Minute Minder
o We would recommend that you place the enamelled baking tray into the lowest shelf position. o This will deflect some of the fierce heat generated by the base burner away from the food that you are cooking. o This will allow food to cook all of the way through, without getting burnt on the base. -
Page 17: The Oven Light
The oven light o Turn the oven light selector knob clockwise, until it reaches the light bulb symbol. o The oven light can be switched on, regardless of whether the oven/grill is in use. Cleaning and maintenance Cleaning operations must only be carried out when the oven is cool. -
Page 18: Replacing The Oven Bulb
Any damage that is caused to the appliance by a cleaning product will not be fixed by Baumatic free of charge, even if the appliance is within the guarantee period. Replacing the oven bulb... -
Page 19: Removing The Oven Door For Cleaning
Removing the oven door for cleaning To facilitate the cleaning of the inside of the oven and the outer frame of the oven, the door can be removed as follows:- o The hinges have two movable bolts on them. o If raise both movable bolts, then the hinges... -
Page 20: Installation
Installation The installation must be carried out by a suitably qualified person, in accordance with the current version of the following. o UK Regulations and Safety Standards or their European Norm Replacements. o Building Regulations (issued by the Department of the Environment). -
Page 21: Positioning
Positioning The adjacent furniture and all materials used in the installation must be able to withstand a minimum temperature 85°C above ambient temperature of the room it is located in, whilst the appliance is in use. o Your appliance is heavy, so you should be careful when moving or positioning it. -
Page 22: Ventilation Requirements
o The oven must be fitted into an oven housing with the ventilation cut-outs shown in the “Ventilation requirements” section below. o Ensure that the rear panel of the furniture housing unit has been removed. Ventilation requirements o You should remove the rear panel of the housing unit before attempting to install the oven. - Page 23 Additional built under ventilation requirements o Remove the horizontal strengthening support at the upper front housing unit. o If your housing unit incorporates a domestic lower drawer, this must be made non-functioning with a ventilated false front. o A 5 mm ventilation gap must be allowed between the top of the appliance and the underside of the worktop.
-
Page 24: Gas Connection
Conversion for use on LPG and other gases must only be undertaken by a qualified person. For information on the use of other gases, please contact the Baumatic Advice Line. o The oven must be installed by a qualified person, in accordance with the current edition of the Gas Safety (Installation and Use) Regulations and the relevant building/I.E.E. -
Page 25: Room Ventilation Requirements
o Ensure that the room containing the oven is well ventilated, keep natural ventilation holes. o Prolonged intensive use of the appliance may call for additional ventilation. o This oven is not fitted with a device for discharging the products of combustion. - Page 26 o This appliance is not designed to be connected to a combustion product evacuation device. Particular attention should be given to the relevant requirements regarding ventilation. o A ½” BSP female to female gas elbow should be connected to the gas inlet at the rear of the appliance and pointing in a downward direction.
-
Page 27: Gas Adjustment (Conversion To Lpg And Gas Adjustment)
Gas adjustment (Conversion to LPG and gas adjustment) IMPORTANT: Your appliance must be disconnected from the electric and gas supply before completing this process. Burner kW rated load Ø Nozzle (mm) 20 mbar 50 mbar 29 mbar Oven burner 2.50 1.13 0.67 0.76... - Page 28 o Unscrew screw (A) which will allow you to remove the oven burner. o Unscrew the injector (B) and replace it with one suitable for LPG (see the table on the previous page). It is recommended that the appropriate thread sealant is used; always check for gas tightness after assembly.
- Page 29 o Re-fix the grill burner, no further adjustments are necessary. o Remove control panel cover from the top of the appliance. o Remove oven control knobs then undo the two fixing rings that are exposed underneath, by turning them anti- clockwise.
-
Page 30: My Appliance Isn't Working Correctly
and through the rear panel of the control panel. Turn the screw anticlockwise to decrease the flow. o Adjust the bypass setting until the correct flame size is achieved. o Refit the control knob, then turn it to the Max position and then back to Min several times, checking that the flame is maintained. - Page 31 Or any installation other than the one specified by Baumatic has been completed. Please refer to the conditions of guarantee that appear on the warranty...
-
Page 33: Contact Details
6 Bennet Road, Reading, Berkshire RG2 0QX United Kingdom Customer Care Telephone 0844 692 3605 Spares Telephone 0844 692 3606 Website: www.baumatic.co.uk... - Page 36 2.005.74.0 www.baumatic.co.uk...
Need help?
Do you have a question about the BO610.5SS and is the answer not in the manual?
Questions and answers