Table of Contents
Advertisement
Quick Links
GAS BUILT-IN COOKING APPLIANCES
OWNER'S MANUAL
Thank you for buying a Westinghouse oven.
Please read your owner's manual carefully, it provides
instructions on safe installation, use and maintenance.
Retain it for future reference.
Record the model and serial numbers of your oven.
Record model and serial number here:
Model: ...................................................
Serial No:...............................................
Advertisement
Table of Contents

Related Manuals for Westinghouse GOP474


Summary of Contents for Westinghouse GOP474
- Page 1 GAS BUILT-IN COOKING APPLIANCES OWNER'S MANUAL Thank you for buying a Westinghouse oven. Please read your owner's manual carefully, it provides instructions on safe installation, use and maintenance. Retain it for future reference. Record the model and serial numbers of your oven.
- Page 2 S A F E T Y A N D W A R N I N G I N S T R U C T I O N S Read the following carefully to avoid an accident. General warnings • This appliance is not intended for use by persons (including children) with reduced physical, sensory or mental capabilities, or lack of experience and knowledge, unless they have been given supervision or instruction concerning use of the appliance by a person responsible for their safety.
-
Page 3: Table Of Contents
C O N T E N T S DESCRIPTION OF YOUR APPLIANCE ........................4 GOP474 .................................4 GOP476 .................................4 GGP475 ................................4 GXP650 ................................4 BEFORE OPERATING YOUR APPLIANCE FOR THE FIRST TIME...............5 Setting the time ............................5 Preparing your appliance for the first time....................5 Installing your oven accessories ........................5... -
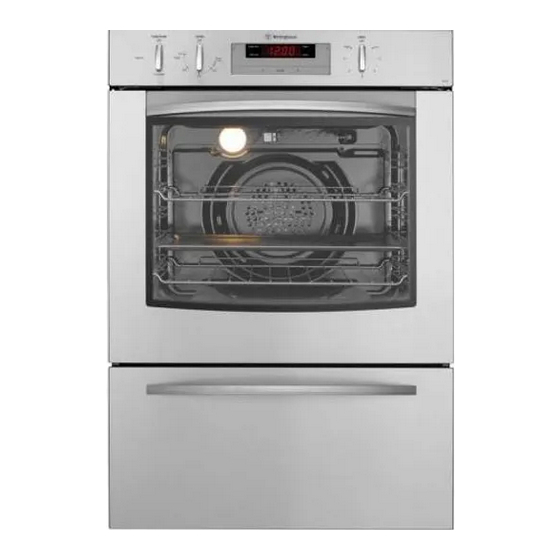
Page 4: Description Of Your Appliance
D E S C R I P T I O N O F Y O U R A P P L I A N C E... -
Page 5: Before Operating Your Appliance For The First Time
BEFORE OPERATING YOUR APPLIANCE FOR THE FIRST TIME S e t t i n g t h e t i m e If you have purchased a model fitted with an electronic clock, you must set the time of day before you can operate your appliance. - Page 6 BEFORE OPERATING YOUR APPLIANCE FOR THE FIRST TIME 2. Shelves and trays The shelves are designed so that they have maximum travel but cannot be accidentally pulled right out. The trays are designed the same way and fit straight into the side racks. •...
-
Page 7: Using Your Oven
U S I N G Y O U R O V E N U n d e r s t a n d i n g y o u r o v e n f u n c t i o n s Your oven will have a selection of the following functions. -
Page 8: Cooling/Venting Fan
U S I N G Y O U R O V E N Cooling/Venting fan Your built-in appliance is fitted with a cooling fan. This prevents your kitchen cabinet from overheating and reduces the condensation inside the oven. It will operate whenever you are using your oven or grill and will blow warm air across the top of the oven or grill door. -
Page 9: Pre-Heating Your Appliance
U S I N G Y O U R O V E N Pre-heating your appliance For best results when baking you must preheat your oven for 30 minutes. Preheat grill for 3 minutes to obtain best results. Pre-heating your appliance allows it to reach the required temperature quickly and efficiently. -
Page 10: Cooking With Your Timer
C O O K I N G W I T H Y O U R T I M E R 2-hour “Auto Off” timer The 2-hour timer features an automatic oven "cut off". This means that a cooking period of up to 120 minutes can be set. When the timer has counted back to "Auto Off"... -
Page 11: Cooking Guide
OPERATING THE ELECTRONIC CLOCK (Continued) Setting the delayed start cooking time 1. Program the “cook time“ and “end time“ as described in the relevant sections. Once both the “cook time“ and “end time“ have been set, the “cook time“ and “end time” indicators will stop flashing and the current time of day will be displayed. -
Page 12: Choosing The Best Oven Settings
C O O K I N G G U I D E Choosing the best oven settings The following table is intended as a guide and experience may show some variation in cooking times necessary to meet individual requirements. For best results when baking you must preheat your oven for 30 minutes. Modes without Oven Fan Temperature Oven shelf... -
Page 13: Roasting Meat
C O O K I N G G U I D E Roasting Meat 1. Place the meat in the oven and set the Recommended Minutes per temperature between 180°C and 200°C. (It is Meat temperature kilogram recommended to wrap your meats in an oven Beef 200°C Rare... -
Page 14: Grilling Guide
G R I L L I N G G U I D E G r i l l i n g h i n t s NOTE: Always clean the grill / oven dish after every use. Excessive fat build up may cause a fire. As a method of cooking, grilling can be used to: •... -
Page 15: Dealing With Cooking Problems
DEALING WITH COOKING PROBLEMS (see also p.20) Problem Causes Remedies Uneven cooking: • Incorrect shelf position. - Select shelf that puts food in the centre of the oven. • Oven tray too large. - Experiment with other trays or dishes. •... -
Page 16: Cleaning Your Appliance
CLEANING YOUR APPLIANCE IMPORTANT: • Always make sure that the oven is electrically isolated before cleaning. This can be done via the power point switch located nearby. • Do not use steam cleaners. • Do not line the bottom of the oven or grill with foil or cookware. •... -
Page 17: Cleaning Your Oven Accessories
CLEANING YOUR APPLIANCE C l e a n i n g y o u r o v e n a c c e s s o r i e s Removing the trays and shelves from your appliance • Slide the dish and shelves towards you until they reach the front stop. •... - Page 18 CLEANING YOUR APPLIANCE Removing and replacing the oven light • Turn oven light glass anticlockwise to remove it for globe replacement. • A special high temperature resistant globe should be used. This can be purchased from the Customer Care Centre. IMPORTANT: Make sure the appliance is turned off before you remove or replace parts, to...
-
Page 19: Electronic Burner Control
ELECTRONIC BURNER CONTROL Your gas oven is fitted with an electronic controller which manages the operation of the burner and monitors the flame. This controller includes features which ensure the safe operation of your appliance and will prevent the build up of unburnt gas, should a fault occur. It is normal for the flame to turn on and off during cooking, to maintain a stable temperature in the oven. -
Page 20: Solving Problems
SOLVING PROBLEMS Faults If there is a problem with the oven and/or grill, please: • Check the points listed below before calling for service. It may be possible to avoid a call by fixing the problem yourself - and so continue cooking. •... -
Page 21: Installation
I N S TA L L AT I O N USE AN AUTHORISED PERSON As stated in the local municipal building codes and other relevant statutory regulations. • Refer to data plate for rating information and circuit diagram. The data plate is positioned behind the bottom of the oven door. -
Page 22: Cabinet Construction
INSTALLATION C a b i n e t C o n s t r u c t i o n f o r y o u r a p p l i a n c e For the best integration within a kitchen, install this appliance in a standard 600mm wide cupboard that gives a flush fit with the surrounding cupboard fronts (figure A). -
Page 23: Gas Installation Information
GAS INSTALLATION INFORMATION G a s C o n n e c t i o n Before commencing installation, check to ensure the type of gas to which the appliance is intended to be connected matches the gas type given on the appliance data plate. -
Page 24: Operating Pressures
GAS INSTALLATION INFORMATION O p e r a t i n g P r e s s u r e s Supply and operating pressures for various gases and corresponding injector sizes for each burner. Gas Type Supply Pressure (kPa) Nominal Test Point Oven injector Pressure (kPa) -
Page 25: Separate Grill Underbench
GAS INSTALLATION INFORMATION S e p a r a t e G r i l l U n d e r b e n c h O v e n s Recommended Cabinet Design 720mm Module(s) NOTE TO INSTALLER: For Separate Grill Bench top Underbench Installations where a Cooktop is installed directly above the appliance, a... -
Page 26: Separate Grill Walloven
GAS INSTALLATION INFORMATION S e p a r a t e G r i l l Wa l l o v e n D o o r R e m o v a l Removing the door from your appliance •... - Page 28 H E A D I N G H E A D I N G P/N 342-1-541 ECN 08A001A 05/08...
Need help?
Do you have a question about the GOP474 and is the answer not in the manual?
Questions and answers