Table of Contents
Advertisement
Quick Links
Advertisement
Table of Contents

Related Manuals for Estate TS25AQ


Summary of Contents for Estate TS25AQ
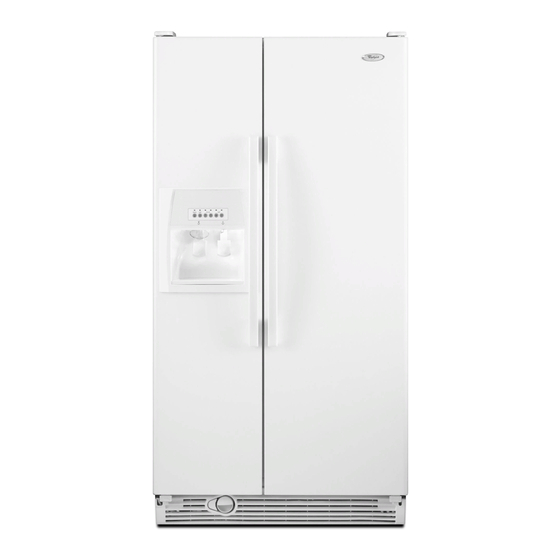
- Page 1 UseAndCare A Note To You !iiiEZiF Parts And Features Before Using Your Reftigelator Using Your Refrigerator caa;zp Foal Storage Guide 24 If Yqu Need g$!l!z Warranty 1400-253-1301 C8llUSWitlltpStiOnrOreOmllWlb. NO-FROST REFRIGERATOR-FREEZER MODEL TS25AQ aI@/...
- Page 2 A Note To You Thank you for buying an Estate. appliance. You purchased a quality, ~~rW*/ass home appliance. Years of engineering experience went into its manufacturing. To ensure that you enjoy many years of trouble-free operation, we developed this Use and Care Guide. It is full of valuable information on how to operate and maintain your appliance property safely.
- Page 3 Important Safety Instructions To reduce the risk of fire, electrical shock, or injury when follow these basic precautions: using your rdrigerator, Never clean refrigerator parts with Read all instructions before using the flammable fluids. The fumes can create a refrigerator. fire hazard or explosii.
-
Page 4: Parts And Features
Parts And Features This section contains captioned illustrations. Use them to become familiar with where all parts and features are located what they bok like. Control panel Control panel Light Upper freezer Ii& Automatic ice mmker Removable door Freezer basked... -
Page 5: Before Using Your
Before Using Your Refrigerator In This Section PagO Cleaning lt ..........lnstalllng lt properly . -
Page 6: Changing The Control Settings
Installing it properly 1. Allow ‘!A inch (1.25 cm) space on each side and at the top of the refrigerator for ease of installation. 2. If the refrigerator is to be against a wall, you might want to leave extra space on the hinge side cbsest to the wall so the door can he opened wider. -
Page 7: Table Of Contents
Using Your Refrigerator In This Section Pago Setting the controls ......7 Removing the freezer shelves ..12 Using the ice and water Changing the control settings . - Page 8 NOTE: The Automatic Exterior Moisture 3. Give the refrigerator time to cool down control continuously guards against moisture completely before adding food. Thii may build-up on the outside of your refrigerator take several hours. The settings indiited above should be cabinet.
-
Page 9: Removing The Door Shelf Fronts
Removing the door shelf fronts Remove the door shelf fronts for easier cleaning. To remove shelf fronts: Remove all items from the shelf. 2. Pull out on the inside tab at each end of the shelf front. 3. Pull shelf front straight out. To replace shelf fronts: Line up each end of the shelf front with the button on the door liner wail. -
Page 10: Adjusting The Refrigerator Shelves
Adjusting the refrigerator shelves way you usa Adjust the shelves to match the your refrigerator. Glass shelves are strong enough to hold bottles, milk, other heavy food items. To remove the shelves: Remove items from the shelf. 2. Tilt shelf up at front. Lll shelf up at back. -
Page 11: Removing The Meat Drawer
Removing the meat drawer and cover To remove the meat drawer: Pull out to the stop, lift Slide the meat drawer straight out to the the front and pull again. stop. 2. Lii the front slightly. 3. Sliie out the rest of the way. Replace in reverse order. -
Page 12: Removing The Freezer Shelves
Removing the freezer shelves To remove the shelf: 1. Lii right side of shelf off supports. Slide shelf out of shelf support holes. Replace in reverse order. Using the ice and water dispensers Personal Injury Hazard Tumbling ice and pressure can break fragile glass. - Page 13 2. Press a sturdy glass against the ice dispenser bar. HoM glass close to dispenser opening so ice does not fall outside of glass. 3. Remove the glass to stop dispensing. NOTE: The first few batches of ice may have an off-flavor from new plumbing and parts.
-
Page 14: Using The Automatic Ice Maker
Using the automatic ice maker Here are a few things you will want to know about your automatic ice maker: The ON/OFF lever is a wire signal arm. upt0 dop ka DOWN to make ice automatically. maker. UP to shut off the ice maker. NOTE: Do not turn ice maker on until it is DOWN to water supply. -
Page 15: Removing The Ice Maker
Removing the ice maker storage Remove, empty and clean the storage bin if: the ice dispenser has not, or will not, be used for week or more. a power failure causes ice in the bin to melt and freeze together. the ice dispenser is not used regularly. -
Page 16: Solving Common Ke Maker
Solving common ice maker/dispenser problems SOLUTlONS PROBLEM CAUSE Ice dispenser Close the freezer door. Freezer door open won’t work Make sure bin is pushed in all the way. Ice bin not properly installed Use only crescents from ke maker. Wrongiceinbin Shake the bin occasionally to keep cubes separated and to increase storage room. -
Page 17: Removing The Base Grille
Removing the base grille Condenser coil0 To remove the grille: Cpen both doors. 2. Pull base grille foMlard to release the support tabs from the metal clii. 3. Do not remove Tech Sheet fastened behind the grille. To replace the grille: Line up grille support tabs with metal clips. - Page 18 To change crisper light: Disconnect refrigerator from power supply. 2. Pull top of light shield forward until it snaps free. 3. Lower light shield to clear bottom supports. 4. Pull light shield straight out to remove. 5. Replace bulb with a 40-watt appliance bulb.
-
Page 19: You May Hear
Understanding the sounds you may hear Your new refrigerator may make sounds that Water sounds your old one didn’t. Because the sounds are When the refrigerator stops running, you new to you, you might be concerned about may hear gurgling in the tubing for a few them. - Page 20 Caring For Your Refrigerator In This Section Page Cleaning your refrigerator ....20 ......23 Power interruptions Vacation and moving care .
- Page 21 PART WHAT TO USE HOW TO CLEAN Door liners and Wash, rinse and dry thoroughly. Sponge, soft cloth gaskets or paper towel with DO NOT USE cleaning waxes, concen- mikl detergent and trated detergents, bleaches or cleaners warm water containing petroleum on plastic parts. Soft, clean sponge Piastk parts Wash, rinse and dry thoroughly.
- Page 22 Vacation and moving care Moving Short vacations When you are moving the refrigerator to a No need to shut off the refrigerator if you will new home: be away for less than four weeks. Turn off the water supply to the ice 1.
- Page 23 Power interruptions If electricii goes off, call the power corn- pany. Ask how long power will be off. 1. If service will be interrupted 24 hours or less, keep both doora closed. This helps food stay frozen. 2. If service will be interrupted longer than 24 hours: (a) Remove all frozen food and store in a frozen food locker.
- Page 24 Food Storage Guide There is a correct way to package and store refrigerated or frozen food. To keep food fresher, longer, take the time to study these recommended steps. Storing fresh food Cheese Wrap or store food placed in the refrigerator in airtight and moisture-proof material.
- Page 25 Storing frozen food Freezing The freezer section is designed for storage of commercially frozen food and for freezing Do not expect your freezer to quick-freeze focd at home. any large quantity of food. Put no more unfrozen food into the freezer than will NOTE: For further information about prepar- freeze within 24 hours (no more than 2 to ing food for freezing or food storage times,...
- Page 26 If You Need Assistance Service Performance problems often result from little things you can fix without tools. Please read the chart below before calling for service on your appliance. 1. Before calling for assistance . . . Listed in this chart are the most common problems consumers run into with their appliances. and see if it Please read through this can solve vour problem.
-
Page 27: Warranty
1-800-253-1301 syn&ol of quality whenever you need a and talk with one of our trained consultants. replacement part for your Estate@appliince. The consultant can instruct you in how to FSP replacement parts will fit right and work obtain satisfactory operation from your... - Page 28 ESTATE” Refrigerator Warranty WHIRLPOOL WILL PAY FOR LENGTH OF WARRANTY FSV replacement parts and repair labor to correct FULL ONE-YEAR materials or workmanship. defects in Service must be WARRANTY an authorized provided by Whirlpool service company. From Date of Purchase...
Need help?
Do you have a question about the TS25AQ and is the answer not in the manual?
Questions and answers