
Related Manuals for Pansat 9500HDX


Summary of Contents for Pansat 9500HDX
- Page 1 User’s Guide HD Satellite Receiver Pansat 9500HDX Panarex Electronics Sun Valley, California, U.S.A. ⓒ 2011 by Panarex Electronics...
-
Page 3: Table Of Contents
CONTENTS 1 - GETTING STARTED ..................................4 Introduction ..................................4 Caution ..................................4 What’s inside the box ................................4 2 - Controls and Displays ..................................5 Remote Control ....................................5 Front Panel ...................................... - Page 4 3.8.3 Timeshift ..................................15 3.8.4 Jump .................................... 15 Channel List ..................................16 3.10 Program Guide (EPG) ............................... 16 3.11 Audio Change ................................... 16 3.12 Favorite Channels ................................16 ...
-
Page 5: Getting Started
This manual will show you how to setup and operate the Pansat 9500HDX. You will find the operation of the Pansat 9500HDX to be simple and easy to handle. Any problems not addressed in this manual should be handles by qualified personnel. -
Page 6: Controls And Displays
2 - Controls and Displays Remote Control Function Power on/off Mute PAUSE Holds the picture or releases the pause INFO Shows channel information AUDIO Selects audio mode, Selects audio language LAST Returns to previous channel MENU Enter/Exit main menu screen EXIT Move to previous menu Page down... -
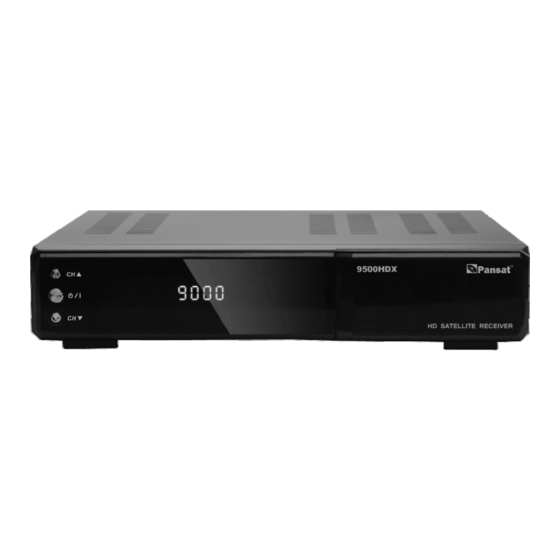
Page 7: Front Panel
Front Panel Name Fuction CH DOWN Moves down in menus, Changes channel down POWER Switches the unit between standy and on CH UP Moves up in menus, Changes channel up DISPLAY Segment LED Display IR Receiver USB Port (+5V 500mA) Rear Panel Name Function... -
Page 8: Operation
3 - OPERATION 3.1 Initial Setup When the receiver is powered on for the first time, the main menu will appear. When first powering on the unit, please do the following: 1. Select the System Setup 2. Switch the language using the ◀ ▶ buttons. Confirm the language by pressing [OK]. -
Page 9: Single Satellite Search
3.2.2.1 Motor DiSEqC DiSEqC 1.2 “Local Longitude”/”Local Latitude” is disabled for DiSEqC 1.2 Motor Setting Select “Motor Setting” in the DiSEqC 1.2 menu Press◀ ▶ buttons to change satellite or transponder Go to “Position No. & Save” Press ◀... -
Page 10: Multi Satellite Search
Scan Start: After options are chosen press [OK] to start the search. 3.2.4 Multi Satellite Search Under “Satellite”, press [OK] to view the selected satellite. The system will use the DiSEqC1.0/DiSEqC1.2/USALS function to search for the satellite and scan the channels. The satellites displayed in the bottom box will be scanned. 3.2.5 TP List and Search ... -
Page 11: Radio Channel List
Sort Press the red button in the Edit Channel menu. Channels may be sorted in the following ways: Name(A-Z): Sort in alphabetical order. “$” symbol is ignored. Name(Z-a): Sort in descending alphabetical order. “$” symbol is ignored. FTA: Sort the channel into free and scrambled order. Free channels will be in the front of the channel list while scrambled channels will be found at the end of the channel list. -
Page 12: Display Settings
Press [OK] to select the Video Resolution (options : 576i, 576p, 720p, 1080i.). After selecting the resolution, it will ask you if you would like to save the setting. If you select “No”, or if you do not confirm in 15 seconds, it will go back to the original resolution. ... -
Page 13: Osd Setting
Use the Menu Lock to enable/disable password entry into Edit Channel/Installation/Tools menus. Use the Channel Lock to enable/disable the password requirement for locked channels. To change the password, select New Password. Use the numerical buttons to enter the new password when prompted. -
Page 14: Game
Download – USB Mode has the following options: Maincode Bootlogo All Code All Data + Boot_code Background Bootloader Userdata Upload(All Data Backup) User needs to put the upgrade file under root in the USB storage device. When the user switches to the Download – USB mode, “File”... -
Page 15: Video Player
Use the [Red] button to show the playlist you selected. Use the [Green] button to select the music file to play. Use the [Yellow] button to select all files in the folder. Use the [Blue] button to enter Edit Mode EDIT MODE ... -
Page 16: Pvr
3.8 PVR 3.8.1 Recording While watching a channel, pressing the [REC] button will start recording for a set duration of 2 hours. If the [REC] button is pressed for a second time, the user will be given the option to change the record duration. Pressing [STOP] at any time will stop the recording. -
Page 17: Channel List
Channel List Press [OK] during playback to open the channel list. Navigate the channel list using the ▲▼ PG↑ PG↓ buttons. Press [OK] to select a channel to watch. Press the [Red] button to set the Parental Lock for the current program. -
Page 18: Specifications
4 – SPECIFICATIONS Satellite Tuner 1 RF Input Connector F-type,IEC169-24 1 RF output(loop through out) F-type,IEC169-24 Frequency Range 950MHz to 2150MHz Input Level -65 dBm~-25 dBm LNB Power 14V/19V (400mA Max) Symbol Rate 1 to 45Msps.(SCPC,MCPC) DiSEqc Diseqc 1.0, 1.1, 1.2 & USALS Compatible Band Switch 22KHz tone Demodulation... -
Page 19: Troubleshooting
5 – TROUBLESHOOTING If the unit is not functioning properly, use this guide to identify and troubleshoot some common causes. If your problem cannot be solved using this guide, please contact your vendor to resolve the issue. Problem Possible causes Remedy Wrong connection of the Component to Connect two terminals correctly...
Need help?
Do you have a question about the 9500HDX and is the answer not in the manual?
Questions and answers