Table of Contents
Advertisement
Advertisement
Table of Contents

Related Manuals for NEC MultiSync PA242W


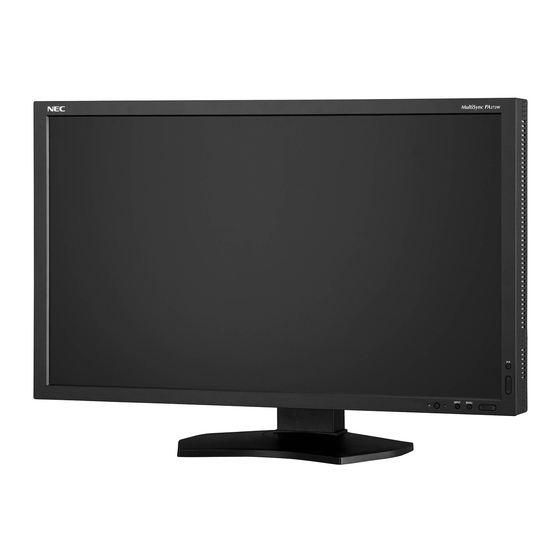
Summary of Contents for NEC MultiSync PA242W
- Page 1 MultiSync PA242W MultiSync PA272W MultiSync PA302W User’s Manual...
-
Page 2: Table Of Contents
Index Warning, Caution ..........................English-1 Registration Information .......................English-2 Recommended use ........................English-3 Product Features ..........................English-5 Contents ............................English-5 Quick Start ............................English-6 Controls ............................English-11 Using the PICTURE MODE function ....................English-17 Advanced OSD ..........................English-18 Specifi cations - PA242W ......................English-26 Specifi cations - PA272W ......................English-27 Specifi cations - PA302W ......................English-28 Features ............................English-29 Troubleshooting ..........................English-30 Using the Auto Brightness function ....................English-32... -
Page 3: Power Cord
Windows is a registered trademark of Microsoft Corporation. NEC is a registered trademark of NEC Corporation. ErgoDesign is a registered trademark of NEC Display Solutions, Ltd. in Austria, Benelux, Denmark, France, Germany, Italy, Norway, Spain, Sweden, U.K. All other brands and product names are trademarks or registered trademarks of their respective owners. -
Page 4: Registration Information
Registration Information FCC Information Use the attached specifi ed cables with the MultiSync PA242W/MultiSync PA272W/MultiSync PA302W monitor so as not to interfere with radio and television reception. The power supply cord you use must have been approved by and comply with the safety standards of U.S.A., and meet the following condition. -
Page 5: Recommended Use
NOTE: As with all personal display devices, NEC DISPLAY SOLUTIONS recommends using a moving screen saver at regular intervals whenever the screen is idle or turning off the monitor when not in use. - Page 6 CORRECT PLACEMENT AND ADJUSTMENT OF THE MONITOR CAN REDUCE EYE, SHOULDER AND NECK FATIGUE. CHECK THE FOLLOWING WHEN YOU POSITION THE MONITOR: • For optimum performance, allow 20 minutes for the display to warm up. • Adjust the monitor height so that the top of the screen is at or slightly below eye level. Your eyes should look slightly downward when viewing the middle of the screen.
-
Page 7: Product Features
Low power consumption via ECO MODE (see page 12). • Small footprint design. • Self calibration with optional sensor (PA302W only). Contents Your new NEC monitor box* should contain the following: • MultiSync monitor with tilt/swivel/pivot/height adjust stand • Power Cord* •... -
Page 8: Quick Start
Quick Start To connect the LCD monitor to your system, follow these instructions: NOTE: Make sure to read “Recommended Use” (page 3) before installation. In order to display the maximum resolution, a video card that can output a resolution of 2560 x 1440 (PA272W) or 2560 x 1600 (PA302W) is needed. - Page 9 4. Connect all cables to the appropriate connectors (Figure C.1). When using the USB cable, connect the B type connector to the USB upstream port on the right back side of the monitor and the A type connector to the downstream port on the computer (Figure C.1a).
-
Page 10: Raise And Lower Monitor Screen
7. Slide down the cable cover (Figure D.1). 8. Connect one end of the power cord to the AC inlet on the back of the monitor and the other end to the power outlet. NOTE: Please refer to Caution section of this manual for proper selection of AC power cord. Figure D.1 9. -
Page 11: Screen Rotation
Screen Rotation Before rotating, the screen must be raised to the highest level and tilt to avoid knocking the screen on the desk or pinching your fi ngers. Disconnect all cables. To raise the screen, place hands on each side of the monitor and lift up to the highest position (Figure RL.1). To rotate screen, place hands on each side of the monitor screen and turn clockwise from Landscape to Portrait or counter- clockwise from Portrait to Landscape (Figure R.1). -
Page 12: Flexible Arm Installation
Flexible Arm Installation This LCD monitor is designed for use with a fl exible arm. To prepare the monitor for alternate mounting purposes: NOTE: For PA302W, the monitor must be installed or moved by two or more people. • Follow the instructions provided by the manufacturer of the display mount. •... -
Page 13: Controls
Controls OSD (On-Screen Display) control buttons on the front of the monitor function as follows: To access OSD menu, press the MENU button. To change signal input, press the SELECT button. NOTE: OSD must be closed in order to change signal input. Landscape Portrait 1 AUTO DIMMING... -
Page 14: Eco Mode
Brightness/Contrast Controls BRIGHTNESS Adjusts the overall image and background screen brightness. NOTE: The brightness level is adjusted using the backlight output. The display will digitally compensate for low or high brightness levels. If digital compensation occurs, the brightness value on the OSD will change to magenta. NOTE: The optimal display performance will be in the range where the OSD brightness value is black. -
Page 15: Color Control Systems
FINE (Analog input only)* Improves focus, clarity and image stability by increasing or decreasing this setting. If the “AUTO ADJUST” function and the “H.SIZE” function do not give you a satisfactory picture setting, a fi ne tuning can be performed using the “FINE” function. For this a Moiré... -
Page 16: Pip Mode
Tools PIP MODE Select PIP MODE, OFF/PIP/PICTURE BY PICTURE - ASPECT/PICTURE BY PICTURE - FULL. You can select individual PICTURE MODE in each screen. This display can display 2 inputs at a time. PICTURE BY PICTURE BY PICTURE - ASPECT PICTURE - FULL MAIN IMAGE ROTATION: ON / SUB IMAGE ROTATION: ON PICTURE BY... -
Page 17: Off Mode
OFF MODE The Intelligent Power Manager allows the monitor to enter into a power saving mode after a period of inactivity. The OFF MODE has four settings. OFF: Monitor does not go into power save mode when the input signal is lost. STANDARD: Monitor enters power save mode automatically when the input signal is lost. -
Page 18: Eco Information
FACTORY PRESET Selecting FACTORY PRESET allows you to reset all OSD control settings (BRIGHTNESS, CONTRAST* , ECOMODE, BLACK, IMAGE CONTROL, COLOR CONTROL SYSTEM, SHARPNESS, PIP MODE, PIP INPUT, PIP LEFT/RIGHT, PIP DOWN/UP, PIP SIZE, USB SELECTION, OFF TIMER, OFF MODE, OSD LEFT/RIGHT, OSD UP/DOWN, OSD TURN OFF, OSD TRANSPARENCY) back to the factory settings. -
Page 19: Cd-Rom
Medical settings for X-ray imaging view. Setting that conforms to the DICOM standard for the Grayscale Standard Display Function. PROGRAMMABLE For “MultiProfi ler” software or the Hardware Calibration settings by NEC Display Solutions software (some OSD settings are disabled). NOTE: - When the selected PICTURE MODE is different from your computer’s ICC color profi... -
Page 20: Advanced Osd
Advanced OSD If you need detailed information about the controls, please use the advanced menu. There are 2 ways to access the advanced menu. Method 1: <To access the advanced menu> • Press the Menu button to access OSD menu. Use the front buttons to move the cursor to the ADVANCED SETTING in Color control systems. - Page 21 GAMMA Allows you to manually select the brightness level of grayscale. There are fi ve selections: sRGB, L Star, DICOM, PROGRAMMABLE and CUSTOM. We recommend to show a grayscale image on screen while adjusting gamma. sRGB: GAMMA setting for sRGB. L Star: GAMMA setting for eciRGB_v2 and Lab color space.
- Page 22 UNIFORMITY This function electronically compensates for the slight variations in the white uniformity level as well as for deviations in color that may occur throughout the display area of the screen. These variations are characteristic of LCD panel technology. This function improves the color and evens out the luminance uniformity of the display.
- Page 23 DIGITAL LONG Compensates for image degradation caused by using a long cable. CABLE A lower number produces less compensation. (DVI/HDMI input only) DIGITAL LONG Compensates for disturbed image caused by using a long DisplayPort cable. CABLE (DP/Mini-DP* There are 2 possible settings, 1 and 2. Setting “2” produces a better result, but may input only) reduce display colors.
- Page 24 H.SIZE* Adjusts the horizontal size of the screen. (Analog input only) If the “AUTO ADJUST” function do not give you a satisfactory picture setting, a further tuning can be performed using the “H.SIZE (V.SIZE)” function (dot clock). For this a Moiré test pattern could be used.
- Page 25 BOOT LOGO* The NEC logo is briefl y displayed after the monitor is powered on. This feature can be turned on or off in the OSD. Note: If the “EXIT” button is kept pressed while NEC logo is displayed, the BOOT LOGO menu will appear.
- Page 26 HOT KEY* When this function is activated; the brightness of the monitor can be adjusted without entering the OSD menu by using the front buttons. The “LEFT” or “RIGHT” buttons adjust the brightness level. When this function is set to OFF, some buttons are disabled. See page 11. FACTORY PRESET* Selecting FACTORY PRESET allows you to reset all OSD control settings back to the factory settings.
- Page 27 TagA TILE MATRIX The TILE MATRIX feature allows one image to be displayed over multiple screens. This feature can be used with up to 25 monitors (5 vertical and 5 horizontal). Using TILE MATRIX requires the PC output signal be sent through a distribution amplifi er to each individual monitor.
-
Page 28: Specifi Cations - Pa242W
1280 x 1024* at 60 Hz to 85 Hz 1600 x 1200* at 60 Hz NEC DISPLAY SOLUTIONS recommended resolution 1920 x 1200 at 60 Hz........... for optimal display performance. 1400 x 1050* at 60 Hz to 75 Hz 1400 x 900*... -
Page 29: Specifi Cations - Pa272W
1600 x 1200* at 60 Hz to 85 Hz 1920 x 1200* at 60 Hz to 75 Hz 2560 x 1440 at 60 Hz........... NEC DISPLAY SOLUTIONS cites recommended 480P (720 x 480* at 60 Hz) resolution for optimal display performance. -
Page 30: Specifi Cations - Pa302W
1920 x 1200* at 60 Hz to 75 Hz 2048 x 1536* at 60 Hz 2560 x 1600 at 60 Hz........... NEC DISPLAY SOLUTIONS cites recommended 480P (720 x 480* at 60 Hz) resolution for optimal display performance. 576P (720 x 576*... -
Page 31: Features
Visual Controller: Is a ground-breaking software family, developed by NEC Display Solutions, providing intuitive access to all monitor setting controls and remote diagnosis via the Windows interface, based upon the VESA standard, DDC/CI. Using a standard VGA or DVI signal cable, Visual Controller can either benefi... -
Page 32: Troubleshooting
NOTE: As with all personal display devices, NEC DISPLAY SOLUTIONS recommends using a moving screen saver at regular intervals whenever the screen is idle or turning off the monitor when not in use. - Page 33 Picture is not as bright • Make sure ECO MODE and AUTO BRIGHTNESS are turned off. • If the brightness fl uctuates make sure AUTO BRIGHTNESS is turned off. • In PICTURE MODE, set HIGH BRIGHT. See page 17. • LCD brightness degradation occurs due to long-term usage or extreme cold conditions.
-
Page 34: Using The Auto Brightness Function
Using the Auto Brightness function The brightness of the LCD screen can be set to increase or decrease depending on the amount of ambient light within the room. If the room is bright, the monitor becomes correspondingly bright. If the room is dim, then the monitor will dim accordingly. The purpose of this function is to make the viewing experience more comfortable to the eye in a variety of lighting conditions. -
Page 35: Self Calibration (Pa302W Only)
Self Calibration (PA302W only) Simply connect the external USB color sensor, and re-calibrate the factory settings without the need of a computer. This feature is to compensate for a yellow color shift that typically occurs with long-term LCD usage. All PICTURE MODES are updated when Self Calibration is performed. - Page 36 6. The procedure will ask for the USB color sensor to be placed on the center of the display panel (Figure S.3). Tilt the display panel approximately 5˚ backward and place the USB color sensor in the center of the display panel (Figure S.1). NOTE: Place the USB color sensor fl...
-
Page 37: White Point Matching/Copy (Pa302W Only)
White Point Matching/Copy (PA302W only) The white point can be copied from one display to one or more additional displays. Using this feature reduces the variation between different displays allowing them to match each other more closely. White Point Matching/Copy does not compensate for a typical yellow color shift due to long-term LCD usage. If this yellow shift is noticeable, please do Self Calibration. - Page 38 8. Press SELECT to start the confi rmation of white point. 9. After the confi rmation is fi nished, FINE TUNING MODE message appears. 10. At the FINE TUNING MODE message (Figure C.6), press SELECT if the copy result is satisfactory. If the copy result is unsatisfactory, manually fi...
-
Page 39: Manufacturer's Recycling And Energy Information
Dedicated recycling sites ensure that environmentally harmful components are properly handled and securely disposed. To ensure the best recycling of our products, NEC DISPLAY SOLUTIONS offers a variety of recycling procedures and gives advice on how to handle the product in an environmentally sensitive way, once it has reached the end of its life.
Need help?
Do you have a question about the MultiSync PA242W and is the answer not in the manual?
Questions and answers