Table of Contents
Advertisement
Advertisement
Table of Contents

Related Manuals for Jura IMPRESSA S70


Summary of Contents for Jura IMPRESSA S70
- Page 1 IMPRESSA S70 IMPRESSA X70 Instructions for use 01/03...
-
Page 2: Jura Impressa S70/ X70
Jura Impressa S70/ X70 English ...................... - Page 3 Fig. 1 Fig. 2 Fig. 3 Fig. 4 Fig. 5 Fig. 6 Fig. 7 Fig. 8 Fig. 9...
- Page 4 14 15...
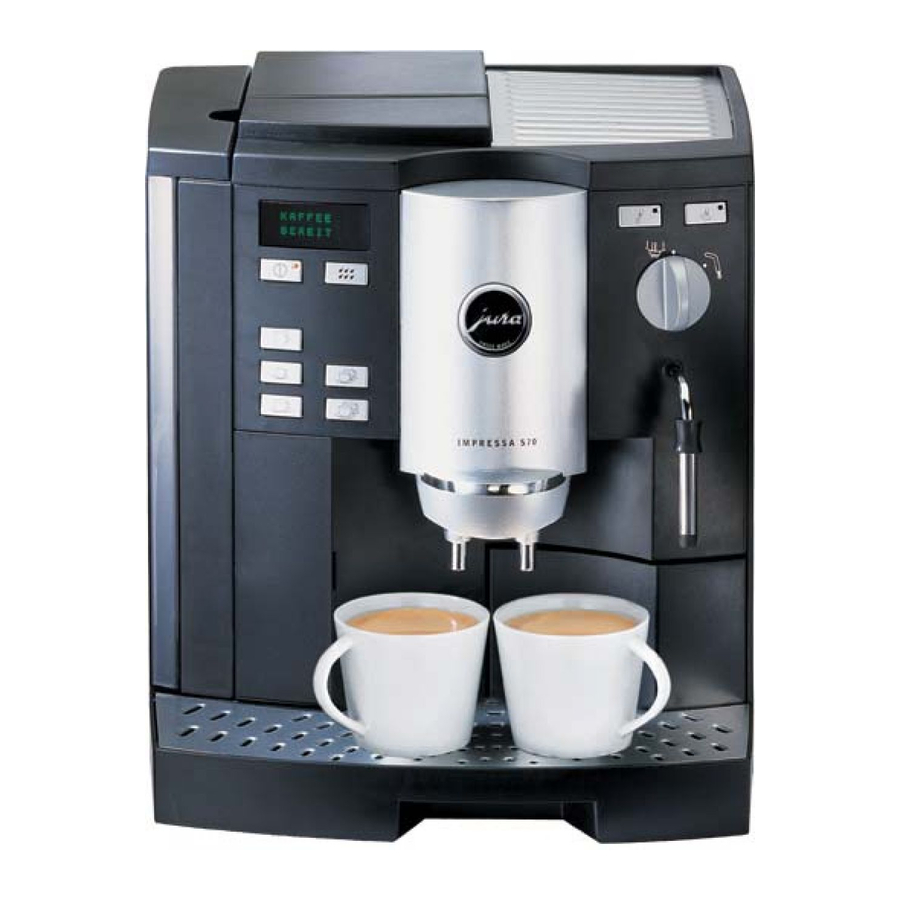
- Page 5 Operating elements Jura Impressa S70/ X70 1 Drip tray / residual water container 2 Drip tray cover 3 Cover for programming keys 4 Coffee key for 2 normal cups 5 Coffee key for 1 normal cup 6 Coffee key for 2 small cups...
-
Page 6: Table Of Contents
Table of contents 12.5 Programming WATER HARDNESS ..page 13 12.6 Programming ECONOMY MODE ....page 13 Jura Impressa S70/X70 12.7 Programming TIMER CLOCK ....page 13 1. Description ...........page 7 12.8 Programming automatic switch on time..page 14 2. Safety instructions .........page 7 12.9 Programming automatic switch off time ..page 14... -
Page 7: Description
Jura nating from professional sectors and having been refined and fur- spare parts and accessories. ther developed by Jura, the Intelligent Pre Brew Aroma System The machine is connected to the mains power socket via an (I.P.B.A.S ©... -
Page 8: Check Before Use
FILL WATER of your Jura coffee machine is not suitable for coffee beans which were treated, during or after roasting, with additives Remove water tank and rinse well with clear tap-water. -
Page 9: Rinsing The Machine
5. Rinsing the machine HARDNESS German water hardness 24 – 30° LEVEL 4 French water hardness 42.96 – 53.7° RINSE UNIT Place an empty cup under the coffee-spout (15). The machine is adjusted to hardness level 3 before it leaves the Press rinsing key factory. -
Page 10: Replacing Of Filter
Empty water tank and pull up cartridge mounting. Pressing light- Switch the machine on by pressing key ON/OFF. ly, place the filter cartridge in the water tank (Fig. 2). Open front cover (3) and press key until you hear an acoustic Pull down cartridge mounting, until it engages audibly. -
Page 11: Drawing Off Powder Coffee
You can interrupt the flow of coffee at any time by simply The machine has a stand-by-status for hot water. If you want pressing any of the coffee keys. to alternate between drawing off coffee and hot water, the selector switch for hot water can be left turned on . -
Page 12: Switching Off Machine
When steam is first drawn off, there is a possibility of spat- POWDER QUANTITY / SELECT KEY tering. The pivoting nozzle becomes hot. Avoid direct Now press the key that you want to programme. Use the key for contact with the skin. 1 cup only. -
Page 13: Programming Filter
When the required water quantity is reached press key . You Then press key briefly to store mode in memory can call up the next setting by pressing key You can call up the next setting by pressing key There is an additional possibility to alter the water quantity anew. -
Page 14: Programming Automatic Switch On Time
12.8 Programming automatic switch on time 12.11 Programming language selection A programming of the timer clock is necessary if an auto- Press key matic switch on is needed. By briefly pressing key call up the language desired and then confirm by pressing key UNIT ON –.–... -
Page 15: Empty Drip Tray
If this message shows on the display no more coffee can be Now turn spanner anticlockwise until the foreign object loosens. drawn off. It is necessary to empty the grounds container. Remove remaining powder with a vacuum cleaner. Remove drip tray carefully as there is water in it. Replace bean container and fasten screws. -
Page 16: General Cleaning Instructions
The machine has an integrated cleaning program. The procedure especially natural stone and wooden surfaces, or take cor- lasts about 15 minutes. Please use Jura cleaning tablets only. These responding precautions. are available from your Jura dealer. -
Page 17: Decalcifying Water Sector
15.2 Decalcifying water sector EMPTY TRAY AGENT IN TANK This message will only appear if the unit is ready to draw off water or steam. Pour 0.6 litres of water into a container and completely dissolve the contents of a blister pack (2 tablets). Then fill Remove and empty water tank. -
Page 18: Disposal
16. Disposal For correct disposal, you should return your coffee machine to your dealer, Jura service centre or Jura Elektroapparate AG. 17. Tips for a perfect coffee Height adjustable coffee-spout You can adjust the height of the coffee-spout to your cup sizes. -
Page 19: Messages
18. Messages Cause Action FILL WATER Water tank is empty Top up with water Water level indicator in tank is jammed Empty tank, rinse out, fill up and replace Tank is calcified, water level indicator is stuck Remove tank, decalcify, rinse well, fill up with water and replace FILL BEANS Bean container is empty... - Page 20 Cause Action CLEAN UNIT You have drawn off coffee 220 times or run Clean as described in chapter 14 the rinsing program 180 times Message still displayed, although machine cleaned Run cleaning program again; this time do not add cleaning tablet UNIT CALCED The appropriate sector needs decalcifying Run decalcifying program as described...
-
Page 21: Problems
– Frothing nozzle blocked – Clean frothing nozzle frothing up milk – Frothing nozzle in wrong position – Draw off steam If the above mentioned problems and/or messages still persist, please contact your dealer or get in touch directly with Jura Elektroapparate AG. -
Page 22: Legal Information
All ob- Capacity, bean container: 280 gr. ligations on the part of Jura Elektroapparate AG result solely from Capacity, grounds container: max. 16 port. the relevant sales agreement which also contains full details of the Cable length: approx.
Need help?
Do you have a question about the IMPRESSA S70 and is the answer not in the manual?
Questions and answers