Table of Contents
Advertisement
Advertisement
Table of Contents

Related Manuals for Gaggenau ED 220/221


Summary of Contents for Gaggenau ED 220/221
- Page 1 Operating and assembly instructions ED 220/221 ED 230/231 Built-in steam oven...
-
Page 3: Table Of Contents
Preface ED 220/221 1. Important notes Page 3-4 ED 230/231 1.1 For your safety Page 3 1.2 About use Page 4 2. Appliance and accessories Page 5-6 2.1 Appliance description Page 5 2.2 Display Page 5 2.3 Accessories / special accessories Page 6 3. -
Page 4: Preface
Preface With your steam oven you can experience modern professional cooking technology in your own household. The steam oven offers the following advantages: – Cooking with steam allows gentle preparation. The valuable substances contained in the foodstuffs you prepare are retained almost completely. -
Page 5: Important Notes
Caution: Fire risk! Do not store any combustible cannot be removed. Lamp must only be replaced objects in your appliance. When operating the by Gaggenau after-sales service. appliance, only ever leave the inner parts inside the Repairs may only be carried out by authorised cooking compartment that you actually need. -
Page 6: About Use
If the problem has nothing to appliance must be descaled. Before commencing do with the power or water supply, please contact operation, you must enter the water hardness in your specialist dealer or your local Gaggenau after- your household on the appliance. sales service. -
Page 7: Appliance And Accessories
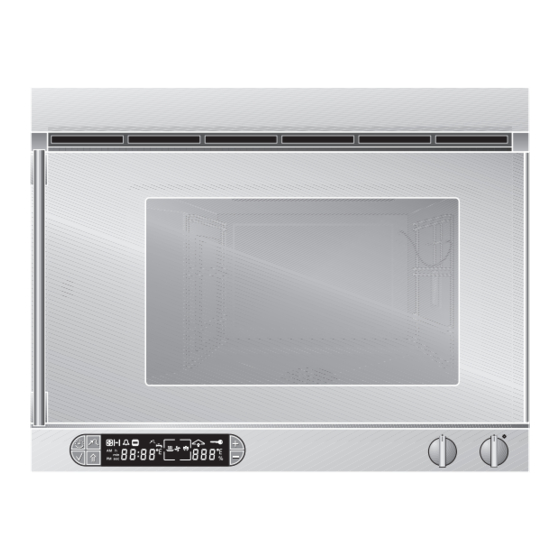
2. Appliance and accessories 2.1 Appliance description 1 Grease filter 2 Air flap 3 Slide-in grills 4 “Temperature” control knob 5 “Moisture level” control knob 6 Core temperature sensor 7 Base strainer with siphon trap 8 Side plate 9 Display Fig. -
Page 8: Accessories / Special Accessories
2.3 Accessories / special accessories As standard, the appliance comes with the following accessories: – Stainless steel cooking insert GN 2/3, Fig. 5 unperforated, 40 mm deep (Fig. 5) – Stainless steel cooking insert GN 2/3, perforated, 40 mm deep (Fig. 6) –... -
Page 9: Operating For The First Time
3. Operating for the first time 3.1 Important notes Before operating the appliance for the first time, please pay attention to the following notes: Read through these instructions attentively before Every appliance is subjected to a thorough check operating the appliance for the first time. before it arrives in your home. -
Page 10: What To Do, When
The appliance automatically cools the oven below 40 °C and re-starts the calibration. F 61 or F 62 lights on the display. Check the power and water supply. If these are functioning correctly call the Gaggenau after-sales service. -
Page 11: Determining Water Hardness
3.4 Determining water hardness Water hardness range 4 has been pre-entered on Please also note that different designations are the appliance. If the hardness of the water in your used outside Germany to describe the hardness of household should deviate from this value, the water. -
Page 12: Entering The Water Hardness
3.5 Entering the water hardness If the hardness of the water in your household deviates from the value that is set at the works Options menu (water hardness range 4), you must enter the right water hardness in the options menu for Temperature commencing operation of the appliance. -
Page 13: Operation
4. Operation 4.1 Switching on and off Switching on – Turn the “Temperature” control knob by one Switching on latching position to the right (Fig. 12). The lighting goes on: – Turn the “Moisture level” control knob to the moisture level you require. –... -
Page 14: Operating Modes
4.3 Operating modes Moisture Temperature Display Particularly Principle Remarks suitable for... 100% 150 - 230 °C Bread Steam baking: poultry, The high moisture prevents the food from drying out. puff pastry Thanks to the high temperature, the surface become crispy brown all-round. 100% 100 °C Vegetables,... -
Page 15: Operating The Timer
4.4 Operating the timer The required moisture level and temperature can The longer you press the + or – key when be set before and after time programming by programming a time, the faster the time elapses on turning the “Temperature” or “moisture level” knob. the display. - Page 16 Setting the time of day Proceed as follows: – Press the (Timer) key 3 times. The (Time unit) symbol flashes on the display. The time display shows the currently set time of day (Fig. 15). – You can select the required time by pressing the + or –...
- Page 17 Short time You can program a period of time with the short time function without automatic activation or deactivation. You can use this mode of operation even when the appliance is switched off as an egg timer, for example. The range that can be set is between ten seconds (00:10) and 23.59 hours (23:59) Fig.
- Page 18 Programming a duration The appliance is operated for a specific period of time. The range that can be set is between one minute (00:01) and 23 hours and 59 minutes (23:59). Proceed as follows: – Press the (Timer) key once. The (Duration) symbol and the (Cooking time) symbol flash on...
- Page 19 Programming a switch-off time The appliance switches off automatically at a time that you have chosen. The starting point is the time of day set on the appliance. Proceed as follows: – Press the (Timer) key twice. The (End) and (Cooking time) symbols flash.
-
Page 20: Special Functions
5. Special functions 5.1 Child lock The child lock prevents inadvertent activation of the steam oven. Proceed as follows: Switching on: – Turn the “Temperature” control knob to the right to any temperature position (not light). – Press the (Confirmation) key and keep it pressed. -
Page 21: Options Menu
5.2 Options menu With the aid of the Options menu, you can – choose between °C and °F on the temperature display. – choose between 12h and 24h on the time display. – turn the timer on and off. – start calibration. –... -
Page 22: Core Temperature Sensor
5.3 Core temperature sensor Using the core temperature sensor, during the cooking process you can measure the core temperature of the food you are preparing exactly between 1 °C and 99 °C. The sensor measures the temperature in the interior of the meat. It indicates when the set core temperature has been reached and the meat has been cooked to satisfaction. - Page 23 Recommended core temperature values An audible signal sounds as soon as the Beef programmed core temperature has been reached. Roast beef / fillet of beef The oven switches off automatically. The (Core temperature sensor) and (End) symbols flash on rare 45-50 °C the display.
-
Page 24: Steaming
5.4 Steaming You have a possibility of deliberately adding more moisture to the food you are cooking (e.g. bread, bread rolls). Note: Steaming is only possible at the “Hot air” stage (0 %) or with 30% moisture (0 %). Proceed as follows: –... -
Page 25: Display Of The Current Cooking Compartment Temperature
5.6 Display of the current cooking When you press the (Confirmation) key, the current temperature in the cooking compartment compartment temperature and the moisture level appears on the display for (ThermoTest) a few seconds (Fig. 28). Note: If the appliance is operated for a prolonged period unavoidable temperature fluctuations of up to 5 °C may occur. -
Page 26: Further Uses
6. Further uses Low-temperature cooking Fermenting Vigorously browned meat matures over a longer Raising yeast dough, self-raising flour and sour time at a lower temperature. dough mixtures – Preheat the appliance to 70 - 80 °C (depending on – Place the bowl containing the dough on the wire the size of the food). - Page 27 Thawing – After 1-2 minutes, remove the cooking receptacle Thawing deep frozen products gently and in a short from the oven again and place the vegetables in time. iced water to cool them. – Place the frozen foodstuff in the perforated –...
-
Page 28: Cooking Table, Baking Table
7. Cooking table Dish Cooking insert selection * Quantity (end weight) VEGETABLES ** Leaf spinach perforated / unperforated 500 g Cauliflower perforated 1 head Cauliflower and carrots perforated together approx. 1 kg Broccoli perforated 1 kg Peas perforated / unperforated 1 kg Stuffed vegetables (courgette, aubergine, peppers) unperforated... - Page 29 Preparation Temperature Moisture Core temp. Cooking times (approx. in min.) plucked 100 °C 100 % 2 - 5 whole 100 °C 100 % 20 - 30 in roses / in slices 100 °C 100 % 20 - 25 in roses 100 °C 100 % 10 - 15...
- Page 30 Cooking table Dish Cooking insert selection * Quantity (end weight) MEAT Fillet in puff pastry perforated with baking paper 1 - 1,5 kg Roast pork with rind wire grill, unperforated 1,5 kg Leg of lamb (Low-temperature cooking) perforated 1,5 - 2,5 kg Roast beef (Low-temperature cooking) perforated 1,5 - 2,5 kg...
- Page 31 Preparation Temperature Moisture Core temp. Cooking times (approx. in min.) see recipe book 180 - 200 °C 80 - 100 % 50 - 60 cut the rind between 1) 100 °C 100 % step 1 and 2 and season 2) 160 - 170 °C 60 - 80 % 80 - 85 °C 50 - 60...
- Page 32 Baking table Cakes and biscuits Temperature Moisture Cooking time Special notes (app. in min.) Apple tart 170 - 190 °C 30 % 30 - 45 Swiss roll 190 - 210 °C 0 - 30 % 7 - 9 Small flaky pastry cakes 180 - 200 °C 80 - 100 % 15 - 25...
-
Page 33: Tips And Tricks
8. Tips and tricks General: Tips on how to save energy and protect the – The appliance does not need long to heat up. environment: It therefore operates in an extremely energy and – Give good thought to what foods you can cook at time-saving fashion. -
Page 34: Cleaning And Care
9. Cleaning and care 9.1 Manual cleaning You should thoroughly clean the appliance before Clean operator controls and glass surfaces with operating it for the first time and after every a soft cloth and light rinsing detergent and wipe use. By doing so, you avoid baking in of residues. them dry with a soft dry cloth. -
Page 35: Cleaning The Side Plate
9.2 Cleaning the side plate – Allow the appliance to cool down completely before cleaning it. – Be careful not to scratch the oven interior when removing the side plate. Small parts might fall into the base strainer. Tip: put a kitchen cloth over the oven base. -
Page 36: Cleaning Aid
9.3 Cleaning aid Stubborn soiling can be loosened by means of the cleaning aid and may then be removed more easily. You should not detach the grease filter. It protects the fan against cleaning agent residues. You can then clean the grease filter and shelves in a dishwasher. - Page 37 – By pressing the (Clock) key you can query the remaining time. An audible signal sounds once the cleaning aid has finished. – Press the (Confirmation) key to switch off the signal. Do not turn the control knobs. – Immediately clean the inside of the oven with a soft brush, and wipe with a soft cloth.
-
Page 38: Maintenance
If the power and water supply is functioning correctly, but your appliance still does not work, please contact your dealer or your local Gaggenau customer service agency. Specify the appliance type (see rating plate located on the inner side of the door and also included with these instructions). -
Page 39: Descaling
10.3 Descaling The water evaporates behind the side plate. Scaling therefore drops out there and is washed into the oven compartment. Scale can be wiped away with a moist cloth. The inlet pipe must be descaled at regular inter- vals. The oven is equipped with a device which counts the operational hours. -
Page 40: Dismantling The Front Window
10.4 Disassembly of the front window Proceed as follows: – Remove the bottom screw from the door handle. – Remove the top screw from the door handle and detach the door handle. – Hold the front window with one hand and lightly shake the door to and fro. -
Page 41: Remedying Small Malfunctions Yourself
– Switch off the steam oven and isolate the appliance from the mains. – Shut off the water supply. – Do not open the housing of the appliance. – Call Gaggenau after-sales service. What to do if... ? The cause The solution! ... -
Page 42: Assembly Instructions
11. Assembly instructions 11.1 Technical data Electrical connection conditions and water connection information on the rating plate must Rating: 230 V 1N or 400 V 2N AC, 16 A agree. Heating power The wiring schematic that is adhered to the outer Hot air heating element 2700 W panel of the appliance shows the connection variant Max. -
Page 43: Installation
11.3 Installation The steam oven must be installed at a height of at least 900 mm or more above floor level. Do not install the steam oven above a dishwasher. place electrical do not place electrical Steam from the dishwasher might damage the junction box here junction box directly behind electronics of the steam oven. - Page 44 Installation above EB ED 220/221/230/231 as seen from the side In order to be able to position the supply/drain hose correctly behind the appliance when the unit is being installed over built-in ovens (EB), the cabinet carcass must be shifted forward by 5 cm, and a 483,8 cladding or blanking piece inserted at the side.
- Page 45 Drainage The drain pipe connection must be accessible at all times and should not be directly behind the appliance. Before installing the steam oven, remove the metal holder on the back which holds the drain hose in place during transport. –...
- Page 46 Fresh water – The water connection for the supply hose must If the water pressure in your house exceeds 6 bar, always be accessible, and must not be directly you must use the connection set DR 220-010. The behind the appliance. connection set DR 220-010 is intended for an input pressure of 6 to 10 bar.
- Page 48 GAGGENAU HAUSGERÄTE GMBH CARL-WERY-STR. 34 · D - 81739 MÜNCHEN Y (0 89) 45 90 - 03 FAX (0 89) 45 90 - 23 47 www.gaggenau.com...
Need help?
Do you have a question about the ED 220/221 and is the answer not in the manual?
Questions and answers