Table of Contents
Advertisement
• Istruzioni per l'uso . . . . . . . . . . . .
• User manual
• Mode d'emploi et d'entretien . . . . .
• Betriebsanleitung . . . . . . . . . . . . .
• Gebruiksaanwijzing . . . . . . . . . . . . . .
• Instrucciones de uso . . . . . . . . . .
• Manual de instruções . . . . . . . . . .
•
√‰ËÁ›Â˜ ¯Ú‹Û˘ Î·È Û˘ÓÙ‹ÚËÛ˘ . . .
S 1 0 0 0
S 1 0 0 0
. . . . . . . . . . . . . . . .
pag. 6
page 20
pag. 34
pag. 48
pag. 62
pag. 76
pag. 90
ÛÂÏ.
104
Advertisement
Table of Contents

Related Manuals for DeLonghi PINGUINO S1000


Summary of Contents for DeLonghi PINGUINO S1000
- Page 1 S 1 0 0 0 S 1 0 0 0 • Istruzioni per l’uso ... . pag. 6 • User manual ....page 20 •...
- Page 2 entile Cliente, La ringraziamo per aver scelto un prodotto De’Longhi, il leader mondiale nella costruzione dei climatizzatori portatili. Anni di esperienza in tutto il mondo ci consentono di migliorare costantemente la qualità e le presta- zioni di Pinguino e SuperPinguino. Siamo certi che rimarrà subito soddi- sfatto del suo acquisto e che godrà...
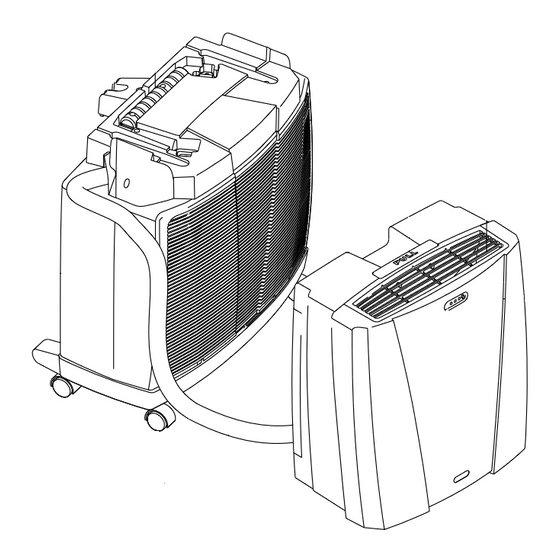
- Page 3 De s c r i z i o n e • De s c r i p t i o n • De s c r i p t i o n • B e s c h re i b u n g • B e s c h r i j v i n g •...
- Page 4 W a r n i n g s • This appliance is designed for home air conditioning and must not be used for other purposes. • It is dangerous to modify or alter the characteristics of the appliance in any way. •...
- Page 5 What are the Pi n gui n o and SuperPi n gui n o? uring the summer, you feel comfortable at a temperature of between 24 and 27°C with a relative humidity of about 50%. An air conditioning unit removes excess moisture and heat from the room where it is located. Compared with installed models, portable air conditioning units have the advantage that they can be moved from one room to another in the home or be transported from one building to another.
- Page 6 Pre p a r i n g f o r u s e USING THE QUICK COUPLINGS POSITIONING THE INDOOR UNIT As an alternative to the methods described Install the appliance inside the room being above, the sheath connecting the outdoor and air-conditioned.
- Page 7 Pre p a r i n g f o r u s e ned, then move the ring on the connec- The outdoor unit can also be installed on a tion back to completely disconnect the window sill, if this faces onto a balcony (Fig. 7) flexible sheath (Fig.
-
Page 8: Buttons And Indicators On Indoor Unit
Buttons and indicators on the indoor unit BUTTONS AND INDICATORS ON THE INDOOR UNIT MANUAL YELLOW GREEN OPERATION LIGHT LIGHT LIGHT BUTTON SIGNAL RECEIVER INDICATOR LIGHTS These turn on according to the function selected or indicate any operating anomalies. FUNCTION RED LIGHT YELLOW LIGHT GREEN LIGHT... - Page 9 The remote control THE REMOTE CONTROL Inserting the batteries • Remove the protective cover (see Figure • Insert two new batteries (not rechargea- ble) making sure the (+) and (-) are in the correct positions. • Replace the cover, sliding it into the initial position.
-
Page 10: Description Of The Remote Control
Description of the remote control THE REMOTE CONTROL A. MODE button Selects the operating mode (air conditio- ning, dehumidifying, fan). B. Buttons for SETTING THE ROOM TEMPERATU- High Set room temperature or program the timer. C. FAN button ( Sets fan speed to automatic, high, medium or low in sequence. - Page 11 Functions AIR-CONDITIONING MODE • Press the button to turn the appliance on. • A beep indicates that the air-conditioning unit is on and the symbol flashes on the display. • Press the MODE button a number of times until the air-conditio- ning symbol appears on the display.
- Page 12 Functions SMART MODE In SMART mode, the air-conditioning unit decides the best way to operate to guarantee maximum comfort. • Press the button to turn the appliance on. A beep indicates that the air-conditioning unit is on and the symbol flashes on the display.
- Page 13 Functions SUPER MODE SUPER mode is used to turn rapid cooling on or off. The fan is set to high speed and the temperature is automatically set to 18°C. To select SUPER mode, proceed as follows: • Press the button to turn the appliance on. A beep indicates that the air-conditioning unit is on and the symbol flashes on the display.
- Page 14 T i p s ELECTRICAL CONNECTIONS • Protect the room from direct exposure to the sun by partially closing curtains and/or Before plugging the appliance into the mains blinds to make the appliance much more socket, check that: economical to run; •...
- Page 15 C l e a n i n g Before cleaning or maintenance, turn the START OF SEASON CHECKS appliance off by pressing the “OFF” button on Make sure the power cable and plug are the remote control ON/OFF and always undamaged and the earth system is efficient.
-
Page 16: Troubleshooting
Troubleshooting TROUBLESHOOTING If something is not working, the problem may at times be simple to resolve. Carefully check these brief instructions before contact your local Authorised Service Centre. PROBLEM CAUSE REMEDY The air-conditioner • no electricity • wait doesn’t work •... - Page 17 Warranty/technical specifications WARRANTY AND TECHNICAL SERVICE TECHNICAL SPECIFICATIONS Power supply voltage see rating plate The conditions of the warranty and technical Max. power input during service are provided on the certificate sup- air conditioning “ plied with your appliance. Max. power input during dehumidifying “...