Table of Contents
Advertisement
Advertisement
Table of Contents

Related Manuals for DeLonghi Pinguino PAC 400


Summary of Contents for DeLonghi Pinguino PAC 400
- Page 1 PAC400 24-04-2003 16:29 Pagina 1 PAC 40 0 PAC 40 0 Use and maintenance manual ..page 2 Mode d’emploi et d’entretien ..page 15 Instrucciones de uso .
-
Page 2: Important Safeguards
- Avoid using Pinguino in oily or sulphurous atmospheres or near sources of heat. - Wait at least 3 minutes before restarting, after the air conditioner has been switched off or the thermostat setting changed. - Do not place hot or heavy objects on the appliance. - Page 3 24-04-2003 16:29 Pagina 3 Dear user, We thank you for purchasing the Pinguino air conditioner and congratulate you on your wise choice. For optimal results please read this manual carefully before installing or operating. We know that Pinguino will maintain a pleasingly comfortable environment at all times.
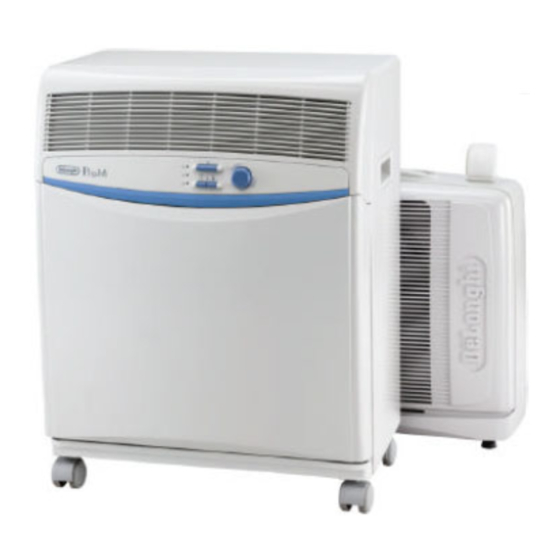
- Page 4 PAC400 24-04-2003 16:29 Pagina 4 Control panel INTERNAL UNIT INTERNAL UNIT Description Air delivery grille Connection hose EXTERNAL UNIT Castor Carrying handle Timer Removable filter Air intake grille Fuse Power cord Power cord storage Condensation drainage tube Castors External unit handle feet...
- Page 5 PAC400 24-04-2003 16:29 Pagina 5 DRAWING Accessories DESCRIPTION Wall-attachment bracket Support block for external unit Anchor screws + screws ø 6 mm Screws M6 mm Screws M4x25 mm Belt with hooks Eye hole screw Sheathing frame Castor stop Drain connection for condensation with seal and two 4.2 penetrating screws Castors for the external unit and...
- Page 6 PAC400 24-04-2003 16:29 Pagina 6 The sheathing that connects the external to the internal unit may pass: a) through a slightly-open window or door; b) through a small hole 2.16” x 0.98” (2.5 cm x 5.5 cm) drilled in the lower part of a door or in a window frame by using the frame provided.
- Page 7 PAC400 24-04-2003 16:29 Pagina 7 USE OF RAPID COUPLINGS In addition to the methods described above, the sheathing that joins the external to the internal unit may also be drawn through a hole (about 6 cm. in diameter) drilled in a wall linked to the out- side.
- Page 8 PAC400 24-04-2003 16:29 Pagina 8 INTERNAL UNIT Install the internal unit inside the room to be air- conditioned. This is usually done near a window or at least close to an outside wall. The internal unit must be placed “on the level”, with the help of the castor-stops provided.
- Page 9 Do not cover IN THIS WAY, YOUR AIR CONDITIONER IS READY TO WORK, so now let’s familiarize our- selves with its controls. Do not use outdoors.
- Page 10 PAC400 24-04-2003 16:29 Pagina 10 SETTING THE TIMER The programmer/timer, like all clocks, must be set to the exact time. If for example it is 4.00 p.m., turn the dial in a clockwise direction (following the direction of the arrow) until the number 4 is lined up with the arrow pointer (the arrows indicates 4:00 p.m.
- Page 11 24-04-2003 16:29 Pagina 11 How to operate the air conditioner (REFER TO THE CONTROL PANEL ON THE OPPOSITE PAGE) This appliance is fitted with a special safety circuit. When the compressor switches off, this cir- cuit prevents it from switching on again for at least 3 minutes.
-
Page 12: Cleaning And Maintenance
Give strict observance to all installation norms. WORK TO BE DONE AT A SEASON’S END Turn off the air-conditioner. Clean the filter and dry it before putting it back in place. Cover the air conditioner with a plastic bag to keep the appliance from getting dusty. -
Page 13: Troubleshooting
24-04-2003 16:29 Pagina 13 IF SOMETHING GOES WRONG Most malfunctions are caused by a very minor and easily solved problem. So carefully check this list before contacting a Delonghi Service Center. PROBLEMS The air conditioner • Power failure does not function •... - Page 14 We do not authorize any other person or company to assume for us any liability in con- nection with the sale or use of our AIR CONDITIONER. This warranty shall not apply to assume for us any liability in connection with the sale or use of our AIR CONDITIONER. This warranty shall not...
Need help?
Do you have a question about the Pinguino PAC 400 and is the answer not in the manual?
Questions and answers