Table of Contents
Advertisement
Advertisement
Table of Contents

Related Manuals for Emotiva XPA-200


Summary of Contents for Emotiva XPA-200
- Page 1 Xpa-200 Stereo Power Amplifier User Manual...
-
Page 3: Important Safety Precautions And Explanation Of Symbols
Do not install the XPA-200 on any stand, shelf, or other piece of furniture that is unable to support its weight. If a cart is used to move the unit, use caution to avoid injury from tip-over. - Page 4 The power cable for the XPA-200 should be unplugged from the outlet during severe electrical storms, or when unused for a long period of time. Only replace the fuse(s) in the XPA-200 with fuse(s) of proper value and voltage rating.
-
Page 5: Table Of Contents
Important Safety Precautions and Explanation of Symbols XPA-200 Stereo Power Amplifier ............1 Introduction ..................3 About This Manual ................4 Features .....................5 Unpacking...................6 XPA-200 Front and Rear Panels ............7 Quick Start ..................9 Connections..................10 Configuration and Operation ............11 Care and Maintenance ..............12 Specifications ...................13 Troubleshooting ................15... - Page 6 XPA-200 Page 2...
-
Page 7: Introduction
Thank you for purchasing your new XPA-200 stereo power amplifier. The XPA-200 is perfect as the foundation of a truly superb stereo sound system, or to power the front main channels of an audiophile quality surround sound system. The XPA-200 delivers 150 watts per channel into 8 Ohms (or 240 watts per channel into 4 Ohms). -
Page 8: About This Manual
About This Manual This User Manual will provide you with the information you need to get started enjoying your XPA-200 stereo power amplifier. For more detailed information, including specifications, please download the full-length version of the User Manual from our website at www.emotiva.com. -
Page 9: Features
• Totally stable - designed for use in the real world, with real speakers. • Classic Emotiva styling - looks great in any home theater rack or living room. • Low profile 2RU chassis - makes it easy to find a home for the XPA-200 in a rack with your other fine equipment. -
Page 10: Unpacking
XPA-200 Unpacking Your XPA-200 was carefully packed and should reach you in perfect condition. If you notice any shipping damage or other issues when you unpack it, please contact Emotiva immediately. Gently remove your XPA-200 from the packing carton and remove all wrappings and shipping material. -
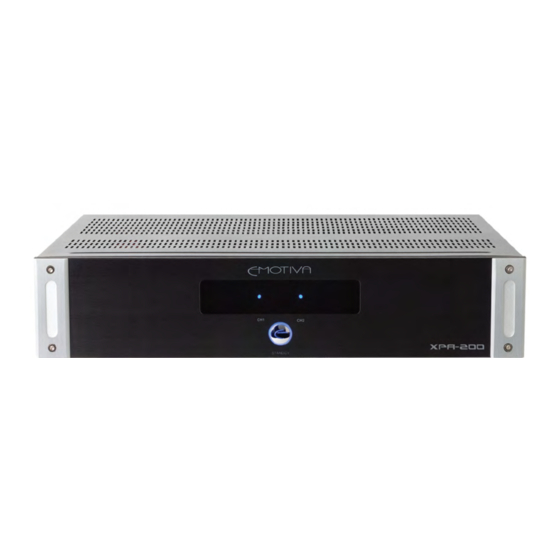
Page 11: Xpa-200 Front And Rear Panels
This window houses four status LEDs (one red and one blue for each channel). When the XPA-200 is Off or in Standby mode, all LEDs will be unlit. When the XPA-200 is powered On, the two red LEDs will illuminate for a few seconds and then go out, at which point the two blue status LEDs will light. -
Page 12: Speaker Terminals
The XPA-200 is switched On (from Standby) when a trigger signal is presented at the Trigger Input; the XPA-200 returns to Standby when the trigger signal is removed. When the XPA-200 is on, a 12 VDC signal is sent from the Trigger Output to control other devices. 4. Status LED Switch Disables the front panel status LEDs when set to Off. -
Page 13: Quick Start
XPA-200 Quick Start To get the most from your XPA-200, we urge you to read the entire manual. If you just can’t wait to listen to it, this section will cover the basics you need to get started. • Find a secure location for your XPA-200 •... -
Page 14: Connections
XPA-200 will return to Standby mode. The Trigger Output sends out 12 VDC whenever the main power to the XPA-200 is On (and NOT when it is in Standby mode) which can be used to switch on other units with trigger capabilities. -
Page 15: Configuration And Operation
Configuration and Operation Line Voltage The XPA-200 can operate from line voltages of 115 VAC +/- 10% or 230 VAC +/- 10%. The amplifier will automatically detect which line voltage it is connected to and configure itself accordingly. The Line Voltage indicators will tell you which line voltage the XPA-200 has detected. -
Page 16: Care And Maintenance
If necessary, the XPA-200 should be cleaned gently with a soft rag. • If something sticky gets on the front panel or case of the XPA-200, it should be cleaned with a mild cleaning solution applied to a soft rag, followed by wiping with a clean rag dampened with plain water and drying with a soft dry rag or cloth. -
Page 17: Specifications
XPA-200 Specifications Topology: Fully discrete, dual differential, high current, short signal path Class A/B. Number of Channels: Power Output (rated power; THD < 1%): 150 watts / channel; into 8 Ohms; both channels driven. 240 watts / channel; into 4 Ohms; both channels driven. -
Page 18: Input Connections
Standby button halo lighting). Input selector; toggle switch (selects between balanced and unbalanced inputs). Protection: The XPA-200 is protected against excessive operating temperature, shorted speaker connections, ground faults, and other common fault conditions. Dimensions: 17” wide x 3.875” high x 19” deep (includes feet and binding posts). -
Page 19: Troubleshooting
The XPA-200 is carefully designed and manufactured from high-quality precision components to ensure years of trouble free operation. We really doubt you’ll ever have any problems with your XPA-200 but, if you do, here are a few things you could try: Problem: No output (nothing is lit). -
Page 20: Emotiva Audio Corporation Five-Year Limited Warranty
NOT APPLY TO YOU. A claim under this warranty must be made by you within the Term. A claim shall not be valid (and Emotiva has no obligation related to the claim) if it is not made within the Term and if it is not made in strict compliance with the requirements of the “How do you get service?”... - Page 21 The CSR will provide you with a returned material authorization number (“RMA”). Ship the product to Emotiva at the following address, with the RMA written in large, bold numbers on the outside of the box, and with the letters “RMA” written before the number.
-
Page 22: Speaker Cables
(you will find them on our website at www.emotiva.com) Rack ears and rack mount brackets for the XPA-200 are available in in the accessories section of our website at www.emotiva.com... -
Page 23: Notes
Notes All information contained in this manual is accurate to the best of our knowledge at the time of publication. In keeping with our policy of ongoing product improvement, we reserve the right to make changes to the design and features of our products without prior notice. User Manual Revision 1.1 May 2013...
Need help?
Do you have a question about the XPA-200 and is the answer not in the manual?
Questions and answers