
Related Manuals for Savin 25105


Summary of Contents for Savin 25105
- Page 1 Operating Instructions COPY REFERENCE Read this manual carefully before you use this product and keep it handy for future reference. For safety, please follow the instructions in this manual.
- Page 2 Two kinds of size notation are employed in this manual. With this machine refer to the inch version. For good copy quality, Savin recommends that you use genuine toner. Savin shall not be responsible for any damage or expense that might result from the use of parts other than genuine parts in your office product.
- Page 3 In accordance with IEC 60417, this machine uses the following symbols for the main power switch: a means POWER ON. c means STAND BY.
-
Page 4: Safety Information
Safety Information When using your equipment, the following safety precautions should always be followed. Safety During Operation In this manual, the following important symbols are used: R WARNING: Indicates a potentially hazardous situation which, if instructions are not followed, could result in death or serious injury. R CAUTION: Indicates a potentially hazardous situation which, if instructions are not followed, may result in minor or moderate injury or damage to property. - Page 5 R CAUTION: • Protect the equipment from dampness or wet weather, such as rain, snow, and so on. • Unplug the power cord from the wall outlet before you move the equipment. While moving the equipment, you should take care that the power cord will not be damaged under the equipment.
-
Page 6: How To Read This Manual
How to Read this Manual Symbols In this manual, the following symbols are used: R WARNING: This symbol indicates a potentially hazardous situation that might result in death or serious injury when you misuse the machine without following the in- structions under this symbol. -
Page 7: Table Of Contents
TABLE OF CONTENTS What You Can Do with this Machine (Copy Mode)......... 2 Machine Types................... 4 Guide to Components ................5 Options ....................... 7 Control Panel ..................... 8 Display Panel ................... 10 Common Displays and Keys ............... 10 1. Basics Starting the Machine ................ - Page 8 2. Copying Basic Procedure ..................23 Setting Originals..................26 Setting Originals on the Exposure Glass ............ 26 Setting Originals in the Document Feeder ..........27 Original Orientation ..................28 Setting Special Originals ................31 Basic Functions..................34 Adjusting Copy Image Density ..............34 Choosing the Original Type.................
- Page 9 Duplex....................... 84 1 Sided 2 Sided ..................84 2 Sided 2 Sided ..................88 Combine ....................90 1 Sided 2 Pages Combine 1 Side............92 1 Sided 4 Pages Combine 1 Side............94 1 Sided 8 Pages Combine 1 Side............95 1 Sided 4 Pages Combine 2 Side............
- Page 10 Preset Stamp..................168 User Stamp..................... 172 Program/Delete User Stamp ..............175 Date Stamp..................... 181 Page Numbering ..................184 Choosing How Copies Are Delivered ..........191 Shift Tray Off In Sort/Stack ............... 191 Separation....................192 Copy Face Up ................... 193 Combination Chart ................194 3.
- Page 11 4. Connect Copy (Option) What is Connect Copy? ................ 241 How Connect Copy Works..............243 Connectable Copier Models ..............244 Functions Not Available with Connect Copy ..........244 Interrupt Functions ..................244 Before You Start..................244 Connect Copy Display Panel..............246 Using Connect Copy ................
- Page 12 d Adding Staples ................. 301 e Removing Jammed Staples............. 304 y Removing Punch Waste..............307 6. User Tools (Copier/Document Server Features) Accessing User Tools (Copier/Document Server Features) ..... 309 Exiting User Tools ..................311 User Tools Menu (Copier/Document Server Features) ...... 312 Settings You Can Change with the User Tools ........
- Page 13 8. Specification Mainframe....................341 Document Feeder .................. 345 Finisher....................346 CD-R/RW (Option).................. 347 A3/11" 17" Tray Kit (Option) .............. 348 Punch Kit (Option)................. 349 Large Capacity Tray (LCT) (Option)............. 350 Copy Connector Cable (Option)............351 INDEX...................... 352...
- Page 14 This page is intentionally blank.
-
Page 15: What You Can Do With This Machine (Copy Mode)
What You Can Do with this Machine (Copy Mode) -
Page 17: Machine Types
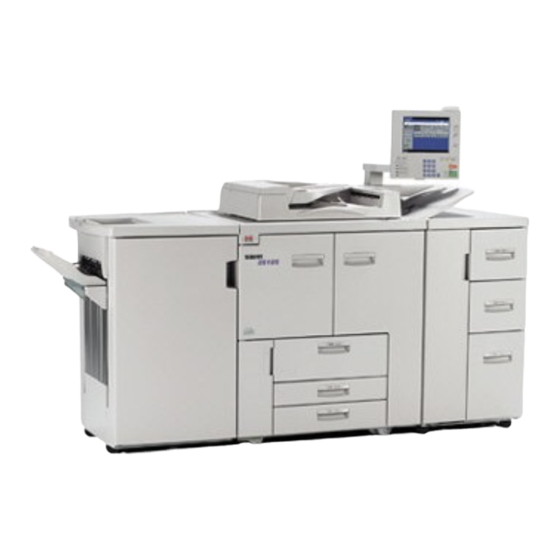
Machine Types This machine comes in two models which vary in copy speed. To make sure which model you have, See the inside front cover. Type 1 Type 2 85 copies/minute (A4 K, 105 copies/minute (A4 K, Copy Speed " 11"K) "... -
Page 18: Guide To Components
Guide to Components Exposure glass Paper tray Position single-page originals here face Set copy paper here. down for copying. See P.15 “Origi- Tray 1 is a tandem tray where the paper nals”. on the left side automatically moves to the right when paper on the right has run Document feeder (ADF) P.281 “... - Page 19 Ventilation hole Prevents overheating. Do not obstruct the ventilation hole by placing or leaning an object near it. If the machine over- heats, a fault might occur. Circuit breaker Do not touch this breaker.
-
Page 20: Options
Options Finisher Note Sorts, stacks, staples and punches copies If you install the A3/11" 17" Tray kit (optional punch kit required.) to your machine, you cannot use it as • A: Finisher proof tray a tandem tray. • B: Finisher shift tray CD-R/RW A3/11"... -
Page 21: Control Panel
Control Panel {Screen Contrast} knob Status indicator Adjusts the brightness of the display pan- • The condition of the machine is de- scribed with this indicator. By default, this indicator is turned off. You can se- {Language Selection} key lect whether to light the Status Indica- Press to change the display language. - Page 22 {Stop} key {User Tools} key Press to stop a copy job in progress. Press to access the User Tools menu where you can customize the default set- {Start} key tings to your preference. Press to start copying. If pressed just after Display panel the machine is turned on, the job will start after the warm-up period.
-
Page 23: Display Panel
Display Panel The display panel shows the status of the machine, error messages and function menus. To select items shown on the display, lightly press the item with your finger. When an item is selected, it is highlighted e.g. . Items that are not available are shown grayed out e.g. - Page 24 You can register up to two fre- Functions you can select. Press an quently used reduction/enlargement item to bring up its function menu ratios other than the fixed reduction/ e.g. press the [Reduce/Enlarge] key to enlargement ratios. bring up the Reduce/Enlarge menu. Sort, Stack, Staple or Punch This indicator shows when toner mode.
- Page 25 Copy Server Display Operational messages. Display titles. The number of originals scanned into memory, number of copies set, and number of copies made. Operational keys.
-
Page 26: Basics
1. Basics Starting the Machine To turn the machine on, press the operation switch. Note This machine automatically enters Energy Saver mode or turns itself off if you do not use the machine for a while. Please refer to “Energy Saver Mode—Sav- ing Energy”... -
Page 27: Starting The Machine
Basics Starting the Machine Press the operation switch. The On indicator lights and the display turns on. Note If the machine does not start when the operation switch is pressed, make sure the main power switch is on. The machine will take up to 360 seconds to warm up during which copying is not possible. -
Page 28: Originals
Originals Originals Sizes and Weights of Recommended Originals Metric version Where Original Is Original Size Original Weight Exposure glass Up to A3 Document feeder 1-sided originals: 52 – 157 g/m A3L – A5KL 2-sided originals: 52 – 128 g/m A3L – A5KL Thin Paper mode: 40 –... -
Page 29: Sizes Detectable By Auto Paper Select
Basics • Originals with any kind of coating, such as thermal fax paper, art paper, alu- minum foil, carbon paper, or conductive paper • Originals with perforated lines • Originals with indexes, tags, or other projecting parts • Sticky originals, such as translucent paper •... -
Page 30: Scannable Area From The Exposure Glass
Originals Inch version Size A3 11" 11" " " " " 17" 15" 14" 11"K " 13"L Where Original Is Set Expo- sure Glass Docu- ment Feeder You can select from 8 " 13", 8 " 13" and 8" 13" with the User Tools (System Settings). -
Page 31: Copy Paper
Basics Copy Paper Recommended Paper Sizes and Types The following limitations apply to each tray: Tray Metric Version Inch Version Paper Paper Weight Capacity " 11" K 52 – 163 1,000 Tray 1 (Tan- A4K, 8 " 11" K A4K, 8 sheets + dem tray) , 16... - Page 32 Copy Paper If you wish to copy onto OHP transparencies or thick paper, select OHP or Thick Pa- per mode. See “Tray Paper Settings” in the System Settings manual. When setting copy paper, make sure the stack height does not exceed the limit mark. The maximum number of sheets you can set at once depends on the paper thickness and condition.
-
Page 33: Non-Recommended Paper
Basics Non-recommended Paper R CAUTION: • Do not use aluminum foil, carbon paper, or similar conductive paper to avoid a fire or equipment failure. Important Do not use any of the following kinds of paper or a fault might occur. •... -
Page 34: Toner
Toner Toner Handling Toner R WARNING: • Do not incinerate used toner or toner containers. Toner dust might ig- nite when exposed to an open flame. Dispose of used toner containers in accordance with local regulations for plastics. R CAUTION: •... - Page 35 Basics...
-
Page 36: Copying
2. Copying Basic Procedure Make sure that the machine is in Copy mode. If user codes are turned on, enter your User Code with the number keys, then press the [#] key. Reference P.69 “User Codes”. Make sure that no previous settings remain. Note To clear any previous settings, press the {Clear Modes} key. -
Page 37: Auto Reset
Copying Enter the number of copies required with the number keys. Note The maximum copy quantity can be set between 1 and 9999 (default: 9999). See “Maximum Copy Quantity” P.314 “General Features”. To change the number entered, press the {Clear} key and enter the new number. -
Page 38: Energy Saver
Basic Procedure -Energy Saver This indicator lights when the machine is saving energy. To exit Energy Saver mode, press any key on the control panel. P.67 “Energy Saver Mode” -Auto Off The machine automatically turns itself off a fixed period of time after your job is finished. -
Page 39: Setting Originals
Copying Setting Originals Limitation Set originals after correction fluid and ink has completely dried. Not taking this precaution could mark the exposure glass and cause marks to be copied. Note Normally originals should be aligned to the rear left corner. However, some copy functions may produce different results depending on the direction of the originals. -
Page 40: Setting Originals In The Document Feeder
Setting Originals Set the first page of your original face down on the exposure glass and align it to the rear left corner. ND1C01EE 1: Reference mark 2: Scale Lower the document feeder. Setting Originals in the Document Feeder Note The last page should be on the bottom. -
Page 41: Original Orientation
Copying Set the aligned originals face up into the document feeder. Your originals are set correctly when the bottom plate rises. TSPH040E Important After the bottom plate of the document feeder rises, do not add or force in originals. Note To avoid a multi-sheet feed, fan the originals before setting them in the document feeder. - Page 42 Setting Originals Standard Orientation Make sure the [Standard Orientation] key is selected. 90 Turn When you want to copy onto A3, B4 or 11" 17" size originals, set your original in the landscape orientation and then press the 90 Turn key. The machine ro- tates original image and you can make copies as you wish.
- Page 43 Copying Press the[90 Turn] key. Rotate Original This function rotates the copy image by 180 . This is useful for copying torn originals. For example, if the left side of the orig- inal is damaged, set it as shown below: Press the [Rotate Original] key.
-
Page 44: Setting Special Originals
Setting Originals Note It is recommended to use this function together with the Auto Paper Select or Preset Reduce/Enlarge function. Copy results may differ depending on the combination of selected func- tions. Setting Special Originals Mixed Sizes Mode Use this mode for copying an original that contains pages of different sizes. If you copy this kind of original from the document feeder using standard copy- ing, some parts of the original images may not appear on copies or misfeeds may occur. - Page 45 Copying Align the rear and left edges of the originals as shown in the illustration. B4 A3 CP19AE 1: Direction in which to set originals in the ADF. 2: Vertical size Important If the originals are of different vertical sizes, put the longer originals on the bottom otherwise the sizes might not be detected correctly.
- Page 46 Setting Originals Press the [Batch (SADF)] key. Set your originals then press the {Start} key. The Auto Feed indicator will light. After all the originals have been fed, make sure the Auto Feed indicator is lit then set the next batch of originals. After setting the second and subsequent batches of originals, you do not have to press the {Start} key.
-
Page 47: Basic Functions
Copying Basic Functions The following functions are explained in this section: Copy Image Density Auto Image Density, Manual Image Density, Combined Auto and Manual Image Density Original Types Text, Auto Text/Photo, Photo, Pale, Generation Copy Copy Paper Select Auto Paper Select and Manual Paper Select Auto Reduce/Enlarge Reduce and Enlarge Note... - Page 48 Basic Functions Do one of the following: To have image density selected automatically A Make sure that the [Auto Image Density] key is selected. If it is not selected press the [Auto Image Density] key. Note If the [Auto Image Density] key is not selected, press the [Auto Image Densi- ty] key.
-
Page 49: Choosing The Original Type
Copying B Press the [Lighter] or [Darker] key to adjust the density. Note If you do not wish to set any other functions press the {Start} key to start copying. Choosing the Original Type The Original Type setting gives you control over the method used to make cop- ies. -
Page 50: Selecting Copy Paper
Basic Functions Press the appropriate key to select the original type. Note If you do not wish to set any other functions, press the {Start} key to start copying. Selecting Copy Paper There are two ways to select copy paper: Auto Paper Select The machine selects a suitable size of copy paper automatically based on the original size and the reproduction ratio... - Page 51 Copying Inch version Where Original Is Set Paper Size and Direction Exposure glass 11" 17" L, 8 " 14" L, 8 " 11" KL, 5 " 8 "K Document feeder A4 KL, 11" 17" L, 11" 15"L, 8 " 14" L, 8 "...
-
Page 52: Image Rotation
Basic Functions -Image Rotation If the direction in which your original is set (landscape or portrait) is different from the paper you are copying onto, this function rotates the original image by 90 and fits it on the copy paper. This function works when the following func- tions are selected. -
Page 53: Auto Reduce/Enlarge
Copying Auto Reduce/Enlarge The machine can choose an appropriate reproduction ratio based on the paper and original sizes you select. Note You can not set papers into the A3/11" 17" Tray Kit. When you use Auto Reduce/Enlarge, refer to the following table for possible original sizes and directions: Metric version Where Original Is Set... -
Page 54: Copying Onto Ohp Transparencies
Basic Functions Press the [Auto Reduce/Enlarge] key. Select the paper tray. Copying onto OHP Transparencies To make copies onto OHP transparencies, you need to specify the paper type. For details, see “Tray Paper Settings” in the System Settings manual. Open designated OHP tray (Tray2-6). Lightly insert the OHP transparencies face up. -
Page 55: Copying Onto Tab Stock
Copying Copying onto Tab Stock Preparation Set the paper tray for tab stock. See “Tray Paper Settings” in the System Set- tings manual. You can set the tab stock in the Large Capacity Tray (LCT) Trays 4 - 5. Check the position of index tab to avoid the image being sheared. See “Tray Paper Settings”... - Page 56 Basic Functions Tab stocks are always brought from top. Select the paper tray in which tab stock are loaded. Place your originals and press the {Start} key.
-
Page 57: Sort
Copying Sort Use this function to have copy sets delivered in order. Every other copy set is shifted and delivered to the shift tray. Reference For the paper capacity of the finisher, see P.346 “Finisher”. Note You can select the shift tray on or off in Sort/Stack mode. P.191 “Choosing How Copies Are Delivered”... -
Page 58: To Stop Scanning Temporarily
Sort To set the original on the exposure glass or in the document feeder using Batch(SADF) mode Reference P.32 “Batch (SADF) mode”. A Set the first page of your original, then press the {Start} key. Note The last page should be on the bottom. B After it has been scanned in, set the next original then press the {Start} key. - Page 59 Copying Reference Scanning will stop when memory reaches 0 % during sorted copying. How- ever, you can change this setting so that all the scanned pages are copied and delivered to the tray first, then the machine automatically continues scanning the remaining originals.
-
Page 60: Stack
Stack Stack This function groups copies of each page in a multi-page original together. Every other page stack is shifted for ease of separation. The finisher shift tray of the finisher provides this function by sliding from side to side. Reference For the maximum tray capacity of the finisher, see P.346 “Finisher”... - Page 61 Copying To set the original on the exposure glass or in the document feeder using Batch(SADF) mode Reference P.32 “Batch (SADF) mode”. A Set the original, then press the {Start} key. Note Start with the first page to be copied. B After it has been scanned in, set the next original then press the {Start} key.
-
Page 62: Staple
Staple Staple Use this function to have each copy set stapled together. Limitation You cannot use the following paper types with this function: • Tracing paper • OHP transparencies • Adhesive labels • Curled paper • Low stiffness paper • Paper of different vertical sizes •... -
Page 63: Stapling Position
Copying Reference P.301 “ d Adding Staples”. For how to replenish the staple supply, see P.304 “ e Removing Jammed Staples”. For how to clear staple jams, see -Stapling Position When there is copy paper identical in size and direction to your original, the sta- pling position is see P.339 “Stapling Position”... - Page 64 Staple To set the original on the exposure glass or in the document feeder using Batch(SADF) mode Reference P.32 “Batch (SADF) mode”. A Set the original, then press the {Start} key. Note Start with the first page to be copied. B When it has been scanned in, set the next original, then press the {Start} key.
-
Page 65: Punch
Copying Punch The optional punch kit is required to use this function. The function is used to make punch holes in copies. 2 holes 3 holes 4 holes Limitation You cannot use the Image Rotation function if the Punch function is selected. Set your original in the same direction (landscape or portrait) as the copy pa- per. - Page 66 Punch Note The relationship between the direction in which you set the original and the punch hole positions is as follows: Punch Hole Positions Direction in which Original Is Set Punch Hole Posi- tions Exposure glass Document feeder 2 holes 3 holes 4 holes Punchable paper sizes are as follows:...
- Page 67 Copying Select the Punch position. Set your originals then press the {Start} key.
-
Page 68: Programs
Programs Programs You can store frequently used copy job settings in machine memory and recall them for future use. Limitation You cannot store the settings whether the Connect Copy function will be se- lected automatically in a program. Note You can store up to 25 programs. You can select the standard mode or program No. - Page 69 Copying Press the [Store] key. Press the program number you want to store. Note Program numbers with m already have settings in them. P.57 “Chang- ing Stored Program” Enter the program name with the letter keys on the display panel. Then press the [#] key.
-
Page 70: Changing Stored Program
Programs Changing Stored Program Press the stored program number key and make sure the settings. Note When you want to check the contents of the program, recall the program. P.59 “Recalling a Program” Repeat the steps A and D in Storing a Program. To overwrite the program A Press the [Yes] key. -
Page 71: Deleting A Program
Copying Deleting a Program Press the {Program} key. Press the [Delete] key. Press the program number you want to delete. Press the [Yes] key. Note To cancel the deletion, press the [No] key. To delete another program, repeat steps C and D. -
Page 72: Recalling A Program
Programs Recalling a Program Press the {Program} key. Press the program number you want to recall. The stored settings are displayed. Note Only programs with m contain a program. Set your originals then press the {Start} key. -
Page 73: Job Preset
Copying Job Preset If a long copy job is in progress and you do not wish to wait for it to finish, you can use this feature to set up the next copy job in advance. When the current copy job is finished, your copy job will be started automatically. Limitation You can not combine Job Preset function with Connect Copy function (op- tion). -
Page 74: Editing Job Preset
Job Preset To set the original in the document feeder A Set a stack of originals in the document feeder, then press the {Start} key. Note The last page should be on the bottom. To set the original on the exposure glass or in the document feeder using Batch(SADF) mode Reference P.32 “Batch (SADF) mode”. - Page 75 Copying Press the [Change] key. Press the number of the job you want to change. Press the [Change Settings] key. Change the setting, then press the [Exit] key.
- Page 76 Job Preset Press the [Yes] key. Note To cancel the changes, press the [No] key. Press the [Exit] key. Note When you want to change the other New Job, repeat C and F. Press the [Previous] key. The initial display reappears.
-
Page 77: Changing The Order Of The Job Preset
Copying Changing the Order of the Job Preset Press the [Job List] key. Press the [Change] key. Press the number of the job you want to change. Change the order using the [ Forward] key or [ Backward] key. -
Page 78: Deleting Job Preset
Job Preset Press the [Confirm] key. Press the [Previous] key. The initial display reappears. Deleting Job Preset Press the [Job List] key. Press the [Change] key. Press the number of the job you want to delete. - Page 79 Copying Press the [Delete] key. Press the [Confirm] key. Press the [Previous] key. The initial display reappears.
-
Page 80: Other Functions
Other Functions Other Functions Energy Saver Mode If you do not operate the machine for a certain period after copying, or when you press the {Energy Saver} key, the display goes blank and the machine enters En- ergy Saver mode. When you press the {Energy Saver} key again, when the origi- nals are set in the document feeder, or when the document feeder is opened, the machine returns to the ready condition. - Page 81 Copying To interrupt an original being fed Press the Interrupt key. The Interrupt key lights up and scanning stops. Remove the originals that were being copied and set the originals you wish to copy. Press the {Start} key. The machine starts making your copies. When your copy job is finished, remove your originals and copies.
-
Page 82: User Codes
Other Functions User Codes If the User Code function is turned on, operators must input their user codes be- fore the machine can be operated. The machine keeps count of the number of copies made under each user code. Note When the machine is set for user codes, the machine will prompt you for your user codes after the operation switch is on or the Auto Reset feature comes into effect. -
Page 83: Original Tone
Copying Note To cancel Auto Start, press the {Stop} key. In Connect Copy mode, press the {Stop} key on the master unit to cancel Auto Start. Original Tone The tone sounds and an error message is displayed when you leave your origi- nal on the exposure glass after copying, and set your originals in the document feeder after copying. -
Page 84: Preset Reduce/Enlarge
Preset Reduce/Enlarge Preset Reduce/Enlarge Use this feature to select a preset magnification ratio for copying. Note You can select one of 12 preset ratios (5 enlargement ratios, 7 reduction ra- tios). You can change the preset ratios to other ratios you frequently use. See P.316 “Set Ratio”. - Page 85 Copying Metric version Ratio (%) Original Copy Paper Size 400 (enlarge area by 16) 200 (enlarge area by 4) A5 A3 141 (enlarge area by 2) A4 A3, A5 A4 F A3, A4 B4 B4 A3 F A4, B4 A4 B4 F4, B4 F A3 A4, A4 A5 71 (reduce area by...
- Page 86 Preset Reduce/Enlarge Press the [Reduce/Enlarge] key. Note To select a preset ratio in the initial display, directly press the shortcut re- duce/enlarge key and proceed to step C. Select a ratio. Note You can specify the reduce/enlarge ratios of the keys displayed when the [Reduce/Enlarge] key is touched.
- Page 87 Copying Press the [Create Margin] key displayed in the initial display. If you do not wish to use the Reduce/Enlarge function as well, set your orig- inals then press the {Start} key.
-
Page 88: Zoom
Zoom Zoom Zoom lets you change the reproduction ratio in 1 % steps. Note You can select a ratio within the following range: • Metric version: 25 – 400 % • Inch version: 25 – 400 % You can select a ratio regardless of the size of an original or copy paper. With some ratios, parts of the image might not be copied or margins will appear on copies. - Page 89 Copying To select the ratio with the [+] and [ ] keys A Select a preset ratio which is close to the desired ratio by using Preset Re- duce/Enlarge. B Adjust the ratio with the [+] or [ ] key. Note To change the ratio in 1 % steps, just press the [+] or [ ] key.
-
Page 90: Size Magnification
Size Magnification Size Magnification This function calculates an enlargement or reduction ratio based upon the lengths of the original and copy. A inch a inch Preparation Measure the length of the image you wish to modify. Note A ratio is selected in the range of 25 to 400 %. If the calculated ratio is over the maximum or under the minimum ratio, it is corrected within the range of the ratio automatically. - Page 91 Copying Enter the length of the original with the number keys and press the [#] key. Note You can enter sizes within the following ranges: Metric version 1 - 999 mm (in 1 mm steps) Inch version 0.1" - 99.9" (in 0.1" steps) To change the length entered, press the {Clear} key on the control panel or [Clear] key on the display and enter the new length.
-
Page 92: Directional Magnification (%)
Directional Magnification (%) Directional Magnification (%) With Directional Magnification, copies can be reduced or enlarged at different reproduction ratios horizontally and vertically. CP2P01EE a: Horizontal b: Vertical Note You can select ratios within the following range: • Metric version: 25 – 400 % •... - Page 93 Copying Press the [Direct. Mag.%] key. To specify the ratio with the [+] and [ ] keys A Press the [+ keys] key. B Press the [Horizontal] key. C Adjust the ratio using the [+] or [ ] key. Note Touching the [+] or [ ] key changes the ratio in 1 % steps.
- Page 94 Directional Magnification (%) To enter the ratio with the number keys A Press the [Horizontal] key. B Enter the desired ratio with the number keys, followed by the [#] key. Note To change the ratio entered, press the {Clear} key on the control panel or [Clear] key on the display and enter the new ratio.
-
Page 95: Directional Size Magnification (Inch)
Copying Directional Size Magnification (inch) The suitable reproduction ratios will be automatically selected when you enter the horizontal and vertical lengths of the original and copy image you require. CP2M01EE 1: Horizontal original size 2: Vertical original size 3: Horizontal copy size 4: Vertical copy size Preparation Specify the vertical and horizontal sizes of the original and those of the copy,... - Page 96 Directional Size Magnification (inch) Press the [Reduce/Enlarge] key. Press the [D. Size Mag. inch] key. Enter the horizontal size of the original with the number keys then press the [#] key. Note To change the value entered, press the {Clear} key on the control panel or the [Clear] key on the display and enter the new value.
-
Page 97: Duplex
Copying Duplex You can make two-sided copies in two ways: 1 Sided 2 Sided This mode makes two-sided copies from one-sided originals. 2 Sided 2 Sided This mode makes two-sided copies from two-sided originals. Limitation You cannot use the following types of copy paper with this function: •... - Page 98 Duplex -Originals And Copy Direction • Top to Top Duplex1 • Top to Bottom Duplex2 -Original Direction And Completed Copies...
- Page 99 Copying Press the [Dup./Combine/Series] key. Press the [1 Sided 2 Sided] key. Check the orientation. Note If you want to change the copy direction to “Top to Bottom” press the [Ori- entation] key, then press the [Top to Bottom] key. If you do not, go to step E. The default setting is “Top to Top”.
- Page 100 Duplex B Press the [Top to Bottom] key. C Press the [OK] key. Set your originals in the following way. When setting an original on the exposure glass or in the document feeder using Batch(SADF) mode Reference P.32 “Batch (SADF) mode”. A Set the original, then press the {Start} key.
-
Page 101: Sided 2 Sided
Copying 2 Sided 2 Sided Press the [Dup./Combine/Series] key. Press the [2 Sided 2 Sided] key. Check the orientation. Note To change the orientation to “Top to Bottom”, press the [Orientation] key, then press the [Top to Bottom] key. If you do not, go to step E. The default setting is “Top to Top”. - Page 102 Duplex To select “Top to Bottom” A Press the [Orientation] key. B Select the original orientation, then the copy orientation. C Press the [OK] key. Set your originals in the following way. When setting an original on the exposure glass or in the document feeder using Batch(SADF) mode Reference P.32 “Batch (SADF) mode”.
-
Page 103: Combine
Copying Combine Use this to combine two or more originals into one copy. 1 Sided Combine mode is for one-sided copies, and 2 Sided Combine mode is for two-sided copies. You can combine images in twelve ways: 1 Sided 2 Pages Combine 1 Side Copies two 1-sided originals on one side of a sheet 1 Sided 4 Pages... - Page 104 Combine If the calculated ratio is under the minimum ratio, it is corrected within the range of the ratio automatically. However, with some ratios, parts of the im- age might not be copied or blank margins appear on copies. You can have separation lines printed around the copy images. See “Combine Separation Line”...
-
Page 105: Sided 2 Pages Combine 1 Side
Copying 1 Sided 2 Pages Combine 1 Side Copies two 1-sided originals to a two-page spread. Direction in which to set originals in the document feeder • Originals reading from left to right Combine5 • Originals reading from top to bottom Combine6 Press the [Dup./Combine/Series] key. - Page 106 Combine Press the [Combine] key. Press the [1 Sided] key for the original, then press the [Combine 1 Side] key for the copy. Press the [2 Originals] key. Select the paper. Set your originals then press the {Start} key.
-
Page 107: Sided 4 Pages Combine 1 Side
Copying 1 Sided 4 Pages Combine 1 Side Copies four 1-sided originals together to one side of a sheet. GC SHVY 8J Note You can change the order that the copy is printed in Combine mode. See P.320 “Adjust Image”. Press the [Dup./Combine/Series] key. -
Page 108: Sided 8 Pages Combine 1 Side
Combine Press the [1 Sided] key for the original, then press the [Combine 1 Side] key for the copy. Press the [4 Originals] key. Select the paper. Set your originals then press the {Start} key. 1 Sided 8 Pages Combine 1 Side Copies eight 1-sided originals together to one side of a sheet. - Page 109 Copying Press the [Dup./Combine/Series] key. Press the [Combine] key. Press the [1 Sided] key for the original, then press the [Combine 1 Side] key for the copy. Press the [8 Originals] key. Select the paper. Set your originals then press the {Start} key.
-
Page 110: Sided 4 Pages Combine 2 Side
Combine 1 Sided 4 Pages Combine 2 Side Copies four 1-sided originals to the two-page spread on both sides of a sheet. GC SHVY 9J Press the [Dup./Combine/Series] key. Press the [Combine] key. Press the [1 Sided] key for the original, then press the [Combine 2 Side] key for the copy. - Page 111 Copying Press the [4 Originals] key. Check the orientation. Note To change the orientation to “Top to Bottom”, press the [Orientation] key, then press the [Top to Bottom] key. If you do not, go to step F. The default setting is “Top to Top”. You can change this setting with the copy User Tools.
-
Page 112: Sided 8 Pages Combine 2 Side
Combine 1 Sided 8 Pages Combine 2 Side Copies eight 1-sided originals together to both sides of a sheet. GCSHVYAE Front Back Note You can change the order that the copy is printed in Combine mode. See P.320 “Adjust Image”. Press the [Dup./Combine/Series] key. - Page 113 Copying Press the [1 Sided] key for the original, then press the [Combine 2 Side] key for the copy. Press the [8 Originals] key. Check the orientation. Note To change the orientation to “Top to Bottom”, press the [Orientation] key, then press the [Top to Bottom] key.
-
Page 114: Sided 16 Pages Combine 2 Side
Combine B Press the [Top to Bottom] key then press the [OK] key. Select the paper. Set your originals then press the {Start} key. 1 Sided 16 Pages Combine 2 Side Copies sixteen 1-sided originals together to both sides of a sheet. 1 2 3 4 5 6 7 8 9 10 11 12... - Page 115 Copying Press the [Combine] key. Press the [1 Sided] key for the original, then press the [Combine 2 Side] key for the copy. Press the [16 Originals] key. Check the orientation. Note To change the copy orientation to “Top to Bottom”, press the [Orientation] key, then press the [Top to Bottom] key.
-
Page 116: Sided 1 Page Combine 1 Side
Combine To select “Top to Bottom” A Press the [Orientation] key. B Press the [Top to Bottom] key then press the [OK] key. Select the paper. Set your originals then press the {Start} key. 2 Sided 1 Page Combine 1 Side Copies one 2-sided original to one side of a sheet. - Page 117 Copying Press the [Dup./Combine/Series] key. Press the [Combine] key. Press the [2 Sided] key for the original, then press the [Combine 1 Side] key for the copy. Press the [2 Pages] key. Check the orientation. Note To change the copy orientation to “Top to Bottom”, press the [Orientation] key, then press the [Top to Bottom] key.
-
Page 118: Sided 2 Pages Combine 1 Side
Combine To select “Top to Bottom” A Press the [Orientation] key. B Press the [Top to Bottom] key then press the [OK] key. Select the paper. Set your originals then press the {Start} key. 2 Sided 2 Pages Combine 1 Side Copies two 2-sided originals to one side of a sheet. - Page 119 Copying Press the [Dup./Combine/Series] key. Press the [Combine] key. Press the [2 Sided] key for the original, then press the [Combine 1 Side] key for the copy. Press the [4 Pages] key. Check the orientation. Note To change the copy orientation to “Top to Bottom”, press the [Orientation] key, then press the [Top to Bottom] key.
-
Page 120: Sided 4 Pages Combine 1 Side
Combine To select “Top to Bottom” A Press the [Orientation] key. B Press the [Top to Bottom] key then press the [OK] key. Select the paper. Set your originals then press the {Start} key. 2 Sided 4 Pages Combine 1 Side Copies four 2-sided originals to one side of a sheet. - Page 121 Copying Press the [Dup./Combine/Series] key. Press the [Combine] key. Press the [2 Sided] key for the original, then press the [Combine 1 Side] key for the copy. Press the [8 Pages] key. Check the orientation. Note To change the copy orientation to “Top to Bottom”, press the [Orientation] key, then press the [Top to Bottom] key.
-
Page 122: Sided 2 Pages Combine 2 Side
Combine To select “Top to Bottom” A Press the [Orientation] key. B Press the [Top to Bottom] key then press the [OK] key. Select the paper. Set your originals then press the {Start} key. 2 Sided 2 Pages Combine 2 Side Copies 2-sided originals together to both sides of a sheet. - Page 123 Copying Press the [Dup./Combine/Series] key. Press the [Combine] key. Press the [2 Sided] key for the original, then press the [Combine 2 Side] key for the copy. Press the [4 Pages] key. Check the orientation. Note To change the copy orientation to “Top to Bottom”, press the [Orientation] key, then press the [Top to Bottom] key.
- Page 124 Combine To select “Top to Bottom” A Press the [Orientation] key. B Press the [Top to Bottom] key then press the [OK] key. Select the paper. Set your originals then press the {Start} key.
-
Page 125: Sided 4 Pages Combine 2 Side
Copying 2 Sided 4 Pages Combine 2 Side Copies four 2-sided originals together to both sides of a sheet. GCSHVY2E Front Back Note You can change the order that the copy is printed in Combine mode. See P.320 “Adjust Image”. Press the [Dup./Combine/Series] key. - Page 126 Combine Press the [2 Sided] key for the original, then press the [Combine 2 Side] key for the copy. Press the [8 Pages] key. Check the orientation. Note To change the copy orientation to “Top to Bottom”, press the [Orientation] key, then press the [Top to Bottom] key.
-
Page 127: Sided 8 Pages Combine 2 Side
Copying B Press the [Top to Bottom] key then press the [OK] key. Select the paper. Set your originals then press the {Start} key. 2 Sided 8 Pages Combine 2 Side Copies eight 2-sided originals together to both sides of a sheet. 1 2 3 4 5 6 7 8 9 10 11 12... - Page 128 Combine Press the [Combine] key. Press the [2 Sided] key for the original, then press the [Combine 2 Side] key for the copy. Press the [16 Pages] key. Check the orientation. Note To change the copy orientation to “Top to Bottom”, press the [Orientation] key, then press the [Top to Bottom] key.
- Page 129 Copying To select “Top to Bottom” A Press the [Orientation] key. B Press the [Top to Bottom] key then press the [OK] key. Select the paper. Set your originals then press the {Start} key.
-
Page 130: Series Copies
Series Copies Series Copies Series copies are made by separately copying the front and back of a 2-sided original or the two facing pages of a spread original onto two sheets of paper. Two varieties of this feature are available: 2 Sided 1 Sided Copies the front and back of a 2-sided original to make two 1-sided copies. - Page 131 Copying Press the [2 Sided 1 Sided] key. Check the orientation. Note To change the copy orientation to “Top to Bottom”, press the [Orientation] key, then press the [Top to Bottom] key. If you do not, go to step F. The default setting is “Top to Top”.
-
Page 132: Book 1 Sided
Series Copies Book 1 Sided Use this function to make one-sided copies from two facing pages of a bound original, e.g., a book or magazine. Note Refer to the following table when you select original and copy paper sizes with a 100 % ratio: Metric version Original Copy paper... - Page 133 Copying Press the [Series] key. Press the [Book 1 Sided] key. Make sure that [Auto Paper Select] is selected. Set the book on the exposure glass, then press the {Start} key.
-
Page 134: Copying Book Originals
Copying Book Originals Copying Book Originals A book is made by copying two or more originals in page order. Book 2 Sided Copies a two-page spread original onto both sides of a sheet. Multi 2 Sided Copies each two-page spread original as it is onto both sides of a sheet. Booklet Make copies in page order for a folded booklet. - Page 135 Copying Metric version Original Copy Paper A4 (2-sided) B5 (2-sided) A5 (2-sided) Inch version Original Copy Paper 11" 17"L " 11" (2-sided) " 11"L " " (2-sided) Press the [Dup./Combine/Series] key. Press the [Book] key. Press the [Book 2 Sided] key. Check the orientation.
-
Page 136: Multi 2 Sided
Copying Book Originals Note To change the copy orientation to “Top to Bottom”, press the [Orientation] key, then press the [Top to Bottom] key. If you do not, go to step F. The default setting is “Top to Top”. You can change this setting with the copy User Tools. - Page 137 Copying Note Refer to the following table when you select original and copy paper sizes with a 100 % ratio: Metric version Original Copy paper A4 (2-sided) B5 (2-sided) A5 (2-sided) Inch version Original Copy paper 11" 17"L " 11" (2-sided) "...
- Page 138 Copying Book Originals Press the [Multi 2 Sided] key. Check the orientation. Note To change the copy orientation to “Top to Bottom”, press the [Orientation] key, then press the [Top to Bottom] key. If you do not, go to step F. The default setting is “Top to Top”.
-
Page 139: Booklet
Copying Booklet Make copies in page order for a folded booklet as shown in the following illus- trations: Forward GCBOOK0E Backward GCBOOK1E Important Before selecting this function, select “Forward” or “Backward” with the User Tools. See “Copy Orientation In Booklet/Magazine” P.320 “Adjust Image”. - Page 140 Copying Book Originals How to fold copies to make a booklet GCBOOK2E Forward Backward Press the [Dup./Combine/Series] key. Press the [Book] key. Press the [Booklet] key. Select the paper. Set your originals then press the {Start} key.
-
Page 141: Magazine
Copying Magazine Copies two or more originals to make copies in page order when they are folded and stacked. Forward GCBOOK3E Backward GCBOOK4E Important Before selecting this function, select “ [Forward] ” or “ [Backward] ” with the User Tools. See “Copy Orientation In Booklet/Magazine” P.320 “Adjust Image”. - Page 142 Copying Book Originals How to fold copies to make a magazine Forward GCBOOK5E Backward GCBOOK6E Press the [Dup./Combine/Series] key. Press the [Book] key.
- Page 143 Copying Press the [Magazine] key. Select the paper. Set your originals then press the {Start} key. Note The copying may take some time after scanning originals.
-
Page 144: Margin Adjustment
Margin Adjustment Margin Adjustment You can shift the image left, right, top or bottom to make a binding margin. Limitation If you set too wide a margin, areas you do not want to delete might be erased. Note You can change the width of the binding margin as follows: Metric version 0 –... - Page 145 Copying Press the [Margin Adj.] key. Set a front margin for a front page. Press the [ ] and [ ] keys when setting the left and right margins, and the [ ] and [ ] keys when setting the top and bottom margins.
-
Page 146: Border Erase
Border Erase Border Erase Limitation This function will not take effect if the size of the original cannot be detected. Note You can change the width of the erased margin as follows: Metric version 3 – 50 mm (in 1 mm steps) Inch version 0.1"... - Page 147 Copying Inch version Where Original Is Set Paper Size and Orientation Exposure glass 11" 17"L, 8 " 14"L, 8 " 11"KL Document feeder A4KL, 11" 17"L, 11" 15"L, 8 " 14"L, 8 " 11"KL, 5 " "KL, 8 " 13"L You can select from 8 "...
- Page 148 Border Erase To select “Same Width” A Press the [Same Width] key. B Adjust the width of the margin to be erased by pressing the [+] or [-] key. Note To change the width entered, press the [+] and [-] keys and enter the cor- rect width.
-
Page 149: Center/Border Erase
Copying Center/Border Erase This function erases the center and/or all four sides of the original image. This is useful for avoiding shadows on the copy image caused by the binding or splayed pages of books etc. Two modes of this feature are available: Center This mode erases the Center margin of the original image. - Page 150 Center/Border Erase Metric version Where Original Is Set Paper Size and Orientation Exposure glass 13" L A3L, B4L, A4KL, 8 " Document feeder A3L, A4KL, A5KL, 11" 17"L, 8 " 11"KL, 8 " 13" L You can select from 8 "...
- Page 151 Copying Press the [Cntr/Brdr Erase] key. Selecting “Same Width” A Press the [Same Width] key. B Set the width with the [+] and [-] keys. Note To change the width entered, press the [+] and [-] keys and enter the cor- rect width.
-
Page 152: Delete Area
Delete Area Delete Area Delete Inside This function blanks out a designated area of the copy image. Note The length you can input is 0-432mm, 0-17". You can erase two parts of the image at a same time. Press the [Edit Image] key. Press the [Delete Area] key. - Page 153 Copying Press the [Delete Inside 1] or [Delete Inside 2] key. Input the value of X1, then press the [#] key or [X2] key. Note To change the length entered, press the {Clear} key on the control panel or [Clear] key on the display panel and enter the new length. Input the value of X2, then press the [#] key or [Y1] key.
-
Page 154: Delete Outside
Delete Area Delete Outside This function blanks out all areas of the copy image except the area you choose. Note The length you can input is 0-432mm, 0-17". Press the [Edit Image] key. Press the [Delete Area] key. Press the [Delete Outside] key. - Page 155 Copying Input the value of X1, then press the [#] key or [X2] key. Note To change the length entered, press the {Clear} key on the control panel or [Clear] key on the display panel and enter the new length. Input the value of X2, then press the [#] key or [Y1] key.
-
Page 156: Additional
Additional Additional There are additional types of Edit Image mode: 3 Side Full Bleed You can make an edge to edge to make with 3 side full bleed. Double Copies One original image is copied twice on one copy. Image Repeat The original is copied repeatedly. -
Page 157: Double Copies
Copying Press the [Additional] key. Press the [3 Side Full Bleed] key. Set your originals then press the {Start} key. Double Copies The one original image is copied twice on one copy as shown in the illustration. Note You can insert lines between repeated images. See “Double Copies Separation Line”... - Page 158 Additional Metric version Original Size and Direction Copy Paper Size and Direction Inch version Original Size and Direction Copy Paper Size and Direction " "L " 11"K " "K " 11"L 11" 17"L " 11"K Press the [Edit Image] key. Press the [Additional] key.
-
Page 159: Image Repeat
Copying Image Repeat The original image is copied repeatedly. Note The number of repeated images depends on the original size, copy paper size, and reproduction ratio. Refer to the following table. Original: A5K/Copy paper: A4K or Original: A5L/Copy paper A4L 4 repeats (71 %) 16 repeats (35 %) Repeat1... - Page 160 Additional Press the [Edit Image] key. Press the [Additional] key. Press the [Image Repeat] key. Set your original, then press the {Start} key.
-
Page 161: Centering
Copying Centering You can make copies by moving the image to the center of the copy paper. Limitation If the direction of originals is different from that of the copy paper, the ma- chine will not rotate the image by 90 (rotate-copy). This function will not take effect if the size of original cannot be detected. - Page 162 Additional Select the paper. Press the [Edit Image] key. Press the [Additional] key. Press the [Centering] key. Set your originals then press the {Start} key.
-
Page 163: Front Cover
Copying Front Cover The first page of your originals is copied on specified paper sheets for covers. Copy Blank Preparation Before selecting this function, set the tray for front cover and slip sheet paper. See “Tray Paper Settings” in the System Settings manual. The cover or slip sheets should be identical in size and direction as the copy paper. - Page 164 Front Cover Press the [Front Cover] key. Select [Copy] or [Blank] key. Select the paper tray you use. Set your originals in the document feeder, then press the {Start} key.
-
Page 165: Back Cover
Copying Back Cover The last pages of your originals are copied on specified paper. Copy GCCOVE1J Blank Preparation Before selecting this function, set the tray for back cover paper and slip sheet paper. See “Tray Paper Settings” in the System Settings manual. The cover or slipsheets should be identical in size and direction as the copy paper. - Page 166 Back Cover Press the [Cover/Slip Sheet] key. Press the [Back Cover] key. Select [Copy] or [Blank] key. Select the paper tray you use. Set your originals in the document feeder, then press the {Start} key.
-
Page 167: Designate/Chapters
Copying Designate/Chapters The following functions are explained in this section: Designate: Copy Use this function to designate certain pages of your original to be copied onto slip sheets. Designate: Blank Use this function to insert the slipsheet into certain pages of your original. Chapters When using one-sided to two-sided copying, the page locations you specify with this function will appear on the front of copy sheets beginning a new... -
Page 168: Designate: Copy
Designate/Chapters Designate: Copy Use this function to designate certain pages of your original to be copied onto slip sheets. Note When “1 Sided 2 Sided” has been selected, the page numbers you desig- nate will always be copied onto the front of copies in the same way as Chap- ters mode. - Page 169 Copying Press the [Designate: Copy] key. Select the tray you wish to use. Select the type of slipsheet. Enter the number of the original's location you want to copy onto a slip sheet with the number keys. Then, press the {#} key. This display shows example settings.
-
Page 170: Designate: Blank
Designate/Chapters When you wish to finish specifying page locations, press the [OK] key. Note To change the number entered, select the desired item, then enter the new number. Set your originals then press the {Start} key. Designate: Blank Use this function to insert the slipsheet into certain pages of your original. Press the [Cover/Slip Sheet] key. - Page 171 Copying Press the [Designate: Blank] key. Select the tray you wish to use. Select the type of slipsheet. Enter the number of the original's location you want to copy onto a slip sheet with the number keys. Then, press the {#} key. This display shows example settings.
-
Page 172: Chapters
Designate/Chapters When you wish to finish specifying page location, press the [OK] key. Note To change the number entered, select the desired item, then enter the new number. Set your originals then press the {Start} key. Chapters When using one-sided to two-sided copying, the page locations you specify with this function will appear on the front of copy sheets beginning a new chapter. - Page 173 Copying Press the [Designate/Chapters] key. Press the [Chapters] key. Enter the page location of the first page of the first chapter with the number keys. Then, press the {#} key. This display shows example settings. Note To change the value entered, press the {Clear} key and enter the new value. To specify another page location, repeat step D.
-
Page 174: Slip Sheet Copy
Designate/Chapters Note To change the number entered, select the desired item, then enter the new number. Select the paper tray. Set your originals then press the {Start} key. Slip Sheet Copy Use this function to insert the slipsheet into certain pages of your original. GCCOVE2J Note When using one-sided to two-sided copying, the page locations you specify... - Page 175 Copying Press the [Slip Sheet Copy] key. Select the tray you wish to use. Select the type of slipsheet. Enter the number of the original's location you want to copy onto a slip sheet with the number keys. Then, press the {#} key. This display shows example settings.
- Page 176 Designate/Chapters Press the [ ] key. Enter the last number of the original. Then press the {#} key. To specify another page location, repeat step D and G. When you wish to finish specifying page location, press the [OK] key. Note To change the number entered, select the desired item, then enter the new number.
-
Page 177: Slip Sheets
Copying Slip Sheets This function inserts a sheet of paper from a different paper tray between each page copied. This function can be used to insert a slip sheet automatically be- tween OHP transparencies or used as a way of separating pages. You can also copy onto the inserted slip sheets. - Page 178 Slip Sheets Blank Note When you want to set the OHP sheet in paper tray, see “Tray Paper Settings” in the System Settings manual. Press the [Cover/Slip Sheet] key. Press the [Slip Sheet] key. Select [Copy] or [Blank] key. Select the paper tray containing the non-slip sheet paper. Set your originals then press the {Start} key.
-
Page 179: Background Numbering
Copying Background Numbering Use this function to have numbers printed on the background of copies. This function can help you to keep track of confidential documents. Note You can change some settings (e.g., density) of the numbers with the User Tools. - Page 180 Background Numbering To change the entered number, press the [Change] key. If you do not wish to, go to step E. Enter the number to start counting from with the number keys. Then press the [#] key. Note To change the entered number, press the {Clear} key on the control panel or press the [Clear] key on the display panel then enter the new number.
-
Page 181: Preset Stamp
Copying Preset Stamp Limitation One message can be stamped at a time. However, you can combine with only one user stamp. When you combine this feature with the Magazine or Booklet function, only the first page is stamped. Note One of the following eight messages can be stamped on copies with a frame around it: “COPY”, “URGENT”, “PRIORITY”, “For Your Info.”, “PRELIMI- NARY”, “For Internal Use Only”, “CONFIDENTIAL”, “DRAFT”. - Page 182 Preset Stamp The relationship between the direction in which you set the original and stamp orientation/position is as follows: Press the [Stamp] key.
- Page 183 Copying Press the [Preset Stamp] key. Select the desired message by touching the appropriate key. Select the print page. Note If you combine this feature with the magazine or Booklet function, “1st Page Only” is selected automatically. To have only the first page stamped A Press the [1st Page Only] key.
- Page 184 Preset Stamp To change the stamp position, size or density A Press the [Change] key. B Select the desired position, size and density by touching the appropriate keys. C Press the [OK] key. Set your originals then press the {Start} key.
-
Page 185: User Stamp
Copying User Stamp Up to five messages which you use frequently can be stored in the machine's memory and stamped on copies. Preparation Before using this function, you have to store your messages with the User Tools. See P.326 “User Stamp”. Note The default stamp position is “Top Right”. - Page 186 User Stamp The relationship between the direction in which you set the original and stamp Orientation/Position is as follows: You cannot combine User Stamp function with Staple or Punch function. Press the [Stamp] key.
- Page 187 Copying Press the [User Stamp] key. Touch a number to select the stamp you require. Select the stamp position and numbering format. To have on the first page stamped A Press the [1st Page Only] key. To change the stamp position A Press the [Change] key.
-
Page 188: Program/Delete User Stamp
User Stamp B Select the desired position by touching keys. C Press the [OK] key. Set your originals then press the {Start} key. Program/Delete User Stamp Make sure that the machine is in Copy mode. Press the {User Tools} key. Press the [Copier/Document Server Features] key. - Page 189 Copying Press the [Stamp] key. Press the [User Stamp] key. Press the [Program/Delete Stamp] key.
- Page 190 User Stamp To program the User Stamp A Press the [Program] key. B Press the stamp number (1-5) you want to program. Note Stamp numbers with m already have settings in them. If the stamp number is already being used, the machine will ask you if you wish to overwrite it - Press the [Yes] or [No] key.
- Page 191 Copying C Enter the user stamp name with the letter keys on the display panel. Then press the [#] key. Note You can register up to 8 characters. To change the name entered, press the [Clear] key and enter new letter. D Press the [OK] key.
- Page 192 User Stamp F Set the user stamp on the exposure glass, and then press the [Scan Start] key. G Press the [Exit] key. To delete the User Stamp Important You cannot restore deleted stamp. A Press the [Delete] key. B Press the stamp number (1-5) you want to delete. Note Only programs with m contain a user stamp.
- Page 193 Copying C Press the [Yes] key. Note To cancel the deletion, press the [No] key. D Press the [Exit] key. Press the {User Tools} key. The initial display appears.
-
Page 194: Date Stamp
Date Stamp Date Stamp Limitation If you combine this feature with the magazine or Booklet feature, you can not set the Page Numbering at a same time. Note You can select the following styles: • MM/DD/YYYY • MM.DD.YYYY • DD/MM/YYYY •... - Page 195 Copying The relationship between the direction in which you set the original and the stamp position is as follows: If you combine with Duplex mode, the page is stamped on the back side as follows. • Combine with 1 Sided/2 Sided in Combine mode Combine with Booklet or Magazine mode...
- Page 196 Date Stamp Press the [Stamp] key. Press the [Date Stamp] key. To change the stamp position A Press the [Change] key. B Select the desired position of the Date Stamp with the keys on the dis- play. C Press the [OK] key. Set your originals then press the {Start} key.
-
Page 197: Page Numbering
Copying Page Numbering Use this feature to print page numbers on your copies. There are six types of page numbering (n is the total number of pages in your original): • Type A: P1,P2,…Pn • Type B: 1/n,2/n,...n/n • Type C: -1-,-2-,...-n- •... - Page 198 Page Numbering The relationship between the direction in which you set the original and the page numbering orientation/position is as follows: If you combine with Duplex (Top to Top) mode, the page is stamped on the back side as follows. If you combine with Duplex mode, you can stamp the same position with front side.
- Page 199 Copying • Combine with 1 Sided/2 Sided in Combine mode. • Combine with Booklet or Magazine mode. Press the [Stamp] key. Press the [Page Numbering] key. Select the desired format and orientation by touching the appropriate keys on display.
- Page 200 Page Numbering If you selected (P1,P2…, -1-,-2-…, P.1, P.2…, 1, 2…, ) in step C. A Press the [Change] key. B Press the [First Printing Page] key, then enter the original sheet number on which you wish numbering to begin. Note To change the number entered, press the {Clear} key on the control pan- el or press the [Clear] key on the display panel and then enter a new...
- Page 201 Copying D Press the [Last Number] key, then enter the page number at wish you wish numbering to stop with the number keys. Note If you wish to print onto the last page, press [To The End] key. If you selected (1/5,2/5…) in step C A Press the [First Printing Page] key, then enter the original sheet number on which you wish numbering to begin.
- Page 202 Page Numbering C Press the [Last Number] key, then enter the page number to stop number- ing using the number keys. Note If you wish to print onto the last page, press [To The End] key. D Press the [Total Pages] key, then enter the total number of original pages using the number keys.
- Page 203 Copying B Press the [Chapter Number From] key, then enter the chapter number start- ing the numbering using the number keys. C Press the [Start Numbering From] key, then enter the page number to start numbering using the number keys. Press the [OK] key.
-
Page 204: Choosing How Copies Are Delivered
Choosing How Copies Are Delivered Choosing How Copies Are Delivered You can have copies delivered in the following ways: Shift Tray Off In Sort/Stack Use this function have copies delivered with no shift in the Sort/Stack mode. Separation You can insert separation sheets between sets or jobs. Copy Face Up Use this function to deliver copies face up (in reverse order). -
Page 205: Separation
Copying Separation Use this feature to have separation sheets inserted between sets. Preparation Before selecting this function, set the tray for separation sheets. See “Tray Pa- per Settings” in the System Settings manual. Note You can choose to have separation sheets inserted between every set, or every n sets. -
Page 206: Copy Face Up
Choosing How Copies Are Delivered Copy Face Up Use this function to reverse the order of copies. Note If you combine this function with the Duplex function, the copying may take a certain time. Press the [Output] key. Press the [Copy Face Up] key. Set your originals then press the {Start} key. -
Page 207: Combination Chart
Copying Combination Chart The combination chart given below shows which modes can be used together. means that these modes can be used together. means that these modes cannot be used together. The mode after you select will be the mode you're working in. means that these modes cannot be used together. -
Page 208: Stamp
Combination Chart Mode after you Select Cover/Designate/ Chapter Slip Sheet Double Copies Delete/Save Area Centre/Border Erase Margin Adjustment Repeat Copies Centering Preset Stamp/Page Numbering/Date Stamp/Background Numbering Shift Sort Off In Sort/Stack mode Separation Copy Face Up Cover and Magazine can be used together. * You cannot combine Slip Sheet with Background Numbering. - Page 209 Copying...
Need help?
Do you have a question about the 25105 and is the answer not in the manual?
Questions and answers