Table of Contents
Advertisement
Advertisement
Table of Contents

Related Manuals for Honda HUT216


Summary of Contents for Honda HUT216
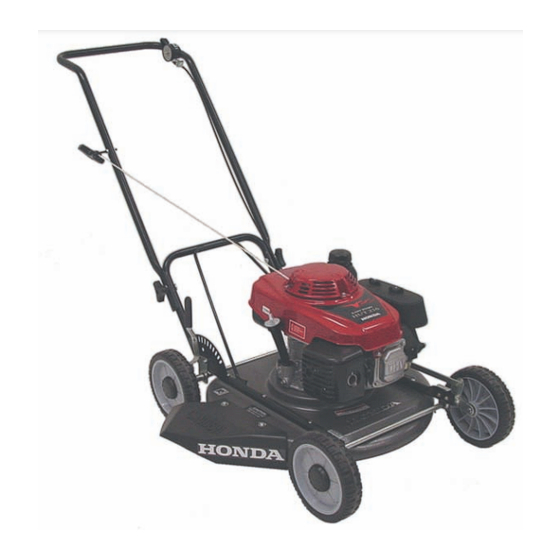
- Page 1 LAWNMOWER OWNER’S MANUAL & Service Record Booklet HUT216...
-
Page 2: Table Of Contents
Contents WARRANTY SAFETY INSTRUCTIONS COMPONENT IDENTIFICATION SETUP INSTRUCTIONS IMPORTANT: BEFORE YOU START THE MOWER OPERATIONAL PROCEDURES TRANSPORTATION AND STORAGE MAINTENANCE TROUBLESHOOTING SPECIFICATIONS SERVICE SCHEDULE SHEET Illustrations in this manual are for instructional purposes only and may not be exact representations. All information contained in this manual is based on the latest product information available at the time of publication. -
Page 3: Warranty
Warranty Honda Warranty Honda* warrants each new Honda lawn mower to be free from defects in material and workmanship for the period detailed on your warranty registration form. In order to qualify for this warranty, the Warranty Registration form (supplied) must be completed and returned to Honda Australia Motorcycle and Power Equipment Pty. -
Page 4: Safety Instructions
Safety Instructions Please read before using mower. 1. Never mow whilst barefoot or wearing open sandals or thongs. Wear long trousers and heavy shoes. 2. Know your controls. Read the Owner’s Manual carefully. Learn how to stop the engine quickly in any emergency. 3. - Page 5 Safety Instructions 17. Do not over speed the engine or alter governor settings. Excessive speed is dangerous and shortens mower life. 18. It is advisable to wear suitable eye protection when operating a mower. 19. Turn the fuel off at the conclusion of mowing and reduce the throttle setting during engine run-out.
-
Page 6: Component Identification
Component Identification Component Identification: HUT216 HANDLE CUTTING HEIGHT THROTTLE ADJUSTER LEVER STARTER ROPE FUEL HANDLE LOCKING SCREWS MUFFLER FUEL TAP AIR FILTER... -
Page 7: Setup Instructions
Setup Instructions 1. Warranty Mower handle assembly CABLE SHOULD BE ON TOP OF PIPE Fold back the handle to the upright position and tighten the locking screws on each side. To fold handle down, loosen the locking screws and fold handle forward over the mower. NOTE: Make sure the throttle control cable is lying on top of handle pipe to prevent fouling when handle is folded forward. -
Page 8: Important: Before You Start The Mower
Important: Before you start the mower 1. Warranty Before you start the mower 1. Check the engine oil NOTE: Do not screw dipstick in when checking oil level. Ensure the engine is stopped and place the mower on level ground. Remove the oil filler cap and check the oil level using the dip stick. -
Page 9: Operational Procedures
1. Warranty Important: Before you start the mower 4. Check the cutting blades ! WARNING Stop engine before tipping the lawn mower to inspect the blades, and remove fuel from fuel tank. Tilt the mower over to the right side and inspect the cutting blades for damage. -
Page 10: Flooded Engine
Operational Procedures 1. Warranty 3. Hold handle bar firmly. Pull the starter rope lightly until you feel resistance, then pull briskly. NOTE: Do not allow the rope to snap back. Return it by hand to prevent damage to the starter. 4. -
Page 11: Cutting Height Adjustment
Operational Procedures 1. Warranty Cutting height adjustment There are 11 height settings available to suit your requirements. To adjust the height, stop the engine, pull the adjuster lever away from the adjuster panel and move rearward to raise the height and forward to lower. TO RAISE LOWER Using your mower... - Page 12 Operational Procedures 1. Warranty Cleaning To maintain cutting performance and reduce fire hazard, the mower should be cleaned on completion of each mowing operation. CAUTION: Do not hose the engine and its components. ! WARNING Do not place hands or feet under cutter deck at any time while engine is running.
-
Page 13: Transportation And Storage
Transportation and storage 1. Warranty Transportation Turn the fuel tap OFF when transporting the mower. ! WARNING To avoid spillage of fuel and oil do not tilt the unit, as spilled fuel may ignite. The handle may be folded for convenience. Loosen the handle locking screws and fold the handle forward, as shown below. -
Page 14: Engine Oil
Transportation and storage 1. Warranty Engine Oil 1. Change engine oil (refer Maintenance Section, page 15). 2. Remove the spark plug and pour 5-10cc of clean engine oil into the cylinder. Using the recoil, crank the engine a few revolutions slowly to distribute the oil in the cylinder, then reinstall POURING OIL INTO CYLINDER the spark plug. -
Page 15: Maintenance
Maintenance 1. Warranty Maintenance Disconnect the spark plug cap before performing any maintenance work. Periodic inspection and adjustment of your Honda lawnmower is essential if a high level performance is to be maintained. Regular maintenance will also ensure long service life. The required service intervals and the kind of maintenance to be performed is described hereunder. -
Page 16: Engine Oil Change
Maintenance 1. Warranty Engine Oil change Drain the oil while the engine is still warm to assure rapid and complete draining. 1. Remove the oil filler cap and drain plug to drain the oil. 2. Install the drain plug, and tighten it securely. 3. -
Page 17: Air Cleaner
Maintenance 1. Warranty Air cleaner A dirty air cleaner will restrict air flow to the carburettor. To prevent carburettor malfunction, service the air cleaner regularly. Service more frequently when operating the engine in extremely dusty areas. ! WARNING Never use gasoline or low flash point solvents for cleaning the air cleaner element. -
Page 18: Spark Plug
Maintenance 1. Warranty Spark plug Recommended spark plug: BPR5ES W16EPR-U For good performance, the spark plug must be properly gapped and free of deposits. 1. Disconnect the cap from the spark plug, and remove any dirt from the spark plug area. 2. -
Page 19: Blade Replacement
Maintenance 1. Warranty Blade replacement To avoid severe personal injury, disconnect the spark plug cap to ! WARNING prevent accidental starting, and wear heavy gloves to protect your hands from the cutter blade. Blade removal Leave cutter disc on. Disconnect spark plug lead. •... -
Page 20: Troubleshooting
Troubleshooting 1. Warranty Engine will not start Possible Cause Correction 1. Check throttle lever position. Throttle lever in wrong position Move throttle lever to the (unless engine is warm). choke position. 2. Check fuel. Out of fuel. Refuel. Fuel valve off. Turn fuel valve on. -
Page 21: Specifications
Specifications 1. Warranty Engine Specifications HUT216 Model GXV160 Engine type 4 stroke OHV Displacement 163cc Bore & Stroke 68 x 45mm Maximum HP 5.5hp (4.0kw)@3,600rpm Maximum torque 10.8Nm@2,500rpm Cooling system Forced air Ignition system Transistorized magneto ignition Lubrication system Forced Splash... -
Page 22: Service Schedule Sheet
Service schedule sheet 1. Warranty Service Record First Year 1ST MONTH OR 5 HOUR SERVICE 1ST MONTH OR 20 HOUR SERVICE (HRU19RPU & HRU19DPU) (ALL MODELS EXCEPT HRU19RPU & HRU19DPU) Hours Use Date Notes Hours Use Date Notes (Tanks x Hrs/Tank) (Tanks x Hrs/Tank) Servicing Dealer Stamp Servicing Dealer Stamp... -
Page 23: Service Record
Service schedule sheet 1. Warranty RECORD FURTHER SERVICES HERE: Service Record NEXT SERVICE NEXT SERVICE Hours Use Date Notes Hours Use Date Notes (Tanks x Hrs/Tank) (Tanks x Hrs/Tank) Servicing Dealer Stamp Servicing Dealer Stamp Date: Date: NEXT SERVICE NEXT SERVICE Hours Use Date Notes... - Page 24 Service schedule sheet RECORD FURTHER SERVICES HERE: Service Record NEXT SERVICE NEXT SERVICE Hours Use Date Notes Hours Use Date Notes (Tanks x Hrs/Tank) (Tanks x Hrs/Tank) Servicing Dealer Stamp Servicing Dealer Stamp Date: Date: NEXT SERVICE NEXT SERVICE Hours Use Date Notes Hours Use...
- Page 25 Service schedule sheet RECORD FURTHER SERVICES HERE: Service Record NEXT SERVICE NEXT SERVICE Hours Use Date Notes Hours Use Date Notes (Tanks x Hrs/Tank) (Tanks x Hrs/Tank) Servicing Dealer Stamp Servicing Dealer Stamp Date: Date: NEXT SERVICE NEXT SERVICE Hours Use Date Notes Hours Use...
- Page 26 C9040 Printed October 2004 by Kenmark Press 03 9555 6075...
Need help?
Do you have a question about the HUT216 and is the answer not in the manual?
Questions and answers