Table of Contents
Advertisement
Quick Links
Advertisement
Table of Contents

Related Manuals for Pioneer AVH-2350DVD


Summary of Contents for Pioneer AVH-2350DVD
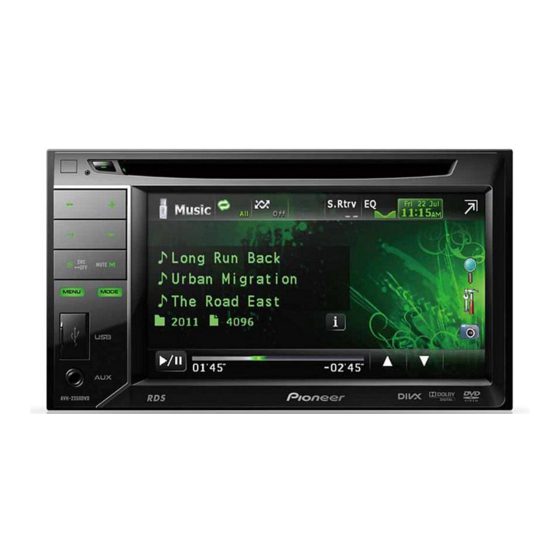
- Page 1 Owner’s Manual DVD RDS AV RECEIVER AVH-2350DVD English...
-
Page 2: Table Of Contents
Contents Thank you for purchasing this PIONEER product. To ensure proper use, please read through this manual before using this product. It is especially important that you read and observe WARNINGs and CAUTIONs in this manual. Please keep the manual in a safe and accessible place for future refer- ence. - Page 3 Contents PBC playback 27 Using the display correctly 68 Selecting tracks from the track title list 27 Copyright and trademark 69 Selecting files from the file name list 28 Language code chart for DVD 71 Using advanced sound retriever 28 Specifications 72 Changing audiobook speed 28 Displaying lists related to the currently...
-
Page 4: Precautions
Section Precautions IMPORTANT SAFEGUARDS WARNING Please read all of these instructions regarding ! Do not attempt to install or service your your display and retain them for future refer- display by yourself. Installation or servi- ence. cing of the display by persons without 1 Read this manual fully and carefully be- training and experience in electronic fore operating your display. -
Page 5: To Avoid Battery Exhaustion
Section Precautions To avoid battery exhaustion To watch a video image on the front display, park your vehicle in a safe place and apply the Keep the vehicle engine running when using parking brake. this unit to avoid draining the battery power. ! When no power is supplied to this unit, When using a display such as when the vehicle battery is being... -
Page 6: Dvd Video Disc Region Numbers
! Keep this manual handy for future reference. please contact your dealer or nearest author- ! Always keep the volume low enough to hear ized Pioneer Service Station. outside sounds. ! Avoid exposure to moisture. ! If the battery is disconnected or discharged, Resetting the microprocessor any preset memory will be erased. -
Page 7: Demo Mode
Section Before you start Adjusting the response The microprocessor must be reset in the fol- lowing situations: positions of the touch panels ! Before using this unit for the first time after (Touch Panel Calibration) installation ! If the unit fails to operate properly If you feel that the touch panel keys on the ! When strange or incorrect messages ap- screen deviate from the actual positions that... -
Page 8: Using The Remote Control
Section Before you start ! Do not store the battery with metallic objects. ! If the battery leaks, wipe the remote control completely clean and install a new battery. ! When disposing of used batteries, comply with governmental regulations or environmen- tal public institutions’... -
Page 9: What's What
Use to connect an auxiliary device. SRC/OFF CAUTION ! Use an optional Pioneer USB cable (CD-U50E) to connect the USB audio player/USB mem- ory as any device connected directly to the unit will protrude out from the unit and may be dangerous. -
Page 10: Remote Control
Section What’s what Remote control Part Operation Press to select the tuner band when tuner is selected as a source. Also used to cancel the control mode of functions. Press to switch be- BAND/ESC tween modes when playing discs with compressed audio and audio data (CD- DA) such as CD-... -
Page 11: Basic Operations
Section Basic operations Basic operations Selecting a source using the buttons 1 Press SRC/OFF to cycle through the sources listed below: Selecting a source using the touch panel keys Wed 28 May 1 Touch the source icon and then touch the desired 12:45 source name. -
Page 12: Activating The Touch Panel Keys
Section Basic operations Activating the touch panel Wed 28 may 12:45 keys Abcdeabcdeabcdeabcdeab 01:45 -02:45 Wed 28 may 12:45 Abcdeabcdeabcdeabcdeab 1 Scroll icon Appears when selectable items are hidden. 2 Scrubber bar 01:45 -02:45 Appears when the playback point can be spe- cified or set by dragging. -
Page 13: Common Operations For Menu Settings/Lists
Section Basic operations Common operations for menu settings/lists Displaying the list menu. Starting the search function. Displaying the menu. Refer to Introduction of menu opera- tions on page 31. Displaying still images as a slide show when listening to another source. -
Page 14: Tuner
Section Tuner Introduction of tuner operations Local Wed 28 may Radio 12:45 Abcdeabc 87.50 P.CH 2 Band: 87.50 MHz ! Touch panel keys Turning local seek tuning on and off. Refer to Tuning in to strong signals on page 22. Displaying the EQ (Audio function menu). -
Page 15: Operations
Section Playing moving images Introduction of video such as the CD-IU50V (sold separately), you can enjoy the video contents of the iPod as playback operations an iPod source. ! Touch panel keys You can view DVD/DVD-R/DVD-RW/CD/CD-R/ CD-RW/USB/iPod. Selecting the repeat range. DVD video Refer to Repeating playback on page 24. - Page 16 Section Playing moving images Starting the search function. Moving ahead one frame at a Refer to Searching for the part time during playback. you want to play on page 26. Refer to Frame-by-frame play- Refer to Selecting files from back on page 26. the file name list on page 28.
- Page 17 Refer to Automatic playback of DVDs on page ! While an iPod is connected to this unit, PIONEER, OK to disconnect or (check mark) is displayed on the iPod.
-
Page 18: Playing Audio
Section Playing audio Introduction of sound Switching the equalizer curves. playback operations Refer to Using the equali- zer on page 32. You can listen to DVD-R/DVD-RW/CD/CD-R/ CD-RW/USB/iPod sound files. Displaying a list of track titles/file names to select songs on a CD. Refer to Selecting tracks from the track title list on S.Rtrv... -
Page 19: Text Information
Playback will automatically start. Refer to Displaying lists ! While an iPod is connected to this unit, PIONEER, related to the currently OK to disconnect or (check mark) is displayed playing song (Link Search) on the iPod. -
Page 20: Introduction Of Still Image Playback Operations
Section Playing still images Introduction of still image Displaying the file name list to select the files. playback operations Refer to Selecting files from the file name list on page You can view still images saved in CD-R/CD- RW/USB. Starting or pausing the sli- deshow. -
Page 21: Operations
Section Playing still images ! Files are played back in file number order and folders are skipped if they contain no files. (If folder 01 (ROOT) contains no files, playback Selecting a file. commences with folder 02.) Starting or pausing the sli- Introduction of still image deshow. -
Page 22: Detailed Instructions
Section Detailed instructions AM: off — — Storing and recalling stations The highest level setting allows reception of You can easily store up to six stations for each only the strongest stations, while lower levels band as presets. allow the reception of weaker stations. Display the preset screen. -
Page 23: Operating This Unit's Ipod Function From Your Ipod
Section Detailed instructions Select the desired menu item. APP mode is compatible with the following iPod models. ! iPhone 4 (software version 4.1 or later) ! iPhone 3GS (software version 3.0 or later) ! iPhone 3G (software version 3.0 or later) ! iPhone (software version 3.0 or later) ! iPod touch 3rd generation (software version Selecting the desired menu item. -
Page 24: Random Play (Shuffle)
Section Detailed instructions ! When playing discs with compressed audio Random play (shuffle) and audio data (CD-DA), playback is re- iPod-videos/songs can be played back in ran- peated within the type of data currently dom order. playing even if Disc is selected. ! If you select another folder during repeat ! Songs –... -
Page 25: Browsing For A Video/Music On The Ipod
Section Detailed instructions Searching the list by alphabet Music Switching to iPod music mode. (Function for iPod) Select a category. Refer to Searching for a video/music by cate- gory on this page. Browsing for a video/music Switch to alphabet search mode. on the iPod (Function for iPod) Switching to alphabet search mode. -
Page 26: Frame-By-Frame Playback
Section Detailed instructions Frame-by-frame playback Start playback from the selected part. (Function for DVD video/video CD/DivX file) Registering the numbers and start- ing playback. Note Images during frame-by-frame playback may be Note unclear for some discs. With discs featuring a menu, you can also use the DVD menu to make your selection. -
Page 27: Changing The Viewing Angle During Playback (Multi-Angle)
Section Detailed instructions ! L+R – left and right Notes ! Left – left ! With some DVDs, switching between subtitle ! Right – right languages may only be possible using a menu ! Mix – mixing left and right display. -
Page 28: Selecting Files From The File Name List
Section Detailed instructions Display the track title list. Changing audiobook speed Refer to Playing audio on page 18. (Function for iPod) – Playback at a speed faster than Touch your favorite track title. normal Playback begins. – Playback at normal speed –... -
Page 29: Playing Divxâ Vod Content
Section Detailed instructions Playing DivX VOD content Pause the slideshow when the desired â image is displayed. Some DivX VOD (video on demand) content Refer to Introduction of still image playback op- may only be playable a fixed number of times. erations on page 20. - Page 30 Section Detailed instructions Just (just) The picture is enlarged slightly at the center and the amount of enlargement increases horizontally toward the edges of the screen, enabling you to enjoy a 4:3 picture without sensing any disparity even when viewing on a wide screen. Cinema (cinema) The picture is enlarged by the same proportion as Full or Zoom in the horizontal direction and by...
-
Page 31: Menu Operations
Section Menu operations ! You cannot display the Audio function menu Introduction of menu when the mute function/attenuation is on or a operations JPEG file is playing. Audio Fader/Balance F/R 0 L/R 0 Graphic EQ Super Bass Loudness High Subwoofer Bass Booster High Pass Filter Display menus. -
Page 32: Audio Adjustments
Section Menu operations Audio Adjustments Display Equalizer curve Note Vocal Vocal When selecting FM as the source, you cannot Custom1 Custom 1 switch to Source Level Adjuster. Custom2 Custom 2 Flat Flat Using fader/balance adjustment Super Bass Super bass You can change the fader/balance setting to provide an ideal listening environment for all ! The equalizer curves for Custom1 and of the occupied seats. -
Page 33: Boosting The Bass
Section Menu operations Touch c or d to select the desired item. Touch c or d next to Level to adjust Powerful—Natural—Vocal—Custom1— the output level of the subwoofer. Range: +6 to –24 Custom2—Flat—Super Bass Touch the Equalizer band to adjust. Touch c or d next to Frequency to se- lect the cut-off frequency. -
Page 34: Setting Up The Dvd Player
Section Menu operations Adjusting source levels Setting up the DVD player With SLA (source level adjustment), the vo- Setting the subtitle language lume levels of each source can be adjusted to You can set a desired subtitle language. When prevent significant differences between available, the subtitles will be displayed in the sources. -
Page 35: Setting The Aspect Ratio
Section Menu operations Display the Video Setup menu. Display the Video Setup menu. Refer to Introduction of menu operations on Refer to Introduction of menu operations on page 31. page 31. Touch Audio Language on the Video Touch Multi Angle on the Video Setup Setup menu. -
Page 36: Setting The Slide Show Interval
Section Menu operations Setting the slide show interval Registering the code. JPEG files can be viewed as a slide show on this unit. In this setting, the interval between Registering the code. each image can be set. Display the Video Setup menu. The code number is set, and the level can now Refer to Introduction of menu operations on be set. -
Page 37: Setting The Divx Subtitle File
Section Menu operations Registering the code. Displaying the DivX â registration code Registering the code. In order to play DivX VOD (video on demand) contents on this unit, the unit must first be re- gistered with a DivX VOD contents provider. This sets the code number, and the level can For registration, generate a DivX VOD registra- now be changed. -
Page 38: System Settings
Section Menu operations ! Some DVDs may not operate properly. If System settings this function is not fully operated, turn this Switching the auxiliary setting function off and start playback. Activate this setting when using an auxiliary Display the Video Setup menu. device connected to this unit. -
Page 39: Setting The Fm Tuning Step
Section Menu operations Display the system menu. Display the system menu. Refer to Introduction of menu operations on Refer to Introduction of menu operations on page 31. page 31. Touch Rear Speaker on the system Touch AM Step on the initial menu to menu. -
Page 40: Selecting The Menu Language
The menu language can be selected from four languages. CAUTION If text information such as the title name, artist Pioneer recommends the use of a camera name or a comment is embedded in a Eur- which outputs mirror-reversed images. opean language or Russian, they can also be Otherwise, the screen image will appear re- displayed on this unit. -
Page 41: Setting The Video Signal
Section Menu operations Selecting the video format Touch c or d to select the desired video signal appears. You can switch the video output format of V Auto—PAL—NTSC—PAL-M—PAL-N— OUT between NTSC and PAL. SECAM Turn the unit off. Refer to Basic operations on page 11. Display the system menu. -
Page 42: Entertainment Settings
Section Menu operations Entertainment settings Selecting the OSD color The OSD color can be changed. Selecting the illumination color Display the entertainment menu. This unit is equipped with multiple-color illu- Refer to Introduction of menu operations on mination. page 31. Direct selection from preset Touch Appearance. -
Page 43: Customizing Menus
Section Menu operations Customizing menus Display menu columns to register. Refer to Introduction of menu operations on page 31. You can customize menus except Video Setup. Touch and hold the menu column to register it. # To cancel registration, touch and hold the menu column again. -
Page 44: Other Functions
Section Other Functions # You cannot adjust the picture adjustment for Changing the picture the rear view camera when Camera Polarity is adjustment set to Off. (Refer to Setting the rear view camera You can adjust the Brightness (brightness), (back up camera) on page 40.) # If the color system is set to PAL/PAL-N/PAL-M/ Contrast (contrast), Color (color) , Hue (hue), Dimmer (dimmer), Temperature (tempera-... -
Page 45: Using An Aux Source
Section Other Functions ! If the touch panel cannot be adjusted prop- is automatically recognized as an AUX source erly, consult your local Pioneer dealer. and is assigned to AUX. Turn the unit off. About AUX connection methods Refer to Basic operations on page 11. -
Page 46: Installation
! The black cable is ground. When installing CAUTION this unit or power amp (sold separately), make ! PIONEER does not recommend that you in- sure to connect the ground wire first. Ensure stall or service your display unit yourself. In-... - Page 47 Section Installation na, connect it to the antenna booster power Important ! This unit cannot be installed in a vehicle with- supply terminal. ! Never connect the blue/white cable to the out ACC (accessory) position on the ignition power terminal of an external power amp. switch.
-
Page 48: When Connecting To Separately Sold Power Amp
Section Installation When connecting to separately sold power amp Rear output or subwoofer output Power amp (sold separately) To rear output or subwoofer output Power amp (sold separately) To front output Front output This product Connect with RCA cables (sold separately) System remote control Blue/white Connect to system control terminal of the... - Page 49 Section Installation...
-
Page 50: Connecting The Power Cord
Section Installation Connecting the power cord This product RGB input Antenna input Fuse (10 A) Yellow Connect to the constant 12 V supply terminal. Orange/white Fuse resistor Connect to lighting switch terminal. Fuse resistor Connect to terminal controlled by ignition switch (12 V DC). Black (chassis ground) Connect to a clean, paint-free metal location. - Page 51 Section Installation Wired remote input Hard-wired remote control adaptor can be connected (sold separately). Fuse resistor Violet/white Of the two lead wires connected to the back lamp, connect the one in which the voltage changes when the gear shift is in the REVERSE (R) position.
-
Page 52: When Connecting The External Video Component And The Display
Section Installation When connecting the external video component and the display Display with RCA input jacks (sold separately) To video input Rear monitor output (V OUT) RCA cables Video input (V IN) (sold separately) To video output To audio outputs This product Audio inputs (L IN, R IN) -
Page 53: When Connecting With A Rear View Camera
Section Installation When connecting with a rear Rear view camera input (R.C IN) view camera When this product is used with a rear view camera, it is possible to automatically switch from the video to rear view image when the gear shift is moved to REVERSE (R). -
Page 54: Installation
Section Installation Installation Installation using the screw holes on the side of the unit Notes ! Check all connections and systems before For Southeast Asian models, South Ameri- can, and Oceanian models final installation. ! Do not use unauthorized parts as this may % Fastening the unit to the factory radio- cause malfunctions. -
Page 55: Before Installing This Unit
Section Installation 5 Dashboard or console Before installing this unit For Middle East Asian and South African models % Remove the holder. Loosen the screws (3 mm × 6 mm) to remove the holder. 1 Dashboard 2 Holder (Supplied with this unit) Install this unit and fasten the screws. -
Page 56: Installation Using The Screw Holes On The Side Of The Unit
Section Installation Attach the trim ring. Fastening the unit to the factory radio- mounting bracket. Position the unit so that its screw holes are aligned with the screw holes of the bracket, and tighten the screws at 3 or 4 locations on each side. - Page 57 Section Installation Note In some types of vehicles, discrepancy may occur between the unit and the dashboard. If this hap- pens, use the supplied frame to fill the gap.
-
Page 58: Additional Information
Appendix Additional Information Troubleshooting Symptom Cause Action (Refer- ence page) Common There is no The parking Connect the park- Symptom Cause Action (Refer- image dis- brake cable is ing brake cable, ence page) played. not connected. and apply the park- ing brake. - Page 59 Appendix Additional Information Symptom Cause Action (Refer- Symptom Cause Action (Refer- ence page) ence page) Nothing is dis- The rear view Connect a rear Dialog lan- The DVD being The language can- camera is not view camera. guage (and played does not not be switched if played.
-
Page 60: Error Messages
Select a file that ble to write it memory used as can be played. When you contact your dealer or your nearest in the flash. the temporary Pioneer Service Center, be sure to note the storage area is error message. full. - Page 61 Appendix Additional Information Message Cause Action Message Cause Action Your device is This unit’s DivX Register this unit Protect All the files on Transfer audio files not author- registration code to the DivX VOD the connected not protected by ized to play has not been contents provider.
-
Page 62: Understanding Messages
This type of file is Select a file that Messages Translation not sup- not supported on can be played. ported. this unit. Pioneer recommends the use of a camera CAUTION: Screen which outputs mirror- iPod image may appear re- reversed images. Message Cause Action versed. -
Page 63: Indicator List
Appendix Additional Information Indicator list Shows which viewing angle has been selected. Area 1 Area 2 Shows which audio output has been selected. Area 2 Shows the disc/album currently being played. Shows the track/song currently being played. Area 3 Area 1 Shows the comment currently being played. -
Page 64: Handling Guidelines
Appendix Additional Information Handling guidelines Read the precautions for discs before using them. Certain functions may not be available for some DVD Discs and player video discs. Use only discs featuring any of following logos. It may not be possible to play back some DVD video discs. -
Page 65: Jpeg Picture Files
Appendix Additional Information iPod Frequent loading and ejecting of a DualDisc may re- sult in scratches on the disc. Serious scratches can lead to playback problems on this unit. In some To ensure proper operation, connect the dock connec- cases, a DualDisc may become stuck in the disc load- tor cable from the iPod directly to this unit. -
Page 66: Compressed Audio Compatibility (Disc, Usb)
Appendix Additional Information ! This unit plays back files with these filename DivX compatibility extensions (.jpg, .jpeg, .jpe or .jfif) as a JPEG Compatible format: DivX video format implemented in image file. To prevent malfunctions, do not relation to DivX standards use these extensions for files other than JPEG File extensions: .avi or .divx image files. -
Page 67: Ipod Compatibility
Partitioned external storage device (USB): Only the first playable partition can be played. Pioneer accepts no responsibility for data lost on the iPod, even if that data is lost while this unit is There is no compatibility for Multi Media Cards (MMC). -
Page 68: Using The Display Correctly
PIONEER Service Station. Do not use the unit ! Small black dots or white dots (bright dots) in this condition because doing so may result may appear on the LCD screen. -
Page 69: Keeping The Display In Good Condition
In such cases, please consult your Windows Media is either a registered trade- dealer or the nearest authorized PIONEER mark or trademark of Microsoft Corporation in Service Station. the United States and/or other countries. - Page 70 Appendix Additional Information ABOUT DIVX VIDEO-ON-DEMAND: This â DivX Certified device must be registered in order to play DivX Video-on-Demand (VOD) content. To generate the registration code, lo- â cate the DivX VOD section in Playing DivX VOD content. Go to vod.divx.com with this code to complete the registration process and learn more about DivX VOD.
-
Page 71: Language Code Chart For Dvd
Appendix Additional Information Language code chart for DVD Language (code), input code Japanese (ja), 1001 Dzongkha (dz), 0426 Kurdish (ku), 1121 Kinyarwanda (rw), 1823 English (en), 0514 Ewe (ee), 0505 Komi (kv), 1122 Sanskrit (sa), 1901 French (fr), 0618 Esperanto (eo), 0515 Cornish (kw), 1123 Sardinian (sc), 1903 Spanish (es), 0519... -
Page 72: Specifications
Appendix Additional Information Specifications Subwoofer (mono): Frequency ......50 Hz/63 Hz/80 Hz/100 Hz/ General 125 Hz Slope ........–18 dB/oct Rated power source ....14.4 V DC Gain ........+6 dB to –24 dB (allowable voltage range: Phase ........Normal/Reverse 12.0 V to 14.4 V DC) Bass boost: Grounding system .... -
Page 73: Infrared Remote Control
Appendix Additional Information FM tuner Frequency range ...... 87.5 MHz to 108.0 MHz Usable sensitivity ..... 9 dBf (0.8 µV/75 W, mono, S/N: 30 dB) Signal-to-noise ratio ....72 dB (IEC-A network) AM tuner Frequency range ...... 531 kHz to 1 602 kHz (9 kHz) 530 kHz to 1 640 kHz (10 kHz) Usable sensitivity ..... - Page 80 TEL: (03) 9586-6300 PIONEER ELECTRONICS OF CANADA, INC. 300 Allstate Parkway, Markham, Ontario L3R 0P2, Canada TEL: 1-877-283-5901 TEL: 905-479-4411 PIONEER ELECTRONICS DE MEXICO, S.A. de C.V. Blvd.Manuel Avila Camacho 138 10 piso Col.Lomas de Chapultepec, Mexico, D.F. 11000 TEL: 55-9178-4270 先鋒股份有限公司...
Need help?
Do you have a question about the AVH-2350DVD and is the answer not in the manual?
Questions and answers