Table of Contents

Related Manuals for TDK DA-5900

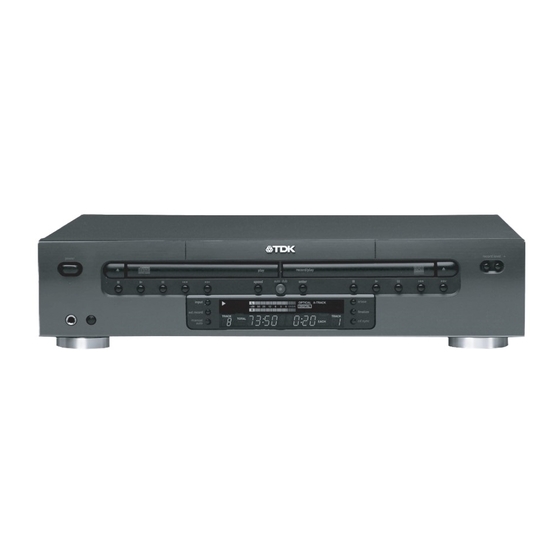
Summary of Contents for TDK DA-5900
- Page 1 DA-5900 USER MANUAL D I G I TA L A U D I O C D R E C O R D E R HIGH SPEED RECORDING TO AUDIO CD-R AND CD-R W DISCS DUB YOUR MUSIC RECORD FROM EXTERNAL SOURCES...
-
Page 2: Important Safety Instructions
Important Safety Instructions Safety and Care Instructions This product has been designed and manufactured according to FCC WATER AND MOISTURE: Keep away from water and moisture. • regulations (title 21, CFR, chapter 1, subchapter J), and is classified as Avoid showers, bathtubs, sinks, swimming pools, open windows, a class 1 laser product. -
Page 3: Table Of Contents
SHUFFLE PLAYBACK & INTRO CHECK -----------------------------------------11 PROGRAMMED PLAYBACK -------------------------------------------------------12 BEFORE RECORDING ----------------------------------------------------------------13 DUBBING --------------------------------------------------------------------------14, 15 BASIC RECORDING-------------------------------------------------------------------15 ADVANCED RECORDING------------------------------------------------------16, 17 FINALIZING DISCS--------------------------------------------------------------------18 TIME DISPLAYS -----------------------------------------------------------------------19 PLAYER DISPLAY MESSAGES -----------------------------------------------------20 ERROR MESSAGES-------------------------------------------------------------------20 TROUBLESHOOTING ----------------------------------------------------------------21 FRENCH DA-5900 USER MANUAL ----------------------------------------------25 SPANISH DA-5900 USER MANUAL----------------------------------------------49... -
Page 4: Disc Compatibility & Care
The last step in making a recording is the finalization process. Unless this step is completed, the disc will not work in other players or the DA-5900’s TRAY I. Once finalized, CD-R discs will play in virtually any CD player. CD-RW discs will play in this unit and other CD-RW compatible players. -
Page 5: Connections
[C] AC POWER CORD Plug the power cord into an AC wall outlet. to use it as an audio source for recording into your TDK Audio CD Recorder. You can also connect many devices, including most CD players and MiniDisc players directly to the DA-5900’s inputs for recording. -
Page 6: Remote Control
(+) and negative (-) poles positioned correctly. 3. Close the cover. BATTERY REPLACEMENT If you have to get closer than normal to the DA-5900 in order for the remote control to operate the unit, the batteries need to be replaced. -
Page 7: Player Button Functions
Player Button Functions [TRAY I] [TRAY II] [14] [15] [16] [12] [11] [10] [13] [DISPLAY PANEL] [1] POWER [7] ENTER Press to turn the power ON or OFF. Press to begin the recording process. (if recording has been armed). [2] TRAY OPEN/CLOSE (TRAY I AND TRAY II) Press to open or close TRAY I or TRAY II. -
Page 8: Remote Control Button Functions
Remote Control Button Functions [1] POWER Press to power unit ON or OFF. [2] ENTER Press to begin the recording process (if recording has been armed). [3] REPEAT 1/ALL, A-B Press to set a repeat mode. [4] NUMERIC BUTTONS Press to select track numbers. [5] SEARCH [ Hold down to scan through a track. -
Page 9: Playback
Playback ente r auto dub spe ed ext. reco ma nua auto To stop playback: Press STOP [ To temporarily suspend playback: Press PAUSE [ TRAY II can play back standard audio CDs, CD-R and CD-RW discs. To resume playback where it was paused: TRAY I can play back standard audio CDs and finalized CD-R/CD-RW Press PAUSE [ ] or PLAY [ ]. -
Page 10: Repeat Playback
Repeat Playback Repeatedly pressing the remote control’s REPEAT 1/ALL button The following buttons will cancel REPEAT A-B mode: changes the mode as follows: • STOP [ • OPEN/CLOSE [ ] • CD–RW REPEAT OPTICAL A-TRACK 1ALL A-B DIGITAL ANALOG NOTOC POWER –dB OVER... -
Page 11: Shuffle Playback & Intro Check
Shuffle Playback & Intro Check SHUFFLE PLAYBACK To activate this mode, press the remote’s SHUFFLE button during playback. The tracks will be played randomly until every track has been played. • If playable discs are in both trays, shuffle will randomly play all •... -
Page 12: Programmed Playback
Programmed Playback 1. Press the remote’s PROGRAM button. STEP 01 and PROGRAM will appear in the display and the track number 1 will blink. 2. Select the disc tray by pressing the remote’s I or II button, then select a track by pressing the numeric buttons or the TRACK SKIP [ ] buttons. -
Page 13: Before Recording
Before Recording Before you start recording, note the following points: The unit requires Digital Audio CD-R or Digital Audio CD-RW media • for recording. Computer CD-R or CD-RW discs do not work with this unit. Only discs with the following logos can be recorded: Once you have recorded on a CD-R disc, the data cannot be •... -
Page 14: Dubbing
STOP [ • When the operation is finished, COMPLETE will appear briefly on the The DA-5900 has a convenient AUTO DUB button that makes it very display, then the display will return to its track/time display mode. easy to copy audio discs. -
Page 15: Basic Recording
2. With playback stopped, press and hold in the FINALIZE button for three seconds. To record from a DIGITAL external source: 1. Connect the source device’s coaxial digital output to the DA-5900’s coaxial digital input. Or connect the source device’s optical digital output to the DA-5900’s optical digital input. -
Page 16: Advanced Recording
Advanced Recording This section covers advanced recording methods. INCREMENT LEVEL The increment level setting affects when the DA-5900 will start When the MANUAL/AUTO button is pressed, the track division mode recording during DIGITAL SYNCHRONIZED mode recording. used during recording changes. - Page 17 During A-TRACK mode recording, a very silent passage-with little • can be connected to a separate preamplifier that’s connected to the DA-5900’s inputs. or no background hiss-will be required to trigger an increase to the next track number on the disc being recorded.
-
Page 18: Finalizing Discs
Unfinalized CD-R and CD-RW discs can only be played in the To unfinalize a CD-RW: DA-5900’s TRAY II. Unfinalized discs will not play in the unit’s TRAY I. 1. Load a finalized CD-RW into TRAY II. 2. Press the FINALIZE button. -
Page 19: Time Displays
Time Displays IN THE STOP MODE: Press the TIME button on the remote control to switch the displayed mode of time. Each instance the TIME button is pressed, the mode changes as follows: CD–RW REPEAT OPTICAL A-TRACK 1ALL A-B DIGITAL ANALOG NOTOC –dB... -
Page 20: Player Display Messages
Player Display Messages The following are the various messages that the DA-5900 will display during operation. ANALOG: Lights when a coaxial or optical connection is made; lights when a analog copy is being made. BLANK: A blank CD-R/RW disc is loaded in the tray. -
Page 21: Troubleshooting
If your turntable doesn’t have a built-in preamplifier (most don’t), the turntable temperature of its surroundings. can be connected to a separate preamplifier that’s connected to the DA-5900’s inputs. Some AV receivers have a built-in phono preamp. If yours does, you can connect as follows: No sound from speakers. - Page 22 Product in conjunction with other products, software or accessories, or where it is determined by TDK that there is no fault with the Product itself. This Limited Warranty is invalid if the factory-applied serial number has been altered or removed from the Product.
- Page 25 FRENCH COVER...
Need help?
Do you have a question about the DA-5900 and is the answer not in the manual?
Questions and answers