Table of Contents
Advertisement
Quick Links
Download this manual
See also:
User Manual
Advertisement
Table of Contents

Related Manuals for TRENDnet TV-IP322P


Summary of Contents for TRENDnet TV-IP322P
- Page 1 Cover Page TRENDnet User’s Guide...
-
Page 2: Table Of Contents
Event Server ......................25 Motion Detect ......................28 Event Config ......................29 Tools ........................32 RS-485 ........................33 SD Card ........................35 Device Info ......................36 How to setup/access the camera behind a Router ........ 37 © Copyright 2012 TRENDnet. All Rights Reserved. -
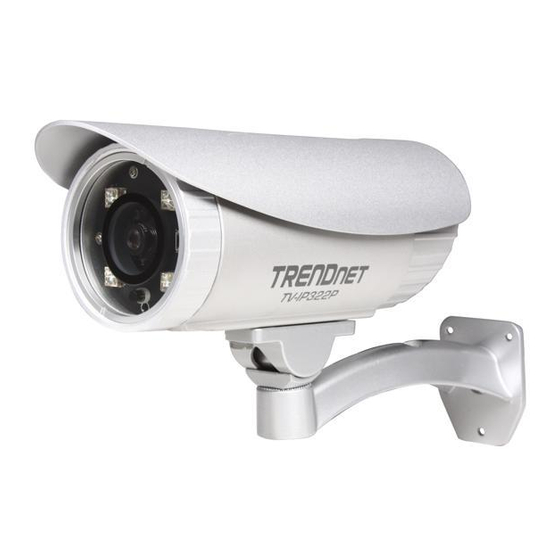
Page 3: Product Overview
Record 1280 x 1024 pixel (SXGA) H.264 video at up to 15 frames per second (fps) or 640 Package Contents x 480 pixel (VGA) resolution at up to 30 fps. Manage up to 32 TRENDnet cameras with the included complimentary camera management software. Advanced features include TV-IP322P ... -
Page 4: Product Hardware Features
Camera Stand: the mounting stand to hold the camera. area network (LAN). If you are using the PoE, you must have the network cable connect to your PoE switch or PoE Injector. © Copyright 2012 TRENDnet. All Rights Reserved. -
Page 5: Application Diagram
Installation Hardware Installation 1. Use the included drill template to drill three mounting holes on the desire location and hammer the plastic anchors into the holes. Secured the provided screws to the camera. © Copyright 2012 TRENDnet. All Rights Reserved. - Page 6 6. Adjust the swivel ball on the mounting bracket to desired position. 4. Assemble the camera mounting bracket to the camera by using the provided screws and washers. 7. The camera hardware installation is now completed. © Copyright 2012 TRENDnet. All Rights Reserved.
- Page 7 To install the memory card: 1. Remove the back cover of the camera by unscrewing the three screws. 2. Locate the SD card slot inside the camera, and then insert the memory card into the slot. © Copyright 2012 TRENDnet. All Rights Reserved.
-
Page 8: Camera Installation
4. If using PoE, please skip to the next step. For non-PoE user, please plug and 2. Click the Install Camera. connect the power adapter to the camera. Please wait for 60 seconds for the camera to boot up. © Copyright 2012 TRENDnet. All Rights Reserved. - Page 9 6. Wait while camera is searching. 8. Type in the Password. The password is “admin” by default. We strongly suggested changing the camera’s password. The Change Password option is enable by default. © Copyright 2012 TRENDnet. All Rights Reserved.
-
Page 10: Starting Camera Finder (Ipsetup)
1. Insert the Installation CD-ROM into your computer’s CD-ROM drive to initiate the Auto-Run program. Click the Camera Finder (IPSetup from the Auto-Run menu screen. 10. Click Finish to exit the program or click Home return to the main screen. © Copyright 2012 TRENDnet. All Rights Reserved. - Page 11 4. After installing the IPSetup utility, the application is installed to your computer, and creates a folder in Start\Program\TRENDnet\IPSetup. 5. Click Start>Programs>TRENDnet>IPSetup, and then click IPSetup. 6. The IPSetup window will appear. It will search for the cameras within the same network.
-
Page 12: Configuration
Permission request depends on the Internet security settings of your computer. Click Install or Yes to proceed. Search: Click this button to search the connected cameras in the same network Exit: Click this button to exit the program. © Copyright 2012 TRENDnet. All Rights Reserved. - Page 13 The information can be modified in the Web Configuration. Live View/Setup Switch: Click the button to configure the camera. Click the button to return to the Main screen to view the live view image. © Copyright 2012 TRENDnet. All Rights Reserved.
-
Page 14: Configuring The Camera Setting
The Web Configuration contains the settings that are required for the camera in the left menu bar, including Smart Wizard, Basic, Network, Video/Audio, Event Server, Motion Detect, Event Config, Tools, RS-485, SD Card, and Device Info. © Copyright 2012 TRENDnet. All Rights Reserved. -
Page 15: Smart Wizard
For example, myserver.com. If you are using a free mail service (e.g. Google Gmail®, Yahoo®, Hotmail®), please enter the SMTP server address and the corresponding information (SSL and/or STARTTLS) from the service provider. © Copyright 2012 TRENDnet. All Rights Reserved. -
Page 16: Basic
Camera Name, Location, Date & Time, and User management. click Prev to go back to the previous step(s) and change the settings; or click Cancel to end the wizard and discard the changes. © Copyright 2012 TRENDnet. All Rights Reserved. - Page 17 In Auto mode, the lens filter will be switched automatically to capture black and white image when the change of environment light is detected by the camera’s light sensor. IR LED: Enable or disable the camera’s IR LED manually by selecting ON or OFF. © Copyright 2012 TRENDnet. All Rights Reserved.
- Page 18 User Name: Enter the guest’s name you want to add to use the camera. Password: Enter the password for the new guest. UserList: Display the existing guests of the camera. To delete a user, select the one you want to delete and click Delete. © Copyright 2012 TRENDnet. All Rights Reserved.
-
Page 19: Network
Static IP: Select this option to assign the IP address for the camera directly. You can use IP Setup to obtain the related setting values. Enter the IP address of the camera. The default setting is 192.168.10.30. © Copyright 2012 TRENDnet. All Rights Reserved. - Page 20 Bonjour, you can find the camera on your local network without knowing its IP address. UPnP Port Forwarding: select this option to have the port forward to router. Ports Number HTTP Port: The default HTTP port is 80. © Copyright 2012 TRENDnet. All Rights Reserved.
- Page 21 RTSP link prompts for authentication. Username/password are encrypted during data transmission. TRENDnet recommends using RTSP Digest authentication method. Disable and basic methods pose security risks. Please verify if your RTSP client supports RTSP authentication method selected. Multicast settings: Configure the following settings so that you can deliver information from your camera to a set of receivers.
-
Page 22: Video & Audio
192.168.0.80 in End IP Address, the user whose IP address located within 192.168.0.50 ~ 192.168.0.80 will not be allowed to access the camera. IPv6: Enter the IP Address that is not allowed to access the camera. © Copyright 2012 TRENDnet. All Rights Reserved. - Page 23 Light Frequency: Select the proper frequency according to the camera’s formats: SXGA, VGA, QVGA and QQVGA. The higher setting (VGA) obtains location to reduce the noise: 50Hz or 60Hz. better video quality while it uses more resource within your network. © Copyright 2012 TRENDnet. All Rights Reserved.
- Page 24 RTSP link: rtsp://(IP address of the camera)/3gp. NOTE Your mobile phone and the service provider must support 3GPP function. Please contact your service provider when you are failed to use this service. © Copyright 2012 TRENDnet. All Rights Reserved.
- Page 25 Include Text: Select this option and enter your heading text in the box to display the text information on the live view image. Enable Opaque: Select this option to display the overlay text with a background color. © Copyright 2012 TRENDnet. All Rights Reserved.
-
Page 26: Event Server
User Name: Enter the username of the HTTP server Password: Enter the password of the HTTP server Query: Enter the query parameter for the request if necessary Example: Host: 192.168.10.1 Port: 80 Query: xxx.cgi?name1=value1&name2=value2 Ex: cgi/event.cgi?status=#s&time=#t&model=modelname Result: http://192.168.10.1:80/cgi/event.cgi?status=#s&time=#t&model=modelna © Copyright 2012 TRENDnet. All Rights Reserved. - Page 27 25. For the free mail service, please enter the correct port number from the service provider. SSL or STARTLLS: If the mail server requires an encrypted connection, you should select the SSL option. STARTTTLS is an extension to plain text © Copyright 2012 TRENDnet. All Rights Reserved.
- Page 28 Encode Format: Select MPEG4 or H.264 as the encode format while recording. File Format: Select MP4 or AVI as the file format while recording. NOTE The recorded video files in Network Storage are enclosed by AVI format without audio. © Copyright 2012 TRENDnet. All Rights Reserved.
-
Page 29: Motion Detect
Encrypt Connection: Select the Enable option to secure the connection. Encrypt Authentication: Select the Enable option to secure the connection. Receiver: Enter the receiver’s information. Message: Enter the message that is to be sent. © Copyright 2012 TRENDnet. All Rights Reserved. -
Page 30: Event Config
After entering the profile name, click OK and the profile is added to the Schedule Profiles list. To delete the profile, select the profile in the list and click Delete. © Copyright 2012 TRENDnet. All Rights Reserved. - Page 31 Click Delete to remove the selected time period. Start/End Time: Enter the start and end time and then click Add to assign a time period within in the selected weekday. © Copyright 2012 TRENDnet. All Rights Reserved.
- Page 32 Action: Set the Trigger Out function or select the destination that the captured images will be sent to: Record to SD Card, Record to Network Storage, Send Email, FTP Upload, or Instant Message. © Copyright 2012 TRENDnet. All Rights Reserved.
-
Page 33: Tools
The camera configuration will be retained after rebooting. Configuration: You can save your camera configuration as a backup file on your computer. Whenever you want to resume the original settings, you can restore them by retrieving the backup file. © Copyright 2012 TRENDnet. All Rights Reserved. -
Page 34: Rs-485
In the Name and Command string boxes, you can customize more buttons for your needs. Please note that the setting values in the Command string boxes should be from the connected external device (please refer to the manual of the connected device). © Copyright 2012 TRENDnet. All Rights Reserved. - Page 35 3. Enter the descriptive name for the location in the text box. 4. Click Apply. Pan Speed: Adjust the moving speed (1 ~ 10) while panning the lens. Tilt Speed: Adjust the moving speed (1 ~ 10) while tilting the lens. © Copyright 2012 TRENDnet. All Rights Reserved.
-
Page 36: Sd Card
You must disable the event trigger in order to dismount the SD Card. SD Card Information: Displays the information of the installed SD card, including the Total space and Free space. SD Card Setting © Copyright 2012 TRENDnet. All Rights Reserved. -
Page 37: Device Info
TRENDnet User’s Guide Device Info Device Info >> Device Info Display the Basic, Video & Audio, and Network settings of the camera. The Information menu displays the current configuration and events log of the camera. © Copyright 2012 TRENDnet. All Rights Reserved. -
Page 38: How To Setup/Access The Camera Behind A Router
2. Enter your DDNS’s the Host Name, User Name and Password. 3. In the Port Number section, assign an HTTP port of the camera. The default HTTP Port on the camera is 80. The example shows above is using port number 9000. © Copyright 2012 TRENDnet. All Rights Reserved. - Page 39 4. Open another web browser and go to your Router’s Web Configuration page. 5. Go to Virtual Server* section and create a new entry. (In the example, TRENDnet’s TEW-651BR Wireless N router is used) Enable: Click Enable Name: Enter the application name (eg. CameraName) Protocol: Select TCP Private Port: The HTTP port that you assign on your Camera.
- Page 40 1. Go to Camera’s DDNS Ports Number section, assign a HTTP port for your camera and click Apply. 4. Enable DDNS, fill out the following information and then click Apply. 2. Login to your router’s web configuration page. © Copyright 2012 TRENDnet. All Rights Reserved.
-
Page 41: Technical Specifications
GPIO Ground, GPIO in/out, RS485, 12V DC, 24V AC 7. The camera login page will appear. SD Slot Supports SD/SDHC (up to 32GB) Hardware Network IEEE 802.3u 10/100Mbps Fast Ethernet IEEE 802.3af PoE © Copyright 2012 TRENDnet. All Rights Reserved. - Page 42 Dynamic DNS RTP, RTSP, and RTCP Time Synchronize with NTP server or set time/date manually Management SMTP SMTP mail supported up to 2 destination accounts Remote Remote management supported System Log 100 entries (max.) © Copyright 2012 TRENDnet. All Rights Reserved.
-
Page 43: Troubleshooting
Go to the TCP/IP settings on your computer and assign a static IP address keyboard. on your computer’s network adapter in the subnet of 192.168.10.x. Since the default IP address of the TV-IP322P is 192.168.10.30, do not assign a Windows XP static IP address of 192.168.10.30 on your computer’s network adapter. - Page 44 4. The image is blurry. How can I adjust the focus on the IP camera? 6. I forgot my password. What should I do? Open the front cover of the TV-IP322P. Adjust the lens focus by turning the lens Open the front cover of the TV-IP322P. Located the reset button and press it ring slowly in either clockwise or counter clockwise direction.
- Page 45 TRENDnet product to access to the GPL Code or LGPL Code. These codes are sent to TRENDnet for RMA service must have the RMA number marked on the outside of return distributed WITHOUT WARRANTY and are subject to the copyrights of the developers. TRENDnet packages and sent to TRENDnet prepaid, insured and packaged appropriately for safe shipment.
Need help?
Do you have a question about the TV-IP322P and is the answer not in the manual?
Questions and answers