NordicTrack Exp3000 User Manual
English manual
Hide thumbs
Also See for Exp3000:
- Manuel de l'utilisateur (34 pages) ,
- User manual (35 pages) ,
- User manual (34 pages)
Table of Contents
Advertisement
Patent Pending
Model No. NTTL15993
Serial No.
Find the serial number in the location
shown below. Write the serial number
in the space above for reference.
Serial Number Decal
QUESTIONS?
As a manufacturer, we are com-
mitted to providing complete
customer satisfaction. If you
have questions, or if there are
missing parts, we will guarantee
complete satisfaction through di-
rect assistance from our factory.
TO AVOID UNNECESSARY DE-
LAYS, PLEASE CALL DIRECT TO
OUR TOLL-FREE CUSTOMER
HOT LINE. The trained techni-
cians on our Customer Hot Line
will provide immediate assis-
tance, free of charge to you.
CUSTOMER HOT LINE:
1-888-825-2588
Mon.–Fri., 6 a.m.–6 p.m. MST
CAUTION
Read all precautions and instruc-
tions in this manual before using
this equipment. Save this manual
for future reference.
USER'S MANUAL
Visit our website at
www.nordictrack.com
new products, prizes,
fitness tips, and much more!
Advertisement
Table of Contents

Subscribe to Our Youtube Channel
Related Manuals for NordicTrack Exp3000


Summary of Contents for NordicTrack Exp3000
- Page 1 CUSTOMER HOT LINE: 1-888-825-2588 Mon.–Fri., 6 a.m.–6 p.m. MST CAUTION Visit our website at Read all precautions and instruc- tions in this manual before using www.nordictrack.com this equipment. Save this manual for future reference. new products, prizes, fitness tips, and much more!
-
Page 2: Table Of Contents
TABLE OF CONTENTS IMPORTANT PRECAUTIONS ..............3 BEFORE YOU BEGIN . -
Page 3: Important Precautions
IMPORTANT PRECAUTIONS WARNING: To reduce the risk of burns, fire, electric shock, or injury to persons, read the following important precautions and information before operating the treadmill. 1. It is the responsibility of the owner to ensure 12. Keep the power cord and the surge protector that all users of this treadmill are adequately away from heated surfaces. - Page 4 22. When using iFIT.com CD’s and videos, an 25. Inspect and tighten all parts of the treadmill electronic “chirping” sound will alert you regularly. when the speed and/or incline of the treadmill is about to change. Always listen for the 26.
-
Page 5: Before You Begin
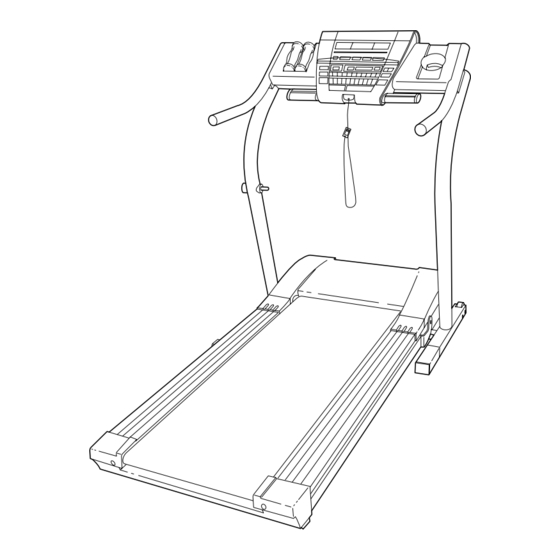
And when you’re not exer- number of the treadmill is NTTL15993. The serial num- cising, the unique EXP3000 can be folded up, requiring ber can be found on a decal attached to the treadmill less than half the floor space of other treadmills. -
Page 6: Assembly
ASSEMBLY Assembly requires two people. Set the treadmill in a cleared area and remove all packing materials. Do not dispose of the packing materials until assembly is completed. Assembly requires the included allen wrench and your own phillips screwdriver and wire cutters Note: The underside of the treadmill walking belt is coated with high-performance lubricant. - Page 7 4. Pull the Upright Wire Harness (98) up through one of the Cutout Handrail Spacers (65). Place the Handrail Spacer (65) on the right Upright (69) as shown, with the cutout turned to- ward the treadmill (see inset drawing A). Place the other Handrail Spacer on the left Upright (not shown).
-
Page 8: Operation And Adjustment
OPERATION AND ADJUSTMENT THE PERFORMANT LUBE WALKING BELT electric shock. This product is equipped with a cord having an equipment-grounding conductor and a Your treadmill features a walking belt coated with grounding plug. Plug the power cord into a surge PERFORMANT LUBE , a high-performance lubricant. - Page 9 Program Display Pulse Pulse Sensor Sensor Note: If there is a thin sheet of clear plastic on the face Clip of the console, remove it. FEATURES OF THE CONSOLE audio cable, you can connect the treadmill to your home stereo, portable stereo, or computer and play The advanced console offers an impressive selection special iFIT.com CD programs (CD’s are available sep- of features to help you get the most from your exercise.
- Page 10 Plug in the power cord. CAUTION: Before operating the See HOW TO PLUG IN THE POWER CORD on console, read the following precautions. page 8. • Do not stand on the walking belt when turn- ing on the power. Move the on/off switch to the on position. •...
- Page 11 Follow your progress with the LED track and HOW TO USE THE MANUAL MODE the displays. The LED track—When Insert the key fully into the console. the manual mode or an iFIT.com program is se- See GETTING STARTED on page 10. lected, the program dis- play will show an LED Select the manual mode.
- Page 12 HOW TO CONNECT YOUR VCR HOW TO USE IFIT.COM CD AND VIDEO PROGRAMS Note: If your VCR has an unused AUDIO OUT jack, see instruction A below. If the AUDIO OUT jack is being used, see instruction B. If you have a TV To use iFIT.com CD’s or videocassettes, the treadmill with a built-in VCR, see instruction B.
- Page 13 Each program is divided into several time seg- Incline buttons on the console. Every few times ments of different lengths. The Time display one of the Speed buttons is pressed, an additional shows both the time remaining in the program and indicator will light or darken in the Current Segment the time remaining in the current segment.
- Page 14 additional indicator will light or darken in the HOW TO CREATE CUSTOM PROGRAMS Current Segment column. When the first segment of the program is com- Insert the key fully into the console. pleted, the current speed setting and the current incline setting will be stored in memory.
- Page 15 mill will automatically adjust to the speed and in- HOW TO USE CUSTOM PROGRAMS cline settings that you programmed previously. The program will continue until the speed setting Insert the key fully into the console. for the last segment is shown in the Current Segment column and no time remains in the Time See GETTING STARTED on page 10.
- Page 16 Press the Start Program button or the Speed + HOW TO USE THE FITNESS TEST PROGRAM button to start the program. The fitness test program is designed to measure your When the button is relative fitness level. For the best results, the fitness pressed, the Distance/ test program should be used at a time when your en- Laps display will show...
- Page 17 When the cool-down segment is completed, the HOW TO USE THE PULSE-DRIVEN PROGRAM walking belt will slow to a stop. After the fitness test program is com- pleted, your fitness level The pulse-driven program automatically adjusts the will be shown in the speed and incline of the treadmill to keep your heart Time display.
- Page 18 cline will decrease. If you increase the incline, the Press the Start Program button or the Speed + speed will decrease; if you decrease the incline, button to start the program. the speed will increase. The treadmill will always attempt to keep your heart rate near the target A moment after the button is pressed, the tread- heart rate setting for the current segment.
- Page 19 HOW TO CONNECT YOUR PORTABLE STEREO HOW TO CONNECT THE TREADMILL TO YOUR CD PLAYER, VCR, OR COMPUTER Note: If your stereo has an RCA-type AUDIO OUT jack, see instruction A below. If your stereo has a 3.5mm LINE OUT jack, see instruction B. If your To use iFIT.com CD’s, the treadmill must be con- stereo has only a PHONES jack, see instruction C.
- Page 20 HOW TO CONNECT YOUR HOME STEREO HOW TO CONNECT YOUR COMPUTER Note: If your stereo has an unused LINE OUT jack, Note: If your computer has a 3.5mm LINE OUT jack, see instruction A below. If the LINE OUT jack is see instruction A.
- Page 21 Speed/Pace display— When you are finished exercising, stop the This display shows the walking belt and remove the key. speed of the walking belt and your current Step onto the foot rails, press the Stop button, and pace (pace is mea- adjust the incline of the treadmill to 1%.
- Page 22 If the speed or incline settings are too high or too Follow your progress with the LED track and low, you can manually override the settings at any the displays. time by pressing the Speed or Incline buttons on the console. However, when the next “chirp” is See step 5 on page 11.
- Page 23 Return to the treadmill and stand on the foot HOW TO USE PROGRAMS DIRECTLY FROM rails. Find the clip attached to the key and slide OUR INTERNET SITE the key onto the waistband of your clothing. When the on-screen countdown ends, the program Our new internet site at www.iFIT.com allows you to will begin and the walking belt will begin to move.
- Page 24 THE INFORMATION MODE/DEMO MODE THE OPTIONAL CHEST PULSE SENSOR The console features an information mode that keeps An optional chest pulse sensor adds even more track of the total number of hours that the treadmill has features to the console. The chest pulse sensor provides been operated and the total number of miles that the hands-free operation and continuously monitors your walking belt has moved.
-
Page 25: How To Fold And Move The Treadmill
HOW TO FOLD AND MOVE THE TREADMILL HOW TO FOLD THE TREADMILL FOR STORAGE Before folding the treadmill, adjust the incline to the lowest position. If this is not done, the treadmill may be per- manently damaged. Remove the key and unplug the power cord. -
Page 26: Trouble-Shooting
TROUBLE-SHOOTING Most treadmill problems can be solved by following the steps below. Find the symptom that applies, and follow the steps listed. If further assistance is needed, please call our Customer Service Department toll- free at 1-888-825-2588, Monday through Friday, 6 a.m. until 6 p.m. Mountain Time (excluding holidays). PROBLEM: The power does not turn on SOLUTION: a. - Page 27 PROBLEM: The walking belt slows when walked on SOLUTION: a. Use only a UL-listed surge protector, rated at 15 amps, with a 14-gauge cord of five feet or less in length. b. If the walking belt is overtightened, treadmill perfor- mance may decrease and the walking belt may be- come damaged.
-
Page 28: Conditioning Guidelines
CONDITIONING GUIDELINES uses easily accessible carbohydrate calories for en- WARNING: ergy. Only after the first few minutes does your body Before beginning this begin to use stored fat calories for energy. If your goal or any exercise program, consult your physi- is to burn fat, adjust the speed and incline of the tread- cian. - Page 29 SUGGESTED STRETCHES The correct form for several basic stretches is shown at the right. Move slowly as you stretch—never bounce. 1. Toe Touch Stretch Stand with your knees bent slightly and slowly bend forward from your hips. Allow your back and shoulders to relax as you reach down toward your toes as far as possible.
-
Page 30: Part List
PART LIST—Model No. NTTL15993 R1200A To locate the parts listed below, refer to the EXPLODED DRAWING attached in the center of this manual. Key No. Qty. Description Key No. Qty. Description Foot Rail Insert Walking Platform Foot Rail Platform Screw Foot Rail Cap Screw Rear Platform Screw Left Foot Rail Cap... -
Page 31: Ordering Replacement Parts
Friday, 6 a.m. until 6 p.m. Mountain Time (excluding holidays). When ordering parts, please be prepared to give the following information: • The MODEL NUMBER OF THE PRODUCT (NTTL15993) • The NAME OF THE PRODUCT (NordicTrack EXP3000 treadmill) ® • The SERIAL NUMBER OF THE PRODUCT (see the front cover of this manual) •... - Page 32 EXPLODED DRAWING—Model No. NTTL15993 R1200A...
- Page 33 EXPLODED DRAWING—Model No. NTTL15993 R1200A...
- Page 34 LIMITED WARRANTY WHAT IS COVERED—The entire NordicTrack ® EXP3000 treadmill (“Product”) is warranted to be free of all defects in material and workmanship. WHO IS COVERED—The original purchaser or any person receiving the Product as a gift from the original purchaser.
Need help?
Do you have a question about the Exp3000 and is the answer not in the manual?
Questions and answers
How much does the Nordic Track Exp3000 weigh in lbs?