Table of Contents
Advertisement
Instrucciones para la instalación
© Panasonic Appliances Microwave Oven (Shanghai) Co., Ltd. 2012
IP4103_F0313BE01AP_29_120515.indd 1
IP4103_F0313BE01AP_29_120515.indd 1
Installation Instructions
Notice d'installation
Cabinet
Armoire
Gabinete
30" (762 mm)
30 po (762 mm)
30" (762 mm)
27" (686 mm)
27 po (686 mm)
27" (686 mm)
Lisez attentivement et conservez cette notice d'installation.
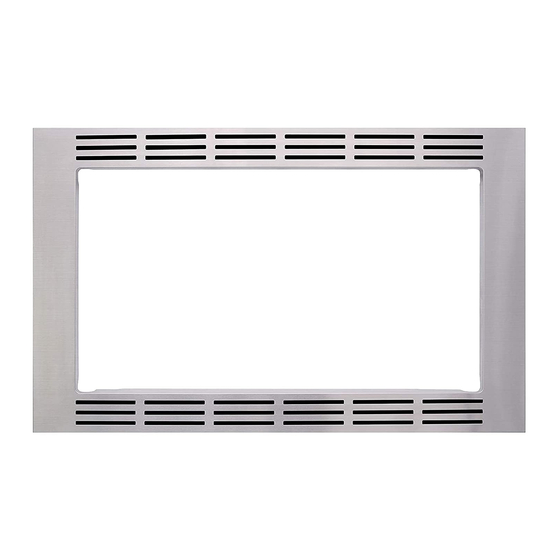
Trim kit
Nécessaire d'encastrement
Juego de acabados
NN-TK932S
NN-TK732S
NN-TK922S
NN-TK722S
Read carefully and keep these installation instructions.
Lea cuidadosamente y guarde este instructivo de
instalación para su referencia.
2012-5-15 Lynn 2:20:21
2012-5-15 Lynn 2:20:21
Advertisement
Table of Contents

Related Manuals for Panasonic NN-SE9**S


Summary of Contents for Panasonic NN-SE9**S
-
Page 1: Installation Instructions
Read carefully and keep these installation instructions. Lisez attentivement et conservez cette notice d'installation. Lea cuidadosamente y guarde este instructivo de instalación para su referencia. © Panasonic Appliances Microwave Oven (Shanghai) Co., Ltd. 2012 IP4103_F0313BE01AP_29_120515.indd 1 IP4103_F0313BE01AP_29_120515.indd 1 2012-5-15 Lynn 2:20:21... -
Page 2: Table Of Contents
CAUTION - Read and follow all instructions completely. 1. This Trim Kit is designed for use only with the Panasonic Microwave Oven listed in the table below, for installation into a cabinet. 2. The dimensions and ground clearance of the cabinet opening must be as indicated in Figure 1 on page 6 to 9. - Page 3 - Lire attentivement la présente notice et suivre les instructions. 1. Ce nécessaire d’encastrement est conçu pour utilisation avec les seuls modèles de fours à micro-ondes Panasonic identifiés dans le tableau ci-dessous, aux fins d’une installation dans une armoire. 2. Les dimensions et la distance de l’ouverture de l’armoire par rapport au sol doivent être tel qu’indiqué...
- Page 4 - Lea y siga todas las instrucciones. 1. El juego de acabados está diseñado solo para su utilización con el horno microondas Panasonic que se enumera en la tabla que se encuentra a continuación y para su instalación dentro de un gabinete.
-
Page 5: Parts List
1. Parts List " ) mm drill Tools Needed: Measuring tape, pencil, Phillips screwdriver, Ø 2 ( 1. Liste des pièces Outils requis: Ruban (de mesurage), crayon, tournevis Phillips, perceuse avec mèche de Ø 2 mm ( 1. Lista de partes ”... -
Page 6: Installation Diagram
2. Installation Diagram 2. Schéma d’installation 2. Diagrama de instalación Trim Kit Dimensions TK932S TK922S TK732S TK722S Width 30" (760 mm) 27" (684 mm) 30" (760 mm) 27" (684 mm) Height " (472 mm) " (472 mm) 16 ½" (419 mm) 16 ½"... -
Page 7: Cabinet Diagram And Dimensions
3-1. Cabinet Diagram and Dimensions (For TK932S) 3-1. Schéma de l’armoire et dimensions (Pour TK932S) 3-1. Dimensiones y diagrama del gabinete (Para TK932S) min. 533 mm (21") fig 1. IP4103_F0313BE01AP_29_120515.indd Sec1:6 IP4103_F0313BE01AP_29_120515.indd Sec1:6 2012-5-15 Lynn 2:20:22 2012-5-15 Lynn 2:20:22... - Page 8 3-2. Cabinet Diagram and Dimensions (For TK922S) 3-2. Schéma de l’armoire et dimensions (Pour TK922S) 3-2. Dimensiones y diagrama del gabinete (Para TK922S) min. 533 mm (21") fig 1. IP4103_F0313BE01AP_29_120515.indd Sec1:7 2012-5-15 Lynn 2:20:22...
- Page 9 3-3. Cabinet Diagram and Dimensions (For TK732S) 3-3. Schéma de l’armoire et dimensions (Pour TK732S) 3-3. Dimensiones y diagrama del gabinete (Para TK732S) min. 533 mm (21") fig 1. IP4103_F0313BE01AP_29_120515.indd Sec1:8 2012-5-15 Lynn 2:20:22...
- Page 10 3-4. Cabinet Diagram and Dimensions (For TK722S) 3-4. Schéma de l’armoire et dimensions (Pour TK722S) 3-4. Dimensiones y diagrama del gabinete (Para TK722S) min. 533 mm (21") fig 1. IP4103_F0313BE01AP_29_120515.indd Sec1:9 2012-5-15 Lynn 2:20:22...
-
Page 11: Left Duct Preparation
4. Left Duct Preparation 4. Préparation du conduit gauche 4. Preparación del conducto izquierdo Note: All folding must be done at a 90° angle. Otherwise, it won’t fit well. Remarque: Effectuer tous les pliages à un angle de 90°, sinon le conduit ne sera pas bien ajusté. -
Page 12: Microwave Oven Preparation
5. Microwave Oven Preparation 5. Préparation du four à micro-ondes 5. Preparación del horno microondas Align the screw hole and tighten the screw. Aligner le trou de passage de la vis et visser. Alinear el agujero del tornillo y ajustar el tornillo. Put a piece of the tape on the top of oven and put a piece of the tape on left of oven and left duct. -
Page 13: Lower Duct Installation
6. Lower Duct Installation 6. Installation du conduit inférieur 6. Instalación del conducto de la parte inferior Center Line of Cabinet Ligne du centre de l’armoire Eje de referencia (línea central) del gabinete Aligning the base bracket assembly Position Base Bracket Assembly on cabinet shelf. The front end of Base Bracket Assembly should align flush with the front edge of the shelf. - Page 14 6. Lower Duct Installation 6. Installation du conduit inférieur 6. Instalación del conducto de la parte inferior Attaching the base bracket assembly Fixation de la base des supports de montage Fijar la abrazadera de montaje de la base Drill bit Foret ø...
-
Page 15: Cabinet Preparation
7. Cabinet Preparation 7. Préparation de l’armoire 7. Preparación del gabinete Bracket assembly Supports de montage Abrazadera de montaje Attaching the bracket Fixation des supports de montage Drill bit Fijación de la abrazadera Foret ø 2 mm ") Broca 2 screws on each bracket 2 vis pour chaque support 2 tornillos en cada abrazadera IP4103_F0313BE01AP_29_120515.indd Sec1:14... -
Page 16: Trim Kit Preparation
8. Trim Kit Preparation 8. Préparation du nécessaire d’encastrement 8. Preparación del juego de acabados Trim Frame Cadre d’encastrement Marco del acabado Inserting strikes Insertion des gâches Inserción de ganchos de soporte IP4103_F0313BE01AP_29_120515.indd Sec1:15 IP4103_F0313BE01AP_29_120515.indd Sec1:15 2012-5-15 Lynn 2:20:23 2012-5-15 Lynn 2:20:23... -
Page 17: Microwave Oven Installation
9. Microwave Oven Installation 9. Installation du four à micro-ondes 9. Instalación del horno microondas Complete the assembly Montage du four Completar el montaje Oven placement Installation du four Colocación del horno IP4103_F0313BE01AP_29_120515.indd Sec1:16 IP4103_F0313BE01AP_29_120515.indd Sec1:16 2012-5-15 Lynn 2:20:23 2012-5-15 Lynn 2:20:23... -
Page 18: Trim Kit/Finishing Installation
10. Trim Kit/Finishing Installation 10. Nécessaire d’encastrement/Fin de l’installation 10. Juego de acabados/Instalación final Complete the assembly Montage du four Completar el montaje Trim frame installation Installation du cadre d'encastrement Instalación de marco embellecedor Note: Place the trim frame with the extended lip at the bottom Remarque: Installer le cadre d’encastrement, côté... - Page 19 F0313BE00AP IP0412-0 Printed in China Imprimé en Chine Impreso en China IP4103_F0313BE01AP_29_120515.indd Sec1:18 2012-5-15 Lynn 2:20:23...