GE JVM1190 Owner's Manual
Ge microwave oven owner's manual
Hide thumbs
Also See for JVM1190:
- Owner's manual (53 pages) ,
- Owner's manual (54 pages) ,
- Owner's manual (54 pages)
Table of Contents
Advertisement
GE Answer Center
®
800.626.2000
GE Appliances
Part No. 164D3370P063–1
COMBINATION
SENSOR COMBINATION
BAKE
BAKED
ROAST
CHICKEN
FISH
HI-LO
POTATO
SENSOR COOK
POPCORN
BEVERAGE
REHEAT
CONVECTION
BROIL
CANNED
FRESH
FROZEN
BAKE
HI-LO
VEG
VEG
VEG
EXPRESS COOK 1-6
TIME COOK
DEFROST
1
2
3
I & II
AUTO/TIME
TEMP
ADD
4
5
6
COOK
30 SEC.
7
8
9
POWER
START
0
CLEAR
HELP
LEVEL
PAUSE
OFF
DISPLAY ON/OFF
SOUND
AUTO
DELAY
TIMER
START
LEVEL
NIGHT LIGHT
ON/OFF
SURFACE
VENT FAN
REMINDER
CLOCK
AM/PM
LIGHT
SCROLL SPEED
Owner's Manual
JVM1190
Pub. No. 49-40063–1
6-98 CG
Advertisement
Table of Contents

Subscribe to Our Youtube Channel
Related Manuals for GE JVM1190


Summary of Contents for GE JVM1190
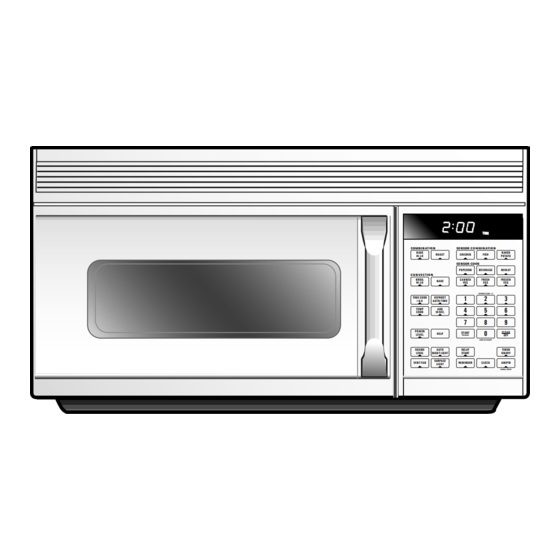
- Page 1 ® GE Answer Center 800.626.2000 GE Appliances COMBINATION BAKE ROAST HI-LO CONVECTION BROIL BAKE HI-LO TIME COOK DEFROST I & II AUTO/TIME TEMP COOK 30 SEC. POWER HELP LEVEL SOUND AUTO LEVEL NIGHT LIGHT SURFACE VENT FAN LIGHT Owner’s Manual JVM1190 Part No.
-
Page 2: Important Safety Information
SAFETY PRECAUTIONS This microwave oven is UL listed for installation over electric and gas ranges. This microwave oven is not approved or tested for marine use. Read and follow the specific... - Page 3 Do not use corrosive chemicals or vapors in this appliance. This microwave oven is specifically designed to heat, dry or cook food, and is not intended for laboratory or industrial use. Do not store this appliance outdoors.
-
Page 4: Arcing
Metal or foil touching the side of the oven. FOODS Do not pop popcorn in your microwave oven unless in a special microwave popcorn accessory or unless you use popcorn labeled for use in microwave ovens. Some products such as whole eggs and sealed containers—for example,... -
Page 5: Foods
SUPERHEATED WATER Microwaved water and other liquids do not always bubble when they reach the boiling point. They can actually get superheated and not bubble at all. Superheated liquid will bubble up out of the cup when it is moved or when something like a spoon or tea bag is put into it. -
Page 6: Microwave-Safe Cookware
IMPORTANT SAFETY INFORMATION. READ ALL INSTRUCTIONS BEFORE USING. WARNING! MICROWAVE-SAFE COOKWARE Make sure all cookware used in your microwave oven is suitable for microwaving. Most glass casseroles, cooking dishes, measuring cups, custard cups, pottery or china dinnerware which does not have metallic trim or glaze with a metallic sheen can be used. - Page 7 “Boilable” cooking pouches and tightly closed plastic bags should be slit, pierced or vented as directed by package. If they are not, plastic could burst during or immediately after cooking, possibly resulting in injury. Also, plastic storage containers should be at least partially uncovered because they form a tight seal.
-
Page 8: The Vent Fan
In the event of a grease fire on the surface units below the microwave oven, smother a flaming pan on the surface unit by covering the pan completely with a lid, a cookie sheet or a flat tray. -
Page 9: Grounding Instructions
WARNING! Improper use of the grounding plug can result in a risk of electric shock. GROUNDING INSTRUCTIONS This appliance must be grounded. In the event of an electrical short circuit, grounding reduces the risk of electric shock by providing an escape wire for the electric current. - Page 10 Congratulations! You Are Now Part of the GE Family. Welcome to the GE family. We’re proud of our quality products and we are committed to providing dependable service. You’ll see it in this easy-to-use Owner’s Manual and you’ll hear it in the friendly voices of our customer service department.
-
Page 11: Table Of Contents
Before You Call For Service..49, 50 Things That Are Normal With Your Microwave Oven....50 Customer Service Warranty ......51 Service Telephone Numbers . -
Page 12: Microwave Oven Features
About the features of your microwave oven. Throughout this manual, features and appearance may vary from your model. 825 Watts Features of the Oven Pull to open the door. The door must be Door Handle. securely latched for the microwave to operate. - Page 13 When replacing a Hi/Low range, the decorative panel kit fills in the area between the microwave and the range left by the Hi/Low model. Available at extra cost from your GE supplier. Door Latches. Temperature Probe. Use with Temp Cook, Convection Temperature Bake, Combination Temperature Bake, or Combination Roast only.
-
Page 14: Sensor Cook
About the features of your microwave oven. You can cook with convection heat, microwaves, or a combination of both. You can cook by time or temperature. You can also let the microwave choose the settings automatically by using the sensor features. -
Page 15: Cooking Controls
Cooking Controls Time Features Press TIME COOK I & II Press once or twice DEFROST AUTO/TIME Press twice Convection BAKE Combination BAKE HI-LO Press once or twice Convection BROIL HI-LO Press once or twice EXPRESS COOK ADD 30 SEC POWER LEVEL Temperature Features—Probe Cooking Press TEMP COOK... -
Page 16: Microwave/Convection Cooking
About microwave/convection cooking. How It Works Microwave cooking uses very short, high frequency radio waves. The movement of the microwaves through the food creates heat and cooks most foods faster than regular methods. Microwave cooking heats the food, not the cookware or the interior of the oven. Convection cooking constantly circulates heated air around the food. -
Page 17: Cookware Guide
Cookware Guide Cookware Heat-Resistant Glass, Glass-Ceramic (Pyrex , Fire King ® ® Corning Ware , etc.) ® Ceramic (cookware with no metal trim) Metal Non Heat-Resistant Glass Microwave-Safe Plastics Plastic Films and Wraps Paper Products Straw, Wicker and Wood *Use only microwave cookware that is safe to 400°F. Cookware Tips Convection Cooking Metal pans are recommended for all types of baked products. -
Page 18: Changing Power Level
Select desired power level 1–10. Press START. Variable power levels add flexibility to microwave cooking. The power levels on the microwave oven can be compared to the surface units on a range. Each power level gives you microwave energy a certain percent of the time. -
Page 19: Time Features
About the time features. TIME COOK I & II EXPRESS COOK 1-6 DISPLAY ON/OFF START PAUSE Time Cook I & II Time Cook I Allows you to microwave for any time up to 99 minutes and 99 seconds. Power level 10 (High) is automatically set, but you may change it for more flexibility. - Page 20 About the time features. Cooking Guide for Time Cook I & II NOTE: Use power level High (10) unless otherwise noted. Vegetable Amount Asparagus (fresh spears) 1 lb. (frozen spears) 10-oz. package Beans (fresh green) 1 lb. cut in half (frozen green) 10-oz.
- Page 21 Vegetable Amount Corn (frozen kernel) 10-oz. package Corn on the cob (fresh) 1 to 5 ears (frozen) 1 ear 2 to 6 ears Mixed vegetables (frozen) 10-oz. package Peas (fresh, shelled) 2 lbs. unshelled (frozen) 10-oz. package Potatoes (fresh, cubed, 4 potatoes white) (6 to 8 oz.
- Page 22 About the time features. DEFROST AUTO/TIME EXPRESS COOK 1-6 DISPLAY ON/OFF START PAUSE Time Defrost Allows you to defrost for a selected length of time. See the Defrosting Guide for suggested times. ( Auto Defrost explained in the About the auto feature section.) Press DEFROST AUTO/TIME twice.
-
Page 23: Defrosting Guide
Defrosting Guide Food Breads, Cakes Bread, buns or rolls (1 piece) Sweet rolls (approx. 12 oz.) Fish and Seafood Fillets, frozen (1 lb.) Shellfish, small pieces (1 lb.) 5 to 7 min. Fruit Plastic pouch—1 or 2 (10-oz. package) Meat Bacon (1 lb.) Franks (1 lb.) Ground meat (1 lb.) -
Page 24: Convection Bake
About the time features. CONVECTION BAKE EXPRESS COOK 1-6 DISPLAY ON/OFF START PAUSE Use the shelf on the oven floor when convection baking. Convection Bake During convection baking a heating element is used to raise the temperature of the air inside the oven. Any oven temperature from 225°F. -
Page 25: Combination Bake
COMBINATION BAKE HI-LO EXPRESS COOK 1-6 DISPLAY ON/OFF START PAUSE Use the shelf on the oven floor when combination baking. Combination Bake Combination baking combines microwave cooking and convection cooking. The microwave energy cooks food quickly and convection circulation of heated air browns foods beautifully. -
Page 26: Convection Broil
About the time features. CONVECTION BROIL HI-LO EXPRESS COOK 1-6 DISPLAY ON/OFF START PAUSE Convection Broil—Place the broiler pan (spatter shield and drip pan) on top of the shelf. Convection Broil Broiling is cooking by intense top heat. The metal shelf must be in place on the shelf supports when convection broiling. - Page 27 Express Cook EXPRESS COOK 1-6 This is a quick way to set cooking time for 1–6 minutes. Press one of the Express Cook pads (from 1 to 6) for 1 to 6 minutes of cooking at power level 10. For example, press the 2 pad for 2 minutes of cooking time.
-
Page 28: Defrost Auto/Time
About the auto feature. DEFROST AUTO/TIME EXPRESS COOK 1-6 DISPLAY ON/OFF START PAUSE Auto Defrost The Defrost Auto/Time feature gives you two ways to defrost frozen foods. Press DEFROST AUTO/TIME once for Auto Defrost or twice for Time Defrost. Use Auto Defrost for meat, poultry and fish up to 6 pounds. -
Page 29: The Temperature Probe
About the temperature features. Cable Handle Sensor Appearance may vary. The Temperature Probe The temperature probe is a food thermometer that monitors the temperature of the food. The probe must be used when using Temp Cook, Convection Temperature Bake, Combination Temperature Bake, or Combination Roast. - Page 30 About the temperature features. TEMP COOK EXPRESS COOK 1-6 DISPLAY ON/OFF START PAUSE Temp Cook Insert the temperature probe in the center of the food and attach it securely in the oven wall. Press TEMP COOK. Enter the desired food temperature. Change power level if you don’t want full power.
- Page 31 CONVECTION BAKE EXPRESS COOK 1-6 DISPLAY ON/OFF START PAUSE Use the shelf on the oven floor when convection baking. Convection Temperature Bake Convection baking with the temperature probe allows you to cook foods precisely to the degree of doneness desired, while the constantly circulating hot air assures even cooking and browning.
- Page 32 About the temperature features. COMBINATION BAKE HI-LO EXPRESS COOK 1-6 DISPLAY ON/OFF START PAUSE Use the shelf on the oven floor when combination baking. Combination Temperature Bake Combination baking with the temperature probe allows you to enjoy the benefits of combination baking with the precision of the temperature probe.
-
Page 33: Combination Roast
COMBINATION ROAST EXPRESS COOK 1-6 DISPLAY ON/OFF START PAUSE Use the shelf on the oven floor when combination roasting. Combination Roast Combination Roast is similar to Combination Temperature Bake . It uses both microwave and convection cooking as well as the temperature probe. Insert the probe in the food and attach it securely to the oven wall. -
Page 34: Humidity Sensor
Be sure the outside of the cooking containers and the inside of the microwave oven are dry before placing food in the oven. Beads of moisture turning into steam can mislead the sensor. - Page 35 POPCORN (less time) (more time) Use only with prepackaged microwave popcorn weighing 1.75 to 3.5 ounces. BEVERAGE Sensor Cook Popcorn NOTE: Do not use the metal shelf when cooking popcorn. To use the Sensor Cook Popcorn feature: Follow package instructions, using Time Cook if the package is less than 1.75 ounces or larger than 3.5 ounces.
- Page 36 About the sensor features. REHEAT How to Change the Automatic Settings To reduce time by 10%: Press 1 after pressing REHEAT. To add 10% to cooking time: Press 9 after pressing REHEAT. FRESH FROZEN CANNED How to Change the Automatic Settings (Fresh Vegetable only) To reduce time by 10%: Press 1 after pressing...
- Page 37 Sensor Combination Chicken CHICKEN Sensor Combination Chicken combines microwave cooking and convection cooking to cook 1–8 pieces of chicken. START PAUSE The oven signals when steam is sensed and time remaining begins counting down. Do not open the oven door until time is counting down.
-
Page 38: Sensor Features
About the sensor features. BAKED POTATO START PAUSE Place shelf on upper supports when sensor combination cooking. About the other features. HELP Cooking Complete Reminder To remind you that you have food in the oven, the oven will display FOOD IS READY and beep once a minute until you either open the oven door or press CLEAR/OFF. -
Page 39: Scroll Speed
Shelf Clock CLOCK Press to enter the time of day or to check the time of day while microwaving. EXPRESS COOK 1-6 DISPLAY ON/OFF AM/PM SCROLL SPEED Scroll Speed The scroll speed of the display can be changed. Press AM/PM and hold the AM/PM pad about 3 seconds to bring up the display. -
Page 40: About The Other Features
About the other features. DELAY START EXPRESS COOK 1-6 DISPLAY ON/OFF AM/PM SCROLL SPEED TIMER ON/OFF EXPRESS COOK 1-6 DISPLAY ON/OFF START PAUSE Delay Start Delay Start allows you to set the microwave to delay cooking up to 24 hours. Press DELAY START. -
Page 41: Vent Fan
REMINDER EXPRESS COOK 1-6 DISPLAY ON/OFF AM/PM SCROLL SPEED CLEAR VENT FAN Automatic Fan An automatic fan feature protects the microwave from too much heat rising from the cooktop below it. It automatically turns on at low speed if it senses too much heat. If you have turned the fan on you may find that you cannot turn it off. -
Page 42: Other Features
About the other features. SURFACE LIGHT SOUND LEVEL AUTO NIGHT LIGHT EXPRESS COOK 1-6 DISPLAY ON/OFF START PAUSE Surface Light Press SURFACE LIGHT once for bright light, twice for the night light or three times to turn the light off. Sound Level The beeper sound level can be adjusted. -
Page 43: Microwave Terms
Microwave terms. Term Definition Arcing is the microwave term for sparks in the oven. Arcing is Arcing caused by: the temperature probe staying in the oven but not inserted in the food. the metal shelf being installed incorrectly and touching the microwave walls. -
Page 44: Care And Cleaning
Care and cleaning of the microwave oven. Helpful Hints Open the oven door a few minutes after cooking to air out the inside. An occasional thorough wiping with a solution of baking soda and water keeps the inside fresh. Be certain the power is off before cleaning any part of this oven. - Page 45 How to Clean the Outside Do not use cleaners containing ammonia or alcohol on the microwave oven. Ammonia or alcohol can damage the appearance of the microwave. Case Clean the outside of the microwave with a sudsy cloth. Rinse and then dry. Wipe the window clean with a damp cloth.
-
Page 46: Oven Light
Break the adhesive seal by gently unscrewing the bulb(s). Replace with 40-watt incandescent bulbs. Order WB02X4253 from your GE supplier. High-intensity 40-watt bulbs (40S11N/1), available in supermarkets and hardware stores, may also be used for replacements. Raise light compartment cover and replace the screw. -
Page 47: Reusable Grease Filters
About the exhaust feature. Charcoal Filter (on some models) Reusable Grease Filters (on all models) Reusable Grease Filters The metal filters trap grease released by foods on the cooktop. They also prevent flames from foods on the cooktop from damaging the inside of the microwave. -
Page 48: Charcoal Filter
(on some models) The charcoal filter cannot be cleaned. It must be replaced. Order Part No. WB02X4267 from your GE supplier. If the model is not vented to the outside, the air will be recirculated through a disposable charcoal filter that helps remove smoke and odors. -
Page 49: Troubleshooting Tips
Before you call for service… Troubleshooting Tips Save time and money! Review the charts on the following pages first and you may not need to call for service. Problem Oven will not start Control panel lighted, yet oven will not start “PLEASE INSERT PROBE”... -
Page 50: Before You Call For Service
Food amount too large for Sensor Cook Reheat Things That Are Normal With Your Microwave Oven Steam or vapor escaping from around the door. Light reflection around door or outer case. Dimming oven light and change in the blower sound at power levels other than high. -
Page 51: Warranty
Any part of the microwave oven which fails due to a defect in materials or workmanship. During this full one-year warranty, GE will also provide, free of charge, all labor and in-home service to replace the defective part. The magnetron tube, if the magnetron tube fails due to a defect in materials or workmanship. -
Page 52: Parts And Accessories
Expert GE repair service is only a phone call away. Special Needs Service TDD 800-TDD-GEAC (800-833-4322) GE offers, free of charge, a brochure to assist in planning a barrier- free kitchen for persons with limited mobility. Service Contracts Purchase a GE service contract while your warranty is still in effect and you’ll receive a substantial discount.
Need help?
Do you have a question about the JVM1190 and is the answer not in the manual?
Questions and answers
part number for microwave tube for jvm 1190ay
The part number for the microwave tube (magnetron) for the GE JVM1190 is not provided in the given context.
This answer is automatically generated
part number for microwave tube jvm 1190ay