Table of Contents
Advertisement
Washing Machine Instruction Manual
INSTRUCTION MANUAL
Economic wash system
Using artificial intelligence, the washer uses minimum energy and water by
selecting optimal water lever and washing time.
Low noise system
The washer minimizes the washing and spinning noises by sensing the
amount of laundry.
Child-Lock
The Child-Lock system has been used to prevent children from pressing any
button to change the program during operation.
Nano-silver sterilization washing(Option)
By applying very fine silver particles on essential parts inside, the washer
sterilizes up to 99.9% as is done by boiling wash.
Air bubble washing(Option)
This is an advanced technology that generates millions of air bubbles inside the drum on washing sequence,
and the bubbles dissolve the detergent particles completely and cleanse all the soil in clothes gently and neatly.
CONTENTS
PARTS AND FEATURES.................................................................................................................2
WASHER SAFETY...........................................................................................................................3
INSTALLATION INSTRUCTIONS ....................................................................................................4
INLET HOSE CONNECTION ...........................................................................................................5
ELECTRICAL REQUIREMENTS .....................................................................................................6
OPERATING YOUR WASHER ........................................................................................................7
THE FUNCTIONS OF THE CONTROL PANEL...............................................................................9
WASHING PROGRAM...................................................................................................................11
WASHING PROCEDURE AND SELECTION ................................................................................12
GUIDE FOR OTHER USEFUL PROGRAMS.................................................................................23
MAINTENANCE .............................................................................................................................27
HOW TO CLEAN THE FILTER ......................................................................................................28
REMOVING STAINS ......................................................................................................................29
TROUBLE SHOOTING ..................................................................................................................30
SPECIFICATION ............................................................................................................................31
A NOTE TO YOU
Thank you for buying a DAEWOO appliance.
DAEWOO washers are easy to use, save time, and help you manage your home better.
This manual contains valuable information about how to operate and maintain your washer property and safely.
Please read it carefully.
DWD-E1211R'S/E1211W'S
Page
Advertisement
Table of Contents

Related Manuals for Daewoo DWD-E1211R’S


Summary of Contents for Daewoo DWD-E1211R’S
-
Page 1: Table Of Contents
A NOTE TO YOU Thank you for buying a DAEWOO appliance. DAEWOO washers are easy to use, save time, and help you manage your home better. This manual contains valuable information about how to operate and maintain your washer property and safely. -
Page 2: Parts And Features
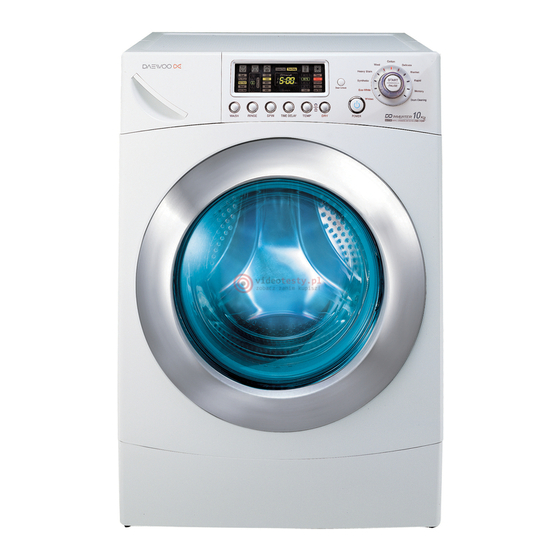
PARTS AND FEATURES The parts and features of your washer are illustrated on the page. Become familiar with all parts and features before using your washer. NOTE The drawings in the book may vary from your washer model. They are designed to show the different features of all models coverd by this book, Your model may not include all features. -
Page 3: Washer Safety
WASHER SAFETY Save these instructions Your safety is important to us. To reduce the risk of fire, electrical shock, or injury when using your washer adhere to the following basic precautions. Read all instructions before using your washer • Flammable fluids (dry-cleaning solvents, Please ... -
Page 4: Installation Instructions
INSTALLATION INSTRUCTIONS Removing transit bolts 1. Before operating the washer, remove the 2. Unscrew the 4 bolts with the spanner transit bolts(4ea) along with the rubber. supplied. Keep the 4 bolts and spanner for future use. • If the bolts are not removed, it may cause heavy vibration, noise and malfunction. -
Page 5: Inlet Hose Connection
INLET HOSE CONNECTION The washer should be connected to the water mains using new hose sets and old hose sets should not be reused. In using only one water tap or in case of only one water inlet valve, connect the inlet hose to the cold water inlet valve. -
Page 6: Electrical Requirements
ELECTRICAL REQUIREMENTS Electrical shock hazard : Failure to follow these instructions could result in WARNING death or serious injury. • Electrical earth is required on this washer • Don’t earth to a gas pipe. • If it does not fit the outlet, have a proper outlet •... -
Page 7: Operating Your Washer
2 Adjust the level of washer using adjustable legs. • Please check if there is any gap between the four adjustable legs and the floor. • Turning adjustable legs by the enclosed spanner, adjust the level of washer and make Fixing Nut it sure that there is no swaying of washer. - Page 8 Sorting • Separate heavily soiled items from lightly soiled ones, even if they would normally be washed together. • Separate dark colors from light colors, colorfast items from non-colorfast item. Soil (Heavy, Normal, Light) Separate clothes according to amount of soil. Color (White, Lignts, Darks) Separate white clothes from colored clothes.
-
Page 9: The Functions Of The Control Panel
THE FUNCTION OF CONTROL PANEL (DWD-E1211R'S) Press this switch to turn the power 'ON' or 'OFF'. Operation and temporary stop is repeated as it is pressed. When you want to change program in operating; Press the 'Start/Pause' button Select the program that you want to change Press the 'Start/Pause' button again. - Page 10 THE FUNCTION OF CONTROL PANEL (DWD-E1211W'S) Press this switch to turn the power 'ON' or 'OFF'. Operation and temporary stop is repeated as it is pressed. When you want to change program in operating; Press the 'Start/Pause' button Select the program that you want to change Press the 'Start/Pause' button again.
-
Page 11: Washing Program
WASHING PROGRAM Program Fabric type Proper Temp. Default data Maximum Load Normal Colorfast garments (shirts, 40 °C Wash: main wash Refer to night dresses, pajamas,..) and lightly (cold,30°C, 60°C) Rinse: 3 rating lavel soiled white cottons(underwares,..) Spin: 800 Temp.: 40°C White First check whether laundry is 95 °C... -
Page 12: Washing Procedure And Selection
WASHING PROCEDURE AND SELECTION 1. NORMAL PROGRAM Put the laundry into the Drum and put the detergent and softerner into the detergent case. Then close the Door. • Put the detergent into the main wash room(I I marking) and prewash room(I marking) in the detergent case. - Page 13 2. WHITE PROGRAM Put the laundry into the Drum and put the detergent and softerner into the detergent case. Then close the Door. • Put the detergent into the main wash room(I I marking) and prewash room(I marking) in the detergent case. •...
- Page 14 3. ECO-WHITE PROGRAM Put the laundry into the Drum and put the detergent and softerner into the detergent case. Then close the Door. • Put the detergent into the main wash room(I I marking) and prewash room(I marking) in the detergent case. •...
- Page 15 4. SYNTHETIC PROGRAM Put the laundry into the Drum and put the detergent and softerner into the detergent case. Then close the Door. • Put the detergent into the main wash room(I I marking) and prewash room(I marking) in the detergent case. •...
- Page 16 5. HEAVY STRAIN PROGRAM Put the laundry into the Drum and put the detergent and softerner into the detergent case. Then close the Door. • Put the detergent into the main wash room(I I marking) and prewash room(I marking) in the detergent case. •...
- Page 17 6. WOOL PROGRAM Put the laundry into the Drum and put the detergent and softerner into the detergent case. Then close the Door. • Put the detergent into the main wash room(I I marking) in the detergent case. • Softener should be below 'MAX' level. •...
- Page 18 7. DELICATE PROGRAM Put the laundry into the Drum and put the detergent and softerner into the detergent case. Then close the Door. • Put the detergent into the main wash room(I I marking) in the detergent case. • Softener should be below 'MAX' level. •...
- Page 19 8. BLANKET PROGRAM Put the laundry into the Drum and put the detergent and softerner into the detergent case. Then close the Door. • Put the detergent into the main wash room(I I marking) in the detergent case. • Softener should be below 'MAX' level. •...
- Page 20 9. RAPID PROGRAM Put the laundry into the Drum and put the detergent and softerner into the detergent case. Then close the Door. • Put the detergent into the main wash room(I I marking) in the detergent case. • Softener should be below 'MAX' level. •...
- Page 21 10. MEMORY PROGRAM Put the laundry into the Drum and put the detergent and softerner into the detergent case. Then close the Door. • Put the detergent into the main wash room(I I marking) and prewash room(I marking) in the detergent case. •...
- Page 22 11. DRUM CLEANING PROGRAM Press the Power button. • The LED shows only '- --' signal. Select the 'DRUM CLEANING' program using the program selection dial. • If you press 'Start/Pause' button aftrer pressing Power button without selecting program, the 'NORMAL' program is selected as default program. •...
-
Page 23: Guide For Other Useful Programs
GUIDE FOR OTHER USEFUL PROGRAMS * DELAY START(RESERVED WASHING) Put the laundry into the Drum and put the detergent and softerner into the detergent case. Then close the Door. • Put the detergent into the main wash room(I I marking) and prewash room(I marking) in the detergent case. - Page 24 * ONLY WASH Put the laundry into the Drum and put the detergent and softerner into the detergent case. Then close the Door. Press the Power button. • The LED shows only '- --' signal. Select the 'WASH COURSE' you want by pressing 'WASH' button. •...
- Page 25 * DRY(DWD-E1211R'S) Put the laundry into the Drum and close the Door. Press the Power button. • The LED shows only '- --' signal. Select the 'DRY CONDITION' you want by pressing 'DRY' button. As this button is pressed, the dry condition is selected by 'Cupboard' 'Very' 'Time(30, 1:00, 1:30)' 'Low Temp'...
- Page 26 * RINSE+SPIN(DWD-E1211W'S) Put the laundry into the Drum and put softerner into the detergent case. Then close the Door. • Softener should be below 'MAX' level. Press the Power button. • The LED shows only '- --' signal. Select the program you want using the program selection dial. •...
-
Page 27: Maintenance
MAINTENANCE Proper care of your washer can extend its life. This section explains how to care for your washer properly and safely. Cleaning your washer Exterior Interior Wipe up detergent, bleach, and other spills with Clean interior with 250ml of chlorine bleach a soft, damp cloth or sponge as they occur. -
Page 28: How To Clean The Filter
HOW TO CLEAN THE FILTER Cleaning the water inlet filter • Clean the filter when water leaks from the water inlet. 1 Pull the power 2 Turn off the water 3 Pull the inlet filter 4 Remove the dirt plug out before supply to the out. -
Page 29: Removing Stains
REMOVING STAINS Stained, heavily-soiled, or greasy items may need to be prewashed or soaked for best results. Soaking helps remove protein-type stains like blood, milk or grass. Prewashing helps loosen soil before washing. Stain removal rules • Use warm water for soaking or prewashing stained laundry. Hot water can set stains. •... -
Page 30: Trouble Shooting
TROUBLE SHOOTING Most problems are easily solved if you understand the cause. Check the following list for problem before calling for service. If the error mode such as IE, OE, UE were displayed on the control part, in order to solve these problem, first turn off the power of the washing machine and then turn on the power pressing Power button. -
Page 31: Specification
SPECIFICATION MODEL DWD-E1211R’S DWD-E1211W’S Dimension (mm) 630 x 750 x 930 (WxDxH) Unit Weight (kg) 80(Net) / 88(Gross) Maximum Mass of Dry Cloth Wash: 10Kg (Dry: 6Kg) Standard Water Consumption Spin Speed (RPM) No Spin/400/600/800/1000/1200 Operating Water Pressure 0.03MPa ~ 0.8MPa (0.3kgf/cm ~ 8kgf/cm WIRING DIAGRAM DWD-E1211R’S... - Page 32 English Português Disposal of Used Electrical & Electronic Equipment Eliminação de Equipamento Eléctrico e Electrónico Usado The meaning of the symbol on the product, its accessory or packaging indicates that this product shall O símbolo no aparelho, nos seus acessórios ou na not be treated as household waste.
- Page 33 » » esky Italiano Likvidace pouû û it˝ ˝ ch elektrick˝ ˝ ch a elektronick˝ ˝ ch za¯ ¯ ízení Trattamento del dispositivo elettrico od elettronico a fine vita (Applicabile in tutti i paesi Tento symbol na v˝robku, jeho p¯ísluöenství nebo obalu dell’Unione Europea e in quelli con sistema di oznaËuje, ûe s tímto v˝robkem nesmí...
- Page 34 Svenska Dansk Omhändertagande av gamla elektriska och Håndtering af udtjente elektriske og elektroniske elektroniska produkter (Användbar i den produkter (Gælder for den Europæiske Union og Europeiska Unionen och andra Europeiska andre europæiske lande med separate länder med separata insamlingssystem) indsamlingssystemer) Symbolen på...
- Page 35 ABOUT THIS MANUAL ABOUT THIS MANUAL VISION CREATIVE, INC.
Need help?
Do you have a question about the DWD-E1211R’S and is the answer not in the manual?
Questions and answers