Table of Contents
Advertisement
Quick Links
Advertisement
Table of Contents

Related Manuals for EnGenius ENH210


Summary of Contents for EnGenius ENH210
- Page 1 ENTERPRISE WIRELESS CLIENT/BRIDGE Model: ENH210 User Manual Version: 1.0...
-
Page 2: Table Of Contents
ENEFITS 1.3 P ..............................9 ACKAGE ONTENTS 1.4 S ............................9 YSTEM EQUIREMENT 1.5 H ............................9 ARDWARE VERVIEW 1.6 U ENH210 LED ........................10 NDERSTANDING THE 2 ENGENIUS ZONECONTROLLER..........................11 2.1 Z ..........................11 ONTROLLER VERVIEW 2.2 Z ..........................13 ONTROLLER EATURE 2.3 Z .......................15 ONTROLLER... - Page 3 8 WIRELESS CONFIGURATION ..........................35 8.1 W ..............................35 IRELESS ETTINGS 8.1.1 Access Point Mode...........................35 8.1.2 Client Bridge Mode..........................38 8.1.3 WDS Bridge Mode ...........................40 8.1.4 Client Router Mode ..........................42 8.2 W ..........................44 IRELESS ECURITY ETTINGS 8.2.1 WEP .................................44 8.2.2 WPA-PSK ..............................45 8.2.3 WPA2-PSK ...............................46 8.2.4 WPA-PSK Mixed ............................47 8.2.5 WPA.................................48 8.2.6 WPA2...............................49...
- Page 4 12 NETWORK CONFIGURATION EXAMPLES......................76 12.1 A ..............................76 CCESS OINT 12.2 C ............................77 LIENT RIDGE 12.3 WDS B ............................78 RIDGE 12.4 C ............................79 LIENT OUTER APPENDIX A – TROUBLESHOOTING ........................80 A.1 P ...............................80 ROBLEM OLVING A.2 C .........................81 ONTACTING ECHNICAL UPPORT APPENDIX B –...
-
Page 5: About This Document
About This Document This document is written by EnGenius Inc. EnGenius Inc. the reserves the right to change this document without notice and all rights are reserved. This document can only be used for the configuration of EnGenius products. This document is to characterize the EnGenius ENH210 Wireless Client Bridge. Please read the document carefully before setting up the ENH210. -
Page 6: Product Overview
Wi-Fi Protected Access (WPA-PSK/WPA2-PSK), (64/128/152)-bit WEP Encryption, and IEEE 802.1x with RADIUS. Additionally, the ENH210 is the ideal choice to pair with the ENH210 in an Access Point – Client Bridge or WDS Bridge – WDS Bridge topology. - Page 7 Users can select the best signal to connect with AP efficiently Indicator (CB mode) Flexible Access Point locations and cost savings (Note: The Power-over-Ethernet ENH210 includes a proprietary PoE adapter.) Support Multi-SSID Allow clients to access different networks through a single function (8 SSID) in...
-
Page 8: Benefits
Clients connect wirelessly to an AP and transmit data through AP to access the Internet. Multiple SSIDs ENH210 supports up to 4 SSIDs on your access point. The following options can be set to each SSID: Public or private SSID... -
Page 9: Package Contents
1 x Mounting Installation Guide 1 x QIG 1 x CD (User Manual) Using a power adapter other than the one included with the ENH210 may cause damage to the device. 1.4 System Requirement The following conditions are the minimum system requirements. -
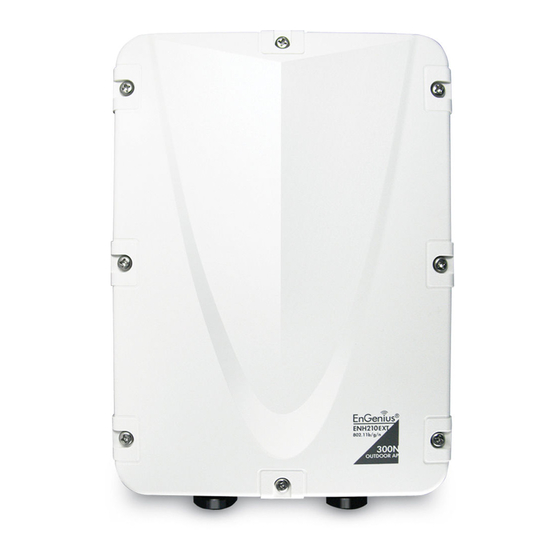
Page 10: Understanding The Enh210 Leds
1.6 Understanding the ENH210 LEDs The rear of the ENH210 has two groups of LEDs. One group, labeled INDICATORS, shows the status of the device. The second group, LINK QUALITY, shows the strength of the link between the ENH210 and the network. The following table describes the ENH210 LEDs. -
Page 11: Engenius Zonecontroller
2 EnGenius ZoneController This chapter describes the purpose and functionality of the ZoneController software which is included with the ENH210. 2.1 ZoneController Overview In enhancing the real-time functionality of a network, applying the best network management software tool is necessary. With an aggressive network management tool... - Page 12 Key Feature List Description SNMP v1, v2c Compliance Simple configuration and discover the active SNMP device around Network Monitoring the network. Repeat the discovery process in a pre-defined time interval to keep track of the status of the nodes Allow super level user to create lower level user to perform User Administration monitoring job only Block List...
-
Page 13: Zonecontroller Feature List
2.2 ZoneController Feature List Upon logging into the ZONECONTROLLER Software, the user is presented with four different functional panels. Users can switch to each panel by selecting the tab button at the top of the suite. The four panels are Map, Stats, Device and User. The Map panel is to geographically display the live status of the managed network. - Page 14 The Stats tab is to monitor the statistics of the nodes that are managed by the software. Users can view the history of the bandwidth utilization in bytes of the node by utilizing the available options. The Device list, meanwhile, lists the discovered node units with their current data. Users can reboot or upgrade firmware of the selected unit at this panel.
-
Page 15: Zonecontroller, Additional Information
2.3 ZoneController, Additional Information The ZoneController Software contains a plethora of features which afford network administrators the ability to effectively manage complex networks. Additional information regarding the installation and features of the suite are available in the EnGenius ZoneController User Manual. -
Page 16: Installation
3.1 Pre-installation Guidelines Select the optimal locations for the equipment using the following guidelines: The ENH210 should be mounted on a 1"- 2" pole or wall. Its location should enable easy access to the unit and its connectors for installation and testing. -
Page 17: Installing The Enh210
3.2 Installing the ENH210 To install the ENH210, use the following procedure to mount the device on a pole and refer to the figure below. 1. Insert a standard Ethernet cable into the RJ-45 port labeled LAN1 (PoE). 2. Plug the power cord into the DC port of the PoE injector. -
Page 18: Wireless Network Modes
IEEE 802.11b/g/n standards. Stations and clients must utilize the same SSID and Security Password to associate while within range. The most suitable topology for this mode is to have one ENH210 as an AP and the second one as a Client-Bridge. 4.2 Access Point with WDS Function Mode The ENH210 also supports WDS functionality while in Access Point Mode. -
Page 19: Client Bridge Mode
4.3 Client Bridge Mode In the Client Bridge Mode, the ENH210 functions like a wireless client, connecting to an Access Point wirelessly and enabling Internet connectivity wherever you want. Use Site Survey function to scan all of the Access Points within range and configure the SSID and Security Password to associate with it. -
Page 20: Wds Bridge Mode
4.4 WDS Bridge Mode In the WDS Bridge Mode, the ENH210 can wirelessly connect different local area networks by configuring each device’s MAC address and security settings. The WDS Bridge Mode can bridge up to four local wired networks together as one logical network. Every computer on this logical network can see each other, sharing files as if they are in the same location. -
Page 21: Client Router Mode
4.5 Client Router Mode In Client Router Mode, the ENH210 provides two functions: 1) acting as a wireless-Ethernet Bridge in order to relay signal from the access point; 2) acting as an active DHCP server that allows WLAN clients to share the same wireless network connection. Ideally, have clients... - Page 22 different from the AP Router Mode. It is not a common application; however, it is useful when connecting to WISP APs.
-
Page 23: Configuring Your Computer For Tcp/Ip
This chapter describes how to configure the TCP/IP settings on a computer that will be used to configure the ENH210. Because the default operating mode is Client Bridge, an IP address will not be assigned to the computer/notebook. Therefore, follow the steps below to assign an IP address to a client’s Ethernet adapter. - Page 24 ENH210, and the default gateway which is the ENH210’s IP address, 192.168.1.1. Note: the subnet mask must match that of the ENH210 and the IP address must be on that subnet. Click the OK button to save your changes and close the dialog box.
-
Page 25: Configuring Microsoft® Windows Vista
5.2 Configuring Microsoft® Windows Vista ® Use the following procedure to configure a computer running Microsoft Windows Vista with the default Windows interface. On the Windows taskbar, click Start, click Control Panel, and then select the Network and Internet icon. Click View Network Status and tasks and then click Manage Networks Connections. -
Page 26: Configuring Microsoft® Windows Xp
ENH210, and the default gateway which is the ENH210’s IP address, 192.168.1.1. Note: the subnet mask must match that of the ENH210 and the IP address must be on that subnet. Click the OK button to save your changes and close the dialog box. -
Page 27: Configuring Apple ® Mac Os X
ENH210, and the default gateway which is the ENH210’s IP address, 192.168.1.1. Note: the subnet mask must match that of the ENH210 and the IP address must be on that subnet. Click the OK button to save your changes and close the dialog box. -
Page 28: Logging Into The Enh210
4. Click Apply Now to apply your settings and close the TCP/IP dialog box. 5. Enter an IP address (i.e. 192.168.1.10), the subnet mask of the ENH210, and the Router which is the ENH210’s IP address, 192.168.1.1. Note: the subnet mask must match that of the ENH210 and the IP address must be on that subnet. - Page 29 Open your web browser. Enter IP 192.168.1.1 into your address bar. If you have changed the ENH210 LAN IP address, make sure to enter the correct IP Address. After successfully connecting to the ENH210, a browser pop-up with a Windows Security notice will appear.
-
Page 30: Status
6 Status The Status section is on the navigation side-bar menu. Selecting it, you will then see four options: Save/Reload, Main, Wireless Client List, and System Log. Each option is described in detail below. 6.1 Save / Load This page allows viewing of the modified settings. The changes will show in the Unsaved changes list. -
Page 31: Main
6.2 Main Click on the Main link under the Status side-bar menu or click Home from the top-right of the webpage. The status that is displayed corresponds with the operating mode that is selected. Information such as operating mode, system up-time, firmware version, serial number, kernel version, and application version are displayed in the System section. -
Page 32: Wireless Client List
Click on the Wireless Client List link under the Status side-bar menu. This page displays the list of Clients that are associated to the ENH210. The MAC addresses and signal strength for each client is displayed. Click on the Refresh button to refresh the client list. -
Page 33: Connection Status
Click on the DHCP Client List link under the Status side-bar menu. This page displays the list of Clients that are associated to the ENH210 through DHCP. The MAC addresses and signal strength for each client is displayed. Click on the Refresh button to refresh the client list. -
Page 34: System
7 System 7.1 Switching the Operation Mode The ENH210 supports 4 modes: Access Point, Client Bridge, WDS Bridge, and Client Router. In order to switch between the operating modes, please go to System -> Operation mode. To begin, view System Properties under System Section. -
Page 35: Wireless Configuration
This section contains the basic wireless settings. Please read the description carefully and consult Chapter 10 for more detailed information. 8.1.1 Access Point Mode While in Access Point mode, the ENH210 functions as a base-station - capable of providing up to 8 SSIDs for wireless client connectivity. - Page 36 Wireless Mode The wireless mode supports 802.11b/g/n mixed operation. Channel HT Mode The default channel bandwidth is 40 MHz. A larger channel can provide better transmit quality and speed, while 20 MHz channel bandwidth affords higher stability at farther distances. Extension Channel When operating with a 40 MHz channel, this specifies which additional wireless channel is to be used.
- Page 37 SSID Specify the SSID for current profile. This is the wireless network name that wireless clients will use to connect to the AP. VLAN ID Specify the VLAN tag for current profile. Only use if configuring multiple SSIDs. Must be using VLAN enabled switches on the network.
-
Page 38: Client Bridge Mode
8.1.2 Client Bridge Mode Wireless Mode The wireless mode supports 802.11b/g/n mixed operation. It is compatible with the most common known wireless bands. SSID Specify the SSID if known. The SSID text box will be automatically filled in when an AP in the Site Survey is selected. Site Survey Use Site Survey to scan nearby APs, and then select the AP to establish a connection. - Page 39 Profile After Site Survey, the webpage will display all of the nearby Access Points. Click the BSSID if you would like to connect with it. Wireless Security Please refer to the Wireless Security section. Refresh Press Refresh to scan again. If the Access Point is suppressing its own SSID, the SSID section will be blank;...
-
Page 40: Wds Bridge Mode
8.1.3 WDS Bridge Mode Wireless Mode The wireless mode supports 802.11b/g/n mixed modes. It is compatible with the most common wireless bands. Channel HT Mode The default channel bandwidth is 40 MHz. A larger channel can provide better transmit quality and speed, while 20 MHz channel bandwidth affords higher stability at farther distances. - Page 41 MAC Address Enter the Access Point’s MAC address that you would like to extend the wireless coverage of into the MAC address filter. Mode Select Disable or Enable from the drop down list. Accept / Cancel Press Accept to confirm the changes or Cancel to return to the previous settings.
-
Page 42: Client Router Mode
8.1.4 Client Router Mode Wireless Mode The wireless mode supports 802.11b/g/n mixed operation. It is compatible with the most common wireless bands. SSID Specify the SSID, if known. The SSID text box will be automatically filled in if an AP in the Site Survey is selected. Site Survey Use Site Survey to scan nearby APs, and then select the AP to establish a connection. - Page 43 Profile After Site Survey, the webpage will display all nearby Access Points. Click the BSSID if you would like to connect with an AP. Wireless Security Please refer to the Wireless Security section, Chapter 8.2. Refresh Press Refresh to scan again. If the Access Point is suppressing its own SSID, the SSID section will be blank;...
-
Page 44: Wireless Security Settings
8.2 Wireless Security Settings Wireless Security Settings section will guide you through the Security configurations: WEP, WPA-PSK, WPA2-PSK, WPA-PSK Mixed, WPA, WPA2, and WPA Mixed. We strongly recommend the use of WPA2-PSK as your security setting. 8.2.1 WEP Security Mode Select WEP from the drop down list. -
Page 45: Wpa-Psk
8.2.2 WPA-PSK Security Mode Select WPA-PSK from the drop down list. Encryption Select Both, TKIP or AES for encryption type. Passphrase Specify the security password. Group Key Update Specify Group Key Update Interval time. Interval The IEEE 802.11n standard does not include WEP/WPA-PSK/WPA-PSK TKIP security mode. -
Page 46: Wpa2-Psk
8.2.3 WPA2-PSK Security Mode Select WPA2-PSK from the drop down list. Encryption Select Both, TKIP or AES for encryption type. Passphrase Specify the security password. Group Key Update Specify Group Key Update Interval time. Interval The IEEE 802.11n standard does not include WEP/WPA-PSK/WPA-PSK TKIP security mode. -
Page 47: Wpa-Psk Mixed
8.2.4 WPA-PSK Mixed Security Mode Select WPA-PSK Mixed from the drop down list. Encryption Select Both, TKIP or AES for encryption type. Passphrase Specify the security password. Group Key Update Specify Group Key Update Interval time. Interval Using WPA-PSK Mixed can allow multiple security modes at the same time. The IEEE 802.11n standard does not include WEP/WPA-PSK/WPA-PSK TKIP security mode. -
Page 48: Wpa
8.2.5 WPA Security Mode Select WPA from the drop down list. Only for Enterprise level security and requires a RADIUS server for authentication. Encryption Select Both, TKIP or AES for Encryption type. Radius Server Specify Radius Server IP address. Radius Port Specify Radius Port number, the default port is 1812. -
Page 49: Wpa2
8.2.6 WPA2 Security Mode Select WPA2 from the drop down list. Only for Enterprise level security and requires a RADIUS server for authentication. Encryption Select Both, TKIP or AES for encryption type. Radius Server Specify Radius Server IP Address. Radius Port Specify Radius Port number, the default port is 1812. -
Page 50: Wpa Mixed
8.2.7 WPA Mixed Security Mode Select WPA Mixed from the drop down list. Encryption Select Both, TKIP or AES for encryption type. Radius Server Specify Radius Server IP Address. Radius Port Specify Radius Port number, the default port is 1812. Radius Secret Specify Radius Secret that is given by the Radius Server. -
Page 51: Wireless Advanced Settings
8.3 Wireless Advanced Settings Data Rate Select Data Rate from the drop down list. Data rate will affect the efficiency of the throughput. A lower data rate will allow for transmissions to travel longer distances. Transmit Power Select Transmit Power to increase or decrease the transmit power. Altering the transmit power will change the wireless coverage area correspondingly;... - Page 52 increase performance by 10% during the data transmission. For example, if the 802.11b/g’s GI is 800μs, the short GI will be 400μs. The shorter guard interval results in a higher packet collision rate when the delay-spread of the channel exceeds the guard interval or if timing synchronization between the transmitter and receiver is not precise.
-
Page 53: Wireless Mac Filter
8.4 Wireless MAC Filter Wireless MAC Filter is used to allow or deny wireless clients, by their MAC addresses, from accessing the network. You can manually add a MAC address to restrict the access permission’s of the client. The default setting is Disable Wireless MAC Filters. ACL Mode ACL Mode can deny or allow specific clients to access the network. -
Page 54: Wds Link Settings
8.5 WDS Link Settings WDS Link Settings is used to establish a connection between Access Points without forgoing Access Point functionality. APs with WDS functionality can extend the wireless coverage and allow LANs to communicate with each other. MAC Address Enter the Access Point’s MAC address that you would like to extend the wireless coverage of into the MAC address filter. -
Page 55: Lan Setup
Please make note of the following: 1. Obtain an IP address automatically is not a DHCP server. This setting allows the ENH210 to automatically request an IP address when it is connected to a device which has a DHCP server. -
Page 56: Spanning Tree Settings
9.2 Spanning Tree Settings Spanning Tree Status Select the Radio button to On or Off to toggle the Spanning Tree function. Spanning Tree may prevent loops in a network when there may be multiple paths that data may travel. Bridge Hello Time Specify Bridge Hello Time in seconds. -
Page 57: Router Settings
10 Router Settings This section is only available for AP Router Mode and Client Router Mode. 10.1 WAN Settings There are four different types of WAN connections: Static IP, DHCP, PPPoE, and PPTP. Please contact your ISP to determine the connection type. 10.1.1 Static IP Select Static IP in WAN connection if your ISP gives all the of the necessary information about IP address, Subnet Mask, Default Gateway, Primary DNS and Secondary DNS. - Page 58 Account Name Specify Account Name that is provided by ISP. Domain Name Specify Domain Name that is provided by ISP. Specify the Maximum Transmit Unit size. EnGenius recommends that it remains in Auto. IP Address Specify WAN port IP address.
-
Page 59: Dhcp (Dynamic Ip)
Specify Account Name which is provided by ISP. Domain Name Specify Domain Name which is provided by ISP. Specify the Maximum Transmit Unit size. EnGenius recommends that it remains in Auto. Get Automatically From Select the Radio button for the DNS servers to be obtained automatically from the DHCP server. - Page 60 Secondary DNS servers manually. Discard Ping on WAN Place a check to Enable or Disable ping from WAN. Accept / Cancel Press Accept to confirm the changes or Cancel to return previous settings. Accept does not apply the changes – you must go to Status -> Save / Load to apply the new settings.
-
Page 61: Pppoe (Point-To-Point Protocol Over Ethernet)
Select PPPoE as your WAN connection type if your ISP provides a Username and Password. If the PPPoE is a DSL service, please remove the PPPoE software from your computer as the software is not necessary with the use of the ENH210. Internet Connection Select PPPoE to begin configuration of the PPPoE connection. - Page 62 Connect on Demand Select the Radio button to specify the maximum idle time. The Internet will disconnect when it reaches the maximum idle time; however, it will automatically connect when a client tries to access the network. Keep Alive Select the Radio button to keep internet connection always on. Specify the redial period for once the Internet connection is lost.
-
Page 63: Pptp (Point-To-Point Tunneling Protocol)
10.1.4 PPTP (Point-to-Point Tunneling Protocol) Select PPTP as your WAN connection type if your ISP provides information regarding: IP Address, Subnet Mask, Default Gateway (Optional), DNS (Optional), Server IP, Username, and Password. - Page 64 Internet Connection Select PPTP to begin configuration of the PPTP connection. Type Specify the Maximum Transmit Unit size. EnGenius recommends that it remains in Auto. IP Address Specify WAN port IP address. IP Subnet Mask Specify WAN IP Subnet Mask.
-
Page 65: Lan Settings (Router Mode)
10.2 LAN Settings (Router Mode) IP Address Specify LAN port IP address. IP Subnet Mask Specify LAN IP Subnet Mask. WINS Server IP Specify WINS Server IP. Use Router As DHCP Place a check to enable the DHCP server. Server Starting IP Address Specify DHCP server starting IP address. -
Page 66: Vpn Pass Through
10.3 VPN Pass Through VPN Pass Through is used to allow certain protocols to be tunneled through an IP network such as PPTP and L2TP, or to implement a secure exchange of packets at the IP Layer such as IPSec. PPTP Pass Through Place a check to enable PPTP protocol passes through WAN. -
Page 67: Port Forwarding
10.4 Port Forwarding Port Forwarding is used to allow public services such as Web Server, Mail Server, or FTP server to be set up. For example: Set up a Web Server on your computer with port number 8080. A visitor on the Internet can access your Web Server by entering WAN Port IP with port number 8080. -
Page 68: Dmz
10.5 DMZ Enabling DMZ will expose the computer which is in the DMZ to the Internet. This feature may be used in scenarios such as Internet Gaming or Video Conferencing. DMZ will forward all the ports to one PC simultaneously. This PC will be vulnerable to any incoming traffic, including unsolicited or malicious traffic, because DMZ opens all of the ports. -
Page 69: Management Settings
11 Management Settings The Management section is on the navigation side-bar menu. You will see seven options: Administration, Management VLAN, SNMP Settings, Backup / Restore Settings, Firmware Upgrade, Time Settings, and Log. Each option is described below. 11.1 Administration Click on the Administration link under the Management menu. This option allows you to create a username and password for the device. -
Page 70: Management Vlan
Please refer to Chapter 6.1 for more information. 2. If you reconfigure the Management VLAN ID, you may lose connection to the ENH210. Verify the DHCP server can support the reconfigured VLAN ID, and then re-connect to the new IP address. -
Page 71: Snmp Settings
11.3 SNMP Settings Click on the SNMP Settings link under the Management menu. This is a networking management protocol used to monitor network-attached devices. SNMP allows messages [called protocol data units] to be sent to various parts of a network. Upon receiving these messages, SNMP-compatible devices [called agents] return data stored in their Management Information Databases. -
Page 72: Backup/Restore Settings
Make sure that to download the appropriate firmware from EnGenius. The upgrade process may take few minutes. Please do not power off the device as this may cause the device to crash or become unusable. The ENH210 will restart automatically once the upgrade is complete. -
Page 73: Time Settings
11.6 Time Settings Click on the Time Settings link under the Management menu. This page allows you to configure the time on the device. You may do this manually or by connecting to a NTP server. Manually Set Date and Manually setup the date and time. -
Page 74: Log
11.7 Log Click on the Log link under the Management menu. This page displays a list of events that are triggered on the Ethernet and Wireless interface. This log can be referred to when an error occurs on the system or when a report needs to be sent to the technical support department for debugging purposes. -
Page 75: Diagnostics
11.8 Diagnostics Click on the Diagnostics link under the Management menu. This function allows you to detect connection quality and trace the routing table to the target. Target IP Specify the IP address you would like to search. Ping Packet Size Specify the packet size of each ping. -
Page 76: Network Configuration Examples
12 Network Configuration Examples This chapter describes the role of the ENH210 with 4 modes. The Access Point mode’s default configuration is a central unit of the wireless network or as a root device of the wired environment. Repeater Mode requires additional configuration. -
Page 77: Client Bridge Mode
The ENH210’s Access Point Mode does not provide a DHCP server so the Wireless Client IP address must be configured manually in Local Area Network Settings. 12.2 Client Bridge Mode Client Bridge Mode functions like a wireless client. It must connect to an Access Point/AP Router to join the network. -
Page 78: Wds Bridge Mode
ENH210’s running on WDS Bridge Mode, which are connected to a main ENH210 that is providing Internet access, also running on WDS Bridge Mode. This is a bridged network; therefore, all nodes on the network can be in the same network IP block. All computers are viewable as if they are in the same location and on the same Ethernet network. -
Page 79: Client Router Mode
12.4 Client Router Mode In the Client Router Mode, the ENH210 has a DHCP Server that allows multiple devices to share the same Internet connection. Connect to an AP/WISP wirelessly and connect to LANs via wired. Client Router Mode is functionally opposite to the AP Router Mode. -
Page 80: Appendix A - Troubleshooting
Appendix A – Troubleshooting This appendix provides problem-solving information you may find useful in case you need to troubleshoot your ENH210. It also includes information about contacting technical support. A.1 Problem Solving Question Answer How do I reset the ENH210? There are two ways to reset the ENH210, a hardware method and a software method. -
Page 81: Contacting Technical Support
The date when you received the product A brief description about the issue and the attempts you tried to resolve it To contact EnGenius Customer Service office in the United States, please use either of the following methods: Email: Support@EnGeniustech.com � Telephone: 1-888-735-7888 ... -
Page 82: Appendix B - Specifications
- Standard 802.3af/at PoE design - Power Adapter 48VAC / 380mA Antenna: - Internal Directional 14dBi Package Contents: - Wireless Long Range 11N AP/CB (ENH210) - PoE Injector (EPE-48GR) - Power Adaptor - 5dBi Omni Antenna - CD with User’s Manual... -
Page 83: Appendix C - Glossary
Waterproof: IP67 Appendix C – Glossary Access Point A base station in a WLAN that act as a central transmitter and receiver of WLAN radio signals. Ad Hoc Network A short-term WLAN framework created between two or more WLAN adapters, without going through an Access Point. - Page 84 A protocol that assigns temporary IP addresses automatically to client stations logging onto an IP network, so the IP addresses do not have to be assigned manually. The ENH210 contains an internal DHCP server that automatically allocates IP address using a user-defined range of IP addresses.
- Page 85 HT mode In the 802.11n system, two new formats, called High Throughput (HT), are defined for the Physical Layer, Mixed Mode, and Green Field. If a system runs 40 HT, two adjacent 20 MHz channels are used. The larger 40 MHz bandwidth can provide better transmit quality and speed.
- Page 86 Remote Authentication Dial-In User Service (RADIUS) Networking protocol that provides centralized authentication, authorization, and accounting management for computers to connect and use a network service. Because of its broad support and ubiquitous nature, the RADIUS protocol is often used by ISPs and enterprises to manage access to the Internet or internal networks, WLANs, and integrated e-mail services.
- Page 87 service for multimedia applications in WLANs. Wireless Client Supplicants Software that runs on an operating system, instructing the wireless client how to use WPA. WPA -Pre-Shared Key (WPA-PSK) WPA-PSK requires a single (identical) password entered into each Access Point, wireless gateway, and wireless client.
-
Page 88: Appendix D - Statements Of Conformity
Appendix D – Statements of Conformity D.1 – Federal Communication Commission Interference Statement This equipment has been tested and found to comply with the limits for a Class B digital device, pursuant to Part 15 of the FCC Rules. These limits are designed to provide reasonable protection against harmful interference in a residential installation. -
Page 89: Industry Canada Statement
D.2 – Industry Canada Statement This device complies with RSS-210 of the Industry Canada Rules. Operation is subject to the following two conditions: (1) This device may not cause harmful interference, and (2) this device must accept any interference received, including interference that may cause undesired operation. -
Page 90: Europe Declaration Of Conformity
D.3 – Europe Declaration of Conformity This device complies with the essential requirements of the R&TTE Directive 1999/5/EC. The following test methods have been applied in order to prove presumption of conformity with the essential requirements of the R&TTE Directive 1999/5/EC: EN60950-1:2006 A11:2009 Safety of Information Technology Equipment EN50385 : 2002... - Page 91 0560 Česky [Jméno výrobce] tímto prohlašuje, že tento [typ zařízení] je ve shodě se základními požadavky a dalšími příslušnými ustanoveními směrnice 1999/5/ES. [Czech] Dansk Undertegnede [fabrikantens navn] erklærer herved, at følgende udstyr [udstyrets [Danish] typebetegnelse] overholder de væsentlige krav og øvrige relevante krav i direktiv 1999/5/EF.
- Page 92 Magyar Alulírott, [gyártó neve] nyilatkozom, hogy a [... típus] megfelel a vonatkozó alapvetõ [Hungarian] követelményeknek és az 1999/5/EC irányelv egyéb elõírásainak. Polski Niniejszym [nazwa producenta] oświadcza, że [nazwa wyrobu] jest zgodny z [Polish] zasadniczymi wymogami oraz pozostałymi stosownymi postanowieniami Dyrektywy 1999/5/EC.
Need help?
Do you have a question about the ENH210 and is the answer not in the manual?
Questions and answers