
Subscribe to Our Youtube Channel
Related Manuals for GE GE PROFILE PDE9900


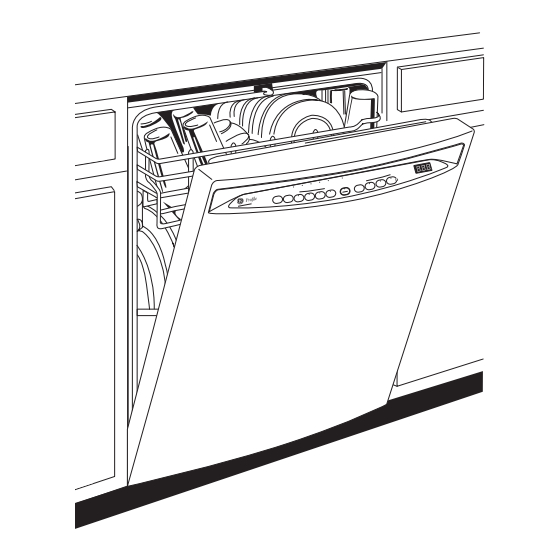
Summary of Contents for GE GE PROFILE PDE9900
- Page 1 GE Consumer & Industrial Technical Service Guide February 2006 GE Profi le Dishwasher PDW8900 Series PDW9700 Series PDW9900 Series 31-9137 GE Appliances General Electric Company Louisville, Kentucky 40225...
- Page 2 If grounding wires, screws, straps, clips, nuts, or washers used to complete a path to ground are removed for service, they must be returned to their original position and properly fastened. GE Consumer & Industrial Technical Service Guide Copyright © 2006 All rights reserved.
-
Page 3: Table Of Contents
Smart Fill System..24 Turbidity Sensor ... 23 Upper Spray Arm ... 21 Using the Dishwasher with the Upper Rack Removed ... 20 Warranty for 2005 Product ...36 Warranty for 2006 and Later Product ... 37 Wash Cycles ... 26 Water Hardness Test and Calibration ... -
Page 4: Nomenclature
Model Designator Designates features – the higher the number, the more features. Nomenclature The serial plate of your dishwasher is lo cat ed on the tub wall just inside the door jam. The mini-manual is located behind the toe plate. -
Page 5: Introduction
• Single Rack Wash - In addition to the two rack wash cycles, this GE Profi le dishwasher has a Single Rack Wash which bypasses the lower spray arm, directing the cleaning power to the up- per rack only. Water is dispensed from the middle and upper wash arms only. -
Page 6: Control Features
Control Settings Status Indicator Lights The Status display tells you what is happening while the dishwasher is in operation and may flash, indicating a malfunction. The lights will come ON indicating the sequence of the dishwasher operation. LOW DETERGENT Displayed when the SmartDispense needs to be refilled with liquid or gel automatic dishwasher SENSING Displayed while the Clean Sensor WASHING Displayed during prewash, main wash and rinse periods. - Page 7 The longer time for this cycle includes a built-in drying portion that is specifically designed to reduce the risk of melting plastic items and improve plastic drying. For removing red tomato-based stains, GE recommends the use of Cascade SINGLE RACK WASH Heavy 6.1 gal., 45 min.
- Page 8 Children cannot accidentally start dishwasher by touching pads with this option selected. To unlock the dishwasher controls, press and hold the HEATED DRY pad for 3 seconds. To lock the dishwasher, press and hold the HEATED DRY pad for 3 seconds. The light above the LOCK pad will turn off.
- Page 9 Water fill begins immediately, and approximately 60 seconds later the wash action begins. When the dishwasher door is fully closed, the control panel lights will display the last settings you selected. If you don’t want to change any of the settings, simply touch the START/RESET pad to begin the cycle.
-
Page 10: Component Locator Views
Component Locator Views PDW8900 Series Shown Inside Cabinet View 1 - Upper Spray Arm, 2 - Middle Spray Arm , 3 - Lower Spray Arm, 4 - Hub, 5 - Filter Screen, 6 - Heating Element, 7 - Float, 8 - Smart Dispense Cap PDW8900 Series Shown Door View (Door Panel and Eschtcheon Keypad... -
Page 11: Bottom View
PDW9000 Series Shown Door View (Door Panel Removed Flapper (Active Vent) Fan Motor Detergent Rinse Module Fan Conduit PDW8900 Series Shown Bottom View Front of Dish wash er Flood Switch Water Valve Wax Motor Drain Pump Drain Line Check Valve Rear of Dish wash er Door Interlock Switch Active Vent Motor... -
Page 12: Dishwasher Components
Dishwasher Components Door Panel PDW9700 Series and PDW9900 Series Note: For top control dishwashers, there must be -inch clearance between the top of the door and the counter top. The door panel covers the main control board, detergent cup, vent fan, motor, louver, wire harness,... -
Page 13: Keypad Assembly
Keypad Assembly PDW9700 Series and PDW9900 Series Top control models have a membrane keypad that is accessed by removing the door panel. (see • When removing the membrane keypad, peel the keypad from right to left. • When installing, make sure the membrane button areas and lights align with the keypad. •... -
Page 14: Water Hardness Test And Calibration
Prior to the fi rst use, this dishwasher must be calibrated for water hardness. This process requires the use of a water hardness test strip (part # WD01X10295). -
Page 15: Smartdispense Tm
Detergent Reservoir Note: The SmartDispense system can only be used with liquid or gel automatic dishwasher detergent. To fi ll the reservoir, push down on the cap covering the reservoir to engage the ratchet, then turn it counterclockwise to open. - Page 16 Detergent Level Sensor The SmartDispense detergent level sensor consists of a single level detection continuity sensor and includes the following components: • a grommet seal • a low detergent LED indicator light • a wire harness. When the detergent in the reservoir drops below the continuity sensor, a signal is sent to the control board and the low detergent LED indicator light is turned on.
- Page 17 Positive Displacement Pump The SmartDispense positive displacement pump consists of a continuous fl exible tube running from the detergent reservoir to the inner door detergent outlet. The tube runs around the inside edge of the pump housing. A 3-roller impeller fi ts tightly into the center of the pump housing with each of the 3 rollers squeezing the sidewall of the tube.
-
Page 18: Customer Purge Of The Bulk Dispenser Tank
These products will produce copious amounts of suds, and water leaks will result every time the dishwasher is run until the tank is emptied. The dishwasher must also be purged if a liquid dishwasher detergent containing chlorine... -
Page 19: Detergent/Rinse Module
Detergent/Rinse Module The door panel must be removed to access the detergent/rinse module. (See Door Panel The detergent rinse module is held in place by 6 Phillips head screws and 2 brackets. Disconnect Bracket The detergent/rinse mod ule au to mat i cal ly dis pens es both the de ter gent and the rinse agent at the ap pro pri ate times. -
Page 20: Using The Dishwasher With The Upper Rack Removed
4. Push the rails all the way back into the dishwasher. 5. Slide the shower nozzle attachment over the spout. 6. The dishwasher is now ready for use. Note: Always use the shower nozzle when the upper rack is removed. Middle Spray Arm 1. -
Page 21: Upper Spray Arm
Fine Filter main body. The fi ll funnel body is held in place by a Assembly nut (located on the inside of the dishwasher). Rotate the nut counterclockwise to remove the main body. Cover Inlet There is a gasket seal be tween the fi ll funnel and dish wash er tub. -
Page 22: Heating Element
J2-7 PURPLE The heating element nuts are located on the underside of the washer, near the back. Ample force is required to remove the nuts. Removing the dishwasher from installation may be required. Heater Grommet – 22 – WHITE Heating... -
Page 23: Turbidity Sensor
Top Control Models) for 3 seconds or until all LEDs turn on. The dishwasher will then perform a series of steps. Once the drain cycle starts, calibration is complete and the Start/Reset pad can be pressed to end the calibration cycle. -
Page 24: Smart Fill System
20 to 120 psi. WHITE The cavitation sensing controls the amount of water for each fi ll. The dishwasher fi lls for 57 seconds, then the pump motor starts. The load on the motor changes as water enters and exits the sump. The electronic control monitors this change as motor current fl... -
Page 25: Water Valve And Flood Switch
The water valve can be replaced with the dish wash er installed. WARNING: Disconnect power to dishwasher before servicing water valve and fl ood switch. The fl ood switch is held in place by 2 Phillips head screws. -
Page 26: Wash Cycles
The display will sequence 999, 888, 777, 666, 555, etc., before running the main pump. • The cycle will end after the main pump stops. The drain cycle will not be energized. • To exit the demo mode, the dishwasher must be disconnected from power. Wash Cycles MAX # OF MAX #... -
Page 27: Control Module Board
Control Module The door panel must be removed to access the control module. (See considered a “smart” control, capable of learning the water temperature and turbidity characteristics of the home. It is normal for the cycle times to vary over a period of time from the factory default settings due to temperature and water quality. -
Page 28: Fan (Pdw9700 And Pdw9900 Series)
Active Vent The active vent consists of the fan, motor, housing, and vent louver motor. The active vent helps to reduce the noise level and heat loss when in the closed position. The control module supplies +/- 12 VDC to the vent louver motor. -
Page 29: Single Rack Wash Tm
Single Rack Wash The Single Rack Wash bypasses the lower spray arm, directing the water fl ow only to the upper rack. A plastic-covered steel ball, released by a wax motor-controlled magnet, is forced by the water fl ow to block the venturi for the lower spray arm. Cleaning power is directed to the top basket ONLY through the middle and upper spray arms. -
Page 30: Wax Motor And Magnet
The wax motor is energized for approximately 1 minute. If the dishwasher door is opened during the Single Rack Wash , the ball will once again be held by the magnet until the wax motor retracts the magnet from the steel ball (approximately 45 seconds). -
Page 31: Door Spring Installation
The PDW9700 Series all have black door springs. They are hooked in the MIDDLE hole of the door cable. Black springs with white painted markings are packaged with the dishwasher for use with heavy door panels. The PDW9900 Series has 1 black door spring hooked... -
Page 32: Service Mode
This dishwasher is programmed with a service mode to aid the technician in troubleshooting the dishwasher. Each component may be cycled to detect if it is functioning correctly. Components are cycled by pressing keypads to the right or the left of the Start/Reset keypad. -
Page 33: Factory Test Mode
10. Active vent opens, drain pump is energized for 75 seconds, then active vent closes. Note: If the calibration test fails, check the following: • Make certain the dishwasher is not located on a non-insulated outer wall where the temperature at the turbidity sensor may be below 42°F. •... -
Page 34: Schematics And Strip Circuits
Schematics and Strip Circuits PDW8900 Series WARNING: Disconnect electrical power before servicing. Caution: Label all wires prior to disconnection. Wiring errors can cause improper and dangerous operation. Verify operation after servicing. – 34 –... - Page 35 PDW9700 Series and PDW9900 Series WARNING: Disconnect electrical power before servicing. Caution: Label all wires prior to disconnection. Wiring errors can cause improper and dangerous operation. Verify operation after servicing. – 35 –...
-
Page 36: Warranty For 2005 Product
Any part of the dishwasher which fails due to a defect in materials or workmanship. During From the date of the this full one-year warranty, GE will also provide, free of charge, all labor and in-home service original purchase to replace the defective part. -
Page 37: Warranty For 2006 And Later Product
This warranty is extended to the original purchaser and any succeeding owner for products purchased for home use within the USA. If the product is located in an area where service by a GE Authorized Servicer is not available, you may be responsible for a trip charge or you may be required to bring the product to an Authorized GE Service location for service.
Need help?
Do you have a question about the GE PROFILE PDE9900 and is the answer not in the manual?
Questions and answers
Is the water full level or timer adjustable .mine ys not getting enough water to wash
The water level is controlled automatically by the electronic control using cavitation sensing and is not user-adjustable. The maximum fill time is limited to 95 seconds, and the tub typically fills with approximately 1.2 gallons of water. The timer for filling is also not adjustable.
This answer is automatically generated