Page 1
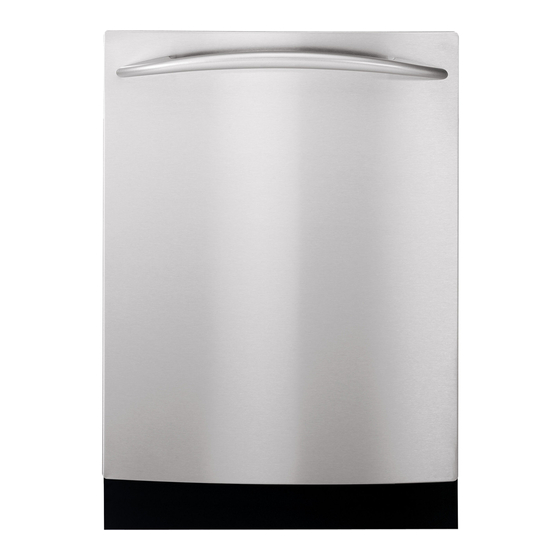
GE Consumer & Industrial TECHNICAL SERVICE GUIDE Top Control Profi le Dishwashers MODEL SERIES: PDW9200 PDW9280 PDW9700 PDW9800 PDW9880 PUB # 31-9113-1 03/04 Replaces PUB # 31-9113...
Table of Contents Active Vent ........................21 Circulation Pump and Motor ....................13 Component Locator Views ....................9 Components ........................11 Control Features ........................5 Control Module ........................19 Control Module Board ......................19 Demo Mode ........................14 Detergent/Rinse Module ....................20 Door Interlock Switch ......................20 Door Panel ........................18 Drain System ........................16 Factory Test Mode ......................23 Fan ...........................21...
Nomenclature Model Number P D W 9 2 0 0 J 0 0 W W Brand Exterior Color P = Profi le BB = Black CC = Bisque SS = Stainless Steel Product Type WW = White DW = Dishwasher II = Integrated* Engineering Model Suffi...
Selections PDW8100–PDW8800 Series: Press the pad for the desired wash cycle. PDW9200–PDW9800 Series: Use the Arrow Pads to scroll through the wash cycles. The light above or next to the selected pad will be ON to indicate which WASH CYCLE has been selected.
Page 6
Light 5.6 gal., 93 min. This cycle is specifically designed to reduce the risk of melting plastic items and improve plastic drying. For removing red tomato-based stains, GE recommends the use of Cascade Plastic Booster ™ RINSE ONLY Heavy 2.9 gal., 7 min.
Page 7
PDW8100–PDW8800 Series: The machine will count down and start automatically at the correct time. PDW9200–PDW9800 Series: After closing the door, the machine will count down and automatically start at the correct time. NOTE: To cancel the DELAY START selection before the cycle begins, press the DELAY START pad until the display is blank.
Page 8
If the door is closed, the indicator lights will turn off if the START/RESET pad is not selected within 2 minutes. To activate the display, open and close the door or press any pad. PDW9200–PDW9800 Series After selecting the cycle and desired enhancements, touch the START/RESET pad to ready the dishwasher to begin the cycle.
Component Locator Views Inside Cabinet View 1 - Upper Spray Arm 2 - Middle Spray Arm 3 - Lower Spray Arm 4 - Hub 5 - Filter Screen 6 - Heating Element 7 - Float Door View ( Panel Removed Door Interlock Switch Vent &...
Page 10
Left Side View Drain Tube Assembly Fill Funnel Fill Hose Door Spring Water Valve Drain Line Check Valve Bottom View Front of Dish wash er Flood Switch Junction Box Water Valve Circulation Pump Motor Sump Drain Pump Turbidity Sensor Drain line Check Heating Element Rear of Dish wash er...
Components Using the Dishwasher with the Upper Middle Spray Arm Rack Removed 1. Check holes in spray arm for bits of china, seeds, and other foreign matter. 1. Unsnap and remove the end cap on each side of the rails. 2.
Lower Spray Arm, Fine Filter, and Inlet Upper Spray Arm Cover Check the holes in spray wash arm for bits of china, seeds, and other foreign matter. Also Check the holes in spray arm for bits of china, check the spray wash arms for rotation. seeds, and other foreign matter.
Wash Cycles MAX # OF MAX # WASH TEMPERATURE WASH TIME FAN ON TIME WASH HEATED CYCLE PRE-WASH RINSE CYCLE DRY TIME HEATED DRY W/O HEATED DRY CYCLES CYCLES Normal Wash Speed Wash Glasses China Crystal Pots & Pans Sani Wash 8+15 Rinse Only Not An Option Not An Option...
The heating element nuts are located on the Heating Element underside of the washer, near the back. Ample force is required to remove the nuts. Removing The heating element can be activated using the dishwasher from installation may be required. Service Mode The dual-wattage heating element produces 875 watts during wash, to help heat the water, and...
Note: If the turbidity sensor circuit fails to open or Turbidity Sensor is shorted, the sensing LED on the control panel will not light, and the unit will operate for the The turbidity sensor is located on the side of the maximum amount of time, using the maximum sump.
The fl ood switch is held in place by 2 Phillips Drain System head screws. The drain system consists of the following com po nents: • Auxiliary drain pump (includes motor and one- way check valve) • Drain tube Flood Switch •...
To replace the transorb, order the kit Water Valve Test WD35X10025. It contains a transorb with two attached butt connectors and instructions. The kit 1. Attempt to activate water valve using Service allows you to splice a new transorb into the wire .
Door Panel The door panel covers the main control board, detergent cup, vent fan, motor, louver, and door-interlock switch. The outer door panel is held in place by 12 screws (5 Phillips head screws per side and two -in. hex head screws at the bottom).
Control Module The door panel must be removed to access the control module (see ). The main control is Door Panel considered a “smart” control, capable of learning the water temperature and turbidity characteristics of the home. It is normal if the cycle times vary over a period of time from the factory default settings due to temperature and water quality.
At the second activation (3), the lever lifts the Detergent/Rinse Module con nect ing rod by the notch. This action lifts the rinse dispenser plunger and re leas es the rinse The door panel must be removed to access the agent.
Note: This also applies to the RINSE ONLY Active Vent cycle. Since heated dry is not an option with RINSE ONLY, the fan will run for approximately 4 The active vent consists of the fan, motor, hours before turning off. housing, and vent louver motor.
Service Mode To enter service mode, press and hold the down arrow and heated dry keypads simultaneously for 3 seconds. All LEDs light for 3 seconds when service mode is entered. To exit service mode press the START/RESET at any time. 6 PAD CONTROL START 2L 1L...
Factory Test Mode Always run the factory test mode to calibrate when replacing the turbidity sensor, control module board, and membrane keypanel. The Factory test mode is the most accurate way to test the turbidity sensor circuit which contains the control module, wiring, and turbidity sensor. Factory test mode will test the thermistor (used for automatic temperature control) that is contained in the turbidity sensor and will test the transmitter that is contained in the turbidity sensor.
Troubleshooting 3-Digit Display Does Not Work Disconnect power to the dishwasher. Access the control circuit board. Remove and reseat the 3-digit display connector. Does the display work? Replace the 3-digit display. Replace the control Does the display work? circuit board. Keypad Does Not Work Disconnect power to the dishwasher.
Strip Circuits DOOR INTERLOCK DOOR INTERLOCK J2-8 NO COM J2-9 WATER VALVE FLOOD WATER VALVE SWITCH J2-2 725-1200 CIRCULATION PUMP MOTOR PUMP J2-1 HEATING ELEMENT HEATING ELEMENT J2-3 J2-4 VENT MOTOR J5-1 J5-2 TURBIDITY SENSOR DRAIN PUMP DRAIN PUMP J2-5 DETERGENT MODULE DETERGENT MODULE J2-6...
Schematic WARNING: Disconnect electrical power before servicing. Caution: Label all wires prior to disconnection. Wiring errors can cause improper and dangerous operation. Verify operation after servicing. TURBIDITY/ CONTROL CIRCUIT BOARD RECEIVER EMITTER TEMPERATURE TRANSMITTER SENSOR KEYPAD CATHODE POWER SWITCHING 3-DIGIT DISPLAY POWER ACTIVE SUPPLY...
Any part of the dishwasher which fails due to a defect in materials or workmanship. During From the date of the this full one-year warranty, GE will also provide, free of charge, all labor and in-home service original purchase to replace the defective part.
Need help?
Do you have a question about the PDW9200 Series and is the answer not in the manual?
Questions and answers