Table of Contents
Advertisement
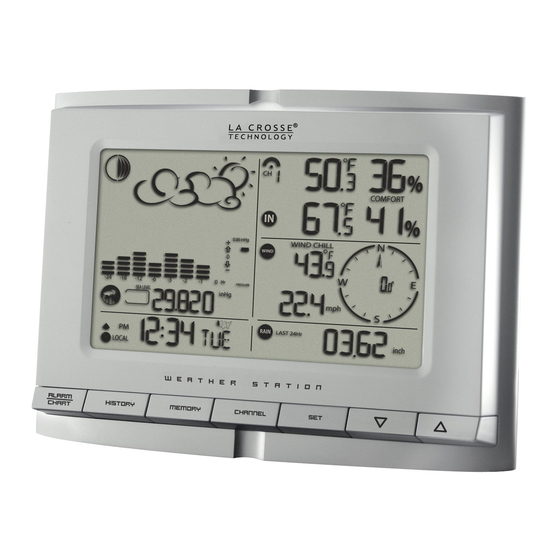
Professional Wireless Weather Station
Model WS-1517 | Instruction Manual
®
La Crosse Technology
, the world leader in atomic time and weather instruments, introduces a Professional Wireless
Weather Station that provides accurate, real-time weather data straight from your backyard. This sleek weather station
offers weather forecasting, indoor/outdoor temperature & humidity, wind & rain data, and precise atomic time & date—all
on one comprehensive device.
1
Advertisement
Table of Contents

Related Manuals for La Crosse Technology WS-1517


Summary of Contents for La Crosse Technology WS-1517
- Page 1 Professional Wireless Weather Station Model WS-1517 | Instruction Manual ® La Crosse Technology , the world leader in atomic time and weather instruments, introduces a Professional Wireless Weather Station that provides accurate, real-time weather data straight from your backyard. This sleek weather station offers weather forecasting, indoor/outdoor temperature &...
-
Page 2: Table Of Contents
Carefully open the package and check that the following contents are complete: Wind Sensor Rain Sensor Thermo-Hygro Sensor Wireless Display TS805 TS906 TS21 WS-1517 • • • 7.5 V AC/DC adapter Requires 4 mounting screws • Wall mount adapter Requires 4 mounting screws •... -
Page 3: Features
Rain Window Rain Statistics Select Rain Display: inches or mm 24 Hour Rainfall Alert Wind Window Wind Display Wind Direction Wind Speed, Wind Gust, Wind Chill Select Wind Speed Unit of Measure: km/h, mph, m/s, knots Wind MAX/MIN Data Set Wind Alerts Disable Wind Alerts Backlight Options Memory Reset Procedure... - Page 4 STEP 1: Complete the initial setup on a table with all components within 10 feet of each other. This allows all the sensors to connect repeatedly with the weather station during setup to lock the signal. STEP 2: Wind Wind Cups 1.
- Page 5 result in permanent damage to the weather station. During the setup process, place the wireless display and the outdoor sensors on a surface with 5-10 feet between each sensor and the display. STEP 5: Weather Station 1. Connect 7.5 V A/C adapter provided, to the weather station and plug into to the wall power outlet. Note: The A/C adaptor connection is required for automatic backlight control to function.
-
Page 6: Lcd Screen
Wind icon Rain icon Buttons Note: This weather station has a channel button and the ability to read additional outdoor sensors. La Crosse ® Technology does not plan to sell these additional outdoor temperature and humidity sensors. Therefore the CHANNEL button has no function on this weather station. -
Page 7: Set Calendar
3. Press the SET button to confirm the city selection and move to calendar settings. Note: You can stop here and allow the radio-controlled time signal from the atomic clock in Ft. Collins, Colorado to set the time and date. Calendar Settings 1. -
Page 8: Wwvb Radio-Controlled Time Signal
WWVB Radio-controlled Time Signal The radio controlled weather station searches for, and periodically synchronizes to, the NIST (National Institute of Standards and Technology) atomic clock signal transmitted from Ft. Collins, Colorado, throughout the entire continental United States. The NIST radio station, WWVB, is located in Ft. Collins, Colorado and transmits the exact time signal continuously throughout the United States at 60 kHz. -
Page 9: Activate/Deactivate Alarm
Note: Press the SET button anytime during alarm programming mode to return to the default clock display. Snooze Function When either alarm sounds, press the LIGHT/SNOOZE button to activate the snooze feature for the time interval set. Note: The alarm will automatically “snooze” if no buttons are pressed after the alarm sounds for 2 minutes. This will occur three times only. -
Page 10: Local-Change Or Set Altitude
6. Set the altitude value with the UP or DOWN arrow buttons. 7. Hold the UP or DOWN arrow button for faster digits advancement. 8. Press the SET button to confirm your selection. Changing or Setting Sea Level Pressure 1. Press the SET button until the local pressure with the word “SEA LEVEL” is displayed. 2. -
Page 11: Moon Phase
For every sudden or significant change in the air pressure, the forecast icons will update accordingly to represent the change in weather. If the icons do not change, then it means either the air pressure has not changed or the change has been too slow for the weather station to register. -
Page 12: Temperature And Humidity Window
(1 remote sensor is included). • There are no additional thermo-hygro sensors available for purchase. • ® La Crosse Technology does not plan to carry add-on sensors. • The TS21 thermo-hygro sensor will not read to other channels. • The channel indicator will stay at CH 1. -
Page 13: Set Temperature Alarms
1. With temperature and humidity icon flashing, press and release the ALARM/CHART button once selecting the desired alarm limit–-Upper or Lower 2. Hold the ALARM/CHART button until the temperature alarm icon starts flashing. 3. Use the UP or DOWN arrows to select the temperature alarm value. Press and hold either button for fast digits advance. -
Page 14: Select Rain Display: Inches Or Mm
View: With the rain icon flashing, press either the SET or the MEMORY button to recall a rain statistics for the past hour, past 24 hours, yesterday, past week or past month. Note: Last Hour rainfall value is displayed as a rate of rain in either “inch/hr.” or “mm/hr.” Reset: With the rain icon flashing, press and hold the MEMORY button to reset all rainfall statistics. -
Page 15: Wind Direction
Wind Direction Wind Direction is set to North during setup. Failure to set the wind direction or mount the wind sensor facing north will result in incorrect wind direction readings. If your wind direction is incorrect, follow the instructions in step 6 of the “Setup Instructions Step-by-step”... -
Page 16: Disable Wind Alerts
The weather station includes a light sensor that detects low light conditions and will turn the backlight on automatically (A/C power cord use required). When operating with the optional A/C power cord, the weather station backlight can be turned ON, OFF or automatic (depending on light conditions). -
Page 17: Position Sensors Outside
Positioning Sensors Outside • Each sensor reads to the weather station independently. • Consider the location of the weather station in the house and in relation to each sensor outside. • The transmission range is 100 ft (30 m) open air, between each sensor and the weather station. •... -
Page 18: Rain
Rain • Make sure that the rain sensor is level. Look inside; there is a built-in level to assist in mounting. Make sure the bubble is centered in the level. • Place the protective screen over the top to protect the rain sensor from the debris. •... -
Page 19: Specifications
Specifications Radio Frequency: 433 MHz RF Reception range: 100 feet (30 m) open air Barometric Pressure Measuring Range: 14.75 inHg to 32.44 inHg (500 hPa to 1100hPa); (374.5 mmHg to 823.8 mmHg) Resolution: 0.003 inHg (0.1 hPa, 0.08 mmHg) Operating range: 100 feet (30 m) open air Sampling interval: 20 minutes... -
Page 20: Warranty Information
La Crosse Technology, Ltd or La Crosse Technology, Ltd’s authorized service center. La Crosse Technology, Ltd will repair or replace this product, at our option and at no charge as stipulated herein, with new or reconditioned parts or products if found to be defective during the limited warranty period specified above. All replaced parts and products become the property of La Crosse Technology, Ltd and must be returned to La Crosse Technology, Ltd. -
Page 21: Fcc Statement
Contact Support: 1-608-782-1610 Product Registration: www.lacrossetechnology.com/support/register Online at: http://www.lacrossetechnology.com/1517 FCC Statement RF Exposure mobile: The internal / external antennas used for this mobile transmitter must provide a separation distance of at least 20 cm (8 inches) from all persons and must not be co-located or operating in conjunction with any other antenna or transmitter." Statement according to FCC part 15.19: This device complies with Part 15 of the FCC Rules. - Page 22 Pacific, Mountain, Central and Eastern time zones will display a map of the USA. Time Time Time Zone Other Zone Other Zone Offset Countries Offset Countries Offset North America Code Code Code Las Vegas, NV Addis, Ababa, Ethiopia Kingston, Jamaica La Angeles, CA Adelaide, Australia Osaka, Japan...
Need help?
Do you have a question about the WS-1517 and is the answer not in the manual?
Questions and answers
wind window not working
The wind window on the La Crosse Technology WS-1517 may not be working because the wind cups are not securely mounted or have dropped, causing the wind speed to show 0.00. Even if the wind direction works, incorrect installation of the wind cups can prevent speed readings. Ensure the wind cups are properly aligned, tightened, and can spin freely.
This answer is automatically generated