Table of Contents
Advertisement
Advertisement
Table of Contents

Subscribe to Our Youtube Channel
Related Manuals for Telefunken Digiframe 7002


Summary of Contents for Telefunken Digiframe 7002
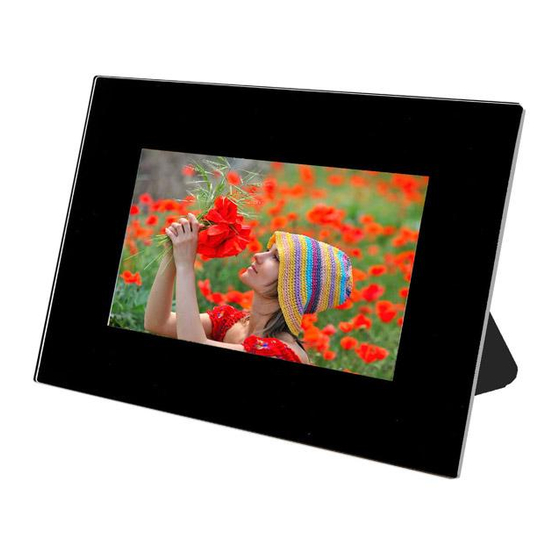
- Page 1 Digiframe User guide Model 7002...
-
Page 2: Table Of Contents
Digiframe [Type some text] Digital photo frame INSTALLATION ................3 1. Contents ......................3 2. Description of the frame ..................4 3. Installing the frame..................... 9 a. Adjusting the stand .................... 9 b. Wall fixing ......................9 USING YOUR DIGIFRAME ............10 1. - Page 3 Digiframe [Type some text] Digital photo frame i. Reset ........................ 27 2. Photo menu ...................... 28 a. Thumbnails menu .................... 29 b. Images menu ....................33 3. Music menu ...................... 39 a. Selecting files ....................40 b. Copying files ....................40 c.
-
Page 4: Installation
Digiframe [Type some text] Digital photo frame Congratulations! You have just purchased a TELEFUNKEN DIGIFRAME 7’’. Please read the instructions and advice contained in this document carefully before using your digital photo frame. Important: keep the packaging and all the items it contains. -
Page 5: Description Of The Frame
Digital photo frame Description of the frame Your TELEFUNKEN DIGIFRAME is composed of a removable acrylic front, a mains adaptor, a remote control and an LCD screen equipped with 2 USB ports and a multi-card reader that is compatible with most memory cards on the market. - Page 6 Digiframe [Type some text] Digital photo frame Card reader Slot 2 CF cards Slot 1 SD, mini SD, XD, MS cards USB Port Mini USB port Socket for mains power supply Non binding document, subject to modification in the event of misprint(s) –...
- Page 7 Digiframe [Type some text] Digital photo frame Back of frame Contrast Menu access buttons Loud speakers Cursor On/Off Adjustable stand Non binding document, subject to modification in the event of misprint(s) – MKG0308...
- Page 8 Digiframe [Type some text] Digital photo frame Frame keys Scrolling keys Validation Exit Non binding document, subject to modification in the event of misprint(s) – MKG0308...
- Page 9 Digiframe [Type some text] Digital photo frame Description of the remote control Access to the Exit menu Accept Right/Left Up/Down Start slideshow Volume Zoom Rotation Non binding document, subject to modification in the event of misprint(s) – MKG0308...
-
Page 10: Installing The Frame
Digiframe [Type some text] Digital photo frame Installing the frame Adjusting the stand You can adjust the angle of your DIGIFRAME by pulling on the adjustable stand. Choose the angle that suits you from 6 different levels (fig. 1). To do this, lift the support, squeeze the notches and pull on the support to achieve the angle of your choice. -
Page 11: Using Your Digiframe
Digiframe [Type some text] Digital photo frame USING YOUR DIGIFRAME 1. Inserting a card Insert the memory card containing the pictures you want to display into one of the slots provided (fig 2). Slot 1: for SD, mini SD, MMC, XD, Memory Stick, Memory Stick Pro, Memory Stick Duo or Memory Stick Pro Duo cards Slot 2: for Compact Flash or MD cards DIGIFRAME reads basis JPEG images, that is to say images as taken by digital... -
Page 12: Switching On The Power
Digiframe [Type some text] Digital photo frame DIGIFRAME can also read MP3 audio files, as well as video files in the Motion JPEG, AVI formats. Switching on the power Plug one end of the mains adaptor into the socket provided on the DIGIFRAME then plug the other end into your power outlet. -
Page 13: Photo, Music, Video Selection
Digiframe [Type some text] Digital photo frame With the frame When the frame is in slideshow mode and is displaying your photos, press the key three times. The screen opposite appears (fig. 3). Select the source for the slideshow you want (card or internal memory) with the buttons, then press the key: the mode selection screen is displayed (Fig 4). -
Page 14: Choosing A Slideshow
Digiframe [Type some text] Digital photo frame With the frame When the frame is in slideshow mode and is displaying your photos, point the remote control towards the frame and press the key twice: the frame then displays the mode selection screen (Fig. 4). Select the mode you want using the keys on the remote control, then press the key. -
Page 15: Multiple Display
[Type some text] Digital photo frame Multiple display The TELEFUNKEN DIGIFRAME has an exclusive function: multiple display. This mode allows you to display 2, 3 or 4 pictures simultaneously depending on their orientation (vertical or horizontal). With the remote control When the menu is displayed, select the "Multiple display"... -
Page 16: Enabling/Disabling Sound
Digiframe [Type some text] Digital photo frame Using the arrow keys, select the option you want. If you choose the "Enable" option, multiple display will be selected. If you choose the "None" option, standard full-screen display will be enabled. Press the to confirm your choice, then twice on the key to exit the menu. - Page 17 Digiframe [Type some text] Digital photo frame With the frame When the frame is in slideshow mode and is displaying your photos, press the key twice to display the mode selection screen, then once more for one second to display the menu. Use the keys until the "Musical slideshow"...
-
Page 18: Settings
Digiframe [Type some text] Digital photo frame III. SETTINGS Main menu With the remote control When the frame is in slideshow mode and is displaying your photos, press the "Exit" key twice to display the mode selection screen. Then press the "Menu" key: this is then displayed. With the frame When the frame is in slideshow mode and is displaying your photos, press the key twice to display the mode selection screen. -
Page 19: Image Size
Digiframe [Type some text] Digital photo frame a. Image size The height/width ratio of the DIGIFRAME 7 inch frame is 16:9. This means that pictures with another ratio (4:3 for photos taken using compact digital cameras, or 3:2 for most digital SLR cameras) will not be fully displayed. The top and bottom of the image will be cropped. -
Page 20: Transitions
Digiframe [Type some text] Digital photo frame With the frame When the menu is displayed, use the keys, until the "Image size" line (fig. 8) is highlighted in blue. Press the key in order to display the options, then using the keys, select the option you want. -
Page 21: Display Time
Digiframe [Type some text] Digital photo frame Press the "Enter" key to display the options, then using the "Up/Down" arrows, select the transition you want. Press "Enter" to confirm your choice, then twice on the "Exit" key to exit the menu. Then press the "Slideshow" key to restart the slideshow. - Page 22 Digiframe [Type some text] Digital photo frame With the remote control When the menu is displayed, use the "Up/Down" keys, until the "Slideshow speed" line (fig. 10) is highlighted in blue. Press the "Enter" key to display the options, then using the "Up/Down" arrows, select the speed you want.
-
Page 23: Musical Slideshow
Digiframe [Type some text] Digital photo frame d. Musical slideshow As DIGIFRAME includes a Sound function you can enhance your slideshow with a musical background. The frame plays the audio files stored on your medium while showing the pictures. With the remote control When the menu is displayed, use the "Up/Down"... -
Page 24: Random Slideshow
Digiframe [Type some text] Digital photo frame then the key twice to exit the menu. Then press the "Enter" key. Press the key for 5 seconds to restart the slideshow. e. Random slideshow By default, DIGIFRAME displays the images in the order in which they were stored in its internal memory or saved on the memory card. -
Page 25: Video Repeat
Digiframe [Type some text] Digital photo frame With the frame When the menu is displayed, use the keys, until the "Random slideshow" line (fig. 12) is highlighted in blue. Press the key in order to display the options, then using the keys, select the option you want. -
Page 26: Audio Repeat
Digiframe [Type some text] Digital photo frame With the frame When the menu is displayed, use the keys, until the "Video repeat" line (fig. 13) is highlighted in blue. Press the key in order to display the options, then using the keys, select the option you want. -
Page 27: Energy Saving
Digiframe [Type some text] Digital photo frame With the frame When the menu is displayed, use the keys, until the "Audio repeat" line (fig. 14) is highlighted in blue. Press the key in order to display the options, then using the keys, select the option you want. -
Page 28: Reset
Digiframe [Type some text] Digital photo frame With the frame When the menu is displayed, use the keys, until the "Energy saving" line (fig. 15) is highlighted in blue. Press the key in order to display the options, then using the keys, select the option you want. -
Page 29: Photo Menu
Digiframe [Type some text] Digital photo frame With the frame When the menu is displayed, use the keys, until the "Reinitialisation" line (fig. 16) is highlighted in blue. Press the key in order to display the options, then using the keys, select the option you want. -
Page 30: Thumbnails Menu
Digiframe [Type some text] Digital photo frame a. Thumbnails menu With the remote control When the screen displays images in the form of thumbnails, press the “Setup” key to display the context sensitive menu. Three options are available from this menu: Starting the slideshow, copying photos, deleting photos. - Page 31 Digiframe [Type some text] Digital photo frame • Starting the slideshow With the remote control Fig.17 When the context sensitive menu is displayed, select the "Start slideshow" line (Fig. 17) using the "Up/Down" arrows, then press the "Enter" key the slideshow starts.
- Page 32 Digiframe [Type some text] Digital photo frame Select the "Copy selected image" line, then press "Enter" to confirm your choice. The image is copied into your internal memory. You also have the option of copying the whole contents of your medium (within the limits of the capacity of the internal memory).
- Page 33 Digiframe [Type some text] Digital photo frame • Deleting photos With the remote control When the menu is displayed, first select the photo you want to delete using the "Right/Left-Up/Down" keys (the image selected is framed in blue), then select the Fig.19 "delete photo"...
-
Page 34: Images Menu
Digiframe [Type some text] Digital photo frame You also have the option of deleting all the images from your internal memory. You just need to select the "Delete all" line. b. Images menu When you display a full-screen image manually, you have access to another context sensitive menu. - Page 35 Digiframe [Type some text] Digital photo frame • Rotation With the remote control When the image you have chosen is displayed in full-screen mode, press the "Rotate" key on the remote control as many times as is required to display the image in the desired orientation.
- Page 36 Digiframe [Type some text] Digital photo frame • Zoom With the remote control When the image you have chosen is displayed in full-screen mode, press the "Zoom" key on the remote control as many times as is required to obtain the result you desire.
- Page 37 Digiframe [Type some text] Digital photo frame With the remote control When the image you have chosen is displayed in full-screen mode, select the "Copy photo" line (Fig. 22) using the "Up/Down" keys on your remote control, then press the "Enter" key: your image is copied into internal memory. With the frame Fig.22 When the image you have chosen is displayed in full-screen mode, press the...
- Page 38 Digiframe [Type some text] Digital photo frame • Deleting photos You can also delete the image being displayed if it is in the DIGIFRAME'S internal memory. With the remote control When the image you have chosen is displayed in full-screen mode, select the "Delete photo"...
- Page 39 Digiframe [Type some text] Digital photo frame • Brightness/contrast/colour/hue settings In order to obtain the best possible results, you can adjust the brightness, contrast, colour and hue of the DIGIFRAME. With the remote control When the image you have chosen is displayed in full-screen mode, press the "Setup"...
-
Page 40: Music Menu
Digiframe [Type some text] Digital photo frame Music menu With the remote control When the frame is in slideshow mode and is displaying your photos, press the "Exit" key twice to display the mode selection screen. Using the “Right/Left” keys, select the "Music"... -
Page 41: Selecting Files
Digiframe [Type some text] Digital photo frame a. Selecting files With the remote control When the list of audio files is displayed, select the one you want to play using the "Up/Down" keys, then press "Enter": the file starts to play. With the frame When the list of audio files is displayed, select the one you want to play using the keys, then press... -
Page 42: Deleting A File
Digiframe [Type some text] Digital photo frame With the remote control When the list of audio files is displayed, select the file you want to copy using the "Up/Down" keys, then press the "Setup" key to display the menu. Select the Fig.26 "Copy file"... - Page 43 Digiframe [Type some text] Digital photo frame With the remote control Fig.27 When the list of audio files is displayed, select the file you want to delete using the "Up/Down" keys, then press the "Setup" key to display the menu. Select the "Delete file"...
-
Page 44: Video Menu
Digiframe [Type some text] Digital photo frame Video menu With the remote control When the frame is in slideshow mode and is displaying your photos, press the "Exit" key twice to display the mode selection screen. Using the “Right/Left” keys, select the "Video"... -
Page 45: Copying Files
Digiframe [Type some text] Digital photo frame With the frame When the list of video files is displayed, select the one you want to play using the keys, then press : the file starts to play. b. Copying files You have the option of copying a video file from your removable medium (memory card, USB stick) to your DIGIFRAME'S internal memory. - Page 46 Digiframe [Type some text] Digital photo frame With the frame When the list of video files is displayed, select the file you want to copy using the keys, then press the key for one second to display the menu. Select the "Copy file"...
-
Page 47: Files Menu
Digiframe [Type some text] Digital photo frame With the frame When the list of video files is displayed, select the file you want to delete using keys, then press the key for one second to display the menu. Select the "Delete file" list (Fig. 29) using the keys, then press : your file is deleted from the internal memory. -
Page 48: Selecting Files
Digiframe [Type some text] Digital photo frame With the frame When the frame is in slideshow mode and is displaying your photos, press the key twice to display the mode selection screen. Using the keys, select the "Files" icon: a list of files (photo, video, audio) present on your medium is displayed. -
Page 49: Copying Files
Digiframe [Type some text] Digital photo frame b. Copying files You have the option of copying a file from your removable medium (memory card, USB stick) to your DIGIFRAME'S internal memory. With the remote control When the list of files is displayed, select the file you want to copy using the Fig.30 "Up/Down"... -
Page 50: Deleting Files
Digiframe [Type some text] Digital photo frame c. Deleting files You also have the option of deleting a file from your DIGIFRAME'S internal memory. With the remote control Fig.31 When the list of files is displayed, select the file you want to delete using the "Up/Down"... -
Page 51: Calendar/Clock Menu
Digiframe [Type some text] Digital photo frame Calendar/Clock menu Your DIGIFRAME also has a calendar/clock/alarm function. With the remote control When the frame is in slideshow mode and is displaying your photos, press the "Exit" key twice to display the mode selection screen. Using the “Right/Left” keys, select the "Clock"... - Page 52 Digiframe [Type some text] Digital photo frame a. Setting the date and time Warning! This function can only be configured using the remote control. Fig.32 When the calendar screen is displayed, press the "Setup" key: the menu is displayed. Select the "set time" line (Fig. 32) using the "Up/Down" keys, then confirm your choice by pressing the "Enter"...
-
Page 53: Connecting To A Computer
Digiframe [Type some text] Digital photo frame c. Displaying the slideshow In calendar display mode, you have the option of displaying a slideshow of the images in the internal memory. When the calendar screen is displayed, press the "Setup" key: the menu is Fig.34 displayed. - Page 54 Digital photo frame In fact, software incompatibilities or hardware conflicts may occur at the time of connection. TELEFUNKEN cannot be responsible under any circumstances for an unsuitable configuration. A USB 2.0 port offers you the best transfer speed, but the DIGIFRAME will also work with a USB 1.1 port.
-
Page 55: Maintenance
Digiframe [Type some text] Digital photo frame MAINTENANCE Warning! Make sure the DIGIFRAME is switched off before cleaning it. Never use a spray or liquid cleaner directly on the frame or on the plastic case. To clean your DIGIFRAME, you can remove the surround. To do this, press the lug on the left-hand side of your frame (fig. -
Page 56: F.a.q
Digiframe [Type some text] Digital photo frame F.A.Q. Q: I inserted a memory card into my DIGIFRAME but the frame cannot read it. What should I do? A: Make sure that the card format is compatible with the frame. Then make sure that the card is properly inserted into the appropriate slot. -
Page 57: Safety And Guarantee
Digiframe [Type some text] Digital photo frame VII. SAFETY AND GUARANTEE Handle the digital photo frame with care and avoid touching the screen; finger marks are difficult to remove. Always place the digital photo frame on a flat, stable surface to make sure it doesn't fall over and get damaged. - Page 58 Digiframe [Type some text] Digital photo frame Ventilation The memory card slots and other openings allow the frame to be ventilated. In order to ensure your frame works at its best and to prevent overheating, these openings should not be obstructed or covered. Keep the frame a sufficient distance from the wall to aid ventilation.
- Page 59 Digiframe [Type some text] Digital photo frame Guarantee period This digital frame comes with a 12 month guarantee. The guarantee period starts on the date you purchase the frame. The guarantee must be proved by presentation of the original invoice or receipt showing the date and model purchased.
- Page 60 Digiframe [Type some text] Digital photo frame No claim can be made under the guarantee if the digital frame's serial number has been changed, removed, erased or made illegible. No claim can be made under the guarantee if the digital frame has been repaired, altered or modified by the purchaser or any other repairer who is not officially approved and qualified The manufacturer does not guarantee the technical properties described in this...
-
Page 61: Technical Specification
[Type some text] Digital photo frame VIII. TECHNICAL SPECIFICATION Model No.: 7002 Product: Digital photo frame with a 7 inch screen Resolution: 480 x 234 pixels JPEG, MP3, Motion JPEG, AVI compatible *Compatible cards: Memory Stick, Memory Stick Pro, SD, Mini SD, Compact Flash, XD and MMC. -
Page 62: Glossary
Digiframe [Type some text] Digital photo frame GLOSSARY Memory card : A memory card is a storage medium used particularly by digital cameras for storing photos (it has replaced the film used in traditional cameras). In the case of video cameras, memory cards are only used for storing still images: video sequences are stored on media more suited to their size (see DV). - Page 63 Digiframe [Type some text] Digital photo frame Jpeg: The .Jpeg format is an image compression format. Compression results in a certain loss of quality, however, the difference between the original and the compressed image is not generally visibly when good quality compression is chosen.
- Page 64 Digiframe [Type some text] Digital photo frame Peripheral: The hardware (keyboard, printer, modem, camera...) connected to a computer via a communication port (serial, parallel, USB...) for entering or transmitting data. Pixel (Picture Element): This is the unit of display of a computer image, the intersection between a line and a column.
- Page 65 Digiframe [Type some text] Digital photo frame USB: Universal Serial Bus. This communication port is characterised by a high transfer speed (12 Megabits/second), about 50 to 100 times faster than the speed of a traditional serial port (RS-232C). The transfer of the contents of a 64 MB memory card is therefore restricted to a few tens of seconds.
Need help?
Do you have a question about the Digiframe 7002 and is the answer not in the manual?
Questions and answers