Table of Contents
Advertisement
Quick Links
Download this manual
See also:
Instruction Manual
Advertisement
Table of Contents

Subscribe to Our Youtube Channel
Related Manuals for Telefunken DPF 9332


Summary of Contents for Telefunken DPF 9332
-
Page 2: Table Of Contents
DIGITAL PHOTO FRAME OPERATING INSTRUCTIONS TELEFUNKEN DPF 9332 DIAMOND Learn about and install your frame ..............2 1. Box contents ......................2 2. Frame diagrams.......................3 3. Remote control......................3 4. Installation .......................4 1 B U se your frame....................4 1. Selecting a language ....................4 2. -
Page 3: Learn About And Install Your Frame
Learn about and install your frame Thank you for your recent purchase of a TELEFUNKEN “DIAMOND Series” digital photo frame. Before using your device, please consult these operating instructions and keep them so you may refer to them later. -
Page 4: Frame Diagrams
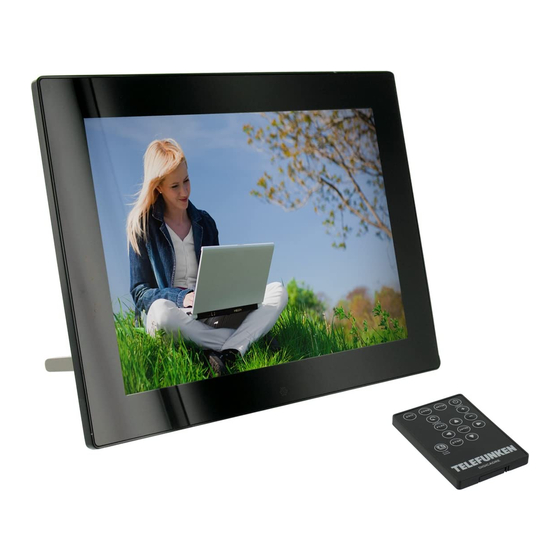
Frame diagrams Remote control All functions can be accessed with the remote control. Press the following keys to access the functions: Function ▲ Navigation up in the menus ◄ Navigation left in the menus and skip to the previous file (photo, music or movie) ▼... -
Page 5: Installation
Installation Take your frame and its accessories out of their packaging. Remove the plastic film protecting the front of the frame. Pull the plastic tab protecting the contacts in the remote control. Stand the frame in the desired location, pulling the adjustable stand towards you (see diagram above). -
Page 6: Reading A Memory Card Or A Usb Key
Caution: Depending on where you place the frame (for example, in furniture or under a shelf), there may not be enough light to turn on the frame or it may unexpectedly turn off. To reactivate it, simply bring into bright light for 2-3 seconds. -
Page 7: Photos
Photos Press EXIT on your remote as many times as necessary for the media selection screen to come up. Press ▲/▼ on the remote to select the media you want to play. Press ◄/► to select Photo. Press ENTER to access the photos in thumbnail mode. Press ENTER again to start playback. -
Page 8: Calendar
During playback, press ▲/▼ to select previous or next music. Press to adjust the volume, or press MUTE to mute/unmute. Press ENTER key to pause, press again to resume. Press EXIT to exit the mode. Calendar Press EXIT on your remote as many times as necessary for the media selection screen to come up. -
Page 9: Deleting Photos
2. Press ▼ to select the internal memory or removable media storing the photos to be copied. 3. Press ◄/► to select Photo mode and press ENTER. 4. Press ▲/▼/◄/► to select the single photo you want to copy. 5. Press COPY/DEL. The screen will display COPY/DELETE/SORT. Press ◄/► to select COPY and press ENTER. -
Page 10: W I-Fip
5. Press ▼ to select 6 PIC, 12 PIC or 30 PIC to display 6, 12 or 30 thumbnails and press ENTER to confirm. ® W I-FI ® Before first time using the Wi-Fi function of the photo frame, follow the steps below to set up the Wi-Fi connection and make the required account configurations, so that you can use the available web services in Wi-Fi List. - Page 11 After entering the correct password “Your Connection is successful” will be displayed. If you enter a wrong password “Connection failure Please try again” will be displayed. - Once the connection is established, the icon will be flashing in the top right corner of the screen. The IP address, Gateway, DNS server and MAC address will be shown at the bottom of the screen.
-
Page 12: Accounts Configuration
Tips: On-screen keyboard use - Press the ◄/►/▲/▼ to select an item, press ENTER to confirm. - Select NEXT and press ENTER to move the cursor forwards. - Select Prev and press ENTER to move the cursor backwards. - To go to the next field or move among fields, select Done and then press ENTER. - Select and press ENTER to cancel your last input. - Page 13 Configuring your Flickr™ account Note: Before making the following configurations, you need to sign up for a Flickr™ account on Internet. Go to w ww.flickr.com H T U - Press EXIT on your remote as many times as necessary for the media selection screen to come up. - Press ◄/►...
-
Page 14: Applications Over Wi-Fi
Gmail™ (Referred to as Google Mail in some countries/regions) POP Serv: pop.gmail.com POP Port: SSL: 1 (Non-zero = Yes, 0 = No) SMTP Serv: smtp.gmail.com SMTP Port: Your Gmail account (no need to enter @gmail.com) Account: Password: Your password Depending on server settings, emails may be deleted from server after received by the photo frame. If you want to use other email account, please contact your network administrator or network service provider for the email settings. - Page 15 The Photo frame will automatically check for incoming Emails every 5 minutes. When you have incoming photo email(s), the “Downloading E-mail images …” message appears. Once the download completes, downloaded photo(s) will be saved into the internal memory of the photo frame. After receiving an Email a list of Emails is displayed.
- Page 16 Using Picasa™ Press ▼ to highlight Picasa and press ENTER. The screen will display public web albums that have been created on your Picasa™ account. Press ▲/▼/◄/► to select an album if you have multiple ones. Press ENTER to enter the selected album. - To play photos in full screen single photo mode, press ENTER.
-
Page 17: S Ettings
S ettings In the main menu, press the ◄/► to select Settings and press ENTER to enter the setup menu. You can also access the settings menu by simply pressing the SETUP key on your remote. When you are in the settings menus, the ▲/▼... - Page 18 Left to Right Horizontal open Horizontal close To go back to the main Settings menu, press EXIT on the remote. Date & Time setting Press ▲/▼ to highlight Date & Time setting and press ENTER. Press ▲/▼ to choose between the below settings, and press ENTER to confirm: ...
- Page 19 To go back to the main Settings menu, press EXIT on the remote. On/Off schedule This setting lets you activate or disable programmed automatic start-up for your TELEFUNKEN frame. Press ▲/▼ to highlight On/Off schedule and press ENTER. Press ▲/▼ to choose between the below settings, and press ENTER to confirm: ...
- Page 20 Photo view options Press ▲/▼ to highlight Photo view options and press ENTER. Press ▲/▼ to choose between the below settings, and press ENTER to confirm: Original Fit to screen Press ◄/► to adjust the value of the selected setting. To go back to the main Settings menu, press EXIT on the remote.
-
Page 21: C Onnecting To A Computer
C onnecting to a computer It is possible to transfer files to the frame by connecting it to your personal computer. To do so, connect your frame via USB cable (mini-USB port on the frame, and standard USB port for the computer) to the computer, then turn on your frame: the screen will show “PC connection...”... -
Page 22: S Afety Instructions
VII. S afety instructions Handle the digital photo frame with care, and avoid touching the screen; fingerprints are difficult to remove. Always set the digital photo frame on a flat and stable surface to prevent it from falling and being damaged. Avoid exposing the digital photo frame to the sun or high temperatures, as these may damage the frame or reduce its operational life. -
Page 23: W Arranty
VIII. W arranty The warranty does not cover damage caused if you (or any unauthorized person) tried to repair the frame. If the frame is emitting smoke, noise, or an unusual smell, immediately turn it off and unplug it. Contact your store. -
Page 24: Non Contractual Document Subject To Change In Case Of Typographical Errors (Mktg0810) Copyright Sopeg
The warranty does not cover damage caused by outside elements, like lightning, water, or fire, or any other damage caused during transport. No warranty coverage may be claimed if the digital frame’s serial number has been modified, removed, erased, or made illegible. No warranty coverage may be claimed if the digital frame has been repaired, altered, or modified by the buyer or any repair personnel not officially qualified and authorized. -
Page 25: S Pecifications
Picasa and Gmail are trademarks of Google, Inc., registered in the U.S. and other countries. All other product or service names are the property of their respective owners. TELEFUNKEN licensed by TELEFUNKEN Licenses GmbH. Non contractual document subject to change in case of typographical errors (Mktg0810) COPYRIGHT SOPEG 2010 The manufacturer reserves the right to modify the product specifications without notice.
Need help?
Do you have a question about the DPF 9332 and is the answer not in the manual?
Questions and answers