Table of Contents
Advertisement
Available languages
Available languages
Advertisement
Chapters
Table of Contents

Subscribe to Our Youtube Channel
Related Manuals for Telefunken DPF 9323


Summary of Contents for Telefunken DPF 9323
-
Page 2: Table Of Contents
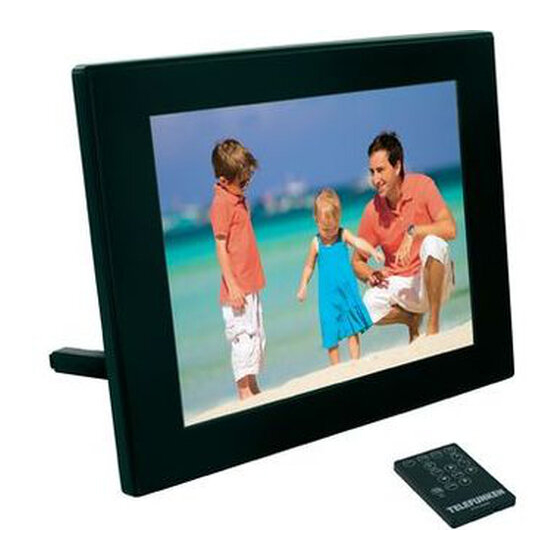
DIGITAL PHOTO FRAME OPERATING INSTRUCTIONS TELEFUNKEN DPF 9323 I. Learn about and install your frame ............2 1. Box contents ........................2 2. Frame diagrams ......................... 2 3. Remote control ........................3 4. Installation ........................... 3 II. Use your frame ..................3 1. -
Page 3: Learn About And Install Your Frame
Learn about and install your frame Thank you for your recent purchase of a TELEFUNKEN DPF 9323 digital photo frame. Before using your device, please consult these operating instructions and keep them so you may refer to them later on. -
Page 4: Remote Control
Remote control All functions can be accessed with the remote control. Press the following keys to access the functions: Function ▲ Navigation up in the menus ◄ Navigation left in the menus and skip to the previous file ▼ Navigation down in the menus ►... -
Page 5: Reading A Memory Card Or A Usb Key
to a standard frame: A LED screen, which uses less energy while improving image quality A low-energy and 'Energy Star'-certified power adapter A light sensor This sensor, on by default, will automatically turn off your picture frame at night and turn it on during the day. -
Page 6: Copying Photos To The Internal Memory
4. Copying photos to the internal memory If you did not select automatic copying when you inserted the card, you have 2 ways to copy images from your memory card to the frame's internal memory. Copy your photos from the file manager If you use this method, you can only copy files one at a time, and you will not be able to resize them to the frame's resolution. -
Page 7: Deleting Photos
resize your images. 7. Select the desired option using the "Up/Down" keys on the remote and confirm the choice by selecting "Confirm". Press "Enter". Your photos are now copied into the internal memory and sized to the frame's resolution. 5. Deleting photos You can delete photos that are in your frame's internal memory. -
Page 8: Selecting The Type Of Files To Play
9. Select the desired option using the "Up/Down" keys on the remote. Press "Enter". Your photos have now been deleted from the internal memory III. Selecting the type of files to play 1. Internal memory/Removable medium If no medium has been inserted, the slideshow from the internal memory will launch automatically whenever the frame is turned on. -
Page 9: Configuring Photos
1. Configuring photos Select this line using the "Up/Down" keys on the remote in order to access this menu. You will then be able to make adjustments with the remote's arrow keys: Display mode Select "Display Mode" using the "Up/Down" keys on the remote and press , then use the "Up/Down"... -
Page 10: System Configuration
Close Slideshow repeat Select "Slideshow repeat" using the "Up/Down" keys on the remote and press , then use the "Up/Down" keys to choose between: Repeat: the slideshow plays in a loop Once: the slideshow is played once ... -
Page 11: Connecting To A Computer
Brightness Select "Brightness" using the "Up/Down" keys on the remote Enter "Left/Right" keys to adjust the brightness level (1-16). Contrast Select "Contrast" using the "Up/Down" keys on the remote Enter "Left/Right" keys to adjust the contrast level (1-16). Saturation Select "Saturation" using the "Up/Down" keys on the remote Enter "Left/Right"... -
Page 12: Safety Instructions
Click "Open folder and display files" in order to view the contents of the internal memory. The following screen will appear: Open the directory storing the files you want to transfer to the frame, and place them in the desired folder using "Copy/paste"... -
Page 13: Warranty
Never remove the plastic cover on the back of the frame. The digital photo frame has electrical circuits and you could be hurt if you touch them. Do not try to repair the digital photo frame by yourself. VII. Warranty The warranty does not cover damage caused if you (or any unauthorized person) tried to repair the frame. - Page 14 Coverage A defective digital frame must be returned complete to your distributor with an explanation. If this digital frame presents a defect during the warranty period, the authorized After-Sales Service will repair any defective component or manufacturing defect. The After-Sales Service will unilaterally decide whether to repair or replace the digital frame, in part or in whole.
-
Page 15: Specifications
VIII. Specifications Specifications DPF 9323 Size Resolution 800 x 600 Screen backlight Image ratio Built-in memory 2 GB Audio/video Compatible cards SDHC,SD/MMC,MS,USB sticks Files supported JPEG Auto resizing Auto rotation Power supply input 100-240 V AC 50/60 Hz Power supply output... - Page 16 TELEFUNKEN DPF 9323 Découvrez et installez votre cadre ................2 1. Contenu de la boîte ....................2 2. Schémas ....................... 2 3. Télécommande ...................... 2 4. Installation ......................3 Utilisez votre cadre ....................3 1. Sélection de la langue .................... 3 2. Le mode « ECO LOGIC »...
-
Page 17: Découvrez Et Installez Votre Cadre
Découvrez et installez votre cadre DPF 9323 et nous vous en remercions. vous y reporter ultérieurement. Contenu de la boîte 1 Cadre photo numérique 1 Adaptateur secteur 1 Télécommande Schémas Boutons de contrôle Marche /arrêt Port USB Port SD/MMC, MS... -
Page 18: Installation
Pour accéder aux fonctions de copie, suppression et classement (seulement sous le (COPY/DEL) menu principal). Pour effectuer une rotation sur image de 90°. (ROTATE) e sur cette touche pour permuter entre les différents modes de zoom : x2, x4, x8 et x16 ; appuyez à nouveau sur cette (SLIDESHOW) Pour directement lancer le diaporama des photos. - Page 19 Si votre cadre est éteint : Mettez votre cadre sous tension : Le diaporama lit automatiquement le contenu de votre carte mémoire ou de votre clé USB. Si votre cadre est allumé et joue le diaporama de la mémoire interne : Votre carte mémoire est automatiquement détectée «...
-
Page 20: Copie De Photos Vers La Mémoire Interne
de 10 000 photos dans la mémoire interne. (IMPORTANT : Seules les copies de vos photos seront redimensionnées, les photos originales de la carte ne seront évidemment pas modifiées) Copie de photos vers la mémoire interne automatique au moment de images de votre carte mémoire vers la mémoire interne du cadre. -
Page 21: Suppression De Photos
5. Appuyez sur la touche « Copy/Del « Copier fichiers ? » (Sélection, tout, ou annuler) isie et appuyez sur « Enter ». « Droite/Gauche » de la télécommande en appuyant sur « Enter » à chaque photo sélectionnée. Le petit carré est alors coché... -
Page 22: Sélection Des Fichiers À Lire
Droite/Gauche », sélectionnez le mode photo et appuyez sur « Enter ». Le diaporama se lance. 4. Appuyez sur la touche « Exit » de la télécommande pour accéder aux vignettes. 5. Appuyez sur la touche « Copy/Del « Supprimer ? » (Sélection, tout, ou annuler) Sélectionnez ion choisie et appuyez sur «... -
Page 23: Les Réglages
Les réglages « Regl. Droite/Gauche » de votre télécommande pour accéder aux différents réglages de votre cadre. Lorsque vous êtes dans les menus de réglage, les touches « Haut/Bas » de la télécommande vous permettent de sélectionner le paramètre à régler, et les touches «... -
Page 24: Configuration Système
60 sec. 5 min. 15 min. Effets de diaporama Sélectionnez « Effet diaporama Haut/Bas » de la télécommande puis appuyez sur la touche « Enter », utilisez les touches directionnelles « Haut/Bas » pour sélectionner parmi les effets suivants : ... - Page 25 Sélectionnez « Capteur de luminosité Haut/Bas » de la télécommande puis appuyez sur la touche « Enter » pour sélectionner parmi « Activé » ou « Désactivé ». Langue Sélectionnez « Langue Haut/Bas » de la télécommande puis appuyez sur la touche « Enter », utilisez les touches directionnelles « Haut/Bas » pour sélectionner parmi : ...
-
Page 26: Connexion À Un Ordinateur
Connexion à un ordinateur Il est possible de transférer des fichiers dans le cadre en reliant celui-ci à votre micro-ordinateur. Pour cela, n câble USB (Prise mini USB côté cadre, et USB standard côté Retour au ordinateur) puis allumez votre cadre : »... -
Page 27: Instructions De Sécurité
Instructions de sécurité ; les traces de doigts sont difficiles à enlever. soit endommagé. Évitez pas le cadre face aux rayons du soleil pour éviter les reflets. puissante. Ceci pourrait provoquer une surchauffe, un feu ou un choc électrique. ; celui-ci ne doit pas être piétiné ou en contact avec tout dommage. -
Page 28: Garantie
VII. Garantie La garantie ne couvre pas les dommages causés si vous (ou toute personne non habilitée) avez tenté de réparer le cadre. Si le cadre émet de la fumée, un bruit ou une odeur inhabituelle, éteignez-le et débranchez-le immédiatement. Contactez votre magasin. , veillez à... -
Page 29: Caractéristiques Techniques
En réutilisant les pièces et matières premières des appareils usagés, vous apportez votre mairie, au service de traitement des déchets usagés ou au magasin où vous acheté le produit. VIII. Caractéristiques techniques Caractéristiques DPF 9323 Taille Définition 800 x 600 Ratio image Mémoire interne... - Page 30 GEBRAUCHSANWEISUNG FÜR DIGITALE BILDERRAHMEN TELEFUNKEN DPF 9323 Auspacken und Installieren Ihres Bilderrahmens ...........2 1. Inhalt der Verpackung ................... 2 2. Abbildungen des Bilderrahmens ................2 3. Fernbedienung ...................... 2 4. Installierung ......................3 Benutzung Ihres Bilderrahmens ................3 1. Sprachauswahl ..................... 3 2.
-
Page 31: Auspacken Und Installieren Ihres Bilderrahmens
Auspacken und Installieren Ihres Bilderrahmens Vielen Dank für Ihren Kauf eines digitalen Bilderrahmens der DPF 9323 von TELEFUNKEN. Bevor Sie Ihr Gerät benutzen, lesen Sie bitte die vorliegende Gebrauchsanweisung durch und bewahren Sie sie gut auf, um später auf sie zurückgreifen zu können. -
Page 32: Installierung
Bilder 90° drehen (ROTATE) Bild vergrößern, drücken Sie mehrmals, um durch die verschiedenen Zoom-Modi zu schalten x2, x4, x8 und x16. Drücken Sie nochmals, um zur Ausgangsgröße zu gelangen Diashow direkt starten (SLIDESHOW) SETUP Einstellungsmenü (Settings) direkt aufrufen Installierung Nehmen Sie Ihren Bilderrahmen und sein Zubehör aus der Verpackung. Entfernen Sie die Schutzfolie von der Vorderseite des Bilderrahmens. -
Page 33: Lesen Einer Speicherkarte Oder Eines Usb-Sticks
Lesen einer Speicherkarte oder eines USB-Sticks Falls Ihr Bilderrahmen ausgeschaltet ist: Führen Sie Ihre Speicherkarte oder Ihren USB-Stick an der hierfür vorgesehenen Stelle ein. Schalten Sie Ihren Bilderrahmen ein. Die Diashow spielt den Inhalt Ihrer Speicherkarte oder Ihres USB-Sticks automatisch ab. Falls Ihr Rahmen eingeschaltet ist und die Diashow des internen Speichers abspielt: Ihre Speicherkarte wird automatisch entdeckt... - Page 34 2. Wählen Sie mithilfe der Tasten „Rechts/Links“ der Fernbedienung das Symbol „Dateien“ aus und drücken Sie auf „Enter“. 3. Auf dem Display erscheint 4. Wählen Sie anhand der Tasten Fernbedienung die gewünschte Option und drücken Sie . Ihre Datei wird kopiert Falls Ihre Speicherkarte einen oder mehrere Ordner enthält, können Sie diese komplett kopieren.
-
Page 35: Löschen Von Fotos
Löschen von Fotos Sie können Fotos löschen, die sich im internen Speicher Ihres Bilderrahmens befinden. Löschen Ihrer Fotos über den Dateimanager. Falls Sie diese Methode anwenden, können Sie die Dateien nur eine nach der anderen löschen. 1. Drücken Sie so häufig auf die „Exit“-Taste Ihrer Fernbedienung, bis die Modus-Auswahl auf dem Bildschirm angezeigt wird. -
Page 36: Auswahl Des Zu Lesenden Dateityps
III. Auswahl des zu lesenden Dateityps Interner Speicher/Mobiler Datenträger Wenn kein Datenträger eingeschoben ist, startet beim Einschalten des Rahmens automatisch die Diashow des internen Speichers. Falls sich beim Einschalten eine Speicherkarte oder ein USB- Stick im Rahmen befindet, wird der Inhalt der Karte bzw. des USB-Sticks abgespielt. -
Page 37: Fotoeinstellungen
Ihnen, die einzustellenden Parameter auszuwählen. Mithilfe der Tasten „Rechts/Links“ können Sie den ausgewählten Parameter dann passend regeln. Fotoeinstellungen Wählen Sie „Fotoeinstellungen“ mit den Tasten „Hoch/Runter“ auf der Fernbedienung, drücken Sie „Enter“. Die folgende Anzeige erscheint: Sie können nun Einstellungen mit den Richtungstasten auf der Fernbedienung ändern. Anzeigemodus Wählen Sie „Anzeigemodus“... - Page 38 Schließen Diashow Wiederholung Wählen Sie „Diashow Wiederholung“ mit den Tasten „Hoch/Runter“ auf der Fernbedienung, drücken Sie „Enter“, wählen Sie mit den Tasten „Hoch/Runter“: Wiederholung: Die Diashow wiederholt sich von vorne. EInmal: Die Diashow wird nur ein Mal abgespielt. ...
-
Page 39: Systemeinstellung
Systemeinstellung Dieses Menü ermöglicht es Ihnen, die Funktionsparameter Ihres Bilderrahmens einzustellen. Aktivierung/Deaktivierung des Helligkeitssensors Wählen Sie „Lichtsensor“ mit den Tasten „Hoch/Runter“ auf der Fernbedienung, drücken Sie „Enter“, um „Ein“ oder „Aus“ zu wählen. Sprache Wählen Sie „Sprache“ mit den Tasten „Hoch/Runter“ auf der Fernbedienung, drücken Sie „Enter“, wählen Sie mit den Tasten „Hoch/Runter“: ... -
Page 40: Verbindung Mit Einem Computer
Verbindung mit einem Computer Es ist möglich, Dateien von einem PC auf den Bilderrahmen zu übertragen. Schließen Sie hierfür Ihren Bilderrahmen mit einem USB-Kabel (Mini-USB-Stecker für den Rahmen, Standard-USB-Stecker für den Computer) an den Computer an und schalten Sie den Rahmen ein: auf dem Bildschirm des Rahmens erscheint „PC-Verbindung …“. -
Page 41: Sicherheitshinweise
VI. Sicherheitshinweise Behandeln Sie den digitalen Bilderrahmen mit Vorsicht und vermeiden Sie es, den Bildschirm zu berühren, denn Fingerabdrücke lassen sich nur schwer entfernen. Stellen Sie den digitalen Bilderrahmen stets auf einer ebenen und stabilen Fläche auf, um Schäden durch Herunterfallen zu vermeiden. Setzen Sie Ihren Bilderrahmen nicht der Sonne oder hohen Temperaturen aus, da er hierdurch beschädigt oder seine Gebrauchsdauer verringert werden könnte. -
Page 42: Garantie
VII. Garantie Die Garantie deckt keine Schäden ab, die durch einen Reparaturversuch durch Sie (oder eine andere nicht autorisierte Person) entstanden sind. Sollte der Bilderrahmen Rauch, ein ungewöhnliches Geräusch oder einen ungewöhnlichen Geruch abgeben, schalten Sie ihn unverzüglich aus und ziehen Sie das Kabel aus der Steckdose. Kontaktieren Sie Ihren Händler. - Page 43 Für weitere Informationen zu den Sammelstellen für gebrauchte Geräte können Sie sich an Ihre Stadtverwaltung, an den Altschrottentsorgungsdienst oder an das Geschäft, in dem Sie das Produkt gekauft haben, wenden. VIII. Technische Merkmale Merkmale DPF 9323 8 ˝ Größe Auflösung 800 x 600...
- Page 44 INSTRUCCIONES DE USO MARCOS DE FOTOS DIGITALES TELEFUNKEN DPF 9323 Descubra e instale su marco ..................2 1. Contenido de la caja ..................... 2 2. Esquemas del marco .................... 2 3. Mando a distancia ....................2 4. Instalación ......................3 Utilice su marco......................3 1.
-
Page 45: Descubra E Instale Su Marco
Descubra e instale su marco Le agradecemos la compra de un marco de fotos digital TELEFUNKEN DPF 9323. Antes de utilizar el aparato, lea las presentes instrucciones de uso, y luego guárdelas para poder consultarlas posteriormente. Contenido de la caja... -
Page 46: Instalación
Girar la foto 90º en el sentido de las agujas del reloj 90° (ROTATE) Agrandar la imagen, púlsela varias veces para pasar por los modos de ampliación x2, x4, x8 y x16; púlsela una vez más para regresar al tamaño normal Inicia la presentación de fotos directamente (SLIDESHOW) SETUP... -
Page 47: Lectura De Una Tarjeta De Memoria O De Una Memoria Usb
Lectura de una tarjeta de memoria o de una memoria USB Si el marco está apagado: Inserte la tarjeta o la memoria USB en el punto previsto a tal efecto. Conecte el marco a la red eléctrica: La presentación de diapositivas lee automáticamente el contenido de la tarjeta de memoria o la llave USB. - Page 48 1. Pulse el botón «Exit» del mando a distancia tantas veces como sea necesario hasta ver la pantalla de selección de modos. 2. Por medio de los botones «Derecha/Izquierda» del mando a distancia, seleccione el icono «Archivos» y pulse «Enter». 3.
-
Page 49: Borrado De Fotos
Borrado de fotos Puede eliminar las fotos que se encuentren en la memoria interna de su marco. Elimine sus fotos a través del administrador de archivos Si opta por este método, sólo podrá eliminar los archivos de uno en uno. 1. -
Page 50: Selección Del Tipo De Archivos A Leer
10. Seleccione la memoria interna mediante los botones «Derecha/Izquierda» del mando a distancia. Pulse «Enter». III. Selección del tipo de archivos a leer Memoria interna/soporte extraíble Si no se ha insertado ningún soporte, la presentación de diapositivas de la memoria interna se inicia automáticamente al encender el marco. -
Page 51: Configuración De Fotos
«Derecha/Izquierda» le permitirán escoger el ajuste adecuado para el parámetro seleccionado. Configuración de Fotos Seleccione «Configuración de Foto» mediante los botones de «Arriba / Abajo» del mando a distancia, a continuación, presione «Enter». La pantalla contraria aparecerá: A continuación, podrá cambiar la configuración de los botones de flecha del mando a distancia. Modo de pantalla Seleccione «Modo de pantalla»... -
Page 52: Configuración Del Sistema
Rect Cerrar Repetir presentación Seleccione «Repetir presentación» mediante los botones de «Arriba / Abajo» del mando a distancia y presione «Enter», a continuación, use los botones de «Arriba / Abajo» para elegir entre: Repetir: la presentación se reproduce en bucle ... - Page 53 Contraste Seleccione «Contraste» mediante los botones de «Arriba / Abajo» del mando a distancia y presione «Enter», a continuación, pulse el botón de «derecha / izquierda» para ajustar el nivel de contraste (1- 16). Saturación Seleccione «saturación» mediante los botones de «Arriba / Abajo» del mando a distancia y presione «Enter», a continuación, pulse el botón de «derecha / izquierda»...
-
Page 54: Conexión A Un Ordenador
Conexión a un ordenador Se pueden transferir archivos al marco conectándolo a su ordenador. Basta con conectar el marco al ordenador con un cable USB (toma mini USB en el marco y USB estándar en el ordenador) y encender el marco. Aparecerá en el marco la pantalla «Conexión PC…». Volver al funcionamiento normal tras la desconexión En el ordenador aparecerá... -
Page 55: Instrucciones De Seguridad
VI. Instrucciones de seguridad Manipule el marco de fotos digital con precaución y evite tocar la pantalla; las marcas de dedos son difíciles de limpiar. Coloque en todo caso el marco de fotos digital sobre una superficie plana y estable para evitar que se caiga y se dañe. -
Page 56: Garantía
VII. Garantía La garantía no cubre los daños ocasionados si usted (u otra persona no capacitada) intenta reparar el marco. Si el marco emite humo, un ruido o un olor no habitual, apáguelo y desenchúfelo de inmediato. Póngase en contacto con la tienda donde lo ha comprado. Si no utiliza el marco digital durante un tiempo, recuerde desenchufar el cable de alimentación. -
Page 57: Características Técnicas
Para obtener más información sobre los lugares de recogida de equipos usados, puede dirigirse a su ayuntamiento, al servicio de tratamiento de residuos o al establecimiento donde ha adquirido el producto. VIII. Características técnicas Características DPF 9323 8 ˝ Tamaño Definición 800 x 600 Tecnologia del marco Relación de imagen... - Page 58 ISTRUZIONI PER L'USO DELLE CORNICI DIGITALI TELEFUNKEN DPF 9323 Descrizione e installazione della cornice ..............2 1. Contenuto della confezione ................... 2 2. Nomi delle parti ..................... 2 3. Telecomando ......................2 4. Installazione ......................3 Utilizzo della cornice ....................3 1. Selezione della lingua ................... 3 2.
-
Page 59: Descrizione E Installazione Della Cornice
Descrizione e installazione della cornice Grazie per aver acquistato una cornice digitale TELEFUNKEN “Serie STYLE”. Prima di utilizzare questa apparecchiatura, consultare le presenti istruzioni per l'uso e conservarle per riferimento futuro. Contenuto della confezione 1 cornice digitale 1 adattatore di rete... -
Page 60: Installazione
principale) Rotazione foto in senso orario a 90° (ROTATE) Ingrandimento immagine; premere ripetutamente per scorrere tra le varie modalità di zoom x2, x4, x8, x16; premere nuovamente per tornare alle dimensioni normali (SLIDESHOW) Avvia direttamente la presentazione delle foto SETUP Accesso diretto al menu di setup (impostazioni) Installazione Estrarre la cornice e gli accessori dall'imballaggio... -
Page 61: Lettura Di Una Scheda Di Memoria O Di Una Chiave Usb
Lettura di una scheda di memoria o di una chiave USB Se la cornice è spenta: Inserire la scheda o la chiave USB nell'apposito slot. Collegare l'alimentazione della cornice: Lo slideshow legge automaticamente il contenuto della scheda di memoria o della chiave USB. Se la vostra cornice è... - Page 62 1. Premere il tasto “Exit” del telecomando fino a visualizzare la schermata di selezione delle modalità. 2. Con i tasti “Destra/Sinistra” del telecomando, selezionare l'icona “File”e premere “Enter”. 3. Sul display compare “Ridimensionare?” 4. Selezionare l’opzione scelta aiutandosi con i tasti “Destra/Sinistra”...
-
Page 63: Eliminazione Delle Foto
6. Vengono nuovamente visualizzati le miniature, con un quadratino nell'angolo superiore destro. Selezionare le foto da copiare utilizzando i tasti “Destra/Sinistra” del telecomando e premendo “Enter” per ogni foto selezionata. Per ogni immagine selezionata, il quadratino viene contrassegnato da un segno di spunta. (Se avete scelto “copia tutto”, tutti le miniature verranno contrassegnate da un segno di spunta). -
Page 64: Selezione Del Tipo Di File Da Leggere
5. Premere il tasto “Copy/Del”. Sullo schermo viene visualizzato il messaggio “Eliminare?”. (Selezionare tutto oppure annullare). Selezionare e premere “Enter”. 6. Vengono nuovamente visualizzati le miniature, con un quadratino bianco nell'angolo superiore destro. Selezionare le foto da copiare utilizzando i tasti “Destra/Sinistra-Su/Giù”... -
Page 65: Impostazioni
IV. Impostazioni Dalla schermata principale, selezionare l'icona “Impost.” con i tasti “Destra/Sinistra” del telecomando per accedere alle diverse impostazioni della cornice. Se lo slideshow continua a scorrere, premere il tasto “Imposta” del telecomando per accedere ai menu di impostazione. All'interno del menu di impostazione, i tasti “Su/Giù”» del telecomando consentono di selezionare il parametro da impostare, mentre i tasti “Destra/Sinistra”... -
Page 66: Configurazione Sistema
10. Effetti presentazione Selezionare gli “Effetti presentazione” utilizzando i tasti “Su/Giù” sul telecomando e premere “Enter”, quindi utilizzare i tasti “Su/Giù” per scegliere tra i seguenti effetti: Casuale Nessuna transizione Dissolvenza Serpente Partizione Cancellare ... - Page 67 Inglese Francese Tedesco Italiano Dutch Portoghese Spagnolo 18. Luminosità Selezionare “Luminosità” utilizzando i tasti “Su/Giù” sul telecomando e premere “Enter”, quindi premere i tasti “Sinistra/Destra” per regolare il livello di luminosità (1-16). 19. Contrasto Selezionare “Contrasto”...
-
Page 68: Collegamento Al Computer
Collegamento al computer È possibile trasferire dei file nella cornice collegandola al portatile. Collegare la cornice al computer tramite un cavo USB (con l’attacco mini USB lato cornice e l’attacco USB standard lato computer) quindi accendere la cornice e attendere la comparsa della schermata “Collegamento al PC…” Ritorno a funzionamento normale dopo scollegamento Sul computer comparirà... -
Page 69: Istruzioni Di Sicurezza
VI. Istruzioni di sicurezza Manipolare con attenzione la cornice digitale, evitando di toccare lo schermo: le impronte digitali sono difficili da togliere. Posizionare sempre la cornice digitale su una superficie piana e stabile, per evitare cadute o danni. Non esporre la cornice digitale ai raggi del sole o a temperature elevate, per evitare di danneggiarla o di ridurne la durata. -
Page 70: Garanzia
VII. Garanzia La garanzia non copre i danni causati dai tentativi di riparazione della cornice da parte dell'utente o di persone non autorizzate. Se la cornice emette fumo, rumori o odori inusuali, spegnerla e scollegarla immediatamente. Rivolgersi al rivenditore. Se non si utilizza la cornice digitale per un periodo prolungato, scollegare il cavo di alimentazione. La garanzia copre la cornice digitale e non include gli accessori. -
Page 71: Caratteristiche Tecniche
Per ulteriori informazioni sui punti di raccolta delle apparecchiature usate, rivolgersi al proprio comune di residenza, al servizio di smaltimento dei rifiuti o al negozio presso cui è stato acquistato il prodotto. VIII. Caratteristiche tecniche Caratteristiche DPF 9323 8 ˝ Dimensioni Definizione... - Page 72 GEBRUIKSAANWIJZING DIGITALE FOTOLIJST TELEFUNKEN DPF 9323 Uw fotolijst uitpakken en installeren .................2 1. Inhoud van de doos ....................2 2. Oversicht van de fotolijst ..................2 3. Afstandsbediening ....................2 4. Installatie ........................ 3 Uw fotolijst gebruiken ....................3 1. Selecteren van de taal .................... 3 modus ..................
-
Page 73: Uw Fotolijst Uitpakken En Installeren
Uw fotolijst uitpakken en installeren U hebt zojuist een digitale fotolijst uit de DPF 9323 van TELEFUNKEN aangekocht, waarvoor onze dank. Wij raden u aan deze gebruiksaanwijzing grondig door te nemen alvorens uw apparaat in gebruik te nemen en ze daarna te bewaren voor toekomstig gebruik. -
Page 74: Installatie
Toegang tot de functies kopiëren, wissen en sorteren (uitsluitend in het hoofdmenu) (COPY/DEL) Roteer de foto 90° rechtsom (ROTATE) De afbeelding vergroten. Druk meerdere keren om langs de verschillende vergrotingen x2, x4, x8 en x16 te lopen. Druk nogmaals op de toets om naar de normale afmeting terug te keren (SLIDESHOW) Start de foto diashow onmiddellijk op SET-UP... -
Page 75: Lezen Van Een Geheugenkaart Of Een Usb-Stick
Lezen van een geheugenkaart of een USB-stick Als uw fotolijst is uitgeschakeld: Voer uw kaart of USB-stick in op de daartoe voorziene plaats. Schakel uw fotolijst in: de diashow leest automatisch de inhoud van uw geheugenkaart of uw USB-stick. Als uw fotolijst ingeschakeld is en de diashow van het interne geheugen afspeelt: Uw geheugenkaart wordt automatisch gedetecteerd Na enkele seconden verschijnt het bericht Wilt u kopiëren... - Page 76 afstandsbediening het pictogram Bestand en druk op Enter . 3. Op het display verschijnt Formaat aanpassen? . 4. Selecteer de gewenste optie met behulp van de toetsen Links/Rechts op de afstandsbediening en druk op Enter . Uw bestand wordt gekopieerd. Als uw geheugenkaart een of meer mappen bevat, kunt u deze volledig kopiëren.
- Page 77 1. Druk zo vaak als nodig is op de toets Exit op uw afstandsbediening om het scherm modusselectie weer te geven. 2. Selecteer met behulp van de toetsen Links/Rechts op de afstandsbediening het pictogram Bestand en druk op Enter . 3.
-
Page 78: Selecteren Van Het Type Te Lezen Bestanden
III. Selecteren van het type te lezen bestanden Intern geheugen/gegevensdrager Wanneer er geen enkele gegevensdrager is ingevoerd, wordt automatisch de diashow van het interne geheugen opgestart bij het inschakelen van de fotolijst. Als er een geheugenkaart of een USB-stick is ingevoerd op het moment dat de fotolijst wordt ingeschakeld, dan wordt de inhoud van de kaart of stick gelezen. -
Page 79: Instellingen
IV. Instellingen Wanneer u zich in het hoofdscherm bevindt, selecteer dan het pictogram Inst. met behulp van de toetsen Links/Rechts op uw afstandsbediening om toegang te krijgen tot de verschillende instellingen van uw fotolijst. Als uw diashow bezig is, druk dan gewoon op de toets Setup op uw afstandsbediening voor toegang tot het menu Instellingen. -
Page 80: Systeemconfiguratie
Effect diavertoning Selecteer Effect diavertoning met de toetsen Omhoog/Omlaag op de afstandsbediening en druk op Enter . Gebruik vervolgens de Omhoog/Omlaag toetsen om een keuze te maken uit de volgende effecten: Willekeurig Geen overgang Fade Slang ... - Page 81 In-/uitschakelen van de lichtsensor Selecteer Lichtsensor met de toetsen Omhoog/Omlaag op de afstandsbediening en druk vervolgens op Enter om voor Aan of Uit te kiezen. Taal Selecteer Taal met de toetsen Omhoog/Omlaag op de afstandsbediening en druk op Enter . Gebruik vervolgens de Omhoog/Omlaag toetsen om een keuze te maken uit: ...
-
Page 82: Aansluiten Op Een Computer
Aansluiten op een computer Het is mogelijk om bestanden over te zetten naar de fotolijst door deze aan te sluiten op uw pc. Sluit hiervoor uw fotolijst aan op de computer via een USB-kabel (mini-USB-aansluiting van de fotolijst en standaard USB-aansluiting van de pc). Schakel vervolgens uw fotolijst in: het scherm van de fotolijst geeft Koppel de kabel los om terug te keren naar normale werking. -
Page 83: Veiligheidsinstructies
Veiligheidsinstructies Hanteer de fotolijst voorzichtig en vermijd het aanraken van het scherm. Vingerafdrukken zijn moeilijk te verwijderen. Plaats de digitale fotolijst altijd op een vlak en stabiel oppervlak om vallen en beschadiging te voorkomen. Vermijd het blootstellen van de digitale fotolijst aan de zon of aan hoge temperaturen aangezien de lijst hierdoor beschadigd kan raken of de gebruiksduur erdoor beperkt kan worden. -
Page 84: Garantie
VII. Garantie De garantie dekt geen schade die voortvloeit uit pogingen om de fotolijst zelf te repareren (of pogingen door niet-bevoegde personen). Als de fotolijst een ongewone geur afgeeft of een vreemd geluid maakt of als er rook uit de fotolijst komt, schakel deze dan onmiddellijk uit en trek de stekker uit. -
Page 85: Technische Specificaties
Voor meer informatie over de plaatsen voor inzameling van gebruikte apparatuur, kunt u terecht in uw gemeentehuis, de afvalverwerkingsdienst of de winkel waar u uw product gekocht hebt VIII. Technische specificaties Kenmerken DPF 9323 Diagonaal Resolutie 800 x 600 Technologie... - Page 86 MANUAL DE UTILIZAÇÃO MOLDURAS FOTOGRÁFICAS DIGITAIS TELEFUNKEN DPF 9323 Conheça e instale a sua moldura ................2 1. Conteúdo da embalagem ..................2 2. Esquema da moldura .................... 2 3. Controlo remoto ....................2 4. Instalação ......................3 Utilização da moldura .....................3 1.
-
Page 87: Conheça E Instale A Sua Moldura
Conheça e instale a sua moldura Acaba de adquirir uma moldura fotográfica digital TELEFUNKEN “STYLE Série”, pelo que lhe estamos gratos. Antes de utilizar o seu dispositivo, queira consultar este manual de utilização, conservando-o para futuras consultas. Conteúdo da embalagem 1 Moldura fotográfica digital... -
Page 88: Instalação
Aceder à cópia, apagar e classificar funções (somente no menu principal) (COPY/DEL) Girar a foto no sentido contrário ao do ponteiro do relógio 90° (ROTATE) Aumentar imagem, prima repetidamente para circular pelos modos de zoom de x2, x4, x8 e x16; prima novamente para retornar ao tamanho normal (SLIDESHOW) Iniciar directamente a apresentação de fotografias SETUP Entrar no menu de configurações (Config) directamente... -
Page 89: Leitura De Um Cartão De Memória Ou De Um Disco Usb (Pen Drive)
Leitura de um cartão de memória ou de um disco USB (pen drive) Caso a sua moldura esteja desligada: Insira o cartão ou disco USB no local apropriado. Ligue a moldura: O diaporama lê automaticamente o conteúdo do seu cartão de memória ou do seu disco USB. -
Page 90: Eliminação De Fotos
3. O ecrã apresenta “Redimensionar?” 4. Seleccione a opção escolhida através das teclas “Direita/Esquerda” do telecomando e prima “Enter”. O seu ficheiro é copiado Se o cartão de memória contiver uma ou várias pastas, pode copiá-las integralmente. Serão armazenadas na pasta “Root” da memória interna e poderá lê-las independentemente umas das outras. -
Page 91: Selecção Do Tipo De Ficheiros A Serem Lidos
1. Prima a tecla “Exit” do seu telecomando tantas vezes quantas necessárias para visualizar o ecrã de escolha dos modos. 2. Através das setas “Direita/Esquerda” do telecomando, seleccione o ícone “Ficheiros” e prima “Enter”. 3. Seleccione a fotografia através das teclas “Cima/Baixo” do telecomando e prima a tecla “Copy/Del”. -
Page 92: Selecção De Uma Pasta
Se for inserido um cartão de memória ou um disco USB ao se ligar a moldura, é o conteúdo do cartão/disco USB que será lido. De qualquer maneira, pode sempre passar do cartão/disco USB para a memória interna da seguinte forma: Prima a tecla “Exit”... -
Page 93: Os Ajustes
IV. Os ajustes Estando no ecrã principal, seleccione o ícone “Ajust.” através das teclas “Direita/Esquerda” e do telecomando para aceder aos diversos ajustes da moldura. Caso o diaporama esteja a correr, prima simplesmente a tecla “Def” do telecomando para aceder aos menus de ajuste. Estando nos menus de ajustes, as teclas “Cima/Baixo”... -
Page 94: Configuração Sistema
Aleatório Nenhum Desaparecer dentro fora Serpente Partição Apagar Persianas Grade Rect. Fechar Repetição da apresentação Seleccionar “Repetição de apresentação” usando as teclas “Cima/Baixo” no controlo remoto e premir “Enter”, depois usar as teclas “Cima/Baixo” para escolher entre: ... - Page 95 Italiano Holandês Português Espanhol Brilho Seleccionar “Brilho” usando as teclas “Cima/Baixo” no controlo remoto e premir “Enter”, depois premir as teclas “Esquerda/Direita” para ajustar o nível de brilho (1-16). Contraste Seleccionar “Contraste” usando as teclas “Cima/Baixo” no controlo remoto e premir “Enter”, depois premir as teclas “Esquerda/Direita”...
-
Page 96: Ligação A Um Computador
Ligação a um computador É possível transferir ficheiros para a moldura ligando-a ao seu microcomputador. Para tanto, ligue a sua moldura ao computador através de um cabo USB (tomada mini USB na moldura e tomada USB standard no computador) e ligue a moldura: o ecrã da moldura mostra “Ligação PC…” Retorno ao funcionamento normal após desconexão Aparece a seguinte caixa de diálogo no seu computador: Clique em “Abrir a pasta para ver os ficheiros”... -
Page 97: Instruções De Segurança
VI. Instruções de segurança Manipule a moldura fotográfica digital com precaução para evitar tocar no ecrã; é difícil retirar as marcas de dedos. Posicione sempre a moldura digital sobre uma superfície plana e estável para evitar que caia e possa danificar-se. -
Page 98: Garantia
VII. Garantia A garantia não cobre os danos provocados caso o adquirente (ou qualquer pessoa não qualificada) tenha tentado consertar a moldura. Caso a moldura liberte fumo, um ruído ou um odor não habitual, desligue-a e desligue imediatamente o cabo da tomada. Contacte o local onde adquiriu o dispositivo. Caso não utilize a moldura digital durante algum tempo, queira desligar o cabo da tomada. -
Page 99: Características Técnicas
Para mais informações sobre os locais de recolha dos equipamentos usados, pode informar-se junto da câmara municipal, no serviço de tratamento de resíduos ou na loja onde adquiriu o produto. VIII. Características técnicas Características DPF 9323 8 ˝ Tamanho Definição...
Need help?
Do you have a question about the DPF 9323 and is the answer not in the manual?
Questions and answers
¿se pueden eliminar las fotos de Marco Digital Telefunken DPF 9323 sin mando a distancia?