Table of Contents
Advertisement
Advertisement
Table of Contents

Subscribe to Our Youtube Channel
Related Manuals for Electrolux EOB31001


Summary of Contents for Electrolux EOB31001
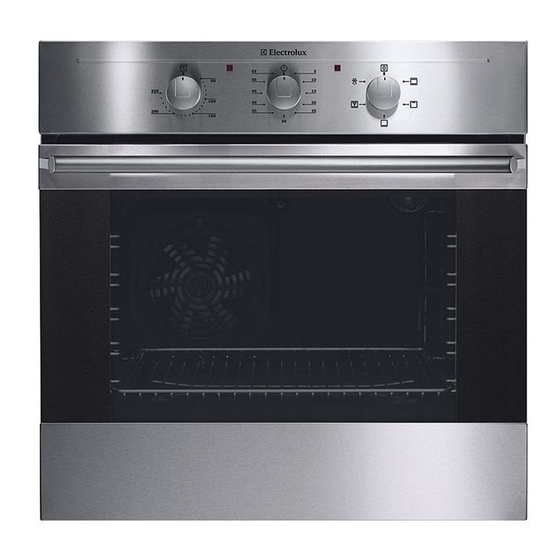
- Page 1 Oven EOB31001...
-
Page 2: Table Of Contents
2 electrolux Electrolux. Thinking of you. Share more of our thinking at www.electrolux.com Contents Safety instructions........3 What to do if …........24 Description of the Appliance ....4 Installation Instructions ......25 Before Using for the first time ....6 Disposal .......... -
Page 3: Safety Instructions
3 Safety instructions Electrical safety How to avoid damage to the appliance • This appliance must be only connected • Do not line the oven with aluminium foil by a registered electrician. and do not place baking trays, pots, etc. -
Page 4: Description Of The Appliance
4 electrolux Description of the Appliance General Overview Control panel Door handle Full glass door Control Panel Oven Power Indicator Temperature Pilot Light Minute timer Oven Functions Temperature selector... -
Page 5: Oven Features
5 Oven Features Top heat and heating elements Oven lighting Shelf positions Bottom Heat Oven shelf runners, removable Oven accessories Roasting Pan Oven shelf For baking and roasting or as a pan for col- lecting fat. For cookware, cake tins, roasts and grilled foods. -
Page 6: Before Using For The First Time
6 electrolux Before Using for the first time Initial Cleaning Turn the oven function switch to oven lighting Before using the oven for the first time you Remove all accessories and the shelf should clean it thoroughly. support rails and wash them with warm Caution: Do not use any caustic, abra- water and washing up liquid. -
Page 7: Oven Functions
7 Oven Functions The oven has the following functions: Oven function Application Light Using this function you can light up the oven interior, e.g. for cleaning. Convection For baking on up to two oven levels. Set the oven temperatures 20-40 °C lower than when using Conven- tional. -
Page 8: Mechanical Door Lock
8 electrolux Inserting the oven shelf: Mechanical door lock When the appliance is delivered the door lock is deactivated. Activating door lock Take hold of the door trim(B) on the up- Insert the oven shelf so that the feet point per edge of the door at both sides and downwards. - Page 9 9 3. Take hold of the door trim (B) at each To open the oven door. side, position it on the inside edge of the door and plug the door trim (B) into the upper edge of the door Keep lever pressed.
- Page 10 10 electrolux 2. Demount lever: On the open side of the door trim(B) Remove lever (1). there is a guide bar(C). This must be pushed between the outer door panel and the guide corner(D). 3. Remove trim from the under side of the door trim (B)(2) and push in (3).
-
Page 11: Uses, Tables And Tips
11 Uses, Tables and Tips Baking General Instructions • Insert the tray with the bevel at the front. Oven function: Convection • With Conventional or Convection Conventional you can also bake with two tins next to Baking tins one another on the oven shelf at the •... -
Page 12: Baking Table
12 electrolux With longer baking times, you can switch the oven off about 10 minutes before the end of the baking time, in or- der to utilise the residual heat. Unless otherwise stated, the values giv- en in the tables assume that cooking is started with the oven cold. -
Page 13: Tips On Baking
13 Time Type of Shelf Tempera- Ovenfunction Hours baking position ture °C mins. Pizza (with a lot of topping) Conventional 190-210 0:30-1:00 Pizza (thin crust) Conventional 230-250 0:10-0:25 Unleavened bread Conventional 250-270 0:08-0:15 Tarts (CH) Conventional 200-220 0:35-0:50 Biscuits... -
Page 14: Bakes And Gratins Table
14 electrolux Baking results Possible cause Remedy Cake is too dry Oven temperature too low Set oven temperature higher Baking time too long Set a shorter baking time Cake browns unevenly Oven temperature too high and baking Set a lower oven temperature and a... - Page 15 15 Roasting Tips on using the roasting chart The information given in the following ta- Oven function: Conventional or Con- ble is for guidance only. vection grilling • We recommend cooking meat and fish Roasting dishes weighing 1 kg and above in the oven.
-
Page 16: Wide Grilling
16 electrolux Temper- Time Shelf Type of meat Quantity Ovenfunction ature Hours position °C mins. Convection Knuckle of veal 1.5-2 kg 160-180 2:00-2:30 grilling Lamb Convection Leg of lamb, roast lamb 1-1.5 kg 150-170 1:15-2:00 grilling Convection Saddle of lamb 1-1.5 kg... -
Page 17: Making Preserves
17 Grilling table Grilling time Food to be grilled Oven level 1st side 2nd side Burgers 8-10 mins. 6-8 mins. Pork fillet 10-12 mins. 6-10 mins. Sausages 8-10 mins. 6-8 mins. Fillet steaks, veal steaks 6-7 mins. 5-6 mins. - Page 18 18 electrolux Cooking time until Continue to cook Temperature Preserve simmering at 100°C in°C in mins. in mins. Mixed pickles 160-170 50-60 Kohlrabi, peas, asparagus 160-170 50-60 15-20 1) Leave standing in oven when switched off Drying Oven function: Convection •...
-
Page 19: Cleaning And Care
19 Cleaning and Care Shelf Support Rails Warning: First switch off the appliance and let it cool down before carrying out The shelf support rails on the left and right any cleaning. hand sides of the oven can be removed for cleaning the side walls. -
Page 20: Oven Ceiling
20 electrolux Oven Ceiling Important! The rounded ends of the guide rails must be pointing forwards! The upper heating element can be folded To re-insert, first hook the rail into place at down to make it easier to clean the oven ceil- the back (1) and then insert the front and ing. -
Page 21: Oven Door
21 Repositioning the heating element Undo the clamping levers (A) on both door hinges fully. Close the oven door as far as the first position (approx. 45°). Take hold of the oven door with a hand on each side and pull it away from the 1. -
Page 22: Oven Door Glass
22 electrolux Let the door slide down as far as it will Oven door glass The oven door is fitted with three panels of glass mounted one behind the other.The in- ner panels can be removed for cleaning. Important! Rough handling, especially around the edges of the front panel, can cause the glass to break. - Page 23 23 Then remove the door trim by pulling it Take hold of the door trim (B) at each side, position it on the inside edge of the door and plug the door trim (B) into the upper edge of the door upwards.
-
Page 24: What To Do If
24 electrolux 4. Fold up the clamping levers (A) on both Close the oven door. door hinges back into their original posi- tions What to do if … Fault Possible cause Remedy The oven does not heat. The oven has not been switched Switch the oven on. -
Page 25: Installation Instructions
25 Installation Instructions • Anti-shock protection must be provided Attention: The new appliance may only by the installation. be installed and connected by a regis- • The built-in unit must meet the stability tered expert. requirements of DIN 68930. - Page 26 26 electrolux...
- Page 27 27...
-
Page 28: Disposal
28 electrolux Disposal Packaging material The packaging materials are environ- mentally friendly and can be recycled. The plastic components are identified by markings, e.g. >PE<, >PS<, etc. Please dispose of the packaging materials in the appropriate container at the com- munity waste disposal facilities. -
Page 29: Guarantee/Customer Service
29 Guarantee/Customer Service European Guarantee This appliance is guaranteed by Electrolux in each of the countries listed at the back of this user manual, for the period specified in the appli- ance guarantee or otherwise by law. If you move... - Page 30 Industriestrasse 10, CH-5506 Mägenwil Svizzera Electrolux Ljubljana d.o.o. Slovenija +38 61 24 25 731 Gerbièeva 98, 1000 Ljubljana Electrolux Slovakia s.r.o., Electrolux Domáce Slovensko +421 2 43 33 43 22 spotrebièe SK, Seberíniho 1, 821 03 Bratisla- Suomi www.electrolux.fi Electrolux Service, S:t Göransgatan 143,...
-
Page 31: Service
31 Service In the event of technical faults, please first check whether you can remedy the problem yourself with the help of the operating in- structions (section “What to do if…”). If you were not able to remedy the problem yourself, please contact the Customer Care Department or one of our service partners. - Page 32 822 928 193-N-241108-01...
Need help?
Do you have a question about the EOB31001 and is the answer not in the manual?
Questions and answers