Table of Contents
Advertisement
Available languages
Available languages
ge.com
Safety Instructions
. . . . . . . . . 2-9
Owner's Manual
Operating Instructions
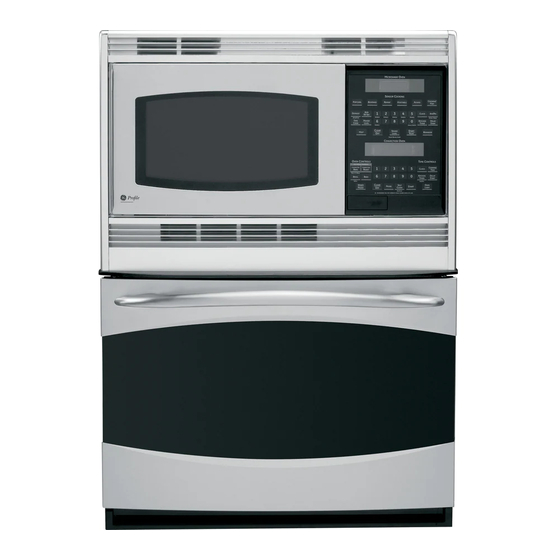
PT970-30 " Double Wall Oven
Lower Oven Control Panel . . . . . .23
Lower Oven Controls . . . . . . .23-38
Lower Oven Thermostat . . . . . . .34
Microwave Control Panel . . .10, 11
Microwave Oven Controls . . . .10-22
Probe . . . . . . . . . . . . . . . . . . .28, 31
Sabbath Feature . . . . . . . . . . . 39, 40
Self-Cleaning Lower Oven . . . 35, 36
Sensor Controls . . . . . . . . . . .16-18
Door . . . . . . . . . . . . . . . . . . . . . .42
Light Bulb . . . . . . . . . . . . . . . . . . . . .44
Microwave Oven . . . . . . . . . . . . . 41
Probe . . . . . . . . . . . . . . . . . . . . . . . .43
Racks . . . . . . . . . . . . . . . . . . . . . .44
. . . . . 45-48
The microwave oven in this
Consumer Support
cooking center is 1000 watts.
Consumer Support . . . . . . . . . . . 52
Product Registration . . . . . . . 49, 50
Warranty . . . . . . . . . . . . . . . . . . .51
Write the model and serial
numbers here:
Model # ____________________
Serial #______________________
You can find them on a label inside
the upper oven on the left side.
49-80432 02-07 JR
Advertisement
Chapters
Table of Contents
Troubleshooting

Related Manuals for GE PT970SMSS


Summary of Contents for GE PT970SMSS
-
Page 1: Table Of Contents
Safety Instructions ..2–9 Owner’s Manual Operating Instructions PT970–30 ″ Double Wall Oven Lower Oven Control Panel ..23 Lower Oven Controls ..23–38 Lower Oven Thermostat . -
Page 2: Important Safety Information
IMPORTANT SAFETY INFORMATION. READ ALL INSTRUCTIONS BEFORE USING. WARNING! For your safety, the information in this manual must be followed to minimize the risk of fire or explosion, electric shock, or to prevent property damage, personal injury, or loss of life. PRECAUTIONS TO AVOID POSSIBLE EXPOSURE TO EXCESSIVE MICROWAVE ENERGY Do not attempt to operate this oven with... -
Page 3: Safety Precautions
Wear proper clothing. Loose-fitting or hanging garments should never be worn while using the appliance. Flammable material could be ignited if brought in contact with hot heating elements and may cause severe burns. ge.com... - Page 4 IMPORTANT SAFETY INFORMATION. READ ALL INSTRUCTIONS BEFORE USING. WARNING! SAFETY PRECAUTIONS Do not use water on grease fires. Never pick up a flaming pan. Smother flaming pan by covering pan completely with well-fitting lid, cookie sheet or flat tray. Flaming grease outside a pan can be put out by covering with baking soda or, if available, a multi-purpose dry chemical or foam-type fire extinguisher.
- Page 5 Be careful when opening any containers of hot food, including popcorn bags, cooking pouches and boxes. To prevent possible injury, direct steam away from hands and face. As with any appliance, close supervision is necessary when used by children. ge.com...
- Page 6 IMPORTANT SAFETY INFORMATION. READ ALL INSTRUCTIONS BEFORE USING. WARNING! MICROWAVE-SAFE COOKWARE Make sure all cookware used in your microwave oven is suitable for microwaving. Most glass casseroles, cooking dishes, measuring cups, custard cups, pottery or china dinnerware which does not have metallic trim or glaze with a metallic sheen can be used. Some cookware is labeled “suitable for microwaving.”...
- Page 7 Do not boil liquids in narrow-necked containers such as soft drink bottles, wine flasks and especially narrow-necked coffee cups. Even if the container is opened, excessive steam can build up and cause it to burst or overflow. ge.com...
- Page 8 IMPORTANT SAFETY INFORMATION. READ ALL INSTRUCTIONS BEFORE USING. ALL THESE THINGS ARE NORMAL WITH YOUR MICROWAVE Steam or vapor escaping from around the door. Light reflection around the door or the outer case. Dimming of the oven light and change in the blower sound may occur while operating at power levels other than high.
-
Page 9: Save These Instructions
If the self-cleaning mode malfunctions, turn the oven off and disconnect the power supply. Have it serviced by a qualified technician. Listen for a fan—a fan noise should be heard sometime during the cleaning cycle. If not, call for service before self-cleaning again. ge.com... - Page 10 Using the microwave oven controls. Throughout this manual, features and appearance may vary from your model. Microwave Oven Control Features and Settings Display Displays the time during cooking functions, the power level being used, the Auto Codes, the Auto Defrost food weights, the cooking mode and instructions.
- Page 11 Delay Start Allows you to set the microwave to delay cooking up to 24 hours. Add 30 Sec Each time you press this pad, the set time is increased 30 seconds. Clock Press this pad before setting the clock. ge.com...
- Page 12 Changing the microwave power level. The power level may be entered or changed immediately after entering the time for Time Cook, Time Defrost or Express Cook. The power level may also be changed during time countdown. To change the power level… Variable power levels add flexibility to microwave cooking.
- Page 13 (Press the Power Level pad. Select a desired power level 1–10.) Press the Time Cook pad again. ge.com Press the Start/Pause pad. You may open the door during Time Cook to check the food. Close the door and press the Start/Pause pad to resume cooking.
- Page 14 Using the timed microwave features. Cooking Guide For Time Cook. Use power level High (10) unless otherwise noted. Vegetable Amount Asparagus (fresh spears) 1 lb. (frozen spears) 10-oz. package Beans (fresh green) 1 lb. cut in half (frozen green) 10-oz. package (frozen lima) 10-oz.
- Page 15 Place unwrapped breast in microwave-safe dish breast-side-down. After first half of time, turn breast-side-up and shield warm areas with foil. Defrost for second half of time. Let stand 1 to 2 hours in refrigerator to complete defrosting. ge.com Defrosting Tips Foods frozen in paper or plastic can be defrosted in the package.
- Page 16 Using the microwave sensor cooking features. The Sensor Features detect the increasing humidity released during cooking. The oven automatically adjusts the cooking time to various types and amounts of food. Sensor Cooking The proper containers and covers are essential for best sensor cooking. Always use microwave-safe containers and cover them with lids or vented plastic wrap.
- Page 17 The oven starts immediately. The oven signals when steam is sensed and time remaining is counting down. ge.com Some foods not recommended for use with Reheat—it is best to use Time Cook for these foods: Bread products.
- Page 18 Using the microwave sensor cooking features. To reduce time by 10%: Press the 1 pad after the feature pad. To add 10% to cooking time: Press the 9 pad after the feature pad. Potato The Potato feature cooks 1/2–2 lbs. of potatoes. (less time) (more time) Do not open the oven door until time is...
- Page 19 For example, press pads 1 and 2 for 1.2 pounds (1 pound, 3 ounces). Press Start/Pause. ge.com Conversion Guide If the weight of food is stated in pounds and ounces, the ounces must be converted to tenths (.1) of a pound.
- Page 20 Using the other microwave features. Cooking Complete Reminder: To remind you that you have food in the oven, the oven will display FOOD IS READY and beep once a minute until you either open the oven door or press the Clear/Off pad. Clock Press to enter the time of day or to check the time of day while microwaving.
- Page 21 0 pad for about 3 seconds. The Display On/Off feature cannot be used while a cooking feature is in use. ge.com When the control panel is locked, an L will be displayed to the extreme right. When time is up, the oven will signal.
-
Page 22: Microwave Terms
Microwave terms. Term Definition Arcing Arcing is the microwave term for sparks in the oven. Arcing is caused by: the temperature probe staying in the oven but not inserted in the food. metal or foil touching the side of the oven. foil that is not molded to food (upturned edges act like antennas). -
Page 23: Lower Oven Controls
Press and then press the number pads to set the amount of time you want your food to cook. The oven will shut off automatically when the cooking time has run out. Clock Pad Press before setting the clock. ge.com... - Page 24 Using the lower oven. To avoid possible burns, place the racks in the desired position before you turn the oven on. Before you begin… The racks have stop-locks, so that when placed correctly on the supports, they will stop before coming completely out, and will not tilt.
-
Page 25: Broiling Guide
Handle and turn very carefully. Brush with lemon butter before and during cooking, if desired. Preheat broiler to increase browning. Increase time 5 to 10 minutes per side for 1 home-cured ham. Slash fat. Slash fat. 12–14 ge.com ″ thick or ⁄... - Page 26 Using the lower oven clock and timer. To Set the Clock The clock must be set to the correct time of day for the automatic oven timing functions to work properly. The time of day cannot be changed during a Make sure the clock is set to the timed baking or self-cleaning cycle.
- Page 27 Press the Delay Start pad. ge.com and minutes. For example, enter 90 minutes as 1 hr. 30 minutes. The oven temperature and the cooking time that you entered will be displayed.
-
Page 28: Probe
Using the lower oven probe. For many foods, especially roasts and poultry, internal food temperature is the best test for doneness. The temperature probe takes the guesswork out of roasting by cooking foods to the exact doneness you want. NOTE: The probe is for use in the lower oven only. Use of probes other than the one provided with this product may result in damage to the probe. - Page 29 Using the lower convection oven. Convection Fan In a convection oven, a fan circulates hot air over, under and around the food. This circulating hot air is evenly distributed throughout the oven cavity. As a result, foods are evenly cooked and browned—often in less time with convection heat.
- Page 30 Using the lower convection oven. Convection Roast Grid Broiler pan The convection fan circulates the heated air evenly over and around the food. Meat and poultry are browned on all sides as if they were cooked on a rotisserie. Heated air will be circulated over, under and around the food being roasted.
- Page 31 Turkey, whole Unstuffed (10 to 16 lbs.) Unstuffed (18 to 24 lbs.) Turkey Breast (4 to 6 lbs.) ge.com When the internal temperature of the meat reaches the temperature you have set, the probe and the oven turn off and the oven control signals.
- Page 32 Using the lower oven timed features for convection cooking. You will hear a fan while cooking with these features. The fan will stop when the door is opened, but the heat will not turn off. NOTE: Foods that spoil easily—such as milk, eggs, fish, stuffings, poultry and pork—should not be allowed to sit for more than 1 hour before or after cooking.
- Page 33 Press the number pads to set the time of day you want the oven to turn on and start cooking. ge.com If you would like to check the times you have set, press the Delay Start pad to check the start time you have set, or press the Cooking Time pad to check the length of cooking time you have set.
- Page 34 Adjust the lower oven thermostat—Do it yourself! You may find that your new oven cooks differently than the one it replaced. Use your new oven for a few weeks to become more familiar with it. If you still think your new oven is too hot or too cold, you can adjust the thermostat yourself.
-
Page 35: Self-Cleaning Lower Oven
If a time other than 4 hours is needed, use the number pads and enter the desired clean time. Press the Start pad. ge.com Make sure the oven light bulb cover (on some models) is in place and the oven light is off. -
Page 36: Self-Cleaning Lower Oven
Using the self-cleaning lower oven. The oven door must be closed and all controls must be set correctly for the cycle to work properly. How to Delay the Start of Cleaning You can change the clean time to any time between 3 hours and 5 hours, depending on how dirty your oven is. - Page 37 To unlock the control, press the 9 and 0 pads at the same time for 3 seconds, until the display shows LOC OFF. ge.com Press the Delay Start pad until no shdn (no shut-off) appears in the display. Press the Start pad to activate the no shut-off and leave the control set in this special features mode.
-
Page 38: Lower Oven Controls
Special features of your lower oven control. Tones at the End of a Timed Cycle At the end of a timed cycle, 3 short beeps will sound followed by one beep every 6 seconds until the Clear/Off pad is pressed. This continuous 6-second beep may be canceled. - Page 39 99 minutes.The cooking time that you entered will be displayed. Touch the Start pad. Touch the Bake pad. No signal will be given. ge.com Using the number pads, enter the desired temperature between 170°F and 550°F. No signal or temperature will be given.
- Page 40 Using the Sabbath Feature. (Designed for use on the Jewish Sabbath and Holidays.) (on some models) How to Exit the Sabbath Feature Touch the Clear/Off pad. If the oven is cooking, wait for a random delay period of approximately 30 seconds to 1 minute, until only ⊃...
-
Page 41: Care And Cleaning
Do not use abrasives, such as cleaning powders or steel and plastic pads. They may mar the surface. ge.com Apply with a soft cloth and allow to soak. Wipe dry and then apply an appliance polish to thoroughly clean and protect the surface. - Page 42 Care and cleaning of the cooking center. Lift-Off Oven Door The door is very heavy. Be careful when removing and lifting the door. Do not lift the door by the handle. Slot To remove the door: Hinge lock Pull hinge locks down to unlock To replace the door: Removal position To clean the inside of the door:...
-
Page 43: Probe
Cool the temperature probe before cleaning. Scour stubborn spots with a soap-filled scouring pad, rinse and dry. ge.com Do not use abrasive cleansers, strong liquid cleaners, plastic scouring pads or oven cleaners on the control panel—they will damage the finish. A 50/50 solution of vinegar and hot water works well. -
Page 44: Racks
To inquire about purchasing stainless steel appliance cleaner or polish, or to find the location of a dealer nearest you, please call our toll-free number: National Parts Center 1.800.626.2002 ge.com... -
Page 45: Troubleshooting Tips
• See the Microwave safe cookware section of the Important Safety Instructions section. • Make sure the inside of the oven and the outside of the containers are dry. • Some standing time is recommended for certain vegetables cooked with the Sensor Controls. ge.com... -
Page 46: Before You Call For Service
Before you call for service… Troubleshooting Tips Problem Possible Causes Lower oven control You forgot to enter a signals after entering bake temperature or cooking time or cleaning time. delay start Food does not bake or Oven controls improperly set. roast properly in the Rack position is incorrect lower oven... - Page 47 • Clean up heavy spillovers before starting the clean cycle. Heavily soiled ovens may need to self-clean again or for a longer period of time. • Close the oven door. • Press the Clear/Off pad. Allow the oven to cool. ge.com...
-
Page 48: Troubleshooting Tips
Before you call for service… Troubleshooting Tips Problem Possible Causes Lower oven light does Light bulb is loose or defective. • Tighten or replace the bulb. not work Pad operating light is broken. “F— and a number or You have a function letter”... - Page 49 You can rest easy, knowing that all your valuable household products are protected against expensive repairs. Place your confidence in GE and call us in the U.S. toll-free at for more information. *All brands covered, up to 20 years old, in the continental U.S.
- Page 50 Check here if you do not want to receive communications from GEA’s carefully selected partners. FAILURE TO COMPLETE AND RETURN THIS CARD DOES NOT DIMINISH YOUR WARRANTY RIGHTS. For more information about GEA’s privacy and data usage policy, go to ge.com and click on “Privacy Policy” or call 800.626.2224. Read your Owner’s Manual carefully.
- Page 51 This warranty is extended to the original purchaser and any succeeding owner for products purchased for home use within the USA. If the product is located in an area where service by a GE Authorized Servicer is not available, you may be responsible for a trip charge or you may be required to bring the product to an Authorized GE Service location for service.
-
Page 52: Consumer Support
Caution must be exercised, since improper servicing may cause unsafe operation. Contact Us If you are not satisfied with the service you receive from GE, contact us on our Website with all the details including your phone number, or write to: General Manager, Customer Relations Register Your Appliance Register your new appliance on-line—at your convenience! Timely product registration will allow for... - Page 53 Instrucciones de seguridad ..2–9 Manual del propietario Instrucciones de operación PT970–Horno de doble pared de 30 ″ Autolimpieza del horno inferior ..35, 36 Controles del horno inferior ..23–38 Controles del horno microondas .
- Page 54 INFORMACIÓN IMPORTANTE DE SEGURIDAD. LEA TODAS LAS INSTRUCCIONES ANTES DE USAR. ¡ADVERTENCIA! Si no se sigue exactamente la información de este manual, puede ocurrir un incendio, una explosión o un cortocircuito que podría causar daños a la propiedad, lesiones personales o la muerte. PRECAUCIONES PARA EVITAR LA POSIBLE EXPOSICIÓN A UNA ENERGÍA DE MICROONDAS EXCESIVA No intente operar este horno con...
- Page 55 Utilice ropa apropiada. Nunca debe vestir ropa suelta u holgada mientras esté utilizando el aparato. Los materiales inflamables pueden encenderse si entran en contacto con elementos calientes y pueden causar quemaduras graves. ge.com...
- Page 56 INFORMACIÓN IMPORTANTE DE SEGURIDAD. LEA TODAS LAS INSTRUCCIONES ANTES DE USAR. ¡ADVERTENCIA! PRECAUCIONES DE SEGURIDAD No use agua para apagar incendios causados por grasa. Nunca agarre una cacerola que se esté quemando. Sofoque las cacerolas que se estén quemando cubriéndolas completamente con una tapa bien ajustada, una bandeja para hornear o una bandeja plana.
- Page 57 Para prevenir posibles lesiones, dirija el vapor lejos de las manos y el rostro. Como con cualquier aparato, se necesita una supervisión cercana cuando sea utilizado por niños. ge.com...
- Page 58 INFORMACIÓN IMPORTANTE DE SEGURIDAD. LEA TODAS LAS INSTRUCCIONES ANTES DE USAR. ¡ADVERTENCIA! UTENSILIOS DE COCINA SEGUROS PARA MICROONDAS Asegúrese de que todos los utensilios de cocina utilizados en su horno de microondas sean adecuados para cocinar con microondas. Pueden utilizarse la mayoría de cacerolas de vidrio, platos para cocinar, tazones de medición, tazones para cremas, cerámica o vajilla de porcelana que no tenga adornos metálicos o esté...
- Page 59 Incluso si el recipiente está abierto, puede acumularse un exceso de vapor y causar que éste explote o se rebose. ge.com...
- Page 60 INFORMACIÓN IMPORTANTE DE SEGURIDAD. LEA TODAS LAS INSTRUCCIONES ANTES DE USAR. TODOS LOS SIGUIENTES ASPECTOS SON NORMALES CON SU HORNO MICROONDAS Vapor escapando alrededor de la puerta. Reflejo de luz alrededor de la puerta o de la carcasa externa. Puede presentarse una pérdida de intensidad de la luz del horno y un cambio en el sonido del soplador cuando se opera a niveles de corriente inferiores.
-
Page 61: Autolimpieza Del Horno Inferior
Haga que un técnico calificado realice la reparación. Esté atento al ventilador: en algún momento durante el ciclo de limpieza debe escucharse el ruido de un ventilador. Si no sucede esto, llame para que el horno reciba mantenimiento antes de una nueva autolimpieza. ge.com... -
Page 62: Controles Del Sensor
Uso de los controles del horno microondas. A lo largo de este manual, las características y apariencia pueden variar con los de su modelo. Características y configuraciones de control del horno microondas Pantalla Muestra el tiempo durante las funciones de cocción, el nivel de potencia que está... - Page 63 Le permite configurar el horno microondas para que demore la cocción hasta por 24 horas. Adicionar 30 segundos Cada vez que presione este botón, el tiempo establecido aumenta en 30 segundos. Clock (Reloj) Presione este botón antes de configurar el reloj. ge.com...
- Page 64 Cambio del nivel de potencia del microondas. El nivel de potencia puede ingresarse o cambiarse inmediatamente después de ingresar el tiempo para Time Cook, Time Defrost o Express Cook. El nivel de potencia también puede cambiarse durante la cuenta regresiva del tiempo. Para cambiar el nivel de potencia…...
- Page 65 Power Level. Seleccione el nivel de potencia deseado 1 a 10.) Presione nuevamente el botón Time Cook. ge.com Presione el botón Start/Pause. Usted puede abrir la puerta durante Time Cook para revisar la comida. Cierre la puerta y presione el botón Start/Pause para continuar la cocción.
- Page 66 Uso de las características cronometradas del microondas. Guía de cocina para el tiempo de cocción. Utilice el nivel de potencia Alto (10) a menos que se indique lo contrario. Verduras Cantidad Arvejas (frescas, descascaradas) 2 lb con la cáscara (congelada) paquete de 10 oz Brócoli (corte fresco)
- Page 67 3 a 7 min Coloque el bloque en la fuente. Voltee y separe después de la mitad del tiempo. 9 a 12 min ge.com Consejos de descongelamiento Los alimentos congelados en papel o plástico pueden ser descongelados dentro del paquete. Los paquetes cerrados deben ser cortados, perforados o ventilados DESPUÉS de...
- Page 68 Uso de las características del sensor de cocción del horno microondas. La característica Sensor detecta el aumento de la humedad liberada durante la cocción. El horno ajusta automáticamente el tiempo de cocción a varios tipos y cantidades de alimentos. Sensor de cocción Los recipientes y cubiertas apropiados son esenciales para el buen funcionamiento del sensor de cocción.
- Page 69 El horno arranca inmediatamente. El horno indica cuando se detecta vapor y el tiempo restante entra en cuenta regresiva. ge.com Algunos alimentos no son recomendados para utilizarse con Reheat; para estos alimentos es mejor utilizar Time Cook: Productos de pan.
- Page 70 Uso de las características del sensor de cocción del horno microondas. Para reducir el tiempo en 10%: presione el botón 1 después del botón de la característica. Para añadir un 10% al tiempo de cocción: presione el botón 9 después del botón de la característica. Potato (Papas) La característica Potato cocina 1/2 a 2 lb de papas.
- Page 71 Por ejemplo, presione los botones 1 y 2 para 1,2 libras (1 libra, 3 onzas). Presione Start/Pause (Inicio/Pausa). ge.com Guía de conversión Si el peso de la comida está establecido en libras y onzas, las onzas deben convertirse a décimas (0,1) de una libra.
- Page 72 Uso de las otras características del microondas. Recordador de cocción terminada: para recordarle que tiene comida en el horno, el horno mostrará FOOD IS READY y sonará una alarma una vez por minuto hasta que abra la puerta del horno o presione el botón Clear/Off. Clock (Reloj) Presione para ingresar la hora del día o revisar la hora del día mientras cocina con el horno...
- Page 73 Para encender o apagar la pantalla del reloj, presione y mantenga sostenido el botón 0 durante aproximadamente 3 segundos. La característica Display ge.com Cuando el panel de control esté bloqueado, aparecerá una L en el extremo derecho de la pantalla.
- Page 74 Términos de microondas. Término Definición Arco eléctrico El arco eléctrico es el término de microondas para definir las chispas dentro del horno. El arco eléctrico es causado por: La sonda de temperatura está en el horno pero no está insertada en la comida. Metal o papel aluminio en contacto con el lado del horno.
- Page 75 Presione y luego presione los botones numéricos para establecer la cantidad de tiempo que desea cocinar sus alimentos. El horno se apagará automáticamente cuando se haya agotado el tiempo de cocción. Botón Clock (Reloj) Presione antes de configurar el reloj. ge.com...
- Page 76 Uso del horno inferior. Para prevenir posibles quemaduras, coloque las parrillas en la posición deseada antes de encender el horno. Antes de comenzar… Las parrillas tienen cierres de tope, de forma tal que cuando se encuentren colocados correctamente en los soportes, se detendrán antes de salir completamente y no se inclinarán.
- Page 77 10 a 12 oz ″ de espesor) 2 (1 ⁄ aproximadamente 1 lb ge.com Presione el botón Broil Hi/Lo una vez para Asar a la parrilla HI (Alto). Para cambiar a Asar a la parrilla LO (Bajo), presione el botón Broil Hi/Lo nuevamente.
- Page 78 Uso del reloj y el temporizador del horno inferior. Para ajustar el reloj El reloj debe ser ajustado en la hora correcta del día para que las funciones automáticas cronometradas del horno funcionen apropiadamente. La hora del Asegúrese de que el reloj sea día no puede cambiarse durante un ciclo ajustado en la hora correcta del día.
- Page 79 1 hora y 30 minutos. En pantalla se mostrará la temperatura del horno y el tiempo de cocción que usted ingresó. Presione el botón Delay Start. ge.com ejemplo, ingrese 90 minutos como 1 hora y 30 minutos. En pantalla se mostrará la temperatura del horno y el tiempo de cocción que usted ingresó.
-
Page 80: Sonda
Uso de la sonda del horno inferior. Para muchos alimentos, especialmente la carne asada y las aves, la temperatura interna del alimento es la mejor prueba para el punto de cocción. La sonda de temperatura elimina las conjeturas acerca de los asados al cocinar los alimentos en el punto de cocción exacto que usted desea. NOTA: la sonda es para ser utilizada únicamente en el horno inferior. -
Page 81: Parrillas
™ . Consulte la sección Conversión ™ en las Características especiales ge.com NOTA: el ventilador de convección se encenderá y apagará en el ciclo mientras cocina para distribuir mejor el aire caliente dentro del horno. - Page 82 Uso del horno de convección inferior. Asado por convección Rejilla Bueno para grandes cortes de carne tierna, Bandeja para asar a la parrilla destapada. El ventilador de convección circula el aire calentado uniformemente sobre y alrededor de los alimentos. La carne roja y aves se doran por todos los lados como si fueran cocinados sobre un rotisserie.
- Page 83 Pavo, completo No relleno (10 a 16 lb) No relleno (18 a 24 lb) Pechuga de pavo (4 a 6 lb) ge.com Cuando la temperatura interna de la carne alcance la temperatura que configuró, la sonda y el horno se apagarán y el control del horno dará...
- Page 84 Uso de las características cronometradas del horno inferior para cocinar por convección. Escuchará un ventilador mientras esté cocinando con estas características. El ventilador se detendrá cuando la puerta se abra, pero el calor permanecerá. NOTA: no debe permitirse que los alimentos que se echan a perder fácilmente—como leche, huevos, pescado, rellenos, aves y cerdo—reposen por más de 1 hora antes o después de la cocción.
- Page 85 Si desea verificar el tiempo que ha configurado, presione el botón Delay Start para verificar la hora de inicio que ha configurado o presione el botón Cooking Time para verificar la duración del tiempo...
- Page 86 Ajuste del termostato del horno inferior: ¡Hágalo usted mismo! Usted se puede percatar que su horno nuevo cocina distinto al que reemplazó. Use su horno nuevo por varias semanas para familiarizarse con él. Si aún piensa que su horno nuevo es demasiado caliente o demasiado frío, usted puede ajustar el termostato usted mismo.
- Page 87 4 horas, utilice los botones numéricos e ingrese el tiempo de limpieza deseado. Presione el botón Start. ge.com Asegúrese de que esté puesta la cubierta de la bombilla eléctrica (en algunos modelos) y que la luz esté apagada.
- Page 88 Uso de la autolimpieza del horno inferior. La puerta del horno debe estar cerrada y todos los controles deben estar configurados correctamente para que el ciclo funcione apropiadamente. Cómo posponer el inicio de la limpieza Usted puede cambiar el tiempo de limpieza en cualquier momento entre 3 y 5 horas, dependiendo de cuán sucio esté...
- Page 89 9 y 0 al mismo tiempo durante 3 segundos, hasta que la pantalla muestre LOC OFF. ge.com Presione el botón Delay Start hasta que no apagado (no shdn) aparezca en la pantalla. Presione el botón Start para activar “no apagado”...
- Page 90 Características especiales de control de su horno inferior. Tonos al final de un ciclo cronometrado Al final de un ciclo cronometrado, sonarán 3 pitidos cortos seguidos por un pitido cada 6 segundos hasta que se presione el botón Clear/Off. Este pitido continuo cada 6 segundos puede cancelarse.
- Page 91 9 horas y 99 minutos. El tiempo de cocción que ingresó aparecerá en la pantalla. Presione el botón Start. ge.com Utilizando los botones numéricos, ingrese la temperatura deseada entre 170 °F y 550 °F. No se dará ninguna señal o temperatura.
- Page 92 Uso de la característica Sabbath. (Diseñada para utilizarse en el Sabbath judío y días festivos). (en algunos modelos) Cómo salir de la característica Sabbath Presione el botón Clear/Off. Si el horno está cocinando, espere durante un periodo aleatorio de aproximadamente 30 segundos a 1 minuto, hasta que solo ⊃...
-
Page 93: Puerta
Remueva las salpicaduras de grasa con un paño jabonoso, luego enjuague y seque. ge.com Aplique con un paño suave y deje empapar. Seque con un paño y luego aplique un lustrador para electrodomésticos para limpiar y proteger completamente la superficie. - Page 94 Cuidado y limpieza del centro de cocina. Despegue de la puerta del horno La puerta es muy pesada. Tenga cuidado al quitar y levantar la puerta. No levante la puerta por la agarradera. Ranura Para quitar la puerta: Cerrojo de la bisagra Jale hacia abajo los cerrojos de la bisagra para desbloquear Posición de remoción...
-
Page 95: Sonda
Restriegue las manchas difíciles de eliminar, con una almohadilla para restregar rellena de jabón, enjuague y seque. ge.com No utilice limpiadores abrasivos, limpiadores líquidos fuertes, almohadillas plásticas para restregar o limpiadores para hornos sobre el panel de control: estos productos dañarán el acabado. - Page 96 Para averiguar acerca de la compra de un limpiador o un lustrador de acero inoxidable, o para encontrar la ubicación de su distribuidor más cercano, por favor llame a nuestro número gratuito: Centro Nacional de Refacciones (National Parts Center) 1.800.626.2002 ge.com...
- Page 97 Instrucciones de seguridad importantes. • Asegúrese de que el interior del horno y el exterior de recipientes estén secos. • Se recomienda algo de tiempo de reposo para ciertas verduras cocinadas con los controles del sensor. ge.com...
-
Page 98: Consejos Para La Resolución De Problemas
Antes de llamar para solicitar un servicio de mantenimiento… Consejos para resolución de problemas Problema Causas posibles Señales de control Olvidó ingresar una del horno inferior temperatura de horneado o después de ingresar el tiempo de limpieza. el tiempo de cocción o Delay Start (Inicio postergado) Los alimentos... - Page 99 • Limpie las sobras pesadas antes de comenzar el ciclo de limpieza. Es posible que los hornos que tienen una mugre muy pesada necesiten de autolimpieza nuevamente o durante un periodo más prolongado. • Cierre la puerta del horno. • Presione el botón Clear/Off. Deje enfriar el horno. ge.com...
- Page 100 Antes de llamar para solicitar un servicio de mantenimiento… Consejos para resolución de problemas Problema Causas posibles La luz del horno inferior La bombilla está floja o defectuosa. • Apriete o reemplace la bombilla. no funciona El botón de operación de la bombilla está...
- Page 101 Service Protection Plus ™ de GE GE, una marca reconocida en todo el mundo debido a su calidad y confiabilidad, le ofrece Service Protection Plus ¡Sin importar la marca! Los beneficios incluyen: • Respaldo de GE • Todas las marcas están cubiertas •...
- Page 102 NO COMPLETAR Y DEVOLVER ESTA TARJETA NO REDUCE SUS DERECHOS DE GARANTÍA. Para más información sobre las políticas de privacidad y de uso de información de GEA, diríjase a ge.com y haga clic en “Política de privacidad” o llame al 800.626.2224. Lea su Manual del Propietario cuidadosamente.
- Page 103 Estados Unidos. Si el producto está situado en un área que no dispone de servicio por parte de un proveedor de servicio autorizado de GE, podría tener que hacerse cargo de los costes de envío o bien podría solicitársele que lleve el producto a un centro de servicio de GE autorizado para realizar la reparación.
-
Page 104: Soporte Al Consumidor
Solicite una reparación El servicio de expertos GE está a tan sólo un paso de su puerta. ¡Entre en línea y solicite su reparación cuando le venga bien 24 horas al día cualquier día del año! O llame al 800.GE.CARES (800.432.2737) durante horas normales de oficina.