Pro-Form 370p Treadmill User Manual
Uk manual
Hide thumbs
Also See for 370p Treadmill:
- Gebruiksaanwijzing (27 pages) ,
- Bedienungsanleitung (27 pages) ,
- Manuale d'istruzioni (27 pages)
Table of Contents
Advertisement
Model No. PETL37905.1
Serial No.
USER'S MANUAL
Serial Number
Decal
QUESTIONS?
As a manufacturer, we are com-
mitted to providing complete
customer satisfaction. If you
have questions, or if there are
missing or damaged parts,
please call:
08457 089 009
Or write:
ICON Health & Fitness, Ltd.
Unit 4
Revie Road Industrial Estate
Revie Road, Beeston
Leeds, LS11 8JG
UK
email: csuk@iconeurope.com
CAUTION
Read all precautions and instruc-
tions in this manual before using
Visit our website at
this equipment. Save this manual
for future reference.
www.iconeurope.com
Advertisement
Table of Contents

Related Manuals for Pro-Form 370p Treadmill


Summary of Contents for Pro-Form 370p Treadmill
- Page 1 Model No. PETL37905.1 Serial No. USER’S MANUAL Serial Number Decal QUESTIONS? As a manufacturer, we are com- mitted to providing complete customer satisfaction. If you have questions, or if there are missing or damaged parts, please call: 08457 089 009 Or write: ICON Health &...
-
Page 2: Table Of Contents
TABLE OF CONTENTS IMPORTANT PRECAUTIONS ..............3 BEFORE YOU BEGIN . -
Page 3: Important Precautions
IMPORTANT PRECAUTIONS WARNING: To reduce the risk of burns, fire, electric shock, or injury to persons, read the following important precautions and information before operating the treadmill. 1. It is the responsibility of the owner to ensure 11. If an extension cord is needed, use only a 3- that all users of this treadmill are adequately conductor, 1mm (14-gauge) cord that is no... - Page 4 20. When folding or moving the treadmill, make maintenance and adjustment procedures de- sure that the storage latch is fully closed. scribed in this manual. Never remove the motor hood unless instructed to do so by an 21. Inspect and properly tighten all parts of the authorised service representative.
-
Page 5: Before You Begin
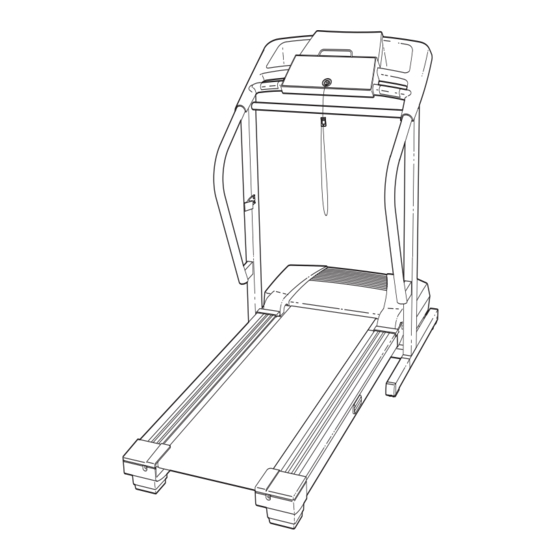
BEFORE YOU BEGIN Thank you for selecting the new PROFORM ® 370 P reading this manual, please see the front of this man- treadmill. The 370 P treadmill offers an array of fea- ual. To help us assist you, note the product model tures designed to make your workouts at home more number and serial number before contacting us. -
Page 6: Assembly
1/2” Screw (119)–1 3/4” Tek Screw (58)–8 1/2” Screw (48)–6 ASSEMBLY Assembly requires two persons. Set the treadmill in a cleared area and remove all packing materials. Do not dispose of the packing materials until assembly is completed. Note: The underside of the treadmill walking belt is coated with high-performance lubricant. During shipping, a small amount of lubricant may be transferred to the top of the walking belt or the shipping carton. - Page 7 2. Identify the Right Handrail (72), which has a large hole in the left side. Feed the Upright Wire (42) into the hole in the bottom of the Right Handrail and out of the large hole in the side. Note: It may be helpful to use needlenose pli- ers to pull the Upright Wire out of the hole.
- Page 8 4. Hold the Console Base (47) near the Left Handrail (71). Attach the ends of the ground wires on the Console Base to the indicated small hole in the Left Handrail with the Ground Silver Ground Screw (75). Wires Small Hole 5.
- Page 9 7. Press the Upright Wire (42) into the slot in the underside of the Console Base (47) in the indicated area. Cover the Upright Wire with the Right Grip Plate (36). Be careful not to pinch the Upright Wire. Tighten three 3/4” Screws (2) into the Right Grip Plate and the Console Slot Base.
- Page 10 2. Connect the included short jumper wire (B) to the wire on the receiver (C). Connect the other end of the short jumper wire to the CHEST PULSE jack on the back of the console (D). CHEST PULSE Jack 3. Peel the paper off the pad on the bottom of the receiver (C).
-
Page 11: Operation And Adjustment
OPERATION AND ADJUSTMENT THE PRE-LUBRICATED WALKING BELT Your treadmill features a walking belt coated with high-performance lubricant. IMPORTANT: Never apply sili- cone spray or other substances to the walking belt or the walking platform. Such substances will deterio- rate the walking belt and cause excessive wear. HOW TO PLUG IN THE POWER CORD This product must be earthed. - Page 12 Note: If there is a sheet of clear plastic Clip on the console, peel off the plastic. FEATURES OF THE CONSOLE Note:To prevent damage to the walking platform, wear clean athletic shoes while using the treadmill. The first The treadmill console offers a selection of features time the treadmill is used, observe the alignment of the designed to make your workouts more effective.
- Page 13 HOW TO TURN ON THE POWER To stop the walking belt, press the Stop button. The Time/Incline display will begin to flash. To Plug in the power cord (see page 11 ). restart the walking belt, press the Start button or the Speed increase button.
- Page 14 Speed display—This in, the key can be removed from the console, and display shows the speed the displays and indicators on the console will au- of the walking belt. tomatically light in a preset sequence. The buttons on the console will not function. If a “d” appears in the display while the information mode is selected, press the Speed decrease button.
- Page 15 ting are programmed for each segment. Note: The HOW TO USE A PRESET PROGRAM same speed setting and/or incline setting may be programmed for two or more consecutive seg- ments. Insert the key into the console. The speed setting for See HOW TO TURN ON THE POWER on page Current Segment the first segment will be...
- Page 16 If the speed or incline setting is too high or too low at Follow your progress with the five displays. any time during the program, you can manually override the setting by pressing the Speed or Incline buttons. See to step 5 on page 13. Every few times a Speed button is pressed, an addi- tional indicator will appear or disappear in the Current Measure your heart rate if desired.
-
Page 17: How To Fold And Move The Treadmill
HOW TO FOLD AND MOVE THE TREADMILL HOW TO FOLD THE TREADMILL FOR STORAGE Before folding the treadmill, adjust the incline to the lowest position. If this is not done, the treadmill may be per- manently damaged. Next, unplug the power cord. CAUTION: You must be able to safely lift 45 pounds (20 kg) to raise, lower, or move the treadmill. - Page 18 HOW TO MOVE THE TREADMILL Before moving the treadmill, convert the treadmill to the storage position as described on page 17. Make sure that the frame is securely held by the storage latch. 1. Hold the upper ends of the handrails, and place one foot against one of the wheels.
-
Page 19: Troubleshooting
TROUBLESHOOTING Most treadmill problems can be solved by following the steps below. Find the symptom that applies, and follow the steps listed. If further assistance is needed, see the front of this manual. PROBLEM: The power does not turn on SOLUTION: a. - Page 20 Locate the Reed Switch (10) and the Magnet (18) on the left side of the Pulley (17). Turn the Pulley until the 3 mm Magnet is aligned with the Reed Switch. Make sure that the gap between the Magnet and the Reed Switch is about 3 mm (1/8 in.).
-
Page 21: Conditioning Guidelines
CONDITIONING GUIDELINES is to burn fat, adjust the speed and incline of the tread- WARNING: mill until your heart rate is near the lowest number in Before beginning this your training zone. or any exercise program, consult your physi- cian. This is especially important for individu- For maximum fat burning, adjust the speed and incline als over the age of 35 or individuals with pre- of the treadmill until your heart rate is near the middle... - Page 22 SUGGESTED STRETCHES The correct form for several basic stretches is shown at the right. Move slowly as you stretch—never bounce. 1. Toe Touch Stretch Stand with your knees bent slightly and slowly bend forward from your hips. Allow your back and shoulders to relax as you reach down toward your toes as far as possible.
- Page 23 NOTES...
- Page 24 PART LIST—Model No. PETL37905.1 R0506A No. Qty. Description No. Qty. Description No. Qty. Description Hood Small Bolt Belt Guide 3/4” Screw Upright Wire Belt Guide Screw Motor Belt Console Optic Disk Motor Tension Bolt Latch Spacer Rear Roller 3/8” Washer Isolator Frame Motor Star Washer...
- Page 25 REMOVE THIS PART LIST/EXPLODED REMOVE THIS EXPLODED DRAWING AND PART DRAWING FROM THE MANUAL! LIST FROM THE MANUAL Save this EXPLODED DRAWING and PART LIST for future reference. Note: Specifications are subject to change without notice. For information about ordering replacement parts, see the back cover of the User’s Manual.
- Page 26 EXPLODED DRAWING—Model No. PETL37905.1 R1005A EXPLODED DRAWING—Model No. PETL37905.1 R0506A...
- Page 28 To help us assist you, please be prepared to provide the following information: • the MODEL NUMBER of the product (PETL37905.1) • the NAME of the product (PROFORM 370 P treadmill) • the SERIAL NUMBER of the product (see the front of this manual) •...
Need help?
Do you have a question about the 370p Treadmill and is the answer not in the manual?
Questions and answers