Table of Contents
Advertisement
Quick Links
Advertisement
Table of Contents

Related Manuals for Campbell HydroSense II


Summary of Contents for Campbell HydroSense II
- Page 1 HydroSense II User Guide 10/11...
- Page 2 HydroSense II Soil Moisture Measurement System...
- Page 3 The form is available from Campbell Scientific Australia. A completed form must be either emailed to info@campbellsci.com or faxed to 07 47720555. Campbell Scientific Australia will not process any returns until we receive this form. If the form is not received within three days of product receipt or is incomplete, the product will be returned to the customer at the customer’s...
-
Page 4: Table Of Contents
Table of Contents General Description ......................6 Introduction ..........................6 Specifications ........................7 HydroSense II Display specifications ................7 HydroSense II sensor specifications ................. 7 What’s included ........................8 Setup and First Use ......................9 Measurements ........................9 Measurement Display ......................9 Water Content Display ...................... - Page 5 11.3 Bluetooth Power ........................ 25 11.4 Time/Date Menu ........................ 26 11.5 Time Set ..........................26 11.6 Date Format ......................... 26 11.7 Time Zone ..........................27 11.8 Time Synchronisation ...................... 28 11.9 Display Settings ........................28 11.10 Contrast ..........................28 11.11 Brightness ..........................29 11.12 Backlight On Time ......................
-
Page 6: General Description
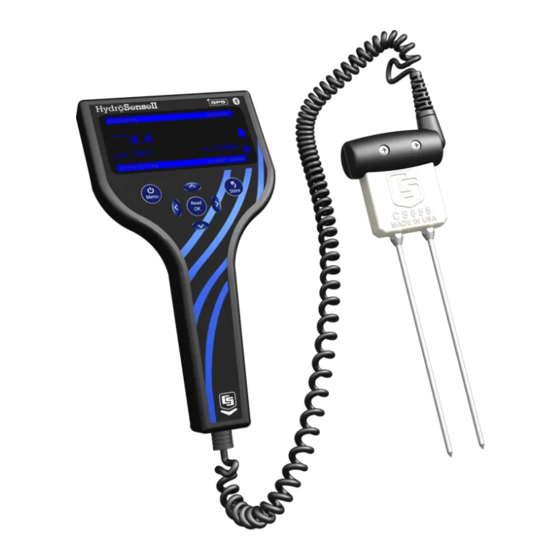
1 General Description 1.1 Introduction The HydroSense II is an easy to use, portable device for measuring soil moisture in terms of volumetric water content (in percent). The three major components of the system are the display, the sensor and the software. The sensor is available in two different versions –... -
Page 7: Specifications
Positioning System) received which enables data to be stored with position information. This technique is known as geo-tagging. The HydroSense II has many power saving features – the device turns off when it has been idle for a configurable period, the backlight brightness and on-time... -
Page 8: What's Included
100mm x 92mm x 40mm (sensor body) 450g Weight (g) 3 What’s included The HydroSense II Soil Moisture Measurement System consists of many parts. Standard parts are listed in the table below. Description HydroSense II measurement and display unit (pn: CD660) -
Page 9: Setup And First Use
The steps to taking a measurement are as follows: Ensure that the HydroSense II is turned on. Start up the HydroSense II by holding the Menu/PWR button for 3 seconds. -
Page 10: Water Deficit Display
5.3 Water Deficit Display The purpose of the HydroSense II Water Deficit display is to help with water management decisions for irrigators. In Water Deficit mode, the HydroSense II stores “wet” and “dry” values for up to 10 different soil types and compares the current measurement to those reference values. -
Page 11: Soil Types
HydroSense II Soil Moisture Measurement System By default the HydroSense II does not display the Water Deficit data set on the main screen. To enable this mode, turn on Deficit Mode from the configuration menus. 5.3.1 Soil types The HydroSense II needs three different parameters to calculate relative water content and deficit - “wet”... - Page 12 HydroSense II Soil Moisture Measurement System The soil profile details page will be displayed. This page shows the reference values stored for this soil profile along with the probe length used. To select this soil and return to the main screen, press the down button to highlight the “SELECT THIS SOIL”...
-
Page 13: Storage
This key also doubles as the Power button. To turn the HydroSense II on or off, press and hold this button for 3 seconds. The Read/OK button. This key is used to initiate a new measurement in the... -
Page 14: Splash Screen
HydroSense II Soil Moisture Measurement System 6.2 Splash Screen To turn on the HydroSense II, press and hold the Menu/PWR Button for 3 seconds. The splash screen shown below is displayed. Please note that the Operating System version number is displayed along with the device serial number. -
Page 15: Status Information
(such as “Zone 00001” above) the zone name will be displayed in a similar way to that shown in the bottom screenshot. This change occurs automatically when the HydroSense II detects that it is within the “Geo-tagging boundaries of a zone. -
Page 16: Deficit Display
HydroSense II Soil Moisture Measurement System PER – The average period of the water content reflectometer (CS658/9). The value is displayed in microseconds. Below the sensor readings is displayed the model number and rod length of the sensor used (in this case “CS658 20cm”). This is updated with each measurement. -
Page 17: Data Storage And Retrieval
7.2 What is stored? The flash file system of the HydroSense II is employed to hold water content measurements, the zone table and the table of configuration settings. The most important among these is the water content data file. When the user... -
Page 18: Connecting Via Bluetooth
Once the HydroSense II has been discovered, click the “Connect” button. The first time that the HydroSense II is used with a new computer is necessary to “pair” the computer and the HydroSense II before a connection can be made. -
Page 19: Geo-Tagging & Zones
The HydroSense II keeps a table of up to 100 GPS zones in memory and searches through this table every few seconds to determine if it is within the boundary of a zone. -
Page 20: Proper Measurement Technique & Limitations
“Zone xxxxx” where xxxxx is a number that automatically increases each time a new zone is created, however the zones can be renamed and updated at a later time using the HydroSense II software. If the... -
Page 21: Probe Insertion
9.3 Soil factors which can affect the Measurement The HydroSense II is very sensitive to changes in dielectric permittivity and the probe has water content measurement resolution better than 0.1%. While the HydroSense II is predominantly sensitive to dielectric permittivity (and consequently soil water content), other physical properties of the soil can affect the measurement. -
Page 22: Measurements In Special Materials
10 Maintenance 10.1 Batteries Under normal use, the life of the 4 AA batteries in the HydroSense II should be close to a year. The device is designed to continue to provide accurate measurements until the batteries are completely exhausted. The battery indicator... -
Page 23: How To Replace The Battery Pack
The process to replace the battery pack is as follows: Place the HydroSense II face down on a clean dry surface. Remove the four (4) Philips screws on the back of the HydroSense II case with the Philips screwdriver provided in the carry case. - Page 24 A small amount of Loctite® 222MS THREADLOCKER is included with the HydroSense II to use when replacing rods. The compound should be used sparingly, as only a thin coating is necessary and a thick coating may affect the measured water content.
-
Page 25: Configuration Menus
HydroSense II Soil Moisture Measurement System 11 Configuration Menus 11.1 Main Menu To enter the main menu, press the Menu button from the main screen. Using the up and down keys, select the desired menu item and press OK. To exit the menu,... -
Page 26: Time/Date Menu
11.5 Time Set This menu, is used to set the HydroSense II clock. The left and right keys can be used to move between the different parts of time and date, while the up and down keys adjust each individual part of the time and date. -
Page 27: Time Zone
HydroSense II Soil Moisture Measurement System 11.7 Time Zone The HydroSense II is able to use its GPS to provide a very accurate clock. Whenever a valid GPS signal is detected, the clock is adjusted using the received time (in UTC) and the time zone selected in this menu. -
Page 28: Time Synchronisation
HydroSense II Soil Moisture Measurement System 11.8 Time Synchronisation The HydroSense II is able to use its GPS to provide a very accurate clock. Whenever a valid GPS signal is detected, the clock is adjusted using the received time (in UTC) and the configured time zone. To use GPS synchronisation select ON from the list, or OFF to ignore the GPS time. -
Page 29: Brightness
11.13 Light Sensing In bright, sunny conditions, the LCD backlight has very little effect on readability, so the HydroSense II detects the ambient light level and switches the backlight off in bright conditions. This feature can be disabled using this menu. -
Page 30: Gps Settings
HydroSense II Soil Moisture Measurement System 11.14 GPS Settings This submenu contains a list of settings related to the GPS of the HydroSense II. Using the up and down keys, highlight one of the options shown and press select that item. Alternatively, press the Back button to exit the menu. -
Page 31: System Settings
Right buttons to choose between the different timeout periods and press save the change. Pressing Back will exit without saving. If the system on time is set to “Always on” the HydroSense II will only turn off when the MENU/PWR button is used. This will increase the average power consumption significantly. -
Page 32: Serial Number
HydroSense II Soil Moisture Measurement System 11.20 Serial Number This screen displays the serial number of the HydroSense II. This should match the serial number labelled on the front panel of the unit. Press Back to exit this screen. -
Page 33: Soil Physics Primer
HydroSense II Soil Moisture Measurement System 12 Soil Physics Primer 12.1 Soil Bolus Testing Soil moisture testing and the soil’s ability to store water and make it available to agricultural crops is highly dependant on the type of soil at the site. There are 3 major non-organic components of soil that affect its texture: sand, silt and clay. -
Page 34: Typical Soil Water Levels
Field Capacity Soil Type In Water Deficit Mode, the HydroSense II will display the mm of rain required to bring the soil up to field capacity. The capillary soil moisture content is the plant usable portion of the soil moisture... -
Page 35: Troubleshooting
On the display of my HydroSense The icon that is not appearing is the Bluetooth connection icon and it only appears when the HydroSense II is paired to a computer and there II, I can see the battery icon, the is an active data connection between them. -
Page 36: Operating System Updates
If the batteries in the HydroSense II fail during the update process, corruption of the operating system can result. Normally the batteries can be replaced and the update restarted, however in rare cases this corruption can lead to problems that can only be repaired by your local agent. - Page 37 300 N Cementerio, Edificio Breller Santo Domingo, Heredia 40305 COSTA RICA www.campbellsci.cc • info@campbellsci.cc Campbell Scientific Ltd. (CSL) Campbell Park 80 Hathern Road Shepshed, Loughborough LE12 9GX UNITED KINGDOM www.campbellsci.co.uk • sales@campbellsci.co.uk Campbell Scientific Ltd. (France) Miniparc du Verger - Bat. H 1, rue de Terre Neuve - Les Ulis 91967 COURTABOEUF CEDEX FRANCE www.campbellsci.fr •...
Need help?
Do you have a question about the HydroSense II and is the answer not in the manual?
Questions and answers