
Related Manuals for Campbell OBS-3A


Summary of Contents for Campbell OBS-3A
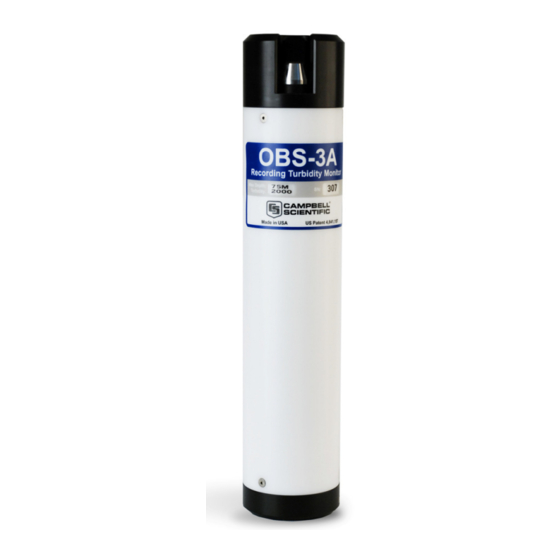
- Page 1 OBS-3A Turbidity and Temperature Monitoring System Revision: 7/13 C o p y r i g h t © 2 0 0 7 - 2 0 1 3 C a m p b e l l S c i e n t i f i c ,...
- Page 3 Campbell pricelist or product manual. Products not manufactured, but that are re-sold by Campbell, are warranted only to the limits extended by the original manufacturer. Batteries, fine-wire thermocouples, desiccant, and other consumables have no warranty.
- Page 4 SCIENTIFIC, INC., phone (435) 227-9000. After an applications engineer determines the nature of the problem, an RMA number will be issued. Please write this number clearly on the outside of the shipping container. Campbell Scientific’s shipping address is: CAMPBELL SCIENTIFIC, INC.
-
Page 5: Table Of Contents
6.1.2 Battery Installation................8 Software Installation ................9 Running HydroSci................10 Testing Sensors ..................12 Water-Density and Barometric Corrections ........13 Menus....................13 Connection ..................14 OBS-3A Configuration ..............14 6.8.1 Information .................14 6.8.2 Operations ...................15 6.8.3 Survey Configuration..............20 6.8.4 Cyclic Configuration..............23 6.8.5 Scheduled Configuration.............26 6.8.6 Setpoint Configuration..............30 Monitor....................32... - Page 6 Table of Contents 6.13 Excel Spreadsheets ................41 6.14 Erasing Memory Data................ 42 7. Calibration ..............43 Turbidity.................... 43 7.1.1 Equipment and Materials............43 7.1.2 Preparation ................. 44 7.1.3 HydroSci Software Steps............44 7.1.4 Making Turbidity Standards............45 Sediment.................... 46 7.2.1 Equipment and Materials............47 7.2.2 Sediment Preparation ..............
- Page 7 Table of Contents Tables 6-1. Working and Maximum Depths ............7 7-1. Mixing Volumes for Formazin Standards ..........46 7-2. Sample Durations for Sediment Calibrations ........48 9-1. Battery Life (Hours)................54...
- Page 8 Table of Contents...
-
Page 9: Introduction
OBS sensor. Do not poke it with any tool or object as the electrodes may be damaged. • Always put the OBS-3A in sleep mode when it will not be used for a while to conserve battery capacity (see Section 6.12, Shutdown). Initial Inspection •... -
Page 10: Ships With
Batteries and electronics are contained in a housing capable of operating at depths of up to 300 meters, depending on which pressure sensor is installed. A survey cable may be used to tow the OBS-3A and a depressor weight by clamping a cable harness to the housing. -
Page 11: Temperature And Optional Sensors
OBS-3A Turbidity and Temperature Monitoring System FIGURE 4-1. Anatomy of an OBS sensor Temperature and Optional Sensors Temperature is measured with a fast-response, stainless steel-clad thermistor. Pressure is measured with a semiconductor piezoresistive strain gage. Conductivity is measured with a four-electrode conduction-type cell. Working depths for available pressure sensors are listed in TABLE 6-1. -
Page 12: Specifications
OBS-3A Turbidity and Temperature Monitoring System Light transmission in water is attenuated by scattering (deflection by water molecules, and suspended matter) and absorption, which converts light to heat. Attenuation, absorption, and scattering are inherent properties of water that are affected only by impurities such as color and suspended organic matter. -
Page 13: Measurement Range
OBS-3A Turbidity and Temperature Monitoring System Measurement Range Turbidity (AMCO Clear): 0.4 to 4,000 NTU Mud (D =20 µm): 0.4 to 5,000 mg/L Sand (D =250 µm): 2 to 100,000 mg/L Pressure 0 to 10, 20, 50, 100, or 200 m Temperature: 0°... -
Page 14: Physcial
Operations Instrument Setup 6.1.1 Mounting Suggestions CAUTION Maximum depth for the OBS-3A housing is 300 meters. Working depths for individual instruments are limited by the installed pressure sensor. If exceeded, the pressure sensor will rupture and the housing will flood. -
Page 15: Working And Maximum Depths
The OBS-3A will usually be towed from a cable harness for surveys. The serial cable supplied with the unit is strong enough to tow the OBS-3A and a 5-kg depressor weight; however, the towing forces must be transmitted to the pressure housing and not to the connector. -
Page 16: Battery Installation
Use caution if you have significantly changed elevation CAUTION since the OBS-3A may be under pressure and the cap could pop out. Wipe water from inside walls of the tube with a paper towel (FIGURE 6-2). -
Page 17: Software Installation
Insert the ResourceDVD and type “OBS-3A” in the product window. Install the HydroSci software. Follow the installation wizard to install the software. This utility is your interface with the OBS-3A. As part of the installation, a system-maintenance program is included. Communication drivers exist on the The main purpose of this section is to explain how to program and operate the OBS-3A with HydroSci. -
Page 18: Running Hydrosci
Running HydroSci 1. Select the HydroSci program to start the program. 2. Physically connect the OBS-3A to a PC with the test cable as shown in FIGURE 6-3. This can be an RS-232, RS485, or USB plug. FIGURE 6-3. Connections and wiring of field cable... - Page 19 COM Port and Baud Rate at which to communicate. Press the Connect button. 4. Upon successful connection, the Monitor screen will appear: 5. Synchronize the OBS-3A clock with your PC by clicking Set OBS-3A Time. 6. Configure your OBS-3A as desired. For more information on...
-
Page 20: Testing Sensors
OBS-3A Turbidity and Temperature Monitoring System 7. After you have finished interacting with your sensor, click on the Connection tab and press the Disconnect button to disconnect from your sensor. Testing Sensors Before daily operations and deployments, verify the instrument works by pressing Survey Configuration and Start Survey. -
Page 21: Water-Density And Barometric Corrections
The Monitor screen can be used to monitor the current survey data. You can choose to view data in a graphical format or a tabular format. The View Data tab can be used to view data stored on the OBS-3A from cyclic, scheduled, and setpoint surveys. (When running in survey... -
Page 22: Connection
If the OBS-3A does not connect this screen will appear: If the OBS-3A is sampling, you have the option to stop the test. You can also choose to connect and allow the test to continue to run. If HydroSci cannot find an OBS-3A at the specified baud rate, you can have HydroSci try each baud rate until the OBS-3A responds. -
Page 23: Operations
Press the Sleep button to put the OBS-3A in low-power, sleep mode. This should be done when the OBS-3A will not be used for an extended period of time to conserve battery capacity. Use the drop-down button to specify how... - Page 24 HydroSci will confirm if you want to put the OBS-3A to sleep. Clear OBS-3A Data Storage Press the Erase Flash Button to clear all data stored in the OBS-3A. HydroSci will confirm you want to clear all the data stored.
- Page 25 Press the Run Correction button to run a barometric pressure correction. NOTE Be sure to do this while the OBS-3A is at the surface. Doing so when the instrument is submerged will result in large errors in the depth measurement.
- Page 26 The Coefficients box can be used to retrieve and save the coefficients stored in the OBS-3A that are used to calculate the output values for each sensor. The saved files can be used to load the coefficients into the OBS-3A at a time later, if necessary.
- Page 27 Coefficients from File button. Select the appropriate file from the resulting browsing window and press Open. You will be asked to confirm that you really want to replace the coefficients from the corresponding sensor. Press Yes and the coefficients from the file will be loaded into the OBS-3A.
-
Page 28: Survey Configuration
PC at rates up to 120 lines per minute (2 Hz). Before setting the survey configuration, run a Barometric Correction from the Options screen. Be sure to do this while the OBS-3A is at the surface. Doing so when the instrument is submerged will result in large depth errors. - Page 29 NOTE In survey mode, data is not saved to the OBS-3A. Data will not be saved if you choose not to log data to a file. After the survey is started, you can select the Monitor tab to view the data.
- Page 30 OBS-3A Turbidity and Temperature Monitoring System You can press the Load Configuration From File button to load a configuration that has previously been saved. The configuration can then be edited and/or started in the OBS-3A.
-
Page 31: Cyclic Configuration
FLASH memory at regular intervals; every 1, 5, 15, or 30 minutes. Depending on the number of sensors measured and the statistics selected, the OBS-3A can log as many as 200,000 lines of data (one per hour for 23 years) including: time, date, depth, NTUs, °C, and salinity. - Page 32 After setting the parameters, press the Start Cyclic Survey button to begin logging data. Go to the Connection tab and press Disconnect to disconnect from the OBS-3A. Unplug the test cable. Install dummy plug and locking sleeve. The instrument is then ready for deployment.
- Page 33 1500 measurements for each sensor. Depth This is the user’s best estimate of the water depth when the OBS-3A is deployed. It is an initial value needed by the unit to compute wave heights and correct for the attenuation of dynamic pressure with depth.
-
Page 34: Scheduled Configuration
24-hour clock. Before setting the survey configuration, run a Barometric Correction from the Options screen. Be sure to do this while the OBS-3A is at the surface. Doing so when the instrument is submerged will result in large depth errors. - Page 35 OBS-3A Turbidity and Temperature Monitoring System Go to the Connection tab and press Disconnect to disconnect from the OBS- 3A. Unplug the test cable. Install dummy plug and locking sleeve. The instrument is then ready for deployment. After setting the parameters, you can also press the Save Configuration To File button to save the configuration to be used at a later time.
- Page 36 1500 measurements for each sensor. Depth This is the user’s best estimate of the water depth when the OBS-3A is deployed. It is an initial value needed by the unit to compute wave heights and correct for the attenuation of dynamic pressure with depth.
- Page 37 Sample Settings Duration This is the length of time in seconds that the OBS-3A is measuring its sensors. The duration must always be less than the interval. The minimum duration is five seconds and the maximum is the longer of the wave record length or the 2048 / rate.
-
Page 38: Setpoint Configuration
Before setting the survey configuration, run a Barometric Correction from the Options screen. Be sure to do this while the OBS-3A is at the surface. Doing so when the instrument is submerged will result in large depth errors. - Page 39 Sample Settings Duration This is the length of time in seconds that the OBS-3A is measuring its sensors. The duration must always be less than the interval. The minimum duration is five seconds and the maximum is 2048 / rate.
-
Page 40: Monitor
• Switches Determines when the OBS-3A will switch from slow to fast and from fast to slow logging. Use the radio buttons to select one of the logic criteria. Monitor The Monitor screen can be used to monitor the current survey data. You can choose to view data in a graphical format or a tabular format. - Page 41 OBS-3A Turbidity and Temperature Monitoring System Temperature, Salinity, Concentration, and Depth are shown on the charts. Only the sensor measurements that were chosen in the configuration will be shown. (Temperature and Salinity are shown as different traces on the same chart.
- Page 42 If a survey is not currently running, the Monitor screen shows the current Sensor Time and PC Time. Press the Set OBS-3A Time button to set the OBS-3A time to the current PC time. Select the Pause Clock Update check...
-
Page 43: View Data
OBS-3A Turbidity and Temperature Monitoring System 6.10 View Data The View Data screen can be used to view data stored on the OBS-3A from cyclic, scheduled and setpoint surveys. (When running in survey configuration, data is not stored to the OBS-3A.) All of the available files will be shown in the List of Data Files. - Page 44 OBS-3A Turbidity and Temperature Monitoring System 3. A screen asking if the OBS-3A is currently sampling will appear. If you are ready to stop sampling, select radio button Stop sampling data. If you are not ready to stop, select Let the sample continue to run.
- Page 45 OBS-3A Turbidity and Temperature Monitoring System 4. Go to View Data to save data in a file. 5. Highlight the data with the start and end times you want. The Data File Contents shows a preview of the data you have selected. You can also...
-
Page 46: Graphing And Printing
OBS-3A Turbidity and Temperature Monitoring System 6. Once the correct data is selected, press Save Data File. The Save As screen will appear, name your file and press Save. When viewing data within View you have the ability to view, graph and print the data from the file. - Page 47 OBS-3A Turbidity and Temperature Monitoring System Then press the New Line Graph button and a new screen will appear with various graphing options. Categories can be selected and unselected to appear in the graph. Graph Width allows you to select the period the graph is showing and adjust how many data points show at once.
-
Page 48: Show Terminal
OBS-3A Turbidity and Temperature Monitoring System The spreadsheet of data can also be printed. 6.11 Show Terminal The Show Terminal tab brings up a terminal screen that allows you to view the commands being sent to the OBS-3A and the responses that are returned. -
Page 49: Shutdown
From the OBS-3A Configuration | Operations tab, select Put OBS-3A To Sleep. It will ask you to confirm your request. Press Yes and the OBS-3A will disconnect from HydroSci. You are then able to unplug your sensor. 6.13 Excel Spreadsheets To make an Excel spreadsheet from OBS-3A data, start Excel and set file type to All. -
Page 50: Erasing Memory Data
To erase the memory data on the OBS-3A, go to OBS-3A Configuration | Operations | Clear OBS-3A Data Storage | Erase Flash. It will have you confirm that you wish to erase all the data from the OBS-3A. By following this procedure, data in the Flash memory is erased, so be careful! -
Page 51: Calibration
OBS-3A Turbidity and Temperature Monitoring System Calibration It is a good idea to use the Retrieve and Save Coefficients to File button (under Operations on the OBS-3A Configuration screen) to save the original coefficients before performing a calibration. Turbidity This section briefly describes the materials and equipment you will need and the basic procedures for calibrating OBS sensors with AMCO Clear and sediment. -
Page 52: Preparation
You cannot change the OBS-3A calibration after exiting the calibration dialog box. 1. Place the OBS-3A in a turbidity standard for NTU calibration or sediment standard for mg/L calibration. 2. Enter the standard value in the Value box of the calibration screen and press the Record Value button. -
Page 53: Making Turbidity Standards
OBS-3A Turbidity and Temperature Monitoring System 3. Prepare the next NTU standard and put the OBS-3A in it. Repeat steps 1 and 2 for all calibration values. 4. After all calibration values have been recorded, click the Calculate Fit button. -
Page 54: Sediment
OBS-3A Turbidity and Temperature Monitoring System The formula for preparing turbidity standards other than shown in TABLE 7-1 ⎡ ⎤ ⎢ ⎥ ⎣ ⎦ × ⎡ ⎤ ⎢ ⎥ − ⎣ ⎦ Where: = Turbidity of the standard solution; = Turbidity of the stock solution, usually 4000 NTU;... -
Page 55: Equipment And Materials
OBS-3A Turbidity and Temperature Monitoring System 7.2.1 Equipment and Materials • Dry, completely disaggregated bottom sediment or suspended matter from the monitoring site, • 1-gallon (4 L) brown Nalgene polypropylene bottle with top cut off, • 1-liter, Class A volumetric flask, •... -
Page 56: Effects Of Disaggregation
Clay Silt Fine Sand 4. Open the calibration the screen under OBS-3A Configuration | Operation | Calibration | Calibrate and select mg/L. 5. Enter sediment concentration values. 6. After each addition of sediment, compute mg/L or ppm with the equations... -
Page 57: Salinity, Pressure And Temperature Calibrations
Due to the specialized equipment involved for salinity, pressure and temperature calibration, it is recommended that the instrument be returned to Campbell Scientific, Inc. if any of these sensors are not operating with specified accuracy. Products may not be returned without prior authorization. -
Page 58: Component Locations
2. The OBS-3A is sleeping and will not wake up. 3. The batteries are dead. 4. The OBS-3A and PC are not set to the same baud rate or communication protocol (RS-232, USB, RS-485). Click and check COM port settings on the Connection tab. The default baud rate is 115.2 kB. - Page 59 OBS-3A Turbidity and Temperature Monitoring System b. If the OBS-3A still fails to respond, try changing baud rate speeds by selecting Attempt to find the baud rate to communicate. If this fails, switch the PC back to 115.2 kB and go to the next step.
- Page 60 Turbidimeters other than the 2100N will read different NTU values on natural water samples. OBS-3A indicates different suspended sediment levels in the field than in the laboratory. This results from a change in sediment size or color (see Section 10, Factors Affecting OBS Response).
-
Page 61: Maintenance
OBS-3A Turbidity and Temperature Monitoring System Maintenance OBS Sensor The OBS sensor must be kept clean to measure sediment concentration or turbidity accurately. A gradual decline in sensitivity over a period of time indicates fouling with mud, oil, or biological material. Regular cleaning with a water jet, mild detergent and warm water, or a Scotch-brite®... -
Page 62: Batteries
The unit runs on three D-size alkaline batteries. Buy the expensive ones with the most distant pull date (“use before May 2012”). With all sensors installed, the OBS-3A will run 400 hours in survey mode and for as long as 8000 hours in one of the logging modes. -
Page 63: Pressure Housing
CSI pn 21149 Hex Driver, 5/64 in 10. Factors Affecting OBS Response This section summarizes some of the important factors that affect OBS-3A measurements and shows how ignoring them can lead to erroneous data. If you are certain that the characteristics of suspended matter will not change during... -
Page 64: Particle Size
OBS-3A Turbidity and Temperature Monitoring System 10.1 Particle Size The size of suspended sediment particles typically ranges from about 0.2 to 500 µm in surface water (streams, estuaries and the ocean). Everything else being equal (size, shape, and color), particle area normal to a light beam will determine the intensity of light scattered by a volume of suspended matter. -
Page 65: Suspensions With Mud And Sand
OBS-3A Turbidity and Temperature Monitoring System 10.2 Suspensions with Mud and Sand As mentioned earlier, backscattering from particles is inversely related to particle size on a mass concentration basis (see FIGURE 10-2). This can lead to serious difficulties in flow regimes where particle size varies with time. For example, when sandy mud goes through a cycle of suspension and deposition during a storm, the ratio of sand to mud in suspension will change. -
Page 66: High Sediment Concentrations
OBS-3A Turbidity and Temperature Monitoring System 10.3 High Sediment Concentrations At high sediment concentrations, particularly in suspensions of high clay and silt, the infrared radiation from the emitter can be so strongly attenuated along the path connecting the emitter, the particle, and the detector, that backscatter decreases with increasing sediment concentration. -
Page 67: Sediment Color
OBS-3A Turbidity and Temperature Monitoring System 10.4 Sediment Color Sediment color, after particle size, has a major effect on OBS sensitivity, and if it changes, it can degrade the accuracy of measurements. Although OBS sensors are “color blind”, “whiteness”, color, and IR reflectivity (measured by an OBS sensor) are well correlated. -
Page 68: Bubbles
OBS-3A Turbidity and Temperature Monitoring System 10.6 Bubbles Although bubbles efficiently scatter IR, monitoring in most natural environments shows that OBS signals are not strongly affected by bubbles. Bubbles and quartz particles backscatter nearly the same amount of light to... -
Page 69: Biological And Chemical Fouling
OBS-3A Turbidity and Temperature Monitoring System 10.7 Biological and Chemical Fouling Sensor cleaning is essential during extended deployments. In salt water, barnacle growth on an OBS sensor can obscure the IR emitter and/or detectors and produce an apparent decline in turbidity. Algal growth in marine and fresh waters has caused spurious scatter and apparent increases of OBS output. - Page 70 OBS-3A Turbidity and Temperature Monitoring System Standard Methods for the Examination of Water and Wastewater, 20 Edition. 1998. 2130 Turbidity. American Public Health Association et al. Washington, Standard Methods for the Examination of Water and Wastewater, 20 Edition. 1998. 2540 B Total Solids Dried at 103-105°C. American Public Health Association et al.
- Page 72 Campbell Scientific Companies Campbell Scientific, Inc. (CSI) 815 West 1800 North Logan, Utah 84321 UNITED STATES www.campbellsci.com • info@campbellsci.com Campbell Scientific Africa Pty. Ltd. (CSAf) PO Box 2450 Somerset West 7129 SOUTH AFRICA www.csafrica.co.za • cleroux@csafrica.co.za Campbell Scientific Australia Pty. Ltd. (CSA)
Need help?
Do you have a question about the OBS-3A and is the answer not in the manual?
Questions and answers