
Related Manuals for Cortelco C58


Summary of Contents for Cortelco C58
- Page 1 C58/C58P VoIP Phone User Manual Cortelco 1703 Sawyer Road Corinth, MS 38834 www.cortelco.com Tel: (662)287-5281 Fax:(662)287-3889 Version 1.0 August 14, 2013...
-
Page 2: Safety Notices
Safety Notices Please read the following safety notices before installing or using this phone. They are crucial for the safe and reliable operation of the device. Please use the external power supply that is included in the package. Other power supplies may cause damage to the device, affect the behavior or induce noise. -
Page 3: Table Of Contents
Table of Contents INTRODUCING C58/C58P VOIP PHONE ..............7 .......................... 7 HANK YOU ........................7 ONTENTS ..........................7 EYPAD ......................8 NPUT UTPUT ORTS ......................9 NTRODUCTION LED I ......................10 NTRODUCTION 1.6.1 Programmable key LEDs for BLF ..................10 1.6.2... - Page 4 ........................18 LICK TO DIAL ......................... 18 ALL BACK ........................18 UTO ANSWER ......................18 OTLINE ARMLINE ........................18 PPLICATION 4.8.1 SMS ........................... 18 4.8.2 Memo ..........................18 4.8.3 Voice Mail .......................... 18 4.8.4 Ping ............................ 19 ................19 ROGRAMMABLE ONFIGURATION 4.9.1 Memory Key ........................
- Page 5 ..........................25 ENERAL ........................... 25 CCOUNT 7.2.1 Basic Settings ........................25 7.2.2 Advanced Settings ......................26 7.2.3 Service Code ........................26 ........................... 26 ETWORK ........................... 26 ECURITY ........................26 AINTENANCE ......................... 27 ACTORY ESET WEB CONFIGURATION ....................27 ................... 27 NTRODUCTION OF CONFIGURATION 8.1.1 Configuration Methods ......................
- Page 6 8.3.4.5 REMOTE CONTACT ....................... 60 8.3.4.6 WEB DIAL ........................60 8.3.5 Function Key ........................61 8.3.5.1 Function Keys ........................61 8.3.5.2 Softkeys ..........................62 8.3.6 Maintenance........................63 8.3.6.1 Auto Provision ........................63 8.3.6.2 Syslog ..........................65 8.3.6.3 Config Setting ........................67 8.3.6.4 Update..........................
-
Page 7: Introducing C58/C58P Voip Phone
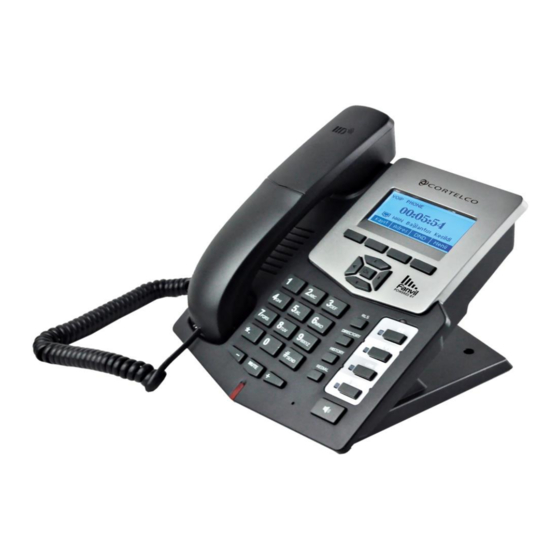
This phone has all the features of a traditional telephone and gives access to many data service features. The C58 and C58P are identical except that the C58P can be powered via Power over Ethernet (PoE). This guide will help you easily use the various features and services available on your phone. -
Page 8: Input/Output Ports
heard. Volume -/+ Adjust the volume by pressing these two keys. Redial When off hook, this will dial the last called number. In stand-by mode, it will check the Outgoing Call. Speaker Activate speakerphone mode. phone Indicator This light blinks to indicate a missed call. light Various functions depending on the phone mode. -
Page 9: Icon Introduction
10/100M Connect to PC Headset Port type: RJ-9 connector Handset Port type: RJ-9 connector Icon Introduction Icon Description Call out Call in Call hold Auto answer Call mute Contact DND(Do not Disturb) In hand free mode In handset mode In headset mode Missed call Call forward... -
Page 10: Led Introduction
LED Introduction 1.6.1 Programmable key LEDs for BLF LED Status Description Steady green The object is idle. Slow blinking red The object is ringing. Steady red The object is active. Fast blinking red The object has failed. Not subscribed. 1.6.2 Programmable key LEDs for Presence LED Status Description... -
Page 11: Network Settings
on the back of your phone to an Ethernet port. The following two figures show connection options. Direct network connection—This method requires at least one available Ethernet port. Connect the WAN port on the back of your phone to the Ethernet port. Since the phone has a built-in router, it can be connected directly to the network. -
Page 12: Pppoe Mode
instructions below to change to either PPPoE or static IP. 2.2.1 PPPoE Mode 1. Press the MENU softkey. 2. Scroll down to “3. Settings.” 3. Press OK. 4. Scroll down to “2. Advanced Settings.” 5. Press OK. 6. The LCD will display “INPUT PASSWORD”. 7. -
Page 13: Dhcp Mode
10. Press OK. 11. Press OK to select WAN Settings. 12. Scroll down to “2. Static IP Settings.” 13. Press OK. 14. Use the keypad to enter the IP Address. 15. Press SAVE softkey. 16. Press DOWN ARROW. 17. Use the keypad to enter the Subnet Mask. 18. -
Page 14: Basic Functions
17. Use LEFT ARROW or RIGHT ARROW to enable or disable DHCP Time. 18. Press SAVE softkey. 19. Press BACK softkey. 20. Press UP ARROW or DOWN ARROW to scroll to “1. Connection Mode.” 21. Press OK. 22. Use LEFT ARROW or RIGHT ARROW to select “DHCP.” 23. -
Page 15: Do Not Disturb (Dnd)
Do Not Disturb (DND) Press the DND softkey to active DND Mode. New incoming calls will be rejected and the display will show: icon. Press the DND softkey twice to deactivate DND mode. Incoming calls will be stored in the Call History. Call Forward This feature allows forwarding an incoming call to another phone number. -
Page 16: Mute
When the Mute button is pressed during a conversation, the icon will be shown in the LCD. The distant party will not hear the party on the C58/C58P, but the distant party can still be heard. Press Mute again to return to normal conversation. -
Page 17: Advanced Functions
4. Press Send and wait for the other party to answer. 5. Use the arrow keys to select a call. Advanced Functions Call pickup This allows a third party to answer a call by dialing a code. For example: A calls B, but there is no answer. -
Page 18: Click To Dial
The user can select any prefix as long as it does not interfere with dialing rules. Click to dial If User A browses to User B’s phone number or SIP address in the contact page and clicks it, User A’s phone will ring. After he goes off hook, the phone will call User B. Note:This feature requires that the PBX support click to dial. -
Page 19: Ping
2. Use the navigation keys to highlight the line for which you want to set voicemail. 3. Press Edit 4. Use the navigation keys to enable voicemail. 5. Input the number. Press 2aB softkey if necessary to change the input method. 6. -
Page 20: Dtmf
None F_MWI – Message Waiting F_DND – Do Not Disturb F_HOLD – Hold F_B_TRANSFER – Blind Transfer F_PBOOK – Phonebook F_REDIAL – Redial F_PICKUP – Call Pickup F_JOIN – Join a call ... -
Page 21: Auto Handdown
3. Use LEFT ARROW or RIGHT ARROW to Enable. 4. Use UP ARROW or DOWN ARROW to access time setting. 5. Use keypad to enter time in seconds. Auto Handdown This is the time after a call ends before the phone returns to the idle state. 1. -
Page 22: Auto Redial
Auto Redial If Auto Redial is enabled, the phone will continue to retry a busy call. The user sets the retry interval and the number of times to redial. The user is also given the option to activate this feature on each busy call. 1. -
Page 23: Pre Dial
be set. Example: A call is placed to 6625551212. Password is set to 662 and length is set to 3. Display will show 662***1212. 1. Press Menu ->Features-> Enter->Passwd Dial-> Enter. 2. Use LEFT ARROW or RIGHT ARROW to enable the feature. 3. -
Page 24: Ring Settings
Ring Settings 6.3.1 Ring Volume 1. Press Menu ->Settings-> Enter->Basic Settings-> Enter->Ring Settings->Enter->Ring Volume->Enter. 2. Use LEFT ARROW or RIGHT ARROW to select the desired ring volume from the 9 choices. The phone will ring at the selected volume shortly after it is selected. 3. -
Page 25: Greeting Words
4. Press Save. 5. Use BACK or EXIT to return to idle screen. Greeting Words This feature shows the words displayed in the upper left of the LCD. Default is VOIP PHONE. 1. Press Menu ->Settings-> Enter->Basic Settings-> Enter->Greeting Word->Enter. 2. -
Page 26: Advanced Settings
7.2.2 Advanced Settings 1. Domain Realm – SIP Domain 2. Dial Without Registered – Enable or disable dialing with no SIP registration 3. Anonymous – Privacy Support. Choose RFC3323, RFC3325 or None 4. DTMF Mode – Choose RFC2833, SIP_Info, In-band, or Auto 5. -
Page 27: Factory Reset
name must be entered. Factory Reset Choose Yes to return the phone to factory default settings. Web Configuration Introduction of configuration 8.1.1 Configuration Methods There are three methods which can be used to configure this phone: Phone keypad – As discussed in previous sections ... -
Page 28: Configuration Via Web
After configuring the IP phone, remember to click SAVE under the Maintenance tab. If this is not done, the phone will lose the modifications when it is rebooted. Configuration via WEB 8.3.1 BASIC 8.3.1.1 Status... -
Page 29: Wizard
Field Name Explanation Network Shows the configuration information for WAN and LAN port, including connection mode of WAN port (Static, DHCP, PPPoE), MAC address, IP address of WAN port and LAN port, DHCP server status for LAN port (ENABLED or DISABLED). Accounts Shows the phone numbers and registration status for the 2 SIP LINES and 1 IAX2 server. -
Page 30: Static Ip
8.3.1.2.1 Static IP If Static IP is selected, this screen will be displayed. Information provided by the ISP should be entered. Click Back to return to the Wizard screen. Click Next to go to Quick SIP Settings 8.3.1.2.2 DHCP After selecting DHCP and clicking NEXT, the Quick SIP Settings screen will appear. Click Back to return to the Wizard screen. -
Page 31: Quick Sip Settings
8.3.1.2.4 Quick SIP Settings Field Name Explanation Display Name The name shown in caller ID. Server Address SIP server address either IP address or URI. Server Port SIP server port (usually 5060). Authentication User Login name or Authentication ID. Authentication Password SIP password. -
Page 32: Call Log
8.3.1.3 Call Log Outgoing call logs can be seen on this page. Field Name Explanation Start Time Start time of the outgoing call Duration Duration of the outgoing call. Dialed Calls Account, protocol, and line of the outgoing call. 8.3.1.4 Language Field name Explanation Language... -
Page 33: Network
8.3.2 Network 8.3.2.1 WAN Config Field Name Explanation Active IP Address The current IP address of the phone. Current Subnet Mask The current Subnet Mask. Current IP Gateway The current Gateway IP address. MAC Address The MAC address of the phone. MAC Timestamp Time the MAC address was obtained. -
Page 34: Static Ip
8.3.2.1.1 Static IP If Static IP is chosen, the screen below will appear. Enter values provided by the ISP. 8.3.2.1.2 DHCP If DHCP is chosen, all configuration information will be provided by a DHCP server. Contact the ISP to determine if DHCP is used. 8.3.2.1.3 PPPoE If PPPoE is chosen, the screen below will appear. -
Page 35: Lan Config
8.3.2.2 LAN Config Field Name Explanation IP Address LAN static IP. Subnet Mask LAN Subnet Mask. DHCP Service Activate DHCP server for LAN port. The phone must be rebooted for the DHCP server setting to take effect. Enable NAT operation Port Mirror Port Mirror can only be activated in bridge mode. - Page 36 Chart 1 shows a network switch with no VLAN. Any broadcast frames will be transmitted to all other ports. For example, and frames broadcast from Port 1 will be sent to Ports 2, 3, and 4. Chart 2 shows an example with two VLANs indicated by red and blue. In this example, frames broadcast from Port 1 will only go to Port 2 since Ports 3 and 4 are in a different VLAN.
- Page 37 Field Name Explanation Enable LLDP Enable or Disable Link Layer Discovery Protocol (LLDP) Packet Interval The time interval for sending LLDP Packets Enable Learning Function Enables the telephone to synchronize its VLAN data with the Network Switch. The telephone will automatically synchronize DSCP, 802.1p, and VLAN ID values even if these values differ from those provided by the LLDP server.
-
Page 38: Service Port
8.3.2.4 Service Port Set the port values for Telnet/HTTP/RTP on this page. Field Name Explanation Specify Web Server Type – HTTP or HTTPS Web Server Type HTTP Port Port for web browser access. Default value is 80. To enhance security, change this from the default. Setting this port to 0 will disable HTTP access. -
Page 39: Dhcp Service
8.3.2.5 DHCP SERVICE Field Name Explanation DHCP Client Table IP-MAC mapping table. If the LAN port of the phone connects to a device, this table will show its IP and MAC address. Leased Table Name Name of the lease table. Start IP Address Beginning IP address of the lease table. -
Page 40: Time&Date
8.3.2.6 TIME&DATE Set the time zone and SNTP (Simple Network Time Protocol) server on this page. Daylight savings time configuration and manual time and date entry are also done on this page Field Name Explanation Simple Network Time Protocol (SNTP) Settings Enable SNTP Enable or Disable SNTP Enable DHCP Time... -
Page 41: Voip
Daylight Saving Time Settings Enable Enable daylight saving time. Offset(minutes) DST offset. Default is 60 minutes. Month Start and end month for DST Week Start and end week for DST Start and end day for DST Hour Start and end hour for DST Minute Start and end minute for DST Manual Time Settings... - Page 42 Field Name Explanation Choose the sip line to configured (SIP 1 – SIP 2). Click the dropdown arrow to select the line. Shows registration status. Will show “Registered” if registered Status or “Unapplied” if not registered. Server Address SIP server IP address or URI. Server Port SIP server port.
- Page 43 Display Name Set the display name. This name is shown on Caller ID. Enable Registration Check to submit registration information. Domain Realm SIP Domain if different than the SIP Registrar Server. Proxy Server Address SIP proxy server IP address or URI(This is normally the same as the SIP Registrar Server) Proxy Server Port SIP Proxy server port.
- Page 44 Subscribe For MWI If enabled, the phone will send Message Waiting Indication (MWI) Subscribe message to the SIP Server MWI Number Specify the number to call to retrieve Voice Messages. Subscribe Period Time interval between MWI Subscribe Messages. Conference Type Choose Conference Type, either local or network Conference Number Number to dial to access network conference server.
- Page 45 Different VoIP Service providers may require different modes. Local port SIP port. Default is 5060. Ring type Set ring tone. There are 9 standard options and 3 user options. Enable Rport Enable/Disable support for NAT traversal via RFC3581 (Rport). Enable PRACK Enable or disable SIP PRACK function.
-
Page 46: Iax2
Registration failure retry time – If registration fails, the phone will Registration Failure Retry Time attempt to register again after registration failure retry time. This will affect all lines 8.3.3.2 IAX2 Field Name Explanation Shows registration status. Will show “Registered” if registered Status or “Unapplied”... -
Page 47: Stun Config
non- numeric, this number can be used to replace the echo test text. This allows dialing a number to perform an echo voice test. This function is provided to test whether communication through the server. Echo Test Text Echo test text Refresh Time Expiration time of IAX2 server registration. -
Page 48: Dial Peer
Field Name Explanation STUN NAT Transversal Shows whether or not STUN NAT Transversal was successful. Server Address STUN Server IP address STUN Server Port – Default is 3478. Server Port STUN blinding period – STUN packets are sent at this interval Binding Period to keep the NAT mapping active. - Page 49 Example 2: Substitution – To dial a long distance call to Beijing requires dialing area code 010 before the local phone number. Using this feature 1 can be substituted for 010. For example, to call 62213123 would only require dialing 162213123 instead of 01062213123. Example 3: Addition –...
- Page 50 Field Name Explanation Phone number There are two types of matching: Full Matching or Prefix Matching. In Full matching, the entire phone number is entered and then mapped per the Dial Peer rules. In prefix matching, only part of the number is entered followed by T.
-
Page 51: Phone
Dial “8309“ The phone will add the alias to the end of the dialed number if The SIP1 server will receive “07558309” the dialed number matches the template in the Phone Number box. Dial “0106228” Set Phone Number, Alias and Delete Length. - Page 52 Third Codec The third codec choice: G.711A/u, G.722, G.723, G.729, G.726, None Fourth Codec The forth codec choice: G.711A/u, G.722, G.723, G.729, G.726, None Fifth Codec The fifth codec choice G.711A/u, G.722, G.723, G.729, G.726, None Sixth codec The sixth codec choice G.711A/u, G.722, G.723, G.729, G.726, None Onhook Time Time the handset must be on hook to disconnect a call.
-
Page 53: Feature
8.3.4.2 FEATURE This page configures various features such as Hotline, Call Transfer, Call Waiting, etc. Field Name Explanation Do Not Disturb If enabled, the phone will reject incoming calls. The callers receive busy tone. Outgoing calls may be made. Enable Call Transfer If enabled, Call Transfer is allowed. - Page 54 Auto Redial Times Maximum number of auto redial attempts. Auto Headset Automatically answers call on headset. Enable Intercom If enabled, allows intercom calls. Enable Intercom Tone If enabled, plays intercom ring tone to alert to an intercom call. P2P IP Prefix Set Prefix for peer to peer IP call.
- Page 55 Ring from Headset If this is enabled and a headset is connected, ring tone will be played in the headset. Enable Intercom Mute If enabled, mutes incoming calls during an intercom call Enable Intercom Barge If enabled, the phone will auto-answer an intercom call during an outside call.
-
Page 56: Dial Plan
8.3.4.3 DIAL PLAN This phone supports 7 dialing modes: 1. End with “#”– Dial the desired number, and press # to send it to the server. 2. Fixed Length – The number will be sent to the server after the specified number of digits are dialed. - Page 57 5. Press # to Do Blind Transfer - Press # after entering the target number for the transfer. The phone will transfer the current call to the third party. 6. Blind Transfer on Onhook - Hang up after entering the target number for the transfer. The phone will transfer the current call to the third party.
-
Page 58: Contact
8.3.4.4 CONTACT Enter the name, phone number and ring type for each contact here. Field Name Explanation Phonebook Tables Group Dropdown box to select group Name Contact name... - Page 59 Office Number, Mobile Contact phone numbers Number, Other Number Ring Type Ring type for this contact Group Contact group for this contact Add Contact Name Contact name Office Number, Mobile Contact phone numbers Number, Other Number Line Select line for associated contact number Ring Type Ring type for this contact Group Setting...
-
Page 60: Remote Contact
8.3.4.5 REMOTE CONTACT Allows access to remote contact lists either via XML or LDAP. TFTP example: Set the Phonebook Name as cortelco - Server URL is tftp://192.168.1.3/admin/phonebook/index.xml. LDAP example: Server URL is ldap://192.168.1.3/dc= winline,dc=com. Remote Phonebook Setting Phonebook Name Phonebook name displayed on the phone. -
Page 61: Function Key
8.3.5 Function Key The phone has 4 programmable DSS/Function keys with associated LEDs. The 4 directional arrow keys and the OK button are also programmable. This screen also sets the LCD contrast and enables the backlight. 8.3.5.1 Function Keys Screen Configuration Field Name Explanation Contrast... -
Page 62: Softkeys
Line – Seize a programmed line (SIP1/SIP2/IAX2) Memory Key – See Section 4.9.1. URL – Directly access a remote XML phonebook Value Parameters associated with the function. For example: The digits to be dialed by a key programmed for DTMF. Line Line on which the function is to be performed. -
Page 63: Maintenance
8.3.6 Maintenance 8.3.6.1 Auto Provision The phone supports PnP, DHCP, and Phone Flash to obtain configuration parameters. They will be queried in the following order when the phone boots. DHCP PnP server Phone Flash Auto Provision Setting Field Name Explanation Show the current config file’s version. - Page 64 Encryption Key Save Autoprovision Save the Autoprovision username and password in the phone until Information the server url changes DHCP Option Settings Field Name Explanation DHCP Option Setting The phone supports configuration from Option 43, Option 66, or a Custom DHCP option. It may also be disabled. Custom DHCP Option Custom option number.
-
Page 65: Syslog
3. Update at time interval – update at periodic update interval TR069 Settings Enable TR069 Enable/Disable TR069 configuration ACS Server Type Select Common or CTC ACS Server Type. ACS Server URL ACS Server URL. ACS User User name for ACS. ACS Password ACS Password. -
Page 66: Syslog Configuration
Syslog Configuration Field Name Explanation Syslog Settings Server IP Syslog server IP address. Server Port Syslog server port. MGR Log Level Set the level of MGR log. SIP Log Level Set the level of SIP log. IAX2 Log Level Set the level of IAX2 log. Enable Syslog Enable or disable syslog. -
Page 67: Config Setting
8.3.6.3 Config Setting Config Setting Field Name Explanation Save Configuration Save the current phone configuration. Clicking this saves all configuration changes and makes them effective immediately. Backup Configuration Save the phone configuration to a txt or xml file. Please note to Right click on the choice and then choose “Save Link As.”... -
Page 68: Update
8.3.6.4 Update This page allows uploading configuration files to the phone. Update Field Name Explanation Web Update Browse to the config file, and press Update to load it to the phone. Web Update Various types of files can be loaded here including firmware, ring tones, local phonebook and config files in either text or xml format. - Page 69 Type Action to be executed by the phone. 1. Application update - download system update file 2. Config file export - Upload config file to FTP/TFTP server. It can then be named and saved. 3. Config file import - Download the config file from FTP/TFTP server.
-
Page 70: Access
8.3.6.5 Access User accounts can be added or deleted from this page. The authority of accounts can also be changed. Access Configuration Field Name Explanation LCD Menu Password Settings Menu Password Sets the password for entering the setup menu from the phone keypad. -
Page 71: Reboot
8.3.6.6 Reboot Some configuration modifications require a reboot to become effective. Clicking the Reboot button will cause the phone to reboot immediately. Note: Be sure to save the configuration before rebooting. 8.3.7 Security 8.3.7.1 WEB FILTER WEB Filter The Web filter is used to limit access to the phone. When the web filter is enabled, only the IP addresses between the start IP and end IP can access the phone. -
Page 72: Firewall
8.3.7.2 Firewall Firewall Configuration Firewall rules can be used to prevent unauthorized Internet users from accessing private networks connected to this phone (input rule), or prevent unauthorized devices connected to this phone from accessing the Internet (output rule). Each rule type supports a maximum of 10 items. -
Page 73: Network Address Translation (Nat)
When a connected device tries to access 192.168.1.118, the phone will deny the request because of the out_access rule. Access to any other IP address will be allowed. Click the Delete button to delete the selected rule. 8.3.7.3 Network Address Translation (NAT) NAT is the process of modifying IP address and port information in transition from a private to a public network. - Page 74 connectivity to specific hosts in the internal network, although communication with other hosts in the DMZ and to the external network is allowed. This allows hosts in the DMZ to provide services to both the internal and external network, while a firewall controls the traffic between the DMZ servers and the internal network clients.
-
Page 75: Vpn
Network Address Translation (NAT) Table Shows the NAT TCP and UDP mapping tables NAT Table Option Transfer Type Select the TCP or UDP protocol. Inside IP Set the local IP address of device. Inside Port Set the LAN (inside) port for NAT mapping Outside Port Set the WAN (outside) port for NAT mapping Note: After entering settings, click the Add button to add new mapping table data. -
Page 76: Security
VPN Server Address Set VPN L2TP Server IP address. VPN User Set User Name access to VPN L2TP Server. VPN Password Set Password access to VPN L2TP Server. 8.3.7.5 Security Field Name Explanation Update Security File Select Security File Browse to the security file to be updated. Click the Update button to update. -
Page 77: Appendix
Appendix Specification 9.1.1 Hardware Item Specification Power Adapter Input: 100-240V Output: 5V 1A Port 10/100Base- T RJ-45 1 PORT 10/100Base- T RJ-45 1 PORT Headset RJ9 1 PORT Power Consumption Idle: 2.5W Active: 2.8W LCD Size 128x48 74x28mm Operation Temperature 0~40℃... - Page 78 SIP authentication none basic MD5 DNS Peer to Peer/ IP call Automatic line selection 9 Standard ring tones and 3 user-defined ring tones DTMF SIP info DTMF Relay (In-Band) ...
-
Page 79: Network Features
Incoming Calls Outgoing Calls Missed Calls Max of 300 Records Each Supports vCard/XML/CSV Support IAX2 4 DSS keys Programmable Soft Keys Programmable Function Keys Code synchronization IP PBX IMS ... -
Page 80: Maintenance And Management
Supports DHCP server on LAN QoS with DiffServ Network Tools in Telnet Server Ping Trace Route Telnet Client 9.1.4 Maintenance and management Firmware Upgrade POST HTTP FTP TFTP HTTPS ... -
Page 81: Digit Character Map Table
Digit-character map table Keypad Character Keypad Character 7 P Q R S p q r s 2 A B C a b c 8 T U V t u v 3 D E F d e f 9 W X Y Z w x y z 4 G H I g h i 5 J K L j k l 6 M N O m n o...
Need help?
Do you have a question about the C58 and is the answer not in the manual?
Questions and answers