Table of Contents
Advertisement
Quick Links
Download this manual
See also:
Quick Manual
Advertisement
Table of Contents

Subscribe to Our Youtube Channel
Related Manuals for Cortelco 2757


Summary of Contents for Cortelco 2757
-
Page 1: Users Guide
2757 VoIP Phone Users Guide Rev. 1.0... -
Page 2: Table Of Contents
Table of Contents Introduction ... 5 Package Contents ... 5 Features ... 5 Basic Setup ... 6 Network Setup ... 8 Static IP Address ... 8 PPPoE...11 DHCP ... 15 Network Setup (Web Configuration) ... 17 2.4.1 Display IP Address... 17 2.4.2 Web Interface Network Configuration... - Page 3 2.11.2 Headset ... 37 Speed Dial ... 37 Call Forwarding ... 38 3.2.1 Busy ... 38 3.2.2 No Answer... 38 3.2.3 Unconditional ... 38 3.2.4 DND ... 38 Advanced Settings ... 38 3.3.1 Inter Digit Time... 38 3.3.2 End of Dial Key ... 39 3.3.3 DTMF Type ...
- Page 4 3.11.1 Phone Interface ... 53 3.11.2 Web Interface ... 54 3.12 Change Password for the Web Interface ... 55 Troubleshooting ... 56 Firmware Update ... 57 Upgrade Procedure ... 57 Recover from Unsuccessful Firmware Update ... 58...
-
Page 5: Introduction
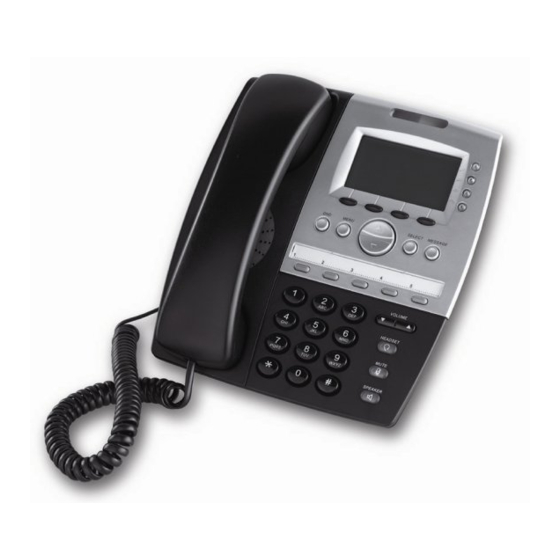
Introduction 1.1 Package Contents Thank you for purchasing the Cortelco 2757 Voice over Internet Protocol (VoIP) phone. The following items should be packed with the 2757. Please contact your dealer if any of them is missing. 2757 Phone (Main Body) -
Page 6: Basic Setup
1. Unpack the box and check for missing items. 2. Connect an Ethernet cable to the WAN jack on the bottom of the 2757. Be sure the other end of this cable connects to your network. In a home application, connect to your cable or DSL modem. - Page 7 7. All the lighted buttons on the phone should now briefly light. phone has power. 7.1 By default, the 2757 will use Dynamic Host Configuration Protocol (DHCP) to obtain an IP address automatically. You will see the message below during this time.
-
Page 8: Network Setup
2 Network Setup 2.1 Static IP Address Press ‘Menu’ Press ‘Up’ or ‘Down’ until ‘3. Settings’ is highlighted, then press ‘Select’. 3. Press ‘Up’ or ‘Down’ until ‘4. System Configuration’ is selected, then press ‘Select’. - Page 9 4. Press ‘Select’ when ‘1: Network Setting’ is highlighted. Use ‘Up’ or ‘Down’ to change network setting to ‘Static’. Press ‘Save’. 5. Press ‘Down’ until ‘2. IP Address (Static)’ is selected, and press ‘Select’. You will be prompted to enter an IP address. Use the numeric keypad to input this address. Use the * key, to input the period.
- Page 10 NOTE: You can set a secondary DNS Server IP address by moving to item ‘6. DNS Server 2 (Static)’. At least one DNS Server is required to make the 2757 work properly. After the IP address is set, please move to Section 2.5 to enter your SIP server information.
-
Page 11: Pppoe
‘Rebooting’ will appear on the LCD screen. After the reboot is completed, the 2757 is ready for use. 2-2 PPPoE When using PPPoE, an IP address will be issued to your 2757 phone by your Internet Service Provider (ISP). Press ‘Menu’... - Page 12 Press ‘Up’ or ‘Down’ until ‘3. Settings’ is selected, then press ‘Select’. Press ‘Up’ or ‘Down’ until ‘4. System Configuration’ is selected, then press ‘Select’. Press ‘Select’ on ‘1: Network Setting’. Use ‘Up’ or ‘Down’ to change network setting to ‘PPPoE’.
- Page 13 Press ‘Down’ until ‘7. PPPoE Username’ is selected, and press ‘Select’. You’ll be prompted to enter a PPPoE username. Use the numeric keypad to input your username. For example, to enter ‘B’, press ‘2’ rapidly 3 times. The time between each keystroke must be less than 2 seconds.
- Page 14 (i.e. this is not an initial setup), you must save the new network settings and reboot the 2757. To save the new network settings, press ‘Up’ or ‘Down’ until ’20. Commit Changes’ is selected, then press ‘Select’. When ’Changes saved’ is displayed on the LCD...
-
Page 15: Dhcp
To reboot the 2757, press ‘Down’ to move to ’21. Reboot System’, and press ‘Select’. ‘Rebooting’ will appear on the LCD screen. After the reboot is completed, the 2757 is ready for use. 2.3 DHCP When using DHCP, an IP address will be issued to your IP phone by the DHCP server on your local network. - Page 16 (i.e. this is not an initial setup), you must save the new network settings and reboot the 2757. To save the new network settings, press ‘Up’ or ‘Down’ until ’20. Commit Changes’ is selected, then press ‘Select’. When ’Changes saved’ is displayed on the LCD...
-
Page 17: Network Setup (Web Configuration)
You can also configure the network by using a web browser. In order to do this, you must first know the IP address of the 2757. If you are using PPPoE or DHCP, please follow the instructions below to get the IP address. -
Page 18: Web Interface Network Configuration
Press ‘Up’ or ‘Down’ until ‘5. Model Information’ is selected, then press ‘Select’. Press ‘Up’ or ‘Down’ until ‘4. IP Address is highlighted. Make a note of the IP address, and then press ‘Exit’ three times to return to the main menu. 2.4.2 Web Interface Network Configuration 1. - Page 19 2. After you have logged in, you will see a summary of the current network settings. To make changes or enter additional information, click ‘Network’ on the left. 3. On this screen, you can choose the connection mode (static IP, PPPoE, or DHCP), enter the IP address in static IP mode, and enter PPPoE username and password.
- Page 20 Press ‘COMMIT…’. When the ‘Configuration OK’ message appears, the network settings have been saved. 5. Now click ‘Management’ again. Then click the ‘System Restart’ tab, and click ‘RESTART…’. The 2757 will reboot. After about 1 minute, it will be ready for use.
-
Page 21: Sip Server Information Setup
2.5 SIP Server Information Setup After the network setup is completed, the SIP server information must be entered. Press ‘Menu’ Press ‘Up’ or ‘Down’ until ‘3. Settings’ is selected, then press ‘Select’. Press ‘Up’ or ‘Down’ until ‘4. System Configuration’ is selected, then press ‘Select’. - Page 22 Press ‘Up’ or ‘Down’ until ’14. SIP Proxy’ is selected, then press ‘Select’. Use the numeric keypad to enter the IP address of your SIP proxy. After the IP address is entered, press ‘Save’ to keep changes, or ‘Cancel’ to discard. Press ‘Down’...
- Page 23 Press ‘Down’ until ’17. SIP Phone Num’ is selected, then press ‘Select’. Use the numeric keypad to enter your SIP phone number. After the SIP Phone Number is entered, press ‘Save’ to keep changes, or ‘Cancel’ to discard. Press ‘Down’ until ’18. SIP Password’ is selected, then press ‘Select’. Use the numeric keypad to enter your SIP phone number.
- Page 24 ‘Select’. When ’Changes saved’ is displayed on the LCD screen, all the settings are saved. Press ‘Down’ to move to ’21. Reboot System’, and press ‘Select’. ‘Rebooting’ will appear on the LCD screen. After the reboot is completed, the 2757 is ready for use.
-
Page 25: Sip Server Information Setup (Web Configuration)
2.6 SIP Server Information Setup (Web Configuration) The web interface can also be used to enter SIP information. This is the only way to enter multiple SIP usernames and passwords. Please refer to Section 2.4.2 to access the web interface. Then follow these instructions. 1. - Page 26 4. Click ‘Management’. Then click the ‘Configuration Commit / Reset’ tab and press ‘COMMIT…’. When you see ‘Configuration OK’, the network settings have been properly saved. 5. Click ‘Management’. Click ‘System Restart’ tab, and then click ‘RESTART…’ button. After the 2757 reboots, it will be ready with the new network settings.
-
Page 27: Accepting And Making Phone Calls
2.7 Accepting and Making Phone Calls After completing the network and SIP settings, you can use the 2757 to make and accept phone calls. 2.7.1 Accepting phone calls Before you can receive phone calls, your phone must be registered to a SIP server. You will see the message below on the LCD screen when the phone is registered. -
Page 28: In-Call Options
The phone will ring when a call is received. The line selector button beside the LCD will also flash. If your service provider supports Caller ID, the phone number of the calling party will be displayed on the LCD screen. To answer the call, pick up the handset, press ‘Speaker’, or press ‘Answer’.. -
Page 29: Attended Transfer
The call is now on hold. You will hear dial tone again. The remote party will hear music if the phone or server is configured to deliver it. There are two types of call transfer – Attended and Blind. In an Attended transfer the party initiating the transfer remains connected until the transfer is completed. -
Page 30: Blind Transfer
2.7.2.1.2 Blind Transfer To perform a blind transfer, dial the asterisk key ‘ * ’ after dialing the phone number for the transfer. You will see the following message displayed on the LCD screen: At this point, the call will be transferred. If a blind transfer fails, the call cannot be retrieved. 2.7.2.2 3-way To create a 3-way conference, ask the remote party to remain online. - Page 31 Before the third party answers, you may drop the call by pressing ‘End’. The original party will then return as a new call. Press ‘Answer’ to return to the conversation. After the connection is made, you will see the following message displayed on LCD screen. If the third party refuses the conference call and hangs up, the second party will return as a new call.
-
Page 32: Line 2
Pressing this key places the distant party on hold and provides a new dial tone. A new call can then be placed. You can toggle between these calls with the ‘Switch’ button. A second SIP registration is not required for this function. The 2757 can support up to two simultaneous calls (one active and one on hold). -
Page 33: Caller Id On Call Waiting
2.8 Caller ID on Call Waiting The 2757 supports Caller ID on Call Waiting. With this service, the 2757 will notify you if you receive a second call while you are on the phone. It will also display the number of the second call. -
Page 34: Calling History
2.9 Calling History The 2757 maintains a calling history database. You can check for outgoing calls, incoming calls, and missed calls. Press ‘Menu’ Press ‘Up’ or ‘Down’ ‘2. until Call Records’ is selected, then press ‘Select’. Use ‘Up’ and ‘Down’ to select a call record type. Press ‘Select’ to view them. -
Page 35: Missed Calls
2.9.1 Missed Calls All unanswered calls will be listed here. You can use ‘Up’ and ‘Down’ to move in this list. Press ‘Dial’ to call the number selected, press ‘Delete’ to delete a selected entry, or press ‘Exit’ to return to previous menu. -
Page 36: Call Rejection (Dnd)
2.10 Call Rejection (DND) Do Not Disturb (DND) can be used to avoid phone calls. To activate DND, press ‘DND’. The activated, callers will hear busy tone or a voice mail message if voice mail is available. A DND forward number may also be set (See Section 3.2.4 or 3.4). If this is set, all calls will forward to this number. -
Page 37: Headset
2.11.2 Headset To use a headset, insert the headset plug into the headset jack of the 2757 as shown below. After the headset is connected, press ‘HEADSET’ to make and receive calls. 3 Speed Dial & Advanced Phone Configuration 3.1 Speed Dial The 2757 has 5 speed dial buttons. -
Page 38: Call Forwarding
Again, only numbers are allowed in these entries. 3.2.1 Busy An incoming call will be transferred to this number if the 2757 is busy or if DND is activated. 3.2.2 No Answer An incoming call will be transferred to this number if the call is not answered. -
Page 39: End Of Dial Key
3.3.7 Silence Suppression When enabled, the 2757 will not transfer data when there is no voice detected from the microphone. This can be useful to reduce the required network bandwidth. However, it can cause the voice quality to degrade. -
Page 40: Set Time Zone
The 2757 supports time zones based on GMT. 3.3.13 NTP Server Address The 2757 keeps time based on signals from a Network Time Protocol (NTP) server. Enter a valid NTP server address here. 3.4 Entry of Call Forward numbers from phone Call forwarding numbers can also be set from the phone. -
Page 41: Phone Book Management
Press ‘Down’ to highlight the desired type of call forward. Press ‘Select’. 4. Enter the number using the keypad. Press ‘Save’ to save changes. Press ‘Clear’ to erase a number, or press ‘Cancel’ to keep the original number unchanged. 3.5 Phone Book Management 3.5.1 Web Interface The web interface must be used to enter frequently dialed numbers into the phone book. -
Page 42: Phone Interface
To delete an existing entry, enter the phone number in the ‘Number’ field, and then press ‘Delete’. 3.5.2 Phone Interface Existing phone book entries can be accessed from the 2757. Press ‘Menu’. Then press ‘Select’ on the first item: ‘1. Phone Book’. - Page 43 All phone book entries will be displayed here. Use ‘Up’ and ‘Down’ to select a phone book entry to dial. 3. After selecting a phone book entry, press ‘Dial’ to dial the phone number, or ‘Exit’ to return to the previous menu. 4.
-
Page 44: Browse System Information
6. To delete all phone book entries press ‘DelAll’ when the phone book entries are displayed. You will be prompted to press 1 or 2 key (1 for YES and 2 for NO). 3.6 Browse System Information System information (IP address, model information, firmware version…etc.) can be displayed using either the web interface or the LCD screen. -
Page 45: Web Interface
Press ‘Up’ or ‘Down’ until ‘5. Model Information’ is selected, then press ‘Select’. 4. All system-related information will be displayed here. Press ‘Up’ and ‘Down’ to browse, and press ‘Exit’ to end. 3.6.2 Web Interface 1. Click ‘Status’... - Page 46 2. Network-related system settings will be displayed. 3. Click the ‘Version Information’ tab, and firmware-related information will be displayed.
-
Page 47: Change Display Language
3.7 Change Display Language The default language of the 2757 is English. However, it can be changed to Chinese. 1. Press ‘Menu’ Press ‘Up’ or ‘Down’ until ‘3. Settings’ is selected, then press ‘Select’. 3. ‘1. Language’ should be selected when this menu is entered. If not, use ‘Up’ or ‘Down’ to... -
Page 48: Change Ringer Type
4. All available languages will be displayed here. A ‘V’ sign will appear on the currently selected language. Use ‘Up’ or ‘Down’ to select the desired language, and press ‘Select’. Press ‘Exit’ to leave this menu without making any changes. 3.8 Change Ringer Type Ring tones can be changed from the LCD screen as well as from the web interface. -
Page 49: Adjust The Contrast Of Lcd Screen
Press ‘Up’ or ‘Down’ until ‘2. Ring Type’ is selected, then press ‘Select’. All available ring tones will be listed here. Use ‘Up’, ‘Down’, and ‘Select’ key to choose a ring tone. Press ‘Exit’ to return to the previous menu after making a selection. A ‘V’ will appear on the currently selected ring tone. - Page 50 2. Press ‘Up’ or ‘Down’ until ‘3. Settings’ is selected, then press ‘Select’. 3. Press ‘Up’ or ‘Down’ until ‘3. Contrast’ is selected, then press ‘Select’. 4. Press ‘Up’ to make the displayed messages darker. Press ‘Down’ to make the displayed messages lighter.
-
Page 51: Reboot The Ip Phone
3.10 Reboot the IP Phone 3.10.1 Phone Interface Press ‘Menu’ Press ‘Up’ or ‘Down’ until ‘3. Settings’ is selected, then press ‘Select’. Press ‘Up’ or ‘Down’ until ‘4. System Configuration’ is selected, then press ‘Select’. -
Page 52: Web Interface
Press ‘Up’ or ‘Down’ until ’21. Reboot System’ is selected, and press ‘Select’. Press ‘Exit’ key to return to the previous menu. 3.10.2 Web Interface Click on ‘Management’... -
Page 53: Factory Reset
Click the ‘System Restart’ tab, then click the ‘RESTART’ button. The web page will display ‘Phone is restarting !!’ The 2757 will be ready again in approximately 1 minute. 3.11 Factory Reset All stored settings can be erased by resetting the 2757 to factory defaults. -
Page 54: Web Interface
Press ‘Up’ or ‘Down’ until ‘4. System Configuration’ is selected. Then press ‘Select’. Press ‘Up’ or ‘Down’ until ’22. Factory Default’ is selected. Then press ‘Select’ to restore the default settins. Press ‘Exit’ key to return to the previous menu without making any changes. -
Page 55: Change Password For The Web Interface
To complete the reset, click ‘COMMIT’ button and reboot the phone. 3.12 Change Password for the Web Interface The web login password can be changed. Connect to the 2757 with the web interface then follow the instructions below. Click ‘Management’. -
Page 56: Troubleshooting
4 Troubleshooting If your 2757 is not working properly, please check this troubleshooting checklist. Scenario / Problem Solution Nothing is displayed Is the AC adapter plugged into an electrical on LCD screen outlet? Is the AC adapter connected to the 2757? If using PoE, check the PoE switch and the Ethernet cable. -
Page 57: Firmware Update
5 Firmware Update 5.1 Upgrade Procedure The system software used by the 2757 can be updated when a newer version is available. Please go to www.cortelco.com information will be needed to upgrade: TFTP/FTP server address • Image file name •... -
Page 58: Recover From Unsuccessful Firmware Update
This will take several minutes. After the download is complete, the 2757 will reboot, and then will be ready for use with the new firmware. WARNING: Do not disconnect power, press any key, take the phone off-hook, or disconnect from the network during the upgrade procedure.
Need help?
Do you have a question about the 2757 and is the answer not in the manual?
Questions and answers