Table of Contents
Advertisement
Advertisement
Table of Contents

Subscribe to Our Youtube Channel
Related Manuals for Gateway MULTIMEDIA NOTEBOOK SYSMAN017AAUS


Summary of Contents for Gateway MULTIMEDIA NOTEBOOK SYSMAN017AAUS
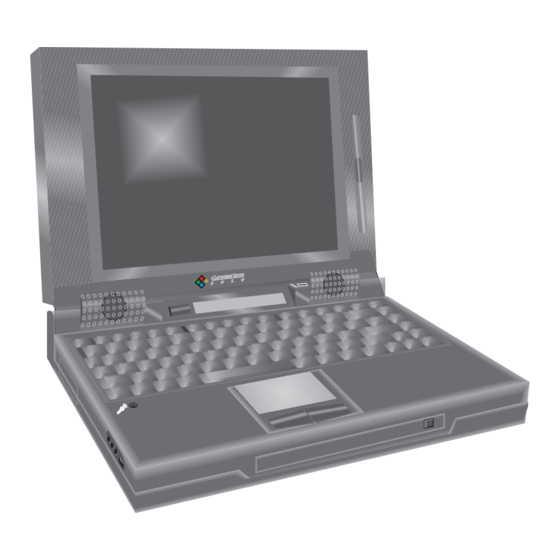
- Page 1 USER’S GUIDE...
- Page 2 5. Your system is now ready to fly. Continue navigating your own path, or, if the CD-ROM drive is installed, follow the steps below to take a quick ride with the Gateway 2000 Solo System CD. B. Insert the Gateway A.
-
Page 3: Table Of Contents
Contents Legal notices ... 2 Specifications ... 4 Outside the Notebook ... 6 Front view ... 6 Back view ... 6 Bottom view ... 7 Left side view ... 7 Inside the Notebook ... 8 Status display bar ... 8 Keyboard ... - Page 4 The Gateway 2000 ™ SOLO Multimedia Notebook User’s Guide...
-
Page 5: Legal Notices
However, Gateway 2000 assumes no responsibility for any inaccuracies that may be contained in this manual. In no event will Gateway 2000 be liable for direct, indirect, special, incidental, or conse- quential damages resulting from any defect or omission in this manual, even if advised of the possibility of such damages. - Page 6 Damage caused by dropping the Gateway 2000 Solo, impact with another object, or immersion in liquids is not covered by the warranty. Never expose the Gateway 2000 Solo to rain, snow, or moisture. Avoid locations with high levels of dirt, dust, or smoke.
-
Page 7: Specifications
The Gateway 2000 Solo Multimedia Notebook Specifications (Specifications are subject to change without notice or obligation.) Dimensions (W × D × H) 11.8" × 8.8" × 2.0" (300mm x 223.5mm x 51mm) Weight approx. 6.3 lbs with battery Keyboard 86 keys, 100% scale; provides same functions as standard Windows 95 AT keyboard Screen Backlit active-matrix LCD: 10.2"... - Page 8 PCMCIA option 2400/9600 data/fax modem; 14,400 data/fax modem; twisted pair or thinnet (BNC) Ethernet network; token ring network; other cards available from other sources Environment 10-35° C; 10-95% noncondensing relative humidity AC adapter Requires 100-240 VAC, 0.88-0.46A nominal: adapter powers system and charges battery simultaneously Battery pack 14.4DC, 2700mAh lithium battery: batteries can be “hot-swapped”...
-
Page 9: Outside The Notebook
The Gateway 2000 Solo Multimedia Notebook Outside the Notebook The Gateway 2000 Solo Multimedia Notebook is designed to provide the multime- dia functionality of a full-size desktop system along with the convenience of a lightweight portable. Even if you are already using the unit, we recommend you take a few moments to familiarize yourself with its many functions and features. -
Page 10: Bottom View
Bottom view Removable Removable Removable Removable Removable lithium ion lithium ion lithium ion lithium ion lithium ion battery: battery: battery: battery: battery: can be removed and charged separately from the unit. (See pages 13 and 14.) Modular drive bay Modular drive bay Modular drive bay Modular drive bay Modular drive bay... -
Page 11: Inside The Notebook
The Gateway 2000 Solo Multimedia Notebook Inside the Notebook Power button: Power button: Power button: Power button: Power button: Press once to activate Suspend or Resume mode. 10” color display: 10” color display: 10” color display: 10” color display: 10” color display:... -
Page 12: Keyboard
Keyboard The system features a specially-designed, 86-key keyboard. In order to provide the full functionality of a 101-key keyboard, many of these keys have been assigned special alternate functions, including shortcut keys for Windows Caps Lock key: Caps Lock key: Caps Lock key: Caps Lock key: Caps Lock key:... - Page 13 The Gateway 2000 Solo Multimedia Notebook To activate press with blue label key activates alternate functions of blue label keys Setup press with Fn key Monitor switch press with Fn key Num Lock press with Fn key Pad Lock press with Fn key...
-
Page 14: Ez Pad Pointing Device
EZ Pad pointing device Like a mouse, the EZ Pad pointing device controls the movements of the cursor on the screen. Press a finger against the pad and move it in the direction you want the cursor to move. Pad: Pad: Pad: Pad:... -
Page 15: Display
The Gateway 2000 Solo Multimedia Notebook Display The system features a built-in, backlit, active-matrix, color display. This display is either a 10.2 inch VGA display or a 10.4 inch SVGA display. Each of these displays provides sharp, clear color and resolution. -
Page 16: Power
Power The unit draws power from either a direct AC connection or its own rechargeable battery. To optimize the system’s use of power, enter the Power Managment Menu in the Setup Menus. (See page 25.) AC power We recommend you use the AC adapter whenever possible to provide the unit with a constant supply of power and simultaneously keep the battery charged. -
Page 17: Removing The Battery
The Gateway 2000 Solo Multimedia Notebook If the battery is installed in the unit and the unit is connected to AC power (See “AC power” on the previous page.), it automatically charges, even if the unit is in use. While the battery charges, the battery charger light (See page 8.) glows yellow, and when it is fully charged, the light glows green. -
Page 18: Bridge Battery
Bridge battery Beneath the unit’s hard disk drive bay lies the bridge battery. This rechargeable 3.6V battery provides power for certain functions when the unit is not connected to a power source (AC or battery). It automatically charges while the unit uses either power source and is designed to last for the life of the unit. -
Page 19: Standby Mode
The Gateway 2000 Solo Multimedia Notebook Standby mode To conserve the system’s power and resources while it is on, enter the Power Management Menu (See page 28.) and switch the Standby Timer setting in the User Settings Menu: Battery to the desired time amount. The unit then goes into Standby mode if you don’t use the keyboard or EZ Pad for a while: The hard disk drive spins... -
Page 20: Modular Option Bay
Modular Option Bay The Gateway 2000 Solo PC features a modular option bay located directly beneath the cover latch. This bay accepts the modular CD-ROM drive, the modular internal floppy disk drive, or the modular bay cover when neither drive is installed. The unit houses either drive, but only one at a time. -
Page 21: Cd-Rom Drive
The Gateway 2000 Solo Multimedia Notebook To use CD-ROM and floppy disk drive functions simultaneously, install the modular CD-ROM drive and connect an external floppy drive to the floppy/parallel port on the unit or the docking bar. (See “External Floppy Drive” on page 19.) -
Page 22: External Floppy Drive
External Floppy Drive The system accepts an optional external floppy disk drive. This drive connects to the floppy/parallel port on the back of the unit as shown below. (It also connects to the floppy/parallel port on the docking bar. See page 24.) This connection requires a floppy drive cable: Step 1: Step 1:... - Page 23 The Gateway 2000 Solo Multimedia Notebook Hard disk drive: Hard disk drive: Hard disk drive: Hard disk drive: Hard disk drive: HDD release HDD release HDD release HDD release HDD release latch: latch: latch: latch: latch: Step 1: Step 1:...
-
Page 24: Pcmcia Cards
PCMCIA Cards The system’s PCMCIA slots are located behind the PCMCIA door on the left side of the unit. These slots may be used as two Type II slots or as one Type III slot. Since these are flush slots, the door can be shut even when a PCMCIA card is installed. The system is preconfigured to accept most PCMCIA cards automatically: simply plug a card into the PCMCIA slot as shown below: PCMCIA door:... -
Page 25: Memory
The Gateway 2000 Solo Multimedia Notebook Memory The system already has a minimum of 8MB of RAM on board. This memory capacity can be upgraded by installing memory modules in the unit’s expandable memory sockets, located on the underside of the unit. These sockets will accept 4, 8, or... -
Page 26: Connections
Connections The unit uses a variety of hardware to connect to peripheral devices or to other computer systems. When the unit connects to another system, that system is called the “remote system.” IR module The IR module uses infrared technology to send signals between the unit and the remote system. - Page 27 The Gateway 2000 Solo Multimedia Notebook Lock: Lock: Lock: Lock: Lock: (shown closed) rotate handle closed (against docking bar) to lock bar to unit. PS/2 (mouse) PS/2 (mouse) PS/2 (mouse) PS/2 (mouse) PS/2 (mouse) VGA port: VGA port: VGA port:...
-
Page 28: Setup Menus
Setup Menus The system contains a series of Setup Menus, or screens, which control its security, efficiency, and functionality. The features these screens control may be modified to suit your needs. To access these menus, press the Fn and Esc(Setup) keys simultaneously. -
Page 29: Password Setup Menu
The Gateway 2000 Solo Multimedia Notebook Option Controls Time unit’s clock/time Date unit’s calendar/date Boot Drive which drive unit boots from Boot Display which display(s) the unit uses Power Switch function of power switch After changing an option, feel free to change another option, select another menu, or exit the Setup Menus. -
Page 30: Port Assignment Menu
Option Function Disable shuts off password protection select (can only be selected if password is currently Enables turns on password protection Change changes password Port Assignment Menu Option To Change Serial Port select; press Spacebar to toggle between: COM1; COM2; COM3; COM4; or DISABLED. IR Port select;... -
Page 31: Power Management Menu
The Gateway 2000 Solo Multimedia Notebook Power Management Menu Option Function Maximum Battery Life see screen Good Battery Life see screen Good Performance see screen Maximum Performance see screen User Settings-Battery sets Battery options User Settings-AC sets AC options User Settings Menu: Battery This menu allows you to control the unit’s efficiency in... -
Page 32: Miscellaneous Menu
Miscellaneous Menu Option To Change Low Battery Beep select; press Spacebar to toggle between: ENABLED or DISABLED. Wake Up Alarm select; press Spacebar to toggle between: ONE TIME; EVERY DAY; or DISABLED. (If selecting One Time or Every Day, be sure to select the box to the right and type in the alarm time.) L2 Cache select;... -
Page 33: Troubleshooting
If the Solo does not respond to these solutions, feel free to contact Gateway 2000 for assistance. The warranty shipped with the unit describes several ways to request help, including traditional Portables Technical Support and our FaxBack Service. - Page 34 The screen says “General Failure reading drive C:”: Try rebooting a couple times. Be sure the unit isn’t too cold. If nothing works, call Gateway 2000 Customer Support. The screen says “Non-system disk or disk error reading drive A:”: You have a non-bootable disk in drive A: (the floppy disk drive).
-
Page 35: Index
The Gateway 2000 Solo Multimedia Notebook Index AC adapter 3, 4, 5, 6, 13, External floppy drive 18, 14, 24, 31 AC power 8, 13, 14, 22, EZ Pad 2, 8, 11, 16. See also Mouse Audio 7, 11, 23, 27... -
Page 36: Calling Gateway
If you encounter any “turbulence” while using your Gateway 2000 Solo™ Multimedia Notebook, feel free to contact Gateway 2000. Please take a moment before calling to determine which service listed below is most appropriate for your particular needs. In most cases, we will need your Customer ID number and order number, so please have these available when you call. - Page 37 SYSMAN017AAUS 8/95...
Need help?
Do you have a question about the MULTIMEDIA NOTEBOOK SYSMAN017AAUS and is the answer not in the manual?
Questions and answers