Sony DWRS02D/14 Operating Instructions Manual
Digital wireless receiver
Hide thumbs
Also See for DWRS02D/14:
- Product information (2 pages) ,
- Manual (34 pages) ,
- Brochure (2 pages)

Related Manuals for Sony DWRS02D/14


Summary of Contents for Sony DWRS02D/14
-
Page 1: Operating Instructions
4-426-169-11 (1) Digital Wireless Receiver Operating Instructions Before operating the unit, please read this manual thoroughly and retain it for future reference. DWR-S02D © 2012 Sony Corporation... - Page 2 If you have any questions about this This device complies with part 15 of the product, you may call; FCC Rules. Operation is subject to the Sony Customer Information Service Center following two conditions: (1) this device 1-800-222-7669 or may not cause harmful interference, and (2) http://www.sony.com/...
- Page 3 Hierbij verklaart Sony Corporation dat het toestel DWR-S02D in overeenstemming is Για τ υς πελάτες στην Eυρώπη met de essentiële eisen en de andere Με την παρ ύσα η Sony Corporation relevante bepalingen van richtlijn 1999/5/ δηλώνει τι DWR-S02D συμμ ρφώνεται πρ ς της υσιώδεις...
- Page 4 és az 1999/5/EC Za stranke v Evropi irányelv egyéb előírásainak. Sony Corporation izjavlja, da je ta További információkat a következő weboldalon találhat: DWR-S02D v skladu z bistvenimi http://www.compliance.sony.de/ zahtevami in ostalimi relevantnimi določili direktive 1999/5/ES.
-
Page 5: Table Of Contents
Table of Contents Features .......... 7 Setting the Brightness of the Parts Identification ......8 Display (BRIGHTNESS) ..20 Preparation ........10 Automatic Dimming of the Attaching to a Camcorder ..10 Display (DIMMER Using the DWA-01D/F01D MODE) ........20 Wireless Adapter ....11 Resetting Parameters to their Setting the Receiving Channel ... - Page 6 Display of the Power Save Setting (POWER SAVE) ..23 Display of Accumulated Battery Use Time (TIME) ....23 Display of the +48V Power Setting (+48V) ....... 23 Cross Remote (RF REMOTE) ......23 Using the Cross Remote ....24 Pairing with a Transmitter ..
-
Page 7: Features
Despite its dual-channel receiver capability, DWX series supports multi-channel the DWR-S02D is small enough to be simultaneous operation, encrypted mounted directly in the slot of the Sony transmission, and metadata transmission for camcorder. monitoring the status of multiple transmitters. Using a main link and a... -
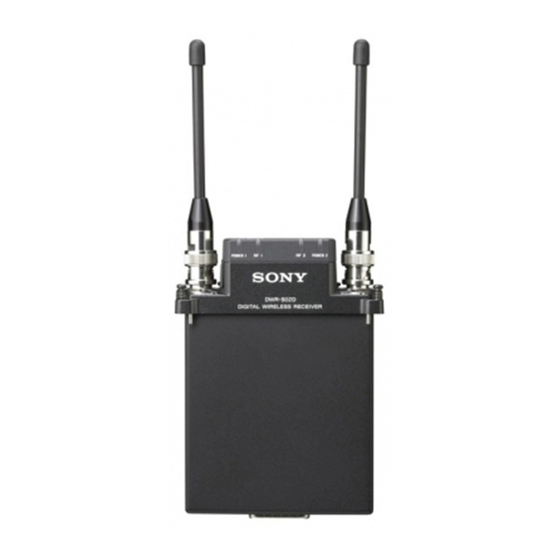
Page 8: Parts Identification
Auto channel scanning Parts function The DWR-S02D comes with two auto Identification channel scanning functions that allows for fast, easy and safe frequency channel changes. Compact, lightweight, and rugged design The DWR-S02D is highly compact and lightweight, maintaining a good balance even when mounted on a camcorder. - Page 9 d Accessory connector i MENU SELECT (menu selection) Use to connect the receiver to a camcorder button or DWA-01D/F01D wireless adapter. Selects the displayed menu. Power, audio, and control signals are sent j SET button through this connector. Changes the item to be set or enters the POWER indicator selected function or parameter value.
-
Page 10: Preparation
This receiver can be inserted into a slot transmitter, refer to the operating instructions supplied with the transmitter. provided on compatible Sony camcorders. The audio signal, which is converted to E Signal quality level meter digital by the digital wireless transmitter,... -
Page 11: Using The Dwa-01D/F01D Wireless Adapter
(GP), and channel (CH) as follows. For details on the groups and channels included in each frequency band, refer to “Sony Digital Wireless Microphone System Frequency Lists” on the supplied CD-ROM. For details on menu operations, see “Basic Menu Operations”... -
Page 12: Using The Active Channel Scan Function
Scan Function Press the + or – button repeatedly to select a group. This function scans for a Sony digital wireless frequency from the frequency lists Press the SET button to confirm the within the GP (group) selected during the selection. -
Page 13: Using The Clear Channel Scan Function
Note If you decide to use that channel, press the + or – button repeatedly to select If a Sony digital wireless frequency within SET, and then press the SET button. the group is not found by the second try, scanning is cancelled. -
Page 14: Using The Encrypted Transmission Function
Preparing the receiver (this unit) This receiver is capable of receiving scrambled signals from Sony digital 1 With the ENCRYPTION wireless transmitters. This function indication on (in the RX1/2 menu), prevents hacking of the signal. -
Page 15: Using Password Mode (Password)
Press the + or – button repeatedly to select PASSWORD, and then press the USB cable (supplied) SET button. Enter a password of up to 8 characters on the receiver. +: The first press on the + button displays the character set. You can then use the + and –... -
Page 16: Using A Usb Keyboard
To enter your password Using a USB You can use a USB keyboard to enter your password during encrypted transmission. Keyboard Characters that can be entered from a USB keyboard: 0, 1, 2, 3, 4, 5, 6, 7, 8, 9, A, B, C, D, E, F, G, H, I, J, K, L, M, N, O, P, Q, R, S, T, U, V, W, X, Y, Z Connecting an optional USB keyboard to Special key: Backspace (BS), and Delete... -
Page 17: Menu Displays And Detailed Settings
Menu hierarchy Menu Displays MENU SELECT and Detailed UTILITY Meter indication Settings AES/EBU LVL@MIC SYNC SOURCE WORD SYNC 75ohm ANALOG OUTPUT 1 TIME BRIGHTNESS Menu Structure and DIMMER MODE Hierarchy FACTORY PRESET VERSION Menu structure GP/CH The receiver has 3 kinds of menu, as BAND follows: ACT CH SCAN... -
Page 18: Basic Menu Operations
01D/F01D wireless adapter. The function Press the + or – button to change the does not operate even when used with a setting. compatible Sony slot-in type camcorder. Press the SET button to enter the Selecting the AES/EBU setting. Output Reference Level... -
Page 19: Selecting The Sync Signal (Sync Source)
Note Note The function does not operate for analog When “EXTERNAL” is selected, digital output. signals and analog signals will be output only if there is an external word clock signal – 36 dBFS LINEAR: The audio signal input. from the transmitter is output with a headroom of 36 dB. -
Page 20: Setting The Brightness Of The Display (Brightness)
Resetting the accumulated time YES, and then press the SET button to indication enter. The receiver parameters are reset to their factory settings. Hold down the SET button until the time indication flashes. Displaying the Software Press the – button so “00:00 RESET” Version (VERSION) appears, and then press the SET... -
Page 21: Rx (Tuner) 1/2 Menu
OFF: The encrypted transmission function For details on the groups and channels included in is not used. each frequency band, refer to “Sony Digital Wireless Microphone System Frequency Lists” on For details, see “Using the Encrypted Transmission the supplied CD-ROM. -
Page 22: Display Of The Audio Signal Delay Time (System Delay)
Because of the time that it takes for a digital Operations” on page 18. wireless microphone to process an audio The Sony digital wireless transmitter sends signal, a delay arises between input on the not only digital audio signals, but also transmitter and output on the receiver. -
Page 23: Display Of The Transmitter's Name (Name)
transmitter does not have the metadata Display of the +48V Power transmission function. Setting (+48V) Display of the Transmitter’s The +48V power setting of the transmitter is displayed. Name (NAME) The name of the transmitter from which Cross Remote (RF REMOTE) transmission is currently being received is displayed. -
Page 24: Using The Cross Remote
During the search, pressing any proper functioning. For details on software operation key on the receiver will updates, contact your Sony service cancel pairing mode. representative. Press the + or – button repeatedly to... - Page 25 paired. To use the wireless remote Cross Remote condition control function with another transmitter, indication you must perform the pairing procedure again for that transmitter. • Pairing with multiple transmitters is not possible. The following transmitter settings can be performed through Cross Note Remote: •...
-
Page 26: Changing The Settings On The Transmitter
For details, see “Selecting the Frequency Band / Changing the Group / Channel” on page 11. Settings on the Transmission Power Setting Transmitter (RF POWER) You can change the transmission power of the transmitter. For details on menu operation, see “Basic Menu Operations”... -
Page 27: Power Setting (+48V)
+48V Power Setting (+48V) Turns the +48V on the transmitter on or off. Cross Remote Setting REMOTE) OFF: Stops the wireless remote control function. ON: Starts the wireless remote control function with the previously paired receiver. PAIRING: Executes a new pairing. For details, see “Using the Cross Remote”... -
Page 28: Block Diagram
Block Diagram Antenna a Tuner 1 Analog Digital Tuner 2 wireless tuner 1 Tuner 1+2 Sync Compressor Digital Antenna b interface Camcorder interface Digital wireless tuner 2 Analog Sync Terminate 75 ohms Block Diagram... -
Page 29: Troubleshooting
If you encounter a problem using this receiver, use the following checklist to find a solution. For any problems with the transmitter or adapter, refer to the operating instructions supplied with the respective device. If the problem persists, consult your Sony dealer. Symptom... - Page 30 It is not possible to use two or more to the same channel. transmitters that are set to the same channel. Refer to the Sony digital wireless frequency lists and reset the transmitter channel. The channel is not set within the The channel plan of the receiver same channel group.
- Page 31 (see page 32). If it is not suitable, software update is necessary. Contact your Sony service representative. The USB You are using a USB keyboard Check the conditions for using a...
-
Page 32: Important Notes On Operation
• The presence of the lighting equipment details on software updates, contact your may produce electrical interference over Sony service representative. the entire frequency range. Position the For details on confirming the software version, refer receiver so that interference is to the operating instructions for each transmitter. -
Page 33: Specifications
Type of reception synchronization is lost and the connection Space diversity finally breaks. Sony digital wireless Circuit system systems suppress the occurrence of large Double superheterodyne noise between these two points as the signal Local oscillators weakens. - Page 34 General Note Always verify that the unit is operating Operating voltage properly before use. SONY WILL NOT 7 V DC BE LIABLE FOR DAMAGES OF ANY Consumption current KIND INCLUDING, BUT NOT 500 mA or less (at 7 V DC)
-
Page 35: Carrier Frequencies And Channel Steps
Carrier Frequencies and Channel Steps Underlined items are the factory setting. US models Channel step: 25 kHz Model No. Frequency band Frequency Group/channel (factory setting) TV14-17 470.125 - 493.875 MHz U1424 TV18-21 494.125 - 517.875 MHz 00 1801 494.125 MHz TV22-25 518.125 - 541.875 MHz TV30-33... - Page 36 Sony Corporation...
Need help?
Do you have a question about the DWRS02D/14 and is the answer not in the manual?
Questions and answers