
Subscribe to Our Youtube Channel
Related Manuals for Kenmore 790.79623


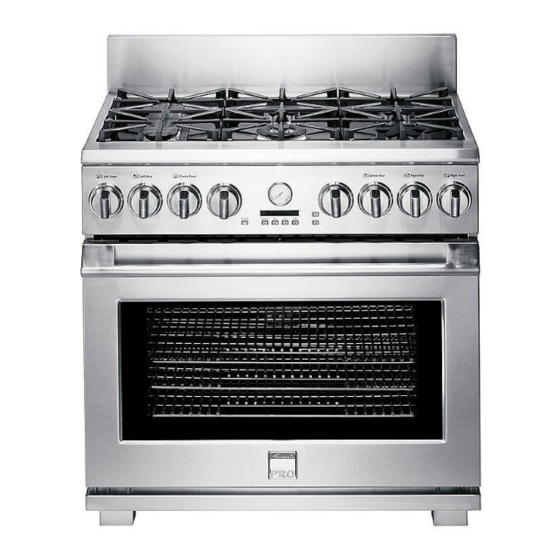
Summary of Contents for Kenmore 790.79623
- Page 1 DUAL FUEL ESTUFA FU L i:'1% IViodel, modelo 790.79623 iii ..iii ..Sears Roebuck and Co., Hoffman Estates, IL 60179 U.S.A. P/N 318203953 Rev. B (0707) www,sears,com...
-
Page 2: Table Of Contents
Table of Contents Kenmere Pro Appliance Warranty ..........Air Circulation in the Oven ............iMPORTANT SAFETY iNSTRUCTiONS ........Control Button Features ............Product Record ................Setting the Clock ..............Serial Plate Location ..............Setting Oven Controls ............15-19 Conversion to Liquefied Petroleum Gas (or L.P. Gas) .... 5 Self-Cleaning ............... -
Page 3: Important Safety Instructions
important Safety instructions Read all instructions before using this appliance. Save these instructions for future reference. This manual contains many important safety messages. Always read and obey all safety messages. The safety symbol _ calls your attention to safety messages that inform you of hazards that can kill or hurt you or others, or cause damage to the product. - Page 4 important Safety Instructions enough to cause burns. During and after use, do not • Use proper pan size. This appliance is equipped with one or more surface burners of different sizes. Select utensils touch, or let clothing or other flammable materials touch these areas until they have had sufficient time to cool.
-
Page 5: Product Record
important Safety Instructions on or near the oven vent. These items could melt or SELF CLEANING OVENS ignite. = in the self-Cleaning cycle only clean the parts listed • Placement of oven/warmer drawer (if equipped) in this Use and Care Guide. Before self cleaning the racks. -
Page 6: Range Features
Range Features Electronic Oven Controls with Center Front Your Clock and Kitchen Timer Oven Temperature Left Rear & Burner Knob Dual Fuel Control Knob Bridge Burner Oven Function Dishwasher Safe Center Rear Range Knob Control Knob Burner Grates Burner Knob Features At a Glance Left Front... -
Page 7: Before Setting Surface Controls
Before Setting Surface Controls Assembly of the Surface Burner Heads, Burner Caps and Burner Grates It is very important to make sure that all of the Surface Burner Heads, Surface Burner Caps and Surface Burner Grates are installed correctly and at the correct locations. 1. -
Page 8: Setting Surface Controls
Setting Surface Controls Operating Gas Surface Controls: Do not place plastic items Place cooking utensil on surface burner. such as salt and pepper shakers, spoon Push the surface control knob down and turn counterclockwise holders or plastic wrappings on top of of the OFF position (See Figure t). - Page 9 Setting Surface Controls Setting the Triple Burner The Triple Burner has three rings of flame that you can control for two different heat levels, one for small and one for large cookware. Small Cookware Operation (Figure 1 ; Zone Place a small cooking utensil centered over the surface Burner Grate. Push the surface control knob in and turn counterclockwise out of the OFF position (See Figures 2 &...
- Page 10 Setting Surface Controls (cont'd) Setting the Bridge Burner The Bridge Burner should be used with rectangular shaped cookware. Cookware like the cast- iron Griddle that is supplied with your appliance is designed specifically for best results with the Bridge Burner. The Bridge Burner feature may be used to combine the cooking power of 2 or if needed 3 gas surface Burners located along the left-hand side of the glass cooktop.
-
Page 11: Surface Cooking
CORRECT INCORRECT Surface Cooking • Curved and warped pan bottoms. Use Proper Cookware Cookware should have flat bottoms that make good contact with the entire Pan overhangs burner grate by = Flat bottom and straight surface heating sides. more than 2.5 cm (1"). element. -
Page 12: Before Setting Oven Controls
Surface Cooking Care & Seasoning of the Griddle Before first use: • Wash Griddle in hot soapy water. Rinse and then dry completely. • Apply a thin coat of vegetable oil to the entire surface (front and back of griddle). = Preheat your oven to 350°E Place the griddle on the upper rack in your oven. -
Page 13: Air Circulation In The Oven
Before Setting Oven Controls (cont'd) Arranging Oven Racks ALWAYS ARRANGE OVEN RACKS WHEN THE OVEN IS COOL (PRIOR TO OPERATING THE OVEN). Always use oven mitts when the oven is hot. 1 Oven Rack Always use pot holders or oven mitts when adjusting the oven racks. -
Page 14: Control Button Features
Control Button Features READ THE iNSTRUCTiONS CAREFULLY BEFORE USING THE OVEN. For satisfactory use of your oven, become familiar with the various features and functions of the oven as described below. Detailed instructions for each feature and function follow Jater in this Use &... -
Page 15: Setting Oven Controls
Setting the Clock (cont'd) Setting Continuous Bake or 12 Hour Energy Saving The oven control has a factory preset built-in 12 Hour Energy Saving that will shut off the oven if the oven control is left on for more than t t hours and 59 minutes. The oven can be programmed to override this feature for Continuous Baking. To set the control for Continuous Bake or 12 Hour Energy Saving features... - Page 16 Setting Oven Controls (cont'd) Oven Baking For best cooking results, pre-heat the oven before baking cookies, breads, cakes, pies or pastries, etc. The cooking times and temperatures needed to bake a product may vary slightly from your previously owned appliance. if you feel your oven is too hot or too cold, you can adjust its temperature.
- Page 17 Setting Oven Controls (cont'd) Setting Convection Bake Use the Convection Bake feature when faster cooking is desired. The oven can be programmed for Convection baking at any temperature between 170°F and 550°F. Convection baking uses a fan to circulate the oven's heat evenly and continuously within the oven (See Figure 1).
- Page 18 Setting Oven Controls (cont'd) Using the Temperature Probe Feature For many foods, especially roasts and poultry, testing the internal temperature is the best method to insure properly cooked food. The Temperature Probe gets the exact temperature you desire without having to guess. IMPORTANT: Use only the probe supplied with your appliance;...
-
Page 19: Setting Oven Controls
Setting Oven Controls (cont'd) Setting the Warm & Hold Feature The Warm & Hold feature will maintain an oven temperature of 170°F, and will keep oven baked foods warm for serving for 3 hours after cooking has finished. The Warm & Hold feature may be used without any other cooking operations or can be used after cooking has finished. -
Page 20: Self-Cleaning
Self-Cleaning Self=Cleaning Oven During the self-cleaning cycle, the outside of the wall oven can become A Self-Cleaning oven cleans itself with high temperatures (well above cooking temperatures) which eliminate soils completely or reduces very hot to the touch. DO NOT leave small them to a fine powdered ash you can wipe away with a damp cloth. -
Page 21: Adjusting Oven Temperature
Self=Cleaning (cont'd) Self=Clean Cycle Time Length To avoid possible burns use care when opening If you are planning to use the oven directly after a self-clean cycle remember to the oven door after the Self- allow time for the oven to cool down and the oven door to unlock. This normally Cleaning cycle. -
Page 22: General Care & Cleaning
General Care & Cleaning Cleaning Various Parts of Your Oven Before cleaning any part of the oven, be sure all controls are turned OFF and the oven is COOL. REMOVE SPILLOVERS AND HEAVY SOILING AS SOON AS POSSIBLE. REGULAR CLEANINGS NOW WILL REDUCE THE EXTENT AND DIFFICULTY OF MAJOR CLEANING LATER. - Page 23 General Care & Cleaning (cont'd) Removing and Replacing the Oven Door The door is heavy. For safe, temporary storage, lay the door fiat with the inside of the door facing down. To Remove Oven Door: 1. Open the door to the fully opened position. 2.
- Page 24 General Care & Cleaning (cont'd) Cleaning the Cooktop, Burner Heads, Caps & Grates The cooktop is designed to make cleaning easier. Because the gas Burners are sealed, cleanups are easy when spillovers are cleaned up immediately. The cooktop, Burner Heads and Caps should be routinely cleaned. Keeping the Burner Head Ports clean will prevent improper ignition and an uneven flame.
- Page 25 General Care & Cleaning (cont'd) Ceramic Glass Cooktop Cleaning and Maintenance Consistent and proper cleaning is essential to maintaining your ceramic glass cooktop Prior to using your cooktop for the first time, apply the recommended CookTopO Cleaning Creme to the ceramic surface (on the web visit www.sears.com for replacement cooktop cleaner, item number 40079).
-
Page 26: General Care & Cleaning
General Care & Cleaning (cont'd) following glass cooktop Do not on the ceramic • Do not use abrasive cleaners and scouring pads, such as metal and some nylon pads. They may scratch the cooktop, making it more difficult to clean. •... -
Page 27: Before You Call
Before You Call SolutionsTo Common Problems Before you call for service, review this list. It may save you time and expense. The list includes common occurrences that are not the result of defective workmanship or materials in this appliance. OCCURRENCE POSSIBLE CAUSE/SOLUTION Oven Control Beeps and Electronic control has detected a fault condition. -
Page 28: Before You Call
Before You Call Solutions To Common Problems OCCURRENCE POSSIBLE CAUSE/SOLUTION Make sure the oven door is closed. Self-cleaning cycle does not work. Controls not set properly. Follow instructions. Self-cleaning cycle was interrupted. Stop time must be set 2-4 hours past the start time. Follow steps under "Stopping or Interrupting a Self-Cleaning Cycle"... -
Page 29: Protection Agreements
Master Protection Agreements Acuerdos maestros de protecci6n Enhorabuena por haber heeho una compra inteligente. Su nuevo Congratulations on making a smart purchase. Your producto Kenmore®esta diseSado y fabricado para brindarle aSos de Kenmore®product is designed and manufactured for years funcionamiento fiable. -
Page 30: Sears Service
Your Home For repair - in your home - of all major brand appliances, lawn and garden equipment, or heating and cooling systems, no matter who made it, no matter who sold itt For the replacement parts, accessories owner's manuals that you need to do-it-yourself. For Sears professional installation of home appliances and items like garage door openers and water heaters.
Need help?
Do you have a question about the 790.79623 and is the answer not in the manual?
Questions and answers