Table of Contents
Advertisement
Advertisement
Table of Contents

Related Manuals for Sanyo FXCD-500


Summary of Contents for Sanyo FXCD-500
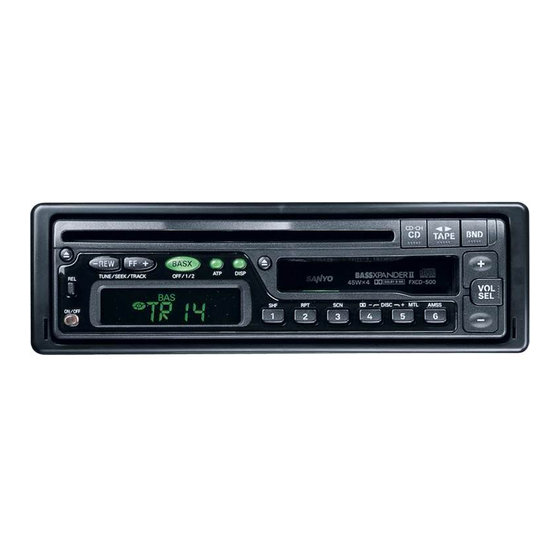
- Page 1 OPERATING INSTRUCTIONS FXCD-500 Full Panel Detachable FM Stereo/AM Receiver Auto Reverse Cassette Player Compact Disc Player with CD Changer Controller IS0 Mounting with Removable Trim Ring (English) 7 -30 OPERATING INSTRUCTIONS (Espafiol) 31-59 LIBRITO DE INSTRUCCIONES...
- Page 2 OBLIGATIONS In order to obtain warranty service, the product must be delivered to and picked up from an Authorized Sanyo Factory Service Center at the user’s expense, unless specifically stated otherwise in this warranty The names and addresses of Authorized Sanyo Service Centers may be obtained by calling the toll-free number listed below.
-
Page 3: Table Of Contents
This unit should not be adjusted or repaired by anyone except qualified service personnel If servicing is required, return the unit to an authorized SANYO mobile audio dealer Use of Controls or adjustments or performance of procedures other than those specified herein may result in... -
Page 4: Compact Disc Care
COMPACT DISC CARE Dirt, dust, scratches and warpage can cause a deterioration in the sound or intermittent skipping some tracks during play This unit has been designed to play compact discs bearing the identification logo shown onthe left Discs bearingothertypesofiden- tification logos may not play properly DIGITAL AUDIO... - Page 5 Never use chemicals such as record clean- ing sprays, antistatic sprays or fluids, ben- zene or thinner to clean compact discs These chemicals will permanently damage the plastic surface of the disc ing spray When not using the disc player for extended periods, remove the compact disc and re- turn it to the plastic storage case This will protect the disc from dust and exposure to...
-
Page 6: Digital Display
DIGITAL DISPLAY Automatic Music Select System (AMSS) Metal Display Auto Travel Preset (ATP) Tape playing direction Disc in BASSXPANDER Dolby Noise Reduction Disc Number Preset Channel, Radio Frequency, Time, CD Track Number, Auto Travel FM Bands Preset Channel Audio Control Selection, Scan Play, Repeat Play, Shuffle Play, Error Signs, CD In (CD player and... -
Page 7: Detachable Front Panel
DETACHABLE FRONT PANEL The front panel is designed to be removable for antitheft purposes It is recommended that you remove and carry the front panel with you when you leave your car A carrying case is provided with the unit for this purpose HOW TO DETACH THE FRONT PANEL... -
Page 8: General Operation
GENERAL OPERATION TURNING THE POWER ON install the front panel and press the ON/OFF button 0 when ACC is on TURNING THE POWER OFF ......Press the ON/OFF button 0 to stop the current operation The button dims when the power is off (ACC on) ELECTRONIC CONTROLS . - Page 9 ELECTRONIC CONTROL RESET Press the SEL button 0 for about 3 seconds until the unit beeps, the audio controls, except for vol- ume, will be reset BASSXPANDER (BASX) - l/2 ......BASSXPANDER is a dual-mode sound equalization feature Press button @ to select the BASSXPANDER...
-
Page 10: Radio Operation
RADIO OPERATION SELECTING RADIO MODE Press the BND button 0 to switch from tape, CD or CD changer* mode to the radio Each time the BND button is pressed, the selected band changes as shown below * If a CD changer is connected FM1 - FM11 - RADIO TUNING . - Page 11 ATP (AUTO TRAVEL PRESET) OPERATION ....The Auto Travel Preset function searches for and memorizes the 6 strongest stations in one of the two bands (FM I, AM) in order of signal strength This feature is useful when you are driving in an unfamiliar location and want to memorize local stations without changingthe standard preset stations A total of 12 stations (6 FM and 6 AM) can be programmed...
-
Page 12: Tape Operation
TAPE OPERATION 109876 LOADING AND EJECTING THE TAPE Insert a cassette into the tape slot 0 and the tape player will start Press the eject button 0 to eject a tape The system will return to the last mode CAUTION Only cassette that play no longer than 90 minutes should be used Tapes exceeding tapes... - Page 13 4,5,6 LOCATING THE BEGINNING OF A PROGRAM (AMSS) ..This system is equipped with a function that allows you to skip forward or backward to locate the beginning of a particular selection on the tape (Automatic Music Select System : AMSS) Press the AMSS button @ “AMSS T;qpE ”...
- Page 14 SCAN MODE ......... . . Scan helps to find a program by playing about the first 10 seconds of each selection ’...
-
Page 15: Cd Operation
CD OPERATION LOADING AND EJECTING THE CD .., . , ... 1, insert a disc into the CD slot 0 and the CD player will start Press the eject button 0 to eject a disc pm CAUTION This CD player is not designed for 8 cm CDs... - Page 16 SKIPPING TRACKS ........495 Press the TRACK $ button 6% to skip to the beginning of the next track Press the TRACK 0 button 0 to skip to the beginning of the track currently playing Press the TRACK 8 button 0 twice to skip to the beginning of the previous track...
-
Page 17: Cd Changer Operation
CD CHANGER OPERATION THE UNIT CAN BE USED TO CONTROL THE FUNCTIONS OF THE AX-300, AX-500 OR OTHER COMPATIBLE SANYO CD CHANGERS 67832 SELECTING CD CHANGER MODE ....1 Press the CD/CD-CH button 0 to switch from radio, tape or CD player mode to CD changer mode Pressing the button will change the mode as explained in section “CD PLAYER OR CD CHANGER... - Page 18 REPEATMODE ........Repeat tracks Press the RPT button 0 to play the current track repeatedly Repeat discs...
- Page 19 CD Player If a problem should occur while operating the built-in CD player, one of the following error signs may be displayed Error Sign Cause Remedy Abnormal mechanism function Press the eject button Turn the power off and then on again If it is not corrected, contact the place of Durchase The disc is inserted incorrectly...
-
Page 20: Clock
CLOCK DISPLAY MODE CHANGE ....... 1 The display on the unit can be changed by pushing button Press... -
Page 21: Hints For Proper And Safe Operation
Do not leave a disc partially ejected from the player Servicing Shoulda problem develop, do not open the unit or try to repair it yourself If servicing is required, bring the unit to a Sanyo Authorized Service Center -2o-... -
Page 22: Troubleshooting
TROUBLESHOOTING Sometimes a simple operational error or a mistake in the wiring can appear to be a problem with the unit Before having the unit serviced, refer to the troubleshooting chart below Symptom Cause Solution The compact disc does not The volume control is Turn up the volume control play when inserted into the turned down... -
Page 23: Accessories And Hardware
ACCESSORIES AND HARDWARE INSTALLATION Mounting Bracket Rear Strap Screw M5 x 14 Hex bolt M8 x 6 (Half Sleeve) (Brace) Mounting Screw MountingGrommet Removable SECURITY OF FRONT PANEL SET REMOVAL Screw M2 x 8 Unlock Levers... -
Page 24: Installation
INSTALLATION 1. BEFORE INSTALLATION When mounting the unit in a car, keep the unit as level as If the unit must be mounted at an angle, due to the design of the vehicle, make sure the unit does not tilt by more than 30” 2. - Page 25 3. INSTALLATION PROCEDURES 1) Installation with Mounting Kit DASHBOARD TRIM RING DASHBOARD OR CONSOLE MOUNTING SCREW TRIM 1 Inset-t the mounting bracket into the DIN-standard cutout (182 x 53 mm) in the dashboard or console Bend the mounting bracket stopper outward until the bracket fits snugly...
- Page 26 2) Installation to TOYOTA/NISSAN Vehicles Install the unit using the existing TOYOTA/NISSAN Mounting Bracket and Screws Use the mounting holes in the unit chassis ‘7” or “N” is engraved next to each mounting hole Use 7” holes for Toyota vehicles and “N”...
-
Page 27: Unit Removal
UNIT REMOVAL UNLOCK LEVERS Remove the front panel by pressing the release knob Insert the unlock levers into the slots as illustrated Note The jagged side of the key should face outward Slide down keys outward and pull to remove the audio unit -26-... -
Page 28: Electricalconnections
ELECTRICAL CONNECTIONS - - P-speaker System - - - Left Speaker Right : (Gray/Bl& Speaker (Green) Do Not i (Green/Bw Connect (vi- Do Not i (Violet/Black)B Connect \ - - - - - - - - ----- -2’ + 12V Constant Power Supply (Yellow) 3 -I- 12VAccessoryDwitched (Red) 4 Ground Wire (Black) -
Page 29: Line Out/Cd Changer Connections
15 amp fuse LINE OUT/CD CHANGER CONNECTIONS The unit has a built-in CD changer controller and line output terminals You can use a compatible Sanyo changer and a separate rear channel amplifier to upgrade your system RCA Line-out... -
Page 30: Specifications
TUNER SECTION 5MHz - 107 9MHz Frequency Range 15dBf Usable Sensitivity 30dBf 50dB Quieting Sensitivity 50Hz - 12 5kHz Frequency Response ( f 3dB) 1 OOdB I F Rejection 65dB Image Rejection Signal-to-Noise Ratio 60dB 65dB Selectivity 27dB Stereo Separation Capture Ratio Antenna Impedance 9M TUNER SECTION... - Page 31 Output Power Load Impedance GENERAL 12V(105-15OV) Operating Voltage Operating Current Maximum IMPORTANT INFORMATION Because its products are subject to continuous improvement, SANYO reserves the right to modify prod- uct designs and specifications without notice and without incurring any obligation -3o-...
Need help?
Do you have a question about the FXCD-500 and is the answer not in the manual?
Questions and answers