Table of Contents
Advertisement
Quick Links
Advertisement
Table of Contents

Subscribe to Our Youtube Channel
Related Manuals for Gaggenau VR 230-612


Summary of Contents for Gaggenau VR 230-612
- Page 1 Operating and assembly instructions VR 230-612 Built-in grill...
-
Page 2: Table Of Contents
VR 230-612 Preface Important safeguards 1. Important notes 1.1 For your safety 1.2 Operating for the first time 1.3 About use 2. Structure and operating principle 2.1 Structure of the appliance 2.2 Accessories 2.3 Operating principle 3. Operation 3.1 Switching on 3.2 Switching off... -
Page 3: Preface
Consult “Tips and tricks" if you cannot set the function you require. Please contact Gaggenau after-sales service if these tips are not enough. And now we wish you lots of fun with your... -
Page 4: Important Safeguards
Important safeguards Read All Instructions. 2. To eliminate the risk of burns or fire by reaching over the heated surface units, cabinet storage space located above the surface units should be avoided. 3. Important instructions a) Ensure that this appliance is properly connected and grounded by a qualified electrician. -
Page 5: Important Notes
– In the event of malfunctions, first of all check the household fuses. If the problem has nothing to do with the power supply, please contact your specialist dealer or your local Gaggenau after- sales service. – A built-in temperature protection facility prevents overheating of the appliance. -
Page 6: Structure And Operating Principle
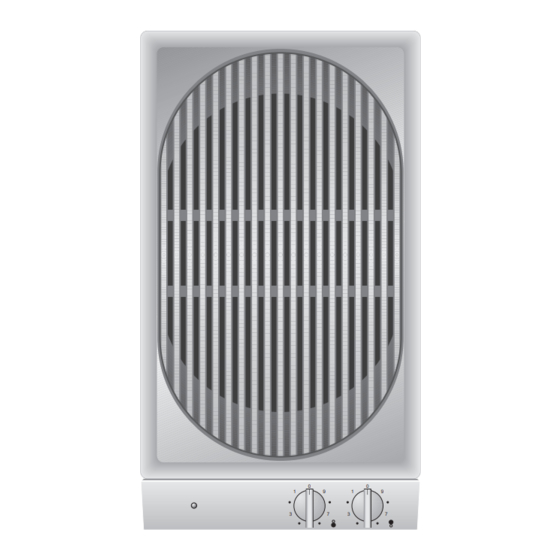
2. Structure and operating principle 2.1 Structure of the appliance Fig. 2 2.2 Accessories Fig. 3 2.3 Operating principle Fig. 4 1 Pilot light 2 Grease tray (dishwasher-proof) 3 Appliance cover 4 Cast gridiron (detachable) 5 Lava stone box (underneath the cast gridiron) to accommodate the lava stones 6 Control knob for the front grilling element 7 Control knob for the rear grilling element... -
Page 7: Operation
3. Operation 3.1 Switching on Fig. 5 3.2 Switching off Fig. 6 Please observe our “tips and tricks"! Make sure when unpacking that there are lava stones in the appliance. Take the lava stones out of the foil and pour them into the lava stone box. (The contents of the bag are sufficient.) Switching on: Turn the two control knobs to the required stage... -
Page 8: Operation With Griddle Plate
3.3 Operation with griddle plate Fig. 7 – Detach the gridiron – Place the grille plate AM 060-000 (special accessory) on the Vario grill (Fig. 7). – Switch on the appliance as described on Page 6. – Heat up the grill at level 9 for about 5 minutes. –... -
Page 9: Cleaning And Care
4. Cleaning and care Please thoroughly clean the appliance before operating it for the first time. Heat up the appliance at level 9 for a few minutes. Allow the appliance to cool down. Swivel up the two heating elements and remove the inner tub containing the lava stones. -
Page 10: Maintenance
If the power supply is functioning correctly, but your appliance still does not work, please contact your Gaggenau dealer who will provide you with the address and telephone number of your nearest manufacturer’s authorized service agent or contact Gaggenau USA on (800) 828-9165. -
Page 11: Practical Tips
6. Practical tips 6.1 Table of settings The specified grilling times serve as guide values only. Setting table for VR 230 Item Level* Meats Rumpsteak Veal chop Kebab (skewers) 7 to 8 Lamb chop Back of pork steak Pork belly slices Grilled sausage 6 to 7 Beefburger... -
Page 12: Recipes
6.2 Recipes Vegetable kebaps What you need – 8 shallots – 1 green pepper – 8 firm cocktail tomatoes – 8 small mushrooms – 1 cooked corn cob – 8 barbecue onions – 1 clove of garlic – 2 dried red chili peppers –... -
Page 13: Tips And Tricks
6.3 Tips and tricks – The grilled result depends on the nature and quality of the meat and on your personal taste. – As far as possible, grilled pieces should be equally thick. In this way, they will brown evenly and they will stay nice and juicy. - Page 14 Beef – Well-hung pieces are particularly suitable. If you have not gathered much grilling experience, you should practice with pieces of meat such as rump steak or high rib, after which you can try your hand at entrecote or fillet steak. For smaller pieces of meat, the gridiron must be very hot as otherwise the meat will dry out.
-
Page 15: Assembly Instructions
The factory reserves the right to make technical modifications in the interest of progress! VR 230-612 AC 208/220-240 V ”). ”) above the floor behind FD xxx... - Page 16 AM 060-000, installation of the appliance under a ventilator hood is possible. The minimun distance is 24 inches (600 mm). Installation next to a Gaggenau downdraft ventilator is possible, please contact your Gaggenau dealer who will provide you with more information.
-
Page 17: Installation
7.3 Installation Fig. 9 Fig. 10 Fig. 11 – Produce the recess for one or several Vario appliance(s) in your worktop. Proceed as indicated on the installation sketch and the dimension table. The dimension table contains details of the space requirement for the trim between the appliances. -
Page 18: Fitting The Cover
7.4 Fitting the cover Fig. 12 Fig. 13 5080003892ind03 en 07.04 EB – The securing bracket is already fitted on the trough. – Place the lid in upright position and screw it down firmly using the included shett metal screws. (Fig. - Page 19 GAGGENAU HAUSGERÄTE GMBH 5551 McFADDEN AVENUE CARL-WERY-STR. 34 · 81739 MÜNCHEN HUNTINGTON BEACH, CA 92649 GERMANY Y (0 89) 45 90 - 03 Y (800) 828-9165 · FAX (714) 901-0979 FAX (0 89) 45 90 - 23 47 www.gaggenau-usa.com...
Need help?
Do you have a question about the VR 230-612 and is the answer not in the manual?
Questions and answers