
Related Manuals for VTech MobiGo 2 Touch Learning System


Summary of Contents for VTech MobiGo 2 Touch Learning System
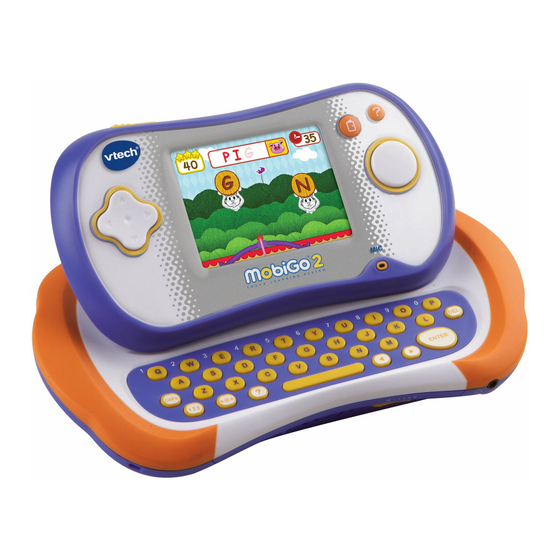
- Page 1 User’s Manual User’s Manual User’s Manual User’s Manual 135800 MobiGo2 M 20120510.indd 1 2012-5-30 10:17:10...
- Page 2 Dear Parent, At VTech ® , we know how much you enjoy staying on top of the hottest trends and having the most high-tech gadgets around. We also know that your kids feel the same way. With that in mind, we developed MobiGo®...
-
Page 3: Table Of Contents
INTRODUCTION ..............Included in This Package ............... PRODUCT FeaTURes ............2 GeTTING sTaRTeD .............. Battery Installation ................AC Adaptor ..................Inserting a Cartridge ................ User Profile ..................UsING YOUR MOBIGO ® ..........Buttons ....................The Touch Screen ................The Keyboard .................. -
Page 4: Introduction
And there’s lots of memory storage so kids can expand the fun by importing pictures into a photo album or downloading new games online! Included in This Package Included in This Package • One VTech MobiGo ® 2 Touch Learning System (including Stylus) ®... -
Page 5: Product Features
• Sliding Screen Slide the screen up or down to show or hide the keyboard. NOTE: For your own safety, please do NOT place your fingers under the hinge mechanism that controls the sliding of the screen. • Exit Button • ON/OFF Button Press this button to exit a game. -
Page 6: Getting Started
Battery Installation Battery Installation • Make sure the unit is turned OFF. • Locate the battery covers on the back of the unit. • Remove the covers as illustrated. • Insert 4 X 1.5v size AA AM-3 or LR6 batteries (not included) as illustrated. • Make sure to replace the battery covers. BATTERy NOTICE • Install batteries correctly observing the polarity (+, -) signs to avoid leakage. • Non-rechargeable batteries are not to be recharged. • Rechargeable batteries are only to be charged under adult supervision (if removable). • Rechargeable batteries are to be removed from the toy before being charged (if removable). -
Page 7: Ac Adaptor
AC Adaptor AC Adaptor • Using a VTech adaptor (AC/DC 7.5V 400mA or 9v 300mA ) is recommended. • Make sure the unit is turned OFF. • Plug the power jack into the 7.5V / 9V socket at the upper right corner of the unit (see illustration). • Plug the AC adaptor into a wall socket. NoTe: 1. The use of an adaptor will override the batteries. When the toy is not going to be in use for an extended period of time, unplug the adaptor. -
Page 8: Inserting A Cartridge
Inserting a Cartridge Inserting a Cartridge • Make sure the MobiGo 2 is turned OFF. ® • Insert the MobiGo cartridge with the label side ® facing up, and push it until it clicks into place. • Press the ON Button turn the unit ON. • Turn the power OFF and pull the cartridge up to remove it. ImPORTANT CARTRIDGE GUIDElINES: • Push the cartridge door open and periodically check the cartridge slot for any foreign materials. -
Page 9: Using Your Mobigo ® 2
Buttons Buttons Directional Pad and Enter Button Use these to control the characters or to perform certain actions in some games. Exit Button During a game, press this button to exit the game, or press it within a menu to go back to the previous screen. Help Button Press this button when you need help in a game. The Touch Screen The Touch Screen MobiGo 2 features a touch sensitive LCD screen. You can use your finger or the ® stylus to operate the screen in a variety of ways. A few of the most common touch operations are shown below. -
Page 10: The Keyboard
Screen Cleaning Procedure If your MobiGo 2 screen gets dirty, wipe it gently with a soft cloth. ® 1. Dampen the cloth with a little water and wipe off the screen. 2. Wipe the screen again with a dry cloth to dry it. The Keyboard The Keyboard Caps Lock Key - Press this key to change between uppercase and lowercase letters. -
Page 11: Motion Controls
motion Controls motion Controls The MobiGo 2 comes with a built-in motion sensor for motion-controlled gaming. ® Move the MobiGo 2 as directed to perform certain actions in some games. ® Basic Operation 2. Operations The following demonstrates the basic motion operations of the MobiGo ® will vary per cartridge. Read the user’s manual that came with the cartridge you’re playing for more specific control instructions. Drive - hold the console upright and turn it left or right like a steering wheel. Move the console up. -
Page 12: The Microphone
Tilt the console left or right. Tilt the console forward or backward. The microphone The microphone Blow or speak into the microphone to trigger an action in some games. Settings Settings Touch the Settings icon in the MobiGo 2 main menu to enter the Settings menu. ®... -
Page 13: Games & Activities
Parent Settings Hold down the down arrow on the directional pad and then press the ? button to enter the Parent Settings. Screen Calibration If you find the touch screen isn’t responding the way it should you can come here to recalibrate the screen. Please use the stylus when doing the calibration, or the screen may not calibrate properly. Progress Log Reset Choose this option if you want to reset the progress log data that’s been stored under the current user profile for the built-in games on your MobiGo ®... - Page 14 Art master Watch the pages of this coloring book come to life! Color and decorate a page. Then touch the star and move the MobiGo 2 for a special surprise. ® Curriculum: Creativity Shooting Gallery Use the keyboard to play this game. Knock down the targets by typing in the letters on Easy level. Type the letters in the correct order to spell the word on difficult level.
-
Page 15: Connecting To The Computer
Connecting to the Computer Connecting to the Computer Connect MobiGo 2 to the internet to download ® new content and follow your child’s learning progress online. NOTe: When not using the USB cable, please ensure that the USB port cover is properly closed. -
Page 16: Mobigo ® 2 Downloads
• If the MobiGo 2 is connected properly, you will see the message “USB Connected” ® appear on your MobiGo 2 screen. You will be taken directly to the Learning Lodge ® Navigator™, where you can access the MobiGo 2 home page and enjoy all of the ®... -
Page 17: Managing The Mobigo
managing the mobiGo managing the mobiGo 2 memory Storage 2 memory Storage ® ® The MobiGo 2 has roughly 75 MB of internal memory storage. If your memory is getting ® full, you can use the Learning Lodge Navigator™ to manage the content on your MobiGo ® 2. To add or remove games or e-books, connect the MobiGo 2 to your computer using ®... -
Page 18: Computer Requirements
Computer Requirements Computer Requirements PC Hardware Requirements: CPU: Pentium® 4, 1 GHz or above Memory: 256MB Video Adaptor: Graphics card with 1024 x 768 at 16 or 32 bit color Monitor Resolution: 1024 x 768 USB 1.1 or higher 100MB Hard disk space Windows® compatible sound card and speakers PC Software Requirements: Microsoft® Windows® XP, Windows Vista® or Windows® 7 Operating System Internet Explorer® version 6 or above Adobe® Flash® Player 10 (To acquire the latest version of Flash player, please visit www.adobe.com) macintosh Hardware Requirements: Macintosh Computer with an Intel (1GHz or faster) processor 256 MB RAM (512 MB recommended) 100 MB Hard disk space USB Port required macintosh Software Requirements: Mac OS X version 10.5, 10.6 or 10.7 Safari Internet Browser version 3.0 or later Adobe® Flash® Player 10 (To acquire the latest version of Flash player, please visit www.adobe.com) -
Page 19: Care & Maintenance
Care & maintenance Care & maintenance 1. Keep your MobiGo 2 clean by wiping it with a slightly damp cloth. Never use solvents ® or abrasives. 2. Keep it out of direct sunlight and away from direct sources of heat. 3. Remove the batteries when not using it for an extended period of time. 4. Avoid dropping it. NEVER try to dismantle it. -
Page 20: Technical Support
No LCD display after Battery power is low. Replace batteries. pressing ON button. Incomplete battery Make sure batteries are installed in both installation. battery compartments. No AC adaptor power. Securely connect AC adaptor or car adaptor to both the MobiGo ® 2 and the power outlet. There’s a cartridge Poor game cartridge Unplug the cartridge and check if there’s any... -
Page 21: Copyright Notices
Creating and developing MobiGo 2 Touch Learning System products are accompanied ® by a responsibility that we at VTech take very seriously. We make every effort to ensure ® the accuracy of the information that forms the value of our products. However, errors sometimes can occur. -
Page 22: Disclaimer And Limitation Of Liability
Disclaimer and limitation of liability VTech Electronics North America, L.L.C. and its suppliers assume no responsibility for ® any damage or loss resulting from the use of this handbook. VTech Electronics North ® America, L.L.C. and its suppliers assume no responsibility for any loss or claims by third parties that may arise through the use of this software. VTech ®... - Page 23 2012 © VTech Printed in China 91-002728-003 135800 MobiGo2 M 20120510.indd 20 2012-5-30 10:17:16...
Need help?
Do you have a question about the MobiGo 2 Touch Learning System and is the answer not in the manual?
Questions and answers