FujiFilm FinePix 50i Owner's Manual
Fujifilm digital camera owner's manual 50i
Hide thumbs
Also See for FinePix 50i:
- Software quick start manual (57 pages) ,
- Brochure & specs (4 pages)
Table of Contents
Advertisement
Quick Links
26-30, Nishiazabu 2-chome, Minato-ku, Tokyo 106-8620, Japan
Printed in Japan
Printed on recycled paper.
FGS - 103106 - FG
This manual will show you how to use your FUJIFILM DIGITAL CAMERA
FinePix50i correctly. Please follow the instructions carefully.
Getting Ready
Basic Photography
Advanced Features
Photography
Advanced Features
Playback
Music
Remote Controller
7
Settings
BL00041-200 ( 1 )
Advertisement
Table of Contents

Related Manuals for FujiFilm FinePix 50i


Summary of Contents for FujiFilm FinePix 50i
- Page 1 26-30, Nishiazabu 2-chome, Minato-ku, Tokyo 106-8620, Japan Printed in Japan Printed on recycled paper. This manual will show you how to use your FUJIFILM DIGITAL CAMERA FGS - 103106 - FG FinePix50i correctly. Please follow the instructions carefully. Getting Ready...
-
Page 2: Warning
Notes on the Grant: To comply with Part 15 of the FCC rules, this product must be used with a Fujifilm-specified ferrite-core A/V cable, USB cable, and DC supply cord. For customers in Canada... -
Page 3: Table Of Contents
Contents Warning ... 2 3 Advanced Features Photography Preface ... 6 ADVANCED FEATURES PHOTOGRAPHY ... 42 Camera Features and Accessories ... 7 I Photography mode specifications ... 42 Nomenclature (Camera/Sample display/Cradle) ... 8 STILL IMAGE MODE SELECTING 1 Getting Ready ATTACHING THE SHOULDER STRAP ... -
Page 4: Digital Zoom
U.S.A., Canada and Japan. h Conforms to the new standard for digital camera file system Phase Alternation by Line, a color television system ✽ Design rule for Camera File System adopted mainly by European countries and China. -
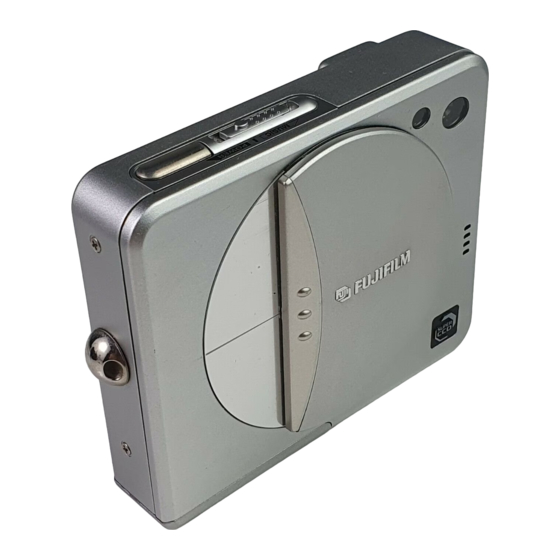
Page 5: Nomenclature (Camera/Sample Display/Cradle)
Nomenclature ✽ Refer to the pages in parentheses for more details. Power switch POWER (P.18) MUSIC (P.89) Shutter button Flash (P.45) Self-timer lamp (P.50 Lens cover (P.18 Lens Viewfinder lamp Viewfinder Flash control sensor BACK button MENU / OK button Viewfinder window LCD monitor DISP button... - Page 6 Nomenclature Example of LCD Monitor Text Display: Shooting Example of LCD Monitor Text Display: Playback Cradle (USB ) socket (Separate Software Quick Start Guide) A/V OUT (audio/video output)socket (P.41) DC IN 5V (power input)socket (P.14) CHARGE /ACCESS lamp(red) POWER lamp(green) The Cradle The cradle is a powerful tool for expanding the functionality of your camera: h When you are not using the camera, you can place it in the cradle to charge the battery (➡P.14).
-
Page 7: Getting Ready Attaching The Shoulder Strap
ATTACHING THE SHOULDER STRAP LOADING THE BATTERY Getting Ready Compatible Batteries NP-60 Rechargeable Battery (1) 1Pass the loop of the cord on the end of the strap through the strap mount. The battery is not fully charged at shipment and must be charged up before being used. -
Page 8: Charging The Battery (Using The Cradle)
Take care not to lose the connection socket cover. Push the cradle terminals firmly into the camera socket. The shape of the plug and socket-outlet depends on Use only the FUJIFILM products listed above. the country of use. Connection socket cover The CHARGE/ACCESS lamp on the cradle glows red and battery charging begins. -
Page 9: Loading The Smartmedia
Operation of this camera is only guaranteed when it 2Push the SmartMedia firmly into the SmartMedia is used with FUJIFILM SmartMedia. slot as far as it will go. Some 3.3V SmartMedia are labelled as “3V” or ID”... -
Page 10: Opening/Closing The Lens Cover
OPENING/CLOSING THE LENS COVER SWITCHING ON AND OFF 1To open the lens cover, push it slightly in the closed direction. The cover then opens 1To turn the camera on or off, slide the Power automatically. switch to “ 2To close the lens cover, slide the cover in the 2Sliding the Power switch to “... -
Page 11: Setting The Date And Time
SWITCHING ON AND OFF You can check the remaining battery charge on the LCD monitor by pressing the “DISP” button to switch the LCD monitor on. 1Battery has ample charge (no indicator displayed). 2The battery is approximately half charged. 3Battery charge low. Replace or recharge the When you switch the camera on, the viewfinder battery as it will run out shortly. -
Page 12: Selecting The Language
SETTING THE DATE AND TIME The “SET–UP” screen reappears. Press the “MENU/OK” button to complete the settings. 1Use “d” or “c” to select the desired item and then use “a( )” and “b( )” to correct the setting. 2When you have finished setting the date and time, press the “MENU/OK”... -
Page 13: Basic Photography
SELECTING THE LANGUAGE Press the “MENU/OK” button to complete the setting. Basic TAKING PICTURES ( AUTO MODE ) STILL IMAGE MODE Photography 1Set the Mode switch to “ ”. 2Open the lens cover (➡P.18). 3Switch the camera on (➡P.18). Loop the shoulder strap over your shoulder, 4To use the viewfinder (excluding Macro brace your arms against your sides and hold the mode), press the “DISP”... - Page 14 TAKING PICTURES (AUTO MODE) STILL IMAGE MODE Be careful to ensure that the lens, microphone and flash control sensor are not obscured by your hands or the camera strap. Using the LCD monitor or viewfinder, frame your shot so that the subject fills the entire AF (Auto Focus) frame.
-
Page 15: Number Of Available Shots
TAKING PICTURES (AUTO MODE) STILL IMAGE MODE I Viewfinder Lamp Display Display Status Lit green Ready to shoot. Blinking green AF/AE in progress, camera shake warning or AF warning. Recording to SmartMedia. Blinking green and orange alternately Lit orange Recording to SmartMedia. Blinking orange Flash charging. -
Page 16: Using Af/Ae Lock
USING AF/AE LOCK In a shot with this type of composition, the Move the camera slightly so that one of the subjects (two people in this case) are not in the subjects is in the AF frame. AF frame. If the shot is taken at this point, the subjects will not be in focus. -
Page 17: Digital Zoom
DIGITAL ZOOM You can use the digital zoom function for all A “zoom bar” appears on the screen. If the Resolution (File Size) settings other than “ ”. image goes out of focus during zooming, press Note that the digital zoom only functions when the shutter button down halfway to make it you use the LCD monitor to take shots. -
Page 18: Viewing Your Images (Playback)
Images That Can be Viewed on the FinePix50i You can use this camera to view (excluding some uncompressed data) images recorded on a FinePix50i or images recorded onto a 3.3V SmartMedia using a FUJIFILM FinePix series, MX series or DX series digital camera. -
Page 19: Playback Zoom
PLAYBACK ZOOM After you have zoomed in on your image, Pressing “a( )” or “b( )” during single-frame 1Press the “DISP” button. playback zooms in (enlarges) or out on a still 2Use “a( image. When you use this function, a zoom bar is displayed. -
Page 20: Multi-Frame Playback
MULTI-FRAME PLAYBACK Normal playback No text displayed Multi-frame playback Pressing the “DISP” button during playback switches the LCD monitor to the next display mode. Press the “DISP” button until the multi- frame playback screen (9 frames) appears. 1Select a frame by using “d”, “c”, “a( “b( to the desired frame. -
Page 21: Using A Tv Monitor (Using The Cradle)
ERASING SINGLE FRAME Press the “MENU/OK” button to erase the displayed image. When erasing is complete, the next image appears and the “ message is displayed. Press “d” or “c” to display the image to be If “ erased. protection must be removed to erase the image (➡P.77). -
Page 22: Advanced Features Photography
Advanced Features ADVANCED FEATURES PHOTOGRAPHY Photography The “Advanced Features Photography” section introduces a range of camera functions that you can access by setting the Mode switch to “ ” or “ ”. I Photography mode specifications Mode switch Photography Mode Accessible menu settings Flash (➡P.45) Macro (➡P.48) -
Page 23: Photography Menu
PHOTOGRAPHY MENU OPERATION PHOTOGRAPHY MENU In “ between menu pages by pressing “d” or “c” for the directions indicated by the arrows “b” or “a” at the end of the menu. 1Press the “MENU/OK” button to display the menu. 2Use “d” and “c” to select the menu item and “a( 8 )”... -
Page 24: Flash
FLASH PHOTOGRAPHY MENU Red-Eye Reduction Forced Flash Use this mode to ensure that the subject’s eyes Use this mode to photograph backlit scenes, appear natural when photographing people in such as a subject against a window or in the low-light conditions. The flash fires automatically shade of a tree, or to obtain the correct colors as required by the photography conditions. -
Page 25: Macro ( Close-Up ) Photography
MACRO ( CLOSE-UP ) PHOTOGRAPHY PHOTOGRAPHY MENU Also, set the flash functions according to the given circumstances. For subjects closer than 40 cm (1.3 ft.), the flash mode should be set to Suppressed Flash (➡P.47). This mode can be selected in the “ ”... -
Page 26: Sound Sync
To switch the LCD monitor off, press LCD monitor off Approx. 115 min. the “DISP” button twice (➡P.33). If you are getting “red-eye” shots due to the photography ✽ Operation times under FUJIFILM test conditions. conditions, set the flash to red-eye reduction mode (➡P.46). -
Page 27: Voice Captioning
VOICE CAPTIONING PHOTOGRAPHY MENU This mode can be selected in the “ ” still • image modes. You can use this function to add a voice caption (comment) up to 30 seconds long to an image immediately after you take the shot. hRecording format: WAVE (➡P.126) PCM recording format Take a picture as normal. -
Page 28: Continuous Shooting
CONTINUOUS SHOOTING PHOTOGRAPHY MENU When you take a series of shots, the resulting This mode can be selected in the “ ” still shots are displayed (shown in order from left to image mode. right) and automatically saved. This function allows you to shoot up to 3 frames continuously at intervals as short as 0.2 seconds. -
Page 29: White Balance
WHITE BALANCE PHOTOGRAPHY MENU AUTO: Automatic adjustment This mode can be selected in the “ ” still image mode. Change the white balance setting when you want to take a picture with the correct balance. In Auto mode, the correct white balance may not ✽... - Page 30 MOVIE (VIDEO) MOVIE/AUDIO MODE Shooting begins when you fully depress the shutter button. You can use “a( )” and “b( )” to zoom in and out. A “zoom bar” is displayed on the LCD monitor. You do not need to hold down the shutter button. The focus is fixed at 80 cm (2.6 ft.) to infinity.
-
Page 31: Audio Recording
AUDIO RECORDING MOVIE/AUDIO MODE The available audio recording time is shown in the 1Set the Mode switch to “ ”. top-right corner of the LCD monitor, while the 2Ensure that the lens cover is closed when you elapsed recording time and the “ switch the camera on. -
Page 32: Audio Indexing
AUDIO RECORDING MOVIE/AUDIO MODE Audio Indexing This function lets you set index markers ( ) in an audio recording so that you can quickly return to key parts of a recorded conversation during audio recording playback. You can set audio index markers at up to 256 locations in an audio recording at intervals as short as 1 second. -
Page 33: Playing Back Movies ( Video )
The FinePix50i can play back movie files shot on a FinePix50i and movie files up to 80 seconds long that were shot on a FUJIFILM digital camera and stored on a 3.3V SmartMedia. If you attempt to play back a movie that is longer than 80 seconds, the “... -
Page 34: Playing Back Voice Captions
✽ Refer to the Software Quick Start Guide (provided) for information on playing back voice captions on your PC. Compatible voice caption files The FinePix50i can play voice caption files recorded on a FinePix50i and voice caption files up to 30 seconds long that were recorded on a FUJIFILM digital camera and stored on a 3.3V SmartMedia. Control Description The voice caption automatically stops when playback ends. -
Page 35: Playing Back Audio Recordings
✽ Refer to the Software Quick Start Guide (provided) for information on playing back audio recordings on your PC. Compatible audio files The FinePix50i can play audio files recorded on a FinePix50i and audio files recorded on a 3.3V SmartMedia using a FUJIFILM digital camera. Description The audio recording automatically stops when playback ends. -
Page 36: Setting Audio Index Markers
PLAYING BACK AUDIO RECORDINGS Setting Audio Index Markers Removing Audio Index Markers 1During recording, press the “MENU/OK” 1Press “b( 9 )” during playback to pause the button to set an audio index marker. recording. 2The “*” icon appears on the LCD monitor. 2Press “d”... -
Page 37: Playback Menu
ERASING SINGLE ALL FRAMES/FORMATTING PLAYBACK MENU • FRAME Erase only the selected file. Protected files (➡P.77, 79) are not erased. ALL FRAMES Erase all unprotected files. FORMAT Erase all the data and reformats (initializes) the SmartMedia for use with this camera. Formatting also erases protected files. -
Page 38: Erasing Music
ERASING MUSIC PLAYBACK MENU MUSIC TRACK Erase just the selected music track. ALL MUSIC TRACKS Erase all the music tracks. 1Press the “MENU/OK” button to display the menu on the LCD monitor. 2Use “d” or “c” to select “ 3Press “a( 8 )” or “b( 9 )” to select “MUSIC”. 4Press the “MENU/OK”... -
Page 39: Playback (Automatic Playback)
PLAYBACK ( AUTOMATIC PLAYBACK ) PLAYBACK MENU Press the “MENU/OK” button to display the 1Use “d” or “c” to select “ menu on the LCD monitor. 2Press the “MENU/OK” button. The image frames are automatically advanced and The Auto Power Off function does not operate during played back. -
Page 40: Setting And Removing Protection For All Frames
SETTING AND REMOVING SINGLE-FRAME PROTECTION PLAYBACK MENU Press the “MENU/OK” button to protect the file. Use “d ” or “c ” to select the image to be The “ protected. To remove the protection, press the “MENU/OK” button again. If you do not want to protect any images, press the To protect another image, repeat the “BACK”... -
Page 41: Playback Menu
SETTING AND REMOVING PROTECTION FOR ALL FRAMES PLAYBACK MENU A confirmation screen will appear to proceed, press the “MENU/OK” button. If you do not want to protect any images, press the “BACK” button to return to the menu. To exit the menu screen, press the “BACK”... -
Page 42: Dpof Date Setting
DPOF DATE SETTING PLAYBACK MENU This function allows you to select whether or not 1Use “b( 9 )” to select “ the date of shooting is included on the print. 2Use “d ” or “c ” to specify “DATE ON” or 1Press the “MENU/OK”... -
Page 43: Dpof Review/Reset
DPOF SET FRAME PLAYBACK MENU <To Apply the Settings> <To Cancel the Settings> When you have finished specifying the DPOF Pressing the “BACK” button only cancels the settings, always press the “MENU/OK” button to setting for the currently selected frame. You confirm the settings. -
Page 44: Dpof Reset All
DPOF REVIEW/RESET PLAYBACK MENU PLAYBACK MENU To delete the print setting, display the image for which the setting is to be deleted and then press the “MENU/OK” button. When the print setting has been deleted, the next image appears with the “... -
Page 45: Music
PLAYING MUSIC Music The Music section describes how to use the remote controller to listen to music and also introduces the other functions that can be used from the remote controller. I Schematic diagram Music CD Created RealJukebox2 Plus (Windows) CDDB MacMP3 for FinePix A database for CDs on the internet. -
Page 46: Using Music
USING MUSIC Text display Track number Clip When HOLD is set, none of the buttons function. To use the remote controller, release HOLD. Due to the nature of the LCD panel on the remote controller, the display may be difficult to see in cold locations or at low temperatures. - Page 47 USING MUSIC P-MODE (playback mode) button BASS button DISPLAY button Text display Clip HOLD switch Due to the nature of the LCD panel on the remote controller, the display may be difficult to see in cold locations or at low temperatures. This is normal and does not indicate a fault. I Playing Back Music Remote controller operation...
-
Page 48: Displaying The Playlist
DISPLAYING THE PLAYLIST Press the “DISP” button on the camera during Pressing “ music playback to display a list of the tracks on controller switches the display to the next 4 the LCD monitor. songs or the previous 4 songs. The displayed playlist allows you to check the track titles/performers 4 tracks at a time. -
Page 49: Remote Controller
TAKING PHOTOGRAPHS USING THE REMOTE CONTROLLER Remote Controller 1Connect the remote controller supplied with the camera (➡P.89). 2Set the Mode switch to “1”. When you are taking pictures at night or in Macro mode, using the remote controller and a tripod is an effective way to prevent camera shake. -
Page 50: Audio Recording Using The Remote Controller
AUDIO RECORDING USING THE REMOTE CONTROLLER 1Connect the remote controller supplied with the camera (➡P.89). 2Set the Mode switch to “3” for recording and to “ ” for playback. 3Ensure that the lens cover is closed when you switch the camera on (➡P.18). P-MODE button For recording For playback... -
Page 51: Settings Settings
SETTINGS Settings The “Settings” chapter looks at functions available from “ menus. I List of settings When Shooting Still Images When Shooting Movies/Recording Audio FILE SIZE/QUALITY (P.102) SET–UP SET–UP LCD BRIGHTNESS (P.103) LCD BRIGHTNESS (P.103) I SET–UP menu options Factory Settings Display default... -
Page 52: Setting The File Size And Quality (Compression Ratio)
SETTING THE FILE SIZE AND QUALITY ( COMPRESSION RATIO ) You can choose any combination of 3 file sizes and 4 image quality settings. Use the table below as a guide to the best settings for your shots. File size FINE NORMAL BASIC... -
Page 53: Set-Up Image Display
IMAGE DISPLAY SET–UP Preview Zoom This setting allows you to specify whether the resulting image is displayed after you take a shot. : The photographed image is automatically recorded without being displayed. POSTVIEW: The photographed image is displayed for about 2 seconds and is then When PREVIEW is selected, you can enlarge automatically recorded. -
Page 54: Frame No. Memory
SmartMedia. Using “RESET ALL” resets the “last file No.” setting. System Expansion Options e By using the FinePix50i together with other optional FUJIFILM products, your system can be expanded to fill a wide range of uses. FinePix50i Digital Camera... -
Page 55: Accessories Guide
Accessories Guide e The optional accessories (sold separately) can make taking pictures with the FinePix50i even easier. For information on how to attach and use the accessories, refer to the instructions provided with the accessory used. h SmartMedia™ These are SmartMedia cards sold separately. Use the 9 types listed below. h MG-4S : 4MB, 3.3V h MG-8S : 8MB, 3.3V h MG-16S : 16MB, 3.3V... -
Page 56: Notes On Using Your Camera Correctly
Places affected by smoke or steam. cloth. If any soiling remains, apply a small amount of Places subject to strong magnetic fields (such as lens cleaning liquid to a piece of FUJIFILM lens places near motors, transformers or magnets). cleaning paper and wipe gently. -
Page 57: Notes On Storage
✽ These specifications are subject to change without notice. AC Power Adapter Use only the AC-5VS/AC-5VHS AC Power Adapter with your FinePix50i Digital Camera. The use of other AC power adapters may result in damage to your camera. h The AC Power Adapter is only intended for indoor use. -
Page 58: Notes On The Smartmedia
Notes on the SmartMedia ™ I SmartMedia switched off during data recording, during data The SmartMedia card supplied with your FinePix50i erasing (SmartMedia formatting) or during frame advance when images are being played back. camera is a new image recording medium developed especially for use in digital cameras. -
Page 59: Warning Displays
• Format the SmartMedia. • Wipe the contact area on the SmartMedia with a soft dry cloth. • Contact your FUJIFILM dealer. • Wipe the contact area on the SmartMedia with a soft dry cloth. It may be necessary to format the SmartMedia. -
Page 60: Troubleshooting
Warning Displays Warning Displayed Explanation Remote LCD Monitor Controller The DPOF file contains an error. — — Alternatively, the DPOF file was set up on a different device. Prints were specified for more than 1000 frames in the DPOF frame settings. - Page 61 Troubleshooting Problem Cause I can’t use the flash to • You pressed the shutter button while the flash take pictures. was charging. • The battery is exhausted. The photographed image • The subject is too far away. is dark even though I •...
-
Page 62: Specifications
Sensitivity: Equivalent to ISO 125 S y stem h Lens: Super EBC Fujinon lens h Model: Digital camera FinePix50i h Focus distance: f = 8.3 mm h Storage media: SmartMedia (3.3V) (Equivalent to 36 mm on a 35 mm camera) -
Page 63: Explanation Of Terms
The number of available shots or available shooting time will be lower in cold conditions. notice. FUJIFILM shall not be held liable for damages resulting from errors in this Owner’s Manual. manufactured using advanced high-precision technology. -
Page 64: Safety Notes
Unplug from power socket. can cause a fire or electric shock. Contact your FUJIFILM dealer. Do not allow water or foreign objects to enter the camera. If water or foreign objects get inside the... - Page 65 This can cause a fire or electric shock. Do not and cause a fire or electric shock. disassemble. Contact your FUJIFILM dealer. Do not use the camera in the bathroom or shower. Do not use the batteries except as This can cause a fire or electric shock.
-
Page 66: Ec Declaration Of Conformity
Take particular care when photographing infants and young childern. CAUTION Contact your FUJIFILM dealer to request internal cleaning every 2 years. EC Declaration of Conformity Name : Fuji Photo Film ( Europe ) G.m.b.H.
Need help?
Do you have a question about the FinePix 50i and is the answer not in the manual?
Questions and answers