Table of Contents
Advertisement
Advertisement
Table of Contents
Troubleshooting

Related Manuals for Xerox Phaser 3160B


Summary of Contents for Xerox Phaser 3160B
- Page 2 This user guide is provided for information purposes only. All information included herein is subject to change without notice. Xerox Corporation is not responsible for any direct or indirect damages, arising from or related to use of this user guide.
-
Page 3: Table Of Contents
Installing printer driver Using CentreWare IS BASIC SETUP Altitude adjustment For Phaser 3140 and 3155 For Phaser 3160B and 3160N Setting the default tray and paper In the computer Using power saving feature For Phaser 3140 and 3155 Table of contents_ 3... - Page 4 For Phaser 3160B and 3160N Changing font setting (Phaser 3160B and Phaser 3160N only) MEDIA AND TRAY Selecting print media Guidelines to select the print media Media sizes supported in each mode Changing the tray size Loading paper in the tray...
- Page 5 Opening the Unified Driver Configurator Printers configuration Ports configuration MAINTENANCE Printing a machine report Using toner low alert (Phaser 3160B and Phaser 3160N only) Cleaning a machine Cleaning the outside Printing a cleaning sheet (Phaser 3160B and Phaser 3160N only) Cleaning the inside...
- Page 6 table of contents GLOSSARY Table of contents_ 6...
-
Page 7: Safety
- Connect the equipment into an outlet on a circuit different from that to which the receiver is connected. - Consult the dealer or an experienced radio/TV technician for help. Changes or modifications to this equipment not specifically approved by the Xerox Corporation may void the user's authority to operate this equipment. -
Page 8: Operational Safety Information
- Do not use aerosol cleaners, they may be explosive and flammable under certain conditions. - Always exercise care when moving or relocating equipment. Please contact your local Xerox Service Department to arrange relocation of the copier to a location outside of your building. -
Page 9: Electrical Supply
5. Do not use an adapter to connect any Xerox equipment to an electrical outlet that lacks a ground connection terminal. 6. Do not place this equipment where people might step or trip on the power cable. 7. Do not place objects on the power cable. -
Page 10: Product Safety Certification
If your product is not part of the Xerox program and you are managing its disposal, please note that the product may contain lead and other materials whose disposal may be regulated due to environmental considerations. For recycling and disposal information, contact your local authorities. -
Page 11: Energy Program Compliance
Power Save Mode from the last copy/print out, set at 1 minutes. A more detailed description of this feature can be found in the Machine Setup Section of this guide. EH&S CONTACT INFORMATION Contact Information For more information on Environment, Health, and Safety in relation to this Xerox product and supplies, please contact the following customer help lines: USA:1-800 828-6571 Canada:1-800 828-6571... -
Page 12: About This User Guide
about this user guide This user guide provides information about basic understanding of the machine as well as detailed explanation on each step during actual usage. Valuable for both novice and professional users can refer to this as a guide for installing and using the machine. -
Page 13: Finding More Information
This help provides you with help information on printer driver and instructions for setting up the options for printing. (See "Using help" on page 38.) Xerox website If you have Internet access, you can get help, support, machine drivers, latest software and firmware vesions, manuals and order information from the Xerox website, www.xerox.com/office/support. About this user guide_ 13... -
Page 14: Features Of Your New Product
(Phaser 3160B, Phaser 3160N) effective output. • Phaser 3140 prints up to 18 ppm, A4-sized paper or up to 19 ppm, letter sized paper. Phaser 3155, Phaser 3160B and Phaser 3160N prints up to 24 ppm, A4-sized paper and letter-sized paper. -
Page 15: Features By Models
The machine is designed to support all of your document needs from printing to more advanced networking solutions for your business. Features by models include: FEATURES Phaser 3140 Phaser 3155 Phaser 3160B Phaser 3160N Hi-Speed USB 2.0 ○ ● ●... -
Page 16: Front View
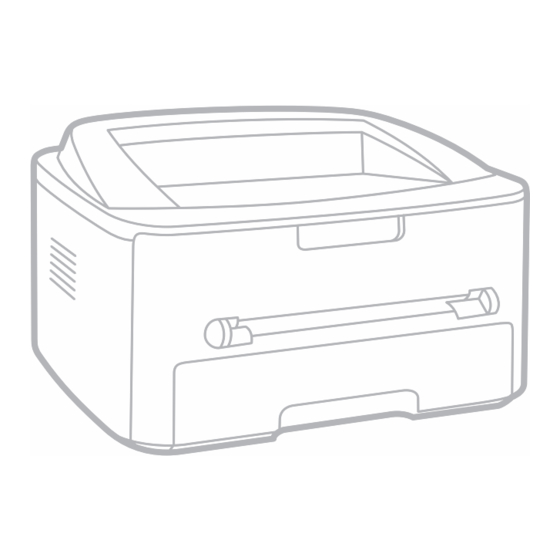
introduction This chapter gives you an overview of your machine: This chapter includes: • Machine overview • Control panel overview • Understanding the control panel MACHINE OVERVIEW Front view This illustration may differ from your machine depending on its model. Document output tray Manual feeder Control panel... -
Page 17: Rear View
Rear view This illustration may differ from your machine depending on its model. Rear cover USB port Network Port Power receptacle a. Phaser 3160N only. Introduction_ 17... -
Page 18: Control Panel Overview
CONTROL PANEL OVERVIEW Error Shows the status of your machine. (See "LEDs" on page 19.) Online Shows the status of your machine. (See "LEDs" on page 19.) Cancel Stops an operation at any time and there are more functions. (See "Understanding the control panel" on page 19.) Power You can turn the power on and off with this button. -
Page 19: Understanding The Control Panel
Xerox cannot guarantee non-genuine Xerox toner cartridge's quality. Service or repair required as a result of using non-genuine Xerox toner cartridges will not be covered under the machine warranty. If the problem persists, call for service. -
Page 20: Printing A Demo Page
getting started This chapter gives you step-by-step instructions for setting up the USB connected machine and software. This chapter includes: • Setting up the hardware • System requirements • Printing a demo page • Installing driver for USB connected machine •... -
Page 21: Supplied Software
128 MB for a 1 GB 10.3 ~ 10.4 Processors PowerPC based • Printer Settings Utility (Phaser 3160B, Phaser 3160N Mac (512 MB) only): This program allows you to set up printer’s other • PowerPC G4/ options from your computer desktop. -
Page 22: Windows
INSTALLING DRIVER FOR USB CONNECTED window. MACHINE A locally connected machine is a machine directly attached to your computer using the USB cable. If your machine is attached to a network, skip the following steps below and go on to installing network connected machine’s driver. -
Page 23: Macintosh
For Mac OS X 10.5~10.6, click Default and find the USB connection. The installation program runs automatically if you have an autorun 14. For Mac OS X 10.3, if Auto Select does not work properly, select Xerox software package installed and configured. -
Page 24: Windows
Windows install the driver, you have to use the driver in the text mode. • Follow the steps 1 to 3, then type [root@localhost Linux]# Setting up a host computer ./install.sh. Follow the instructions on the terminal screen. The installation is completed. 1. -
Page 25: Introducing Useful Network Programs
network setup (phaser 3160n only) This chapter gives you step-by-step instructions for setting up the network connected machine and software. This chapter includes: • Network environment • Using a wired network • Introducing useful network programs • IPv6 Configuration • Installing drivers for network connected machine NETWORK ENVIRONMENT SetIP... -
Page 26: Windows
IP 17. For Mac OS X 10.3, if Auto Select does not work properly, select Xerox address for the printer. in Printer Model and your machine name in Model Name. -
Page 27: Printing Network Configuration Report
In a few situations the IP address must be set manually. This is called a f) Enter the password and click OK. static IP and is often required in corporate Intranets for security reasons. g) The Xerox Installer window opens. Click Continue. • DHCP IP assignment: Connect your machine to the network, connect h) Select Uninstall and click Uninstall. -
Page 28: Network Parameter Setting
1. Print the machine’s network configuration report to find your machine’s MAC address. 2. Open the /opt/Xerox/mfp/share/utils/. 3. Double click the SetIPApplet.html file. 4. Click to open the TCP/IP configuration window. 5. Enter the network card’s MAC address, IP address, subnet mask, default gateway, and then click Apply. -
Page 29: Setting Ipv6 Addresses
IPV6 CONFIGURATION 2. When the CentreWare IS window opens, click Properties > Protocol. 3. Click TCP/IP. TCP/IPv6 is supported properly only in Windows Vista or higher. 4. Enable the Manual Address In the TCP/IPv6 section. If the IPv6 network seems not working, set all the network setting to the factory defaults and try again. -
Page 30: Basic Setup
Using power saving feature • Setting the default tray and paper • Changing font setting (Phaser 3160B and Phaser 3160N only) ALTITUDE ADJUSTMENT SETTING THE DEFAULT TRAY AND PAPER The print quality is affected by atmospheric pressure, which is determined You can select the tray and paper you would like to keep using for printing by the height of the machine above sea level. -
Page 31: Changing Font Setting (Phaser 3160B And Phaser 3160N Only
5. Select the time you want, in the Power Save drop-down list. 6. Click OK. For Phaser 3160B and 3160N You change power save in the Printer Settings Utility. 1. from the Start menu, select Programs or All Programs > your printer driver name >... -
Page 32: Media And Tray
media and tray This chapter provides information on how to load print media into your machine. This chapter includes: • Selecting print media • Printing on special media • Changing the tray size • Using the output support • Loading paper in the tray SELECTING PRINT MEDIA Media sizes supported in each mode MODE... -
Page 33: Loading Paper In The Tray
1. With one hand press and hold the guide lock, and with the other hand, • Do not use a paper with more than 6 mm curl. hold the paper length guide and support guide together. Slide the paper length guide and support guide to locate them in the correct paper size slot. -
Page 34: Envelope
1. Load the paper in the manual tray. TYPES TRAY 1 MANUAL TRAY Labels ● Transparency ● Envelope ● Preprinted ● Cotton ● Recycled ● ● Archive ● ● ( ●: supported, Blank: Not supported) • Do not force the paper beyond the surface with mark The media types are shown in the Printing Preferences. -
Page 35: Transparency
• Transparencies used in the machine must be able to withstand machine’s fusing temperature. • Place them on a flat surface after removing them from the machine. • Do not leave unused transparencies in the paper tray for long periods of time. -
Page 36: Using The Output Support
USING THE OUTPUT SUPPORT • Do not print on media smaller than 76 mm (3.00 inches) wide or 127 mm (5.00 inches) long. The surface of the output tray may become hot if you print a large • In the software application, set margins at least 6.4 mm (0.25 inches) number of pages at once. -
Page 37: Printer Driver Features
printing This chapter explains common printing tasks. This chapter includes: • Printer driver features • Changing the default print settings • Basic printing • Setting your machine as a default machine • Opening printing preferences • Printing to a file (PRN) •... -
Page 38: Using Special Print Features
1. To change the print settings from your software application, access The Favorites option, which is visible on each preferences tab except for Printing Preferences. (See "Opening printing preferences" on Xerox tab, allows you to save the current preferences settings for future page 38.) use. -
Page 39: Printing Posters
6. Click the Paper tab, select the Size, Source, and Type. The Booklet Printing option is not available for all paper sizes. In order to find out the available paper size for this feature, select the 7. Click OK or Print until you exit the Print window. available paper size in the Size option on the Paper tab. -
Page 40: Fitting Your Document To A Selected Paper Size
Using an existing watermark 1. To change the print settings from your software application, access Printing Preferences. (See "Opening printing preferences" on 1. To change the print settings from your software application, access page 38.) Printing Preferences. (See "Opening printing preferences" on 2. - Page 41 After you select the file, click Open. The file appears in the Overlay The values are Normal, Light, and Dark. List box and is available for printing. Select the overlay from the For Phaser 3160B and Phaser 3160N, you can adjust the Overlay List box. darkness in the Printer Settings Utility.
-
Page 42: Setting Your Machine As A Default Machine
• For Windows 2008/Vista, select Control Panel > Hardware and • USB connected (See "Macintosh" on page 23.) Sound > Printers. • Network connected (See "Macintosh" on page 26.) 2. Select your machine. Printing a document 3. Right-click on the printer driver icon and select Printing Preferences. 4. -
Page 43: Printing A Document
Normal, Light, and Dark. • Layout Direction: This option allows you to select the printing For Phaser 3160B and Phaser 3160N, you can adjust the direction on a page similar to the examples on UI. darkness in the Printer Settings Utility. -
Page 44: Printing From Applications
Printing multiple pages on one sheet of paper 4. Change the print job properties using the following four tabs displayed at the top of the window. You can print more than one page on a single sheet of paper. This feature provides a cost-effective way to print draft pages. -
Page 45: Configuring Printer Properties
Configuring printer properties Using the Printer Properties window provided by the Printers configuration, you can change the various properties for your machine as a printer. 1. Open the Unified Driver Configurator. If necessary, switch to Printers configuration. 2. Select your machine on the available printers list and click Properties. 3. -
Page 46: Management Tools
3. To send the changes to the printer, click the Apply button. list and a cleaning page. Using Onscreen Help • Support tab: This tab allows you to connect to Xerox website or download drivers by selecting Link. For more information about Printer Settings Utility, click Management tools_ 46... -
Page 47: Using Setip Program (Phaser 3160N Only
1. Print the machine’s network configuration report to find your connected to a network. machine’s MAC address. 2. Open the Library folder > Printers > Xerox > your printer model Windows name > SetIP. The following procedure is based on the Windows XP operating system. -
Page 48: Opening The Unified Driver Configurator
Opening the Unified Driver Configurator 1. Double-click the Unified Driver Configurator on the desktop. You can also click the Startup Menu icon and select Xerox Unified Driver > Unified Driver Configurator. 2. Click each button on the left to switch to the corresponding configuration window. -
Page 49: Ports Configuration
Classes tab • Refresh: Renews the available ports list. • Release port: Releases the selected port. The Classes tab shows a list of available machine classes. Shows all of the machine classes. Shows the status of the class and the number of machines in the class. -
Page 50: Using Toner Low Alert (Phaser 3160B And Phaser 3160N Only
This chapter includes: • Printing a machine report • Storing the toner cartridge • Using toner low alert (Phaser 3160B and Phaser 3160N only) • Tips for moving & storing your machine • Cleaning a machine PRINTING A MACHINE REPORT... -
Page 51: Handling Instructions
Use of non-Xerox and refilled toner cartridge Xerox does not recommend or approve the use of non-Xerox brand toner While cleaning the inside of the machine, be careful not to damage cartridges in your printer including generic, store brand, refilled, or the transfer roller or any other inside parts. -
Page 52: Tips For Avoiding Paper Curls
troubleshooting This chapter gives helpful information for what to do if you encounter an error. This chapter includes: • Redistributing toner • Clearing paper jams • Tips for avoiding paper curls • Solving other problems • Tips for avoiding paper jams REDISTRIBUTING TONER 4. -
Page 53: Tips For Avoiding Paper Jams
TIPS FOR AVOIDING PAPER JAMS 3. Remove the jammed paper by gently pulling it straight out. By selecting the correct media types, most paper jams can be avoided. When a paper jam occurs, refer to the next guidelines. • Ensure that the adjustable guides are positioned correctly. (See "Loading paper in the tray"... -
Page 54: Inside The Machine
Inside the machine The fuser area is hot. Take care when removing paper from the machine. 1. Open the front cover and pull the toner cartridge out, lightly pushing it down. Pressure lever 5. Pull the fuser cover levers down and remove the paper. Return the fuser cover levers to their original position. -
Page 55: Power Problems
SOLVING OTHER PROBLEMS Paper feeding problems CONDITION SUGGESTED SOLUTIONS The following chart lists some conditions that may occur and the recommended solutions. Follow the suggested solutions until the problem is Paper jams during Clear the paper jam. (See "Clearing paper jams" corrected. -
Page 56: Printing Problems
Printing problems POSSIBLE SUGGESTED CONDITION CAUSE SOLUTIONS POSSIBLE SUGGESTED CONDITION CAUSE SOLUTIONS The machine The document size Get more hard disk space does not print. is so big that the and print the document The machine The machine is not Check the power cord hard disk space of again. - Page 57 Turn the machine malfunctioning. off and back on again. If you are in a DOS See "Changing font setting environment, the (Phaser 3160B and Phaser font setting for your 3160N only)" on page 31. machine may be set incorrectly. Pages print, but...
-
Page 58: Printing Quality Problems
Printing quality problems CONDITION SUGGESTED SOLUTIONS If the inside of the machine is dirty or paper has been loaded improperly, White Spots If white spots appear on the page: there might be a reduction in print quality. See the table below to clear the problem. - Page 59 CONDITION SUGGESTED SOLUTIONS CONDITION SUGGESTED SOLUTIONS Background Background scatter results from bits of toner Wrinkles or • Ensure that the paper is loaded properly. scatter randomly distributed on the printed page. creases • Check the paper type and quality. (See "Print •...
-
Page 60: Common Windows Problems
Common Linux problems CONDITION SUGGESTED SOLUTIONS CONDITION SUGGESTED SOLUTIONS Horizontal stripes If horizontally aligned black streaks or smears appear: The machine does • Check if the printer driver is installed in your A a B b C • The toner cartridge may be installed not print. -
Page 61: Common Macintosh Problems
Common Macintosh problems CONDITION SUGGESTED SOLUTIONS The machine does Printing the PDF file as an image may enable not print PDF files the file to print. Turn on Print As Image from the correctly. Some Acrobat printing options. parts of graphics, It will take longer to print when you print a text, or illustrations PDF file as an image. -
Page 62: Available Supplies
Approx. 50,000 pages To order Xerox-authorized supplies, accessories and, maintenance parts, Pickup roller Approx. 50,000 pages contact your local Xerox dealer or the retailer where you purchased your machine. You can also visit www.xerox.com/office/support, select your Cassette unit Approx. 50,000 pages country/region, and obtain information on calling for service. - Page 63 4. Remove the paper protecting the toner cartridge by pulling the packing 8. Close the front cover. Make sure that the cover is securely closed. tape. 5. Locate the sealing tape at the end of the toner cartridge. Carefully pull the tape completely out of the cartridge and discard it.
-
Page 64: Environmental Specifications
• Hardware specifications • Environmental specifications • Electrical specifications • Print media specifications The specification values here are based on preliminary data. See www.xerox.com/office/support for current information. HARDWARE SPECIFICATIONS ITEM DESCRIPTION Dimension Height 230 mm (9.05 inches) Depth 389 mm (15.31 inches) Width 360 mm (14.17 inches) -
Page 65: Electrical Specifications
• Phaser 3140: Less than 4.5 W • Phaser 3155, Phaser 3160B, Phaser 3160N: Less than 6.5 W Power off mode Less than 0.8 W a. See the rating label on the machine for the correct voltage, frequency (hertz) and type of current for your machine. -
Page 66: Print Media Specifications
PRINT MEDIA SPECIFICATIONS PRINT MEDIA WEIGHT /CAPACITY TYPE SIZE DIMENSIONS TRAY1 MANUAL TRAY Plain paper Letter 216 x 279 mm (8.50 x 11.00 inches) 60 to 105 g/m (16 to 28 lb bond) 60 to 163 g/m (16 to 43 lb bond) •... -
Page 67: Control Panel
glossary The following glossary helps you get familiar with the product by understanding the terminologies commonly used with printing as well Comma Separated Values (CSV). A type of file format, CSV is used to as mentioned in this user guide. exchange data between disparate applications. -
Page 68: Fuser Unit
Emulation IEEE 1284 Emulation is a technique of one machine obtaining the same results as The 1284 parallel port standard was developed by the Institute of another. Electrical and Electronics Engineers (IEEE). The term "1284-B" refers to a specific connector type on the end of the parallel cable that attaches to An emulator duplicates the functions of one system with a different the peripheral (for example, a printer). -
Page 69: Print Media
A convention or standard that controls or enables the connection, cooperative multitasking to run various services on a PC, and the communication, and data transfer between two computing endpoints. network protocols were based on the archetypal Xerox XNS stack. Today NetWare supports TCP/IP as well as IPX/SPX. See PostScript. -
Page 70: Toner Cartridge
pages sent. This report can be set to print after each job or only after failed transmissions. TIFF Tagged Image File Format (TIFF) is a variable-resolution bitmapped image format. TIFF describes image data that typically come from scanners. TIFF images make use of tags, keywords defining the characteristics of the image that is included in the file. - Page 71 Glossary_ 71...
- Page 72 index driver installation Linux 27 adjusting Macintosh 26 tray size 30 clearing paper 53 Windows 25 tips for avoiding paper jams 53 installing environment 25 introducing network programs 25 IPv6 configuration 29 SetIP program 27, 28, 47 booklet printing using a wired network 27 Linux booklets common Linux problems 60...
- Page 73 46 supplies available supplies 62 estimated toner cartridge life 51 ordering 62 replacing toner cartridge 62 toner cartridge estimated life 51 handling instructions 51 non-Xerox and refilled 51 redistributing toner 52 replacing the cartridge 62 storing 51 tray Index_ 73...
Need help?
Do you have a question about the Phaser 3160B and is the answer not in the manual?
Questions and answers