Table of Contents
Advertisement
Quick Links
02/25/2011
Owner's Manual
Standard: ANSI Z83.26-2007 / CSA 2.37-2007 ANSI Z83.26a-2008 / CSA 2.37a-2008
Questions, problems, missing / replacement parts? Before returning to your retailer,
call our customer service department at 1-866-814-0585, 8 a.m.-5 p.m., EST,
Monday-Friday.
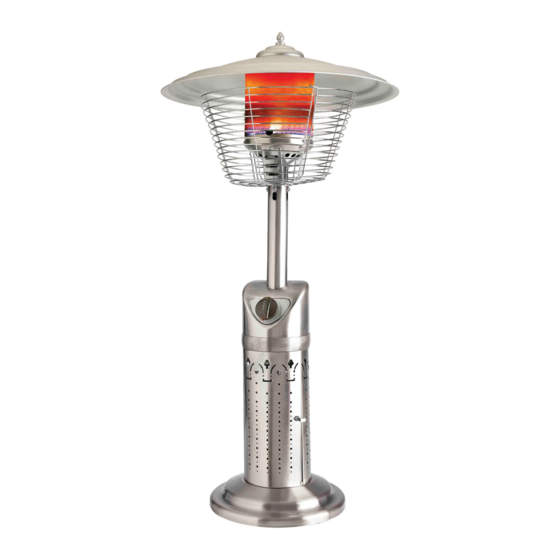
Gas-Fired Outdoor Infrared Patio Heaters.
Tabletop Patio
Heater
DANGER
If you smell gas:
1. Shut off gas to the appliance.
2. Extinguish any open flame.
3. If odor continues, keep away from
the appliance and immediately call
your gas supplier or fire department.
WARNING
Do not store or use gasoline or
other flammable vapors and liquids
in the vicinity of this or any other
appliance.
An LP-cylinder not connected for use
shall not be stored in the vicinity of
this or any other appliance.
WARNING
For Outdoor Use Only.
CAUTION:
Installer: Leave the manual instructions
to the user for future use.
Consumer: Please keep this manual
for future reference.
Model#: SRPT03-XXXX
Read the instructions before use.
This appliance must be installed in
accordance with such regulations as
are in force.
Advertisement
Table of Contents

Subscribe to Our Youtube Channel
Related Manuals for Napoleon Tabletop Patio Heater


Summary of Contents for Napoleon Tabletop Patio Heater
- Page 1 02/25/2011 Tabletop Patio Heater DANGER If you smell gas: 1. Shut off gas to the appliance. 2. Extinguish any open flame. 3. If odor continues, keep away from the appliance and immediately call your gas supplier or fire department. WARNING Do not store or use gasoline or other flammable vapors and liquids in the vicinity of this or any other...
- Page 2 PRECAUTIONS DANGER CARBON MONOXIDE HAZARD This appliance can produce carbon monoxide which has no odor. Using it in an enclosed space can kill you. Never use this appliance in an enclosed space such as a camper, tent or home. WARNING: Improper installation, adjustment, alteration, services or maintenance can cause injury, death or property damage.
- Page 3 PRECAUTIONS NOTE:PLEASE READ THE FOLLOWING SAFETY RULES WARNING: The installation must conform with local codes Installation and repair should be done by or, in the absence of local codes, with the a qualified service person. The heater National Fuel Gas Code, ANSI Z223.1/NFPA 54, should be inspected before use and at NFPA58 Natural Gas and Propane Installation least annually by a qualified service...
- Page 4 PRECAUTIONS NOTE:PLEASE READ THE FOLLOWING SAFETY RULES WARNING: Within a partial enclosure which includes an Do not store a spare LP-gas cylinder under or overhead cover and three side walls, as long as near this appliance; 30 percent or more of the horizontal periphery of the enclosure is permanently open.
-
Page 5: Warnings And Cautions
WARNINGS AND CAUTIONS NOTE: PLEASE READ THE FOLLOWING SAFETY RULES: Perform a leak test with a soapy solution: 1. To check gas connections. 2. After connecting a new cylinder. 3. Upon re-assembly after disassembly. This heater is designed to operate with a standard 1 Ib propane cylinder with Approved Cylinder Connection. -
Page 6: Parts List
PARTS LIST Please check the contents of the packaging as to whether anything is missing! 1 Base 1 Housing 1 Burner Column 2 Emitter Screen Shield 1 Emitter Screen 1 Reflector Dome 1 Dome Cap 1 Decorative Dome Cap Nut 7 M4 x 8 Bolts 7 M4 x 6 Bolts 3 M6 Nuts... - Page 7 ASSEMBLY WARNING : ONLY AN AUTHORIZED GAS TECHNICIAN SHOULD INSTALL THIS PRODUCT. Step 1 Step 1 Attach housing (2) to base (1) using seven M4 x 6 bolts (10). Hardware Used M4 x 6 bolt Step 2 Step 2 Insert the three clamps of the burner column (3) into the three spring pieces of the housing (2) per the picture and screw over.
- Page 8 ASSEMBLY Step 3 Step 2 Attach emitter screen (5) to burner column (3) using three M4 x 8 bolts (9) Note: The ignition hole on emitter screen must line to the control knob. Ignition Hole ODS Hole Hardware Used M4 x 8 bolt Step 4 Step 4 Attach reflector dome (6) to emitter screen (5)
- Page 9 ASSEMBLY Step 5 Step 5 Attach emitter screen shield (4) to burner column (3) using four M4 x 8 bolts (9). Hardware Used M4 x 8 bolt Step 6 Step 6 Open the access door. Open up the gas bottle cover.
-
Page 10: Safety Check
SAFETY CHECK Check for leak Your patio heater has been checked at all factory connections for leakage. To check the connections at the tube/regulator/cylinder. 1) Make leakage solution by mixing 1 part liquid dish soap and 3 parts water. 2) Spoon several drops (or use squirt bottle) of the solution onto the tube/regulator/cylinder connections. -
Page 11: Operation
OPERATION This product is equipped with ODS (Oxygen Deprivation System) WARNING: DO NOT ATTEMPT TO OPERATE HEATER UNTIL YOU HAVE READ AND UNDERSTAND ALL PRECAUTION . FAILURE TO DO SO CAN RESULT IN SERIOUS PERSONAL INJURY, DEATH, OR PROPERTY DAMAGE. Before turning gas supply ON WARNING Your heater was designed and approved for OUTDOOR... - Page 12 OPERATION 4 Push in gas control knob and turn counter clockwise to "IGNITE" then to "PILOT" position, this will light the pilot. If needed, keep depressing and turning control knob counter clockwise until the pilot lights. (You will hear 1 clicking noise) 5.
- Page 13 OPERATION CAUTION : AVOID INHALING FUMES EMITTED FROM THE HEATER'S FIRST USE. SMOKE AND ODOR FROM THE BURNING OF OILS USED IN MANUFACTURING WILL APPEAR. BOTH SMOKE AND ODOR WILL DISSIPATE AFTER APPROXIMATELY 30 MINUTES. THE HEATER SHOULD NOT PRODUCE THICK BLACK SMOKE. NOTE: The burner may be noisy when initially turned on.
-
Page 14: Locating Header For Use
LOCATING HEADER FOR USE CAUTION: WHEN CERTAIN MATERIALS OR ITEMS ARE LEFT, ABOVE, BESIDE OR UNDER THIS HEATER WHILE IN USE, THEY WILL BE SUBJECT TO RADIANT HEAT AND COULD BE SERIOUSLY DAMAGED. This heater is primarily used for the heating of CEILING/OVERHANG outdoor patios, decks, spas, pools and open working areas. -
Page 15: Maintenance & Storage
MAINTENANCE/STORAGE CLEANING AND MAINTENANCE : To enjoy years of outstanding performance from your heater make sure you perform the following maintenance Yellow Tip activities on a regular basis: Primarily Blue Flame Keep exterior surfaces clean. Use warm soapy water for cleaning. Never use flammable of corrosive cleaning agents. - Page 16 MAINTENANCE/STORAGE STORAGE: NOTE: Between uses: wait until heater is cool before Turn the control knob to "OFF" position. covering. Turn clockwise to disconnect cylinder from regulator. Store heater upright in an area sheltered from direct contact with inclement weather (such as rain, sleet, hail, snow, dust and debris).
-
Page 17: Troubleshooting
TROUBLESHOOTING PROBLEM PROBABLE CAUSE SOLUTION Pilot will not light Gas valve may be OFF Turn the gas valve ON Tank fuel empty Refill LP gas tank Air in supply system Purge air from lines Loose connection Check all fittings Debris around pilot Clean dirty area Pilot will not stay on Loose connection... -
Page 18: One-Year Limited Warranty
ONE-YEAR LIMITED WARRANTY The appliance has been manufactured under the highest standards of quality and workmanship. We warrant to the original consumer purchaser that all aspects of this product will be free of defects in material and workmanship for one (1) year from the date of purchase. A replacement for any defective part will be supplied free of charge for installation by the consumer. - Page 19 SRPT03-XXXX color material & base venthole shape reflector venthole shape material & base reflector 1. Round 1. Steel w/ bigger base 1. 1PC reflector 2. S/S w/ bigger base 2. Rhombic 2. 2PCS reflector 3. Steel w/ smaller base 3. Rectangle 3.
Need help?
Do you have a question about the Tabletop Patio Heater and is the answer not in the manual?
Questions and answers