Table of Contents
Advertisement
Quick Links
Advertisement
Table of Contents

Related Manuals for Omega LVP-51-R


Summary of Contents for Omega LVP-51-R
- Page 1 1 ...
- Page 2 2 ...
-
Page 3: Table Of Contents
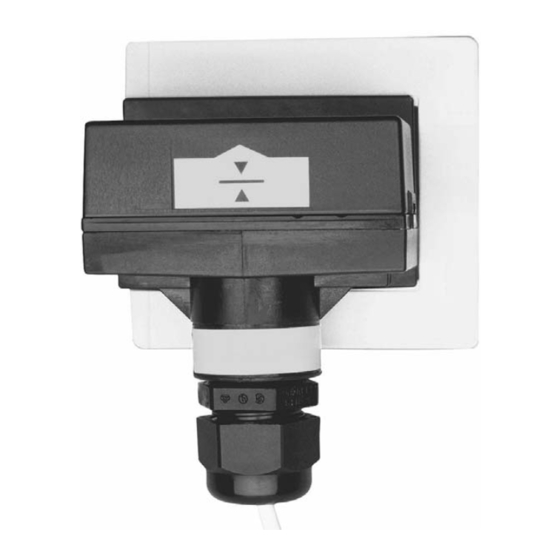
INTRODUCTION Step One About Non‐Intrusive RF Capacitance Technology: OMEGA ENGINEERING's LVP‐51‐R level switch generates a high radio frequency signal from the capacitance electrode on the tank side of each sensor. Depending on the thickness of the tank wall and the material of which it is made, there is a particular minimum dielectric value the electrode measures when there is no liquid on the other side of the tank wall from the sensor. When liquid is on the other side of the wall, the dielectric value rises. As part of installation, a two‐step calibration procedure ensures that the threshold between wet and dry is set at the ideal point for your particular tank and application fluid, without the use of any external test equipment. The sensor’s operation and point of actuation may vary based on the dielectric properties of various application liquids, tank materials and thicknesses. The LVP‐51‐R sensor is intended to be used with ... -
Page 4: Specifications & Dimensions
SPECIFICATIONS & DIMENSIONS Step Two Specifications: Tank mounting: Non‐intrusive Enclosure rating: NEMA 4X (IP65) Tank mat. comp.: Non‐metallic Enclosure mat.: PSO Tank wall thick.: < 1" (25 mm) Conduit entrance: Single, 1/2" NPT Accuracy: ± 1 mm in water Bracket material: LVP‐92: PP Repeatability: ± 0.5 mm in water LVP‐91: PE Dielectric range: > 20 constants Bracket mounting: 3M adhesive / plastic thermal Conductive range: > 100 µS/cm weld Supply voltage: 12‐36 VDC Cable jacket mat.: PP Consumption: 25 mA maximum Cable type: 4‐conductor, #22 AWG Contact type: (1) SPST relay (shielded) ... -
Page 5: Safety Precautions
SAFETY PRECAUTION Step Three About Manual: PLEASE READ THE ENTIRE MANUAL PRIOR TO INSTALLING OR USING THIS PRODUCT. This manual includes information on all models of OMEGA ENGINEERING Non‐Intrusive RF Capacitance Level Switch: LVP‐51‐R. Please refer to the part number located on the sensor label to verify the exact model which you have purchased. User’s Responsibility for Safety: OMEGA ENGINEERING manufactures a wide range of liquid level switches and technologies. While each of the these switches are designed to operate in a wide variety of applications, it is the user’s responsibility to select a switch model that is appropriate for the application, install it properly, perform tests of the installed system, and maintain all components. The failure to do so could result in property damage or serious injury. ... -
Page 6: Make A Fail-Safe System
SAFETY PRECAUTION (capacitance) Step Three Make a Fail‐Safe System: Design a fail‐safe system that accommodates the possibility of switch and/or power failure. OMEGA ENGINEERING recommends the use of redundant backup systems and alarms in addition to the primary system. Adding a redundant high level float switch to the system is a cost effective means to prevent costly tank overflows. The LVP‐51‐R switch has a single relay. The normally open (NO) or normally closed (NC) operation is user selected ... -
Page 7: Installation
INSTALLATION Step Four OMEGA ENGINEERING's LVP‐51‐R level switch may be installed anywhere on a tank wall using the PE (LVP‐91) or PP (LVP‐92) bracket that the switch slides into. The bracket comes with adhesive on the tank side that is sufficient to hold the sensor in position temporarily while the installation is tested, but for permanent installation the bracket must be welded, glassed or strapped to the tank. Extra brackets are available from OMEGA ENGINEERING, so that the level switch may be moved to different locations on the tank by sliding it into other brackets. Attach the bracket to the tank: 1. Determine whether the tank is PP or PE. The slide‐in fitting shipped with the sensor is determined by the part number. If necessary, obtain an additional bracket. 2. Determine the mounting location for the level switch. The point of actuation (where the sensor will send a “wet” signal) is most often at the center of the sensor; however ... -
Page 8: Electrical
ELECTRICAL Step Five Supply Voltage: The supply voltage to the LVP‐51‐R level switch should never exceed a maximum of 36 VDC. OMEGA ENGINEERING controllers have a built‐in 13.5 VDC power supply which provides power to all of OMEGA ENGINEERING’s electrically powered sensors. Alternative controllers and power supplies, with a minimum output of 12 VDC up to a maximum output of 36 VDC, may also be used with the level switch. Required Cable Length: Determine the length of cable required between the level switch and its point of termination. Allow enough slack to ensure the easy installation, removal and/or maintenance of the sensor. ... -
Page 9: Signal Output (Relay Switching)
ELECTRICAL (continued) Step Five Signal Output (Relay switching): Allows the sensor to switch a small load on or off directly, using an internal 1A relay (60 VAC/60 VDC). All models, LVP‐51‐R uses the relay and features 4 wires (red, black, white and green) and a shield wire. The NO/NC status is set by the polarity o–f the voltage feeding the red and black wires. The green wire is the common for the relay and the white wire is the NO or NC, depending on the polarity of red and black. ... -
Page 10: Wiring
WIRING Step Six Wiring to a OMEGA ENGINEERING Controller LVCN‐120 Series Controller (4 or 20 mA output): LVCN‐120 Shown Switching Inductive Loads: The use of suppressors (snubbers) is strongly recommended when switching inductive loads to prevent disrupting the microprocessor’s operation. The suppressors also prolong the life of the relay contacts. Suppression can be obtained with a catch diode for DC circuits and a resistor‐capacitor (RC) for AC circuits. Catch Diode Always use stepper relays between the sensor and external loads. For DC circuits use a catch diode such as 1N4148, shown on left. Refer to the following circuits for RC network assembly and installation: Choose R and C as follows: R: 0.5 to 1 Ohms for each volt across the contacts C: 0.5 to 1 μF for each amp through closed contacts Notes: 1. Use capacitors rated for 250 VAC. 2. RC networks may affect load release time of solenoid loads. Check to confirm proper operation. ... -
Page 11: Wiring The Relay Output
WIRING (continued) Step Six Wiring the Relay Output: The LVP‐51‐R requires 12 ‐ 36 VDC power to operate the sensor and switch the relay. All illustrations below identify a Dry switch state as the normal position of the relay. Switching a Normally Open DC Load: Switching a Normally Closed DC Load: The Red wire connects to Positive (+) of the power The Black wire connects to Positive (+) of the power supply ... -
Page 12: Wiring As A P-Channel Or N-Channel Output
WIRING (continued) Step Six Wiring as a P‐Channel or N‐Channel output: The LVP‐51‐R can be substituted for either a P‐Channel (PNP, sourcing) output or an N‐Channel (NPN, sinking) output. Normally Open DC Load as a P‐Channel Output: Normally Closed DC Load as a P‐Channel Output: The Red wire connects to Positive (+) of the power The Black wire connects to Positive (+) of the power supply and the Black wire connects to Negative (‐). supply and the Red wire connects to Negative (‐). The The Green wire is jumped to the Red wire while the Green ... -
Page 13: Calibration
CALIBRATION Step Seven After it is installed in place, the must be calibrated by the user before operation. Everything needed for the procedure is self‐contained within the electronics of the LVP‐51‐R level switch. Two dielectric states—full condition and empty condition—are measured by the LVP‐51‐R, and then averaged to set the threshold between “wet” and “dry” at the sensor. The empty state must be at least 6" below the bottom of the sensor for calibration. The full state must be to the top of the sensor (not just to the point of actuation) for calibration. ... -
Page 14: Maintenance
MAINTENANCE Step Seven Checking the Point of Actuation: Raise the fluid level to the point where the sensor sends a “wet” signal (Input LED will turn Amber on OMEGA ENGINEERING controllers). The “dry” signal should be sent when the fluid level is lowered (Input LED will turn Green on OMEGA ENGINEERING ... - Page 15 15 ...
- Page 16 16 ...
Need help?
Do you have a question about the LVP-51-R and is the answer not in the manual?
Questions and answers