
Related Manuals for Radio Shack PRO-2067


Summary of Contents for Radio Shack PRO-2067
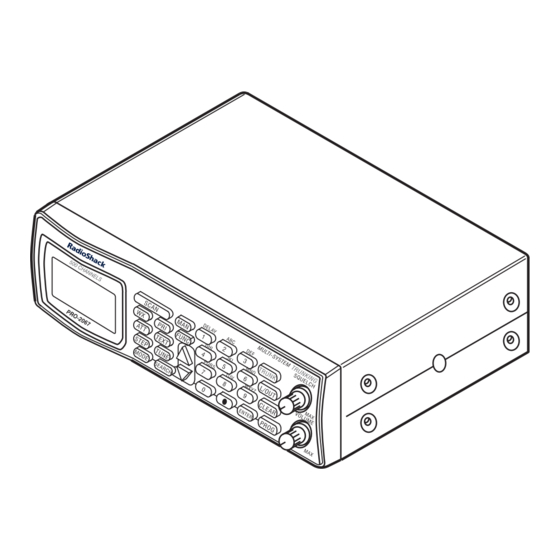
- Page 1 Owner’s Manual Cat. No. 20-196 PRO-2067 500-Channel Mobile Trunk-Tracking Scanner Please read before using this equipment.
- Page 2 INTRODUCTION Your new RadioShack 500-Channel The scanner also lets you scan con- Mobile Trunk-Tracking Scanner is one ventional transmissions, and is pre- of a new generation of scanners de- programmed with service-search signed to track Motorola Type I, banks for convenience. By pressing a Type II (such as Smartnet and Priva- single button, you can quickly search cy Plus ), GE/Ericsson EDACS, E.F.
- Page 3 Simultaneous Trunking Operation Clone/Remote PC Function — lets — you can scan all 3 types of trunking you transfer programmed data directly systems, and both trunking and con- to another Cat. No. 20-196 or Cat. No. ventional frequencies, at the same 20-522 scanner.
- Page 4 HyperSearch and HyperScan — Your scanner can receive these let you set the scanner to search at up bands: to 50 steps per second and scan at up to 25 channels per second, to help Frequency Types of you quickly find interesting transmis- Range (MHz) Transmissions sions.
-
Page 5: Fcc Notice
FCC NOTICE vices, military operations, pager ser- vices, and wireline (telephone and telegraph) service providers. It is legal Your scanner might cause radio or TV to listen to almost every transmission interference even when it is operating your scanner can receive. However, properly. -
Page 6: Table Of Contents
CONTENTS Preparation ......................8 Connecting an Antenna ................... 8 Mounting an Antenna ..................8 Mounting the Scanner In Your Vehicle ............. 8 Powering the Scanner ..................9 Using the Scanner as a Base Station ............10 Connecting an Extension Speaker ..............11 Connecting an Earphone/Headphones ............ - Page 7 Trunking Operation .................... 36 Understanding Trunking ................36 Setting Squelch for the Trunking Mode ............37 Programming Trunking Frequencies ............. 37 Programming Fleet Maps ................39 Talk Group IDs ....................41 Open and Closed Modes ................43 A General Guide to Scanning ................44 Guide to Frequencies ..................
-
Page 8: Preparation
PREPARATION CONNECTING AN outdoor antenna. For lengths over 50 feet, use RG-8 low-loss dielectric co- ANTENNA axial cable. If your antenna’s cable does not have a BNC connector, you You must install an antenna before will also need a BNC adapter (avail- you can operate the scanner. -
Page 9: Powering The Scanner
Caution: Be sure to avoid obstruc- 6. Connect the antenna’s cable to tions behind the mounting surface. jack on the back of the scanner. Follow these steps to mount the scan- ner in your vehicle. 1. Choose a mounting location, then use the supplied mounting bracket as a template to mark the posi- tions for the mounting screw... -
Page 10: Using The Scanner As A Base Station
• Always connect the adapter or DC 3. Insert the power cord’s barrel plug power cord to the scanner before into the jack on the back DC 13.8V you connect it to the power of the scanner. source. When you finish, discon- nect the adapter or DC power cord from the power source before you disconnect it from the scan-... -
Page 11: Connecting An Extension Speaker
Using Standard AC Power 3. Plug the adapter into a standard AC outlet. To power the scanner from an AC out- let, you need an AC adapter (not sup- plied) with a 5.5 mm outer diameter/ 2.1 mm inner diameter tip. Cautions: You must use a Class 2 power source that sup-... -
Page 12: Connecting An Earphone/Headphones
CONNECTING AN • Once you set , do not VOLUME increase it. Over time, your ears EARPHONE/ adapt to the volume level, so a HEADPHONES volume level that does not cause discomfort might still damage your For private listening, you can connect hearing. -
Page 13: Understanding Your Scanner
UNDERSTANDING YOUR SCANNER Once you understand a few simple terms used in this manual and familiarize your- self with your scanner’s features, you can put the scanner to work for you. You sim- ply determine the type of communications you want to receive, then set the scanner to scan them. - Page 14 — changes the frequency step or displays the step frequency during a STEP search. — changes the receive mode. MODE (priority) — sets and turns the priority function on or off. — lets you input text. TEXT — tunes a frequency along with TUNE —...
- Page 15 • — enters a decimal point (necessary when programming frequencies), space, or hyphen (in Motorola type I code setting). —enters frequencies, text, and so on. ENTER — stores the trunking ID code or holds the trunking ID while scanning. TRUNK (lockout) —...
-
Page 16: A Look At The Display
A LOOK AT THE DISPLAY • no signal) Receiving a Signal ( Priority Freq. (T)runked • no attenuation) Attenuate ( • Delay ( no delay) Scanning Up) Locked ( Channel Scanning Down) 00–(49) Bank 0–(9) Current Manual Mode Mode is FM Current Frequency Current Bank Channel... - Page 17 • Bank Off + Selected for Scanning in Open Mode – Selected for Scanning in Closed Mode Scan Mode 6 and 7 are turned off Search Mode Searching Frequency for Range Delay Scanning Up in Bank 3 Search Mode Received Frequency Stepping Search Mode...
-
Page 18: Understanding Banks
UNDERSTANDING UNDERSTANDING BANKS CTCSS/DCS Continuous Tone Coded Squelch Sys- Channel Storage Banks tem (CTCSS) and Digital Coded Squelch (DCS) are two methods used To make it easier to identify and select to prevent interference by other radio the channels you want to listen to, communications. -
Page 19: Understanding Your Scanner's Modes
UNDERSTANDING YOUR When you set a channel storage bank to open mode, (open) appears un- SCANNER’S MODES der the bank’s number while scanning. When you set a channel storage bank Open and Closed Modes to closed mode, – (closed) appear un- der the channel storage bank's num- You can set your scanner to change ber while scanning. -
Page 20: Motorola Mode
When the scanner receives a trans- When the scanner receives a trans- mission on a channel set to the LTR mission on a channel set to the Motor- mode, it first decodes the LTR data in- ola mode, it first decodes the talk cluded with the transmission. -
Page 21: Edacs Mode
Type II system talk groups are identi- EDACS frequencies are organized in fied by a 5-digit number. Valid talk a specific order. Each frequency is as- group IDs are divisible by 16. If you try signed a Logical Channel Number to enter an invalid talk group ID, the (LCN). -
Page 22: Operation
OPERATION TURNING ON THE • To ensure the scanner operates properly while in the trunking SCANNER AND SETTING mode, we suggest you set SQUELCH using above SQUELCH steps, even if the scanner is 1. Turn fully counterclock- SQUELCH automatically muted. wise until the indicator points to STORING KNOWN 2. -
Page 23: Storing Text Tags
4. Press to store the fre- for easy identification of channel ENTER quency into the channel. transmissions, trunk IDs, or banks. Notes: Assigning a Text Tag to a • If you made a mistake in Step Channel Invalid Freq appears and the scanner beeps when 1. -
Page 24: Text Input Chart
3. Enter the desired text using the To access the numbers, after you keypad then press press , press then the ENTER FUNC desired number. Note: If the channel is programmed for PL, DL, LT, MO or ED mode, the To enter a lowercase character or a scanner displays the ID number from character from the second set for key... -
Page 25: Finding And Storing Active Frequencies
FINDING AND STORING Search Search Description ACTIVE FREQUENCIES Bank Range (MHz) 118.000– Aircraft You can search for transmissions 136.00 within ten ranges of frequencies, called a search bank. The search 156.250– Marine bank is divided into ten search bands. 157.425 You can change the bands with the 866.000–... -
Page 26: Changing A Search Range With A Preprogrammed Range
3. When the scanner finds an active 7. If desired, press to return SEARCH frequency, it stops searching. To to the search mode. save the frequency into a channel in the channel storage bank (bank Changing a Search Range 9 only), press then FUNC ENTER... -
Page 27: Scanning The Channels
4. Press to select the prepro- scanner does not accept the grammed search range. entry. 5. Press to replace the ENTER 5. To assign a name to the search search range. range, press twice, then TEXT enter the name. If you want to edit Manually Changing a Search existing text, repeatedly press to move the cursor across... -
Page 28: Manually Tuning Afrequency
Notes: of the channels within the banks you have turned off. • You cannot change the step fre- quency while tuning. Notes: • You can change the receiving • You cannot turn off all banks. mode while tuning. There must be at least one active bank. -
Page 29: Listening To A Weather Channel
Notes: NOAA and your local weather report- ing authority broadcast your local fore- cast and regional weather information • The scanner does not display the on one or more of these channels. actual location referenced SAME messages. It uses only the message portion of the SAME sig- Listening to a Weather nal. -
Page 30: Special Features
SPECIAL FEATURES USING DELAY mode, the lockout is removed when power is disconnected then reapplied to the scanner. This Many agencies use a two-way radio makes it easy to temporarily lock system that might have a period of 2 out trunking data channels. or more seconds between a transmis- sion and a reply. -
Page 31: Priority
Reviewing Locked-Out frequencies are cleared within a bank, appears. L/O list is empty Frequencies Follow these steps to review the fre- Clearing All Locked-Out quencies within a search bank that Frequencies in a Search Bank you locked out. 1. Press to start searching. -
Page 32: Changing The Open/Closed Mode
Notes: To turn on the priority feature, press while scanning. Priority ON • The scanner does not stay on the if you set the prior- Priority WX priority channel while the scanner ity to a weather channel) appears for is receiving trunking frequencies. about 3 seconds then appears. -
Page 33: Changing The Receive Mode
ner receives transmissions only when If you want to listen to private line or a preset ID code is also transmitted, trunking transmissions closed and the ID code appears. In closed mode, you might have to change the mode, the scanner does not receive receive mode. -
Page 34: Using The Attenuator
USING THE Search Step Range (MHz) ATTENUATOR (kHz) 29.000-54.000 5, 10, 15, 20, To reduce interference or noise 25, 30, 50, 100 caused by strong signals, you can re- duce the scanner’s sensitivity to these 108.000-136.9875 12.5, 25, 50, signals (called attenuation ). You can set attenuation for each of the scan- 137.000-174.000 5, 10, 15, 20,... -
Page 35: Changing The Display Contrast
CHANGING THE CLONING DISPLAY CONTRAST PROGRAMMED DATA FROM SCANNER TO 1. Press SCANNER 2. Press then FUNC Down keys to set con- You can transfer the programmed trast. appears on the display. data to and from another RadioShack Cat. No. 20-196 or Cat. No. 20-522 3. -
Page 36: Trunking Operation
TRUNKING OPERATION The scanner tracks transmissions that Trunking group frequencies are in- use the Motorola Type I and Type II cluded in the supplied Police Call ® (such as Smartnet and Privacy Plus) Trunking Guide . Frequency fleet map and hybrid analog trunking systems, and talk group information is also plus GE/Ericsson (EDACS) and EF widely available on the Internet, at... -
Page 37: Setting Squelch For The Trunking Mode
SETTING SQUELCH FOR • If you are programming trunked frequencies for Motorola Type I THE TRUNKING MODE and hybrid systems, you must first program the fleet map (see “Pro- Your scanner automatically mutes the gramming Fleet Maps” audio during trunk scanning when it Page 39). - Page 38 bank (see “Storing a Frequency to www.trunkscanner.com , other Specified Channel” Internet sources, or locally- Page 26). published guidebooks. 5. Repeatedly press to select • The scanner automatically de- MODE the trunking mode ( for EF codes subaudible data it receives Johnson, for Motorola, or in the VHF band.
-
Page 39: Programming Fleet Maps
5. Repeatedly press then to select the offset frequency you want ( 12.5 FUNC , or 25.0 kHz 50 kHz Note: Offset frequencies above 50 kHz do not appear and are used only for subaudible decoding mode. 6. Program the trunking frequencies (see “Programming Trunking Frequencies” on Page 37). - Page 40 Size Code — — — — Size Code — — — 7. Press for each entry. If you make a mistake, press and enter the cor- ENTER rect size code. Note: The default setting of the bank is for Motorola Type II. However, after you set Type I and if you want to return to Type II, enter at Step 6.
-
Page 41: Talk Group Ids
TALK GROUP IDS 5. Enter the talk group ID and press . If necessary, use the deci- ENTER mal point for a hyphen. You can program up to 100 talk group IDs in each bank. When the scanner Note: If you made a mistake in stops on a transmission in the LTR, Step 5, Invalid ID. - Page 42 Clearing a Talk Group ID Follow these steps to lock out a talk group ID. 1. Press then PROG TRUNK 1. Press PROG 2. Repeatedly press FUNC 2. Press TRUNK to move the desired bank. 3. Repeatedly press FUNC 3. Repeatedly press to select to move the desired bank.
-
Page 43: Open And Closed Modes
OPEN AND CLOSED MODES When set to the open mode, the scanner only uses the ID list to look up ID text tags and stops on any ID code. Closed Mode When set to the closed mode, the scanner stops only on sig- nals that have an ID code which is found in the ID list for the bank. -
Page 44: A General Guide To Scanning
A GENERAL GUIDE TO SCANNING Reception of the frequencies covered by your scanner is mainly “line-of-sight.” That means you usually cannot hear stations that are beyond the horizon. GUIDE TO FREQUENCIES National Weather Frequencies 162.400 162.475 162.525 162.425 162.500 162.550 162.450 Birdie Frequencies Every scanner has birdie frequencies. -
Page 45: Guide To The Action Bands
GUIDE TO THE ACTION BANDS Typical Band Usage (MHz) VHF Band Low Range 29.00–50.00 6-Meter Amateur 50.00–54.00 Aircraft 108.00–136.00 U.S. Government 137.00–144.00 2-Meter Amateur 144.00–148.00 High Range 148.00–174.00 UHF Band Military Aircraft 380.00–384.00 U.S. Government 406.00–420.00 70-Centimeter Amateur 440.00–450.00 Low Range 450.00–470.00 FM-TV Audio Broadcast, Wide Band 470.00–512.00... -
Page 46: Band Allocation
Activities Frequencies (MHz) Emergency Services 158.730–159.460 Railroad 160.000–161.900 UHF Band Activities Frequencies (MHz) 70-Centimeter Amateur Band FM 440.000–450.000 Repeaters Land-Mobile “Paired” Frequencies 450.000–470.000 Base Stations 451.025–454.950 Mobile Units 456.025–459.950 Repeater Units 460.025–464.975 Control Stations 465.025–469.975 Note: Remote control stations and mobile units operate at 5 MHz higher than their associated base stations and relay repeater units. - Page 47 MARI ..........Maritime Limited Coast (Coast Guard, Marine Telephone, Shipboard Radio, Private Stations) MARS .
- Page 48 43.700–44.600 ............TRAN 44.620–46.580 .
- Page 49 162.6875–163.225 ......... . GOVT, MIL, USXX 163.250 .
-
Page 50: Frequency Conversion
Note: Some cities use the 470–512 MHz band for land/mobile service. Conventional Systems Band – Locally Assigned 851.0125–855.9875 ........... . . CSB Conventional/Trunked Systems Band –... -
Page 51: Troubleshooting
TROUBLESHOOTING If your scanner is not working as it should, these suggestions might help you elimi- nate the problem. If the scanner still does not operate properly, take it to your local RadioShack store for assistance. PROBLEM POSSIBLE CAUSE REMEDY Scanner is on but will not SQUELCH is not correctly Adjust SQUELCH clock-... -
Page 52: Resetting/Initializing The Scanner
RESETTING/ Initializing the Scanner INITIALIZING THE Important: This procedure clears all SCANNER the information you have programmed into the scanner. Use this procedure You might need to reset or initialize only when you are sure your scanner the scanner if: is not working properly. -
Page 53: Care And Maintenance
CARE AND MAINTENANCE Your RadioShack 500-Channel Mobile Trunk-Tracking Scanner is an example of superior design and craftsmanship. The following suggestions will help you care for your scanner so you can enjoy it for years. Keep the scanner dry. If it gets wet, wipe it dry immediately. Liquids might contain minerals that can corrode the electronic circuits. -
Page 54: Specifications
SPECIFICATIONS Frequency Coverage (MHz): 10 Meter Amateur Radio ......... 29.0000–30.0000 (in 5 kHz steps) VHF Lo ............30.0000–50.0000 (in 5 kHz steps) 6 Meter Amateur Radio ........50.0000–54.0000 (in 5 kHz steps) Aircraft ............ 108.0000–136.9875 (in 12.5 kHz steps) Government ..........137.0000–144.0000 (in 5 kHz steps) 2 Meter Amateur Radio ....... - Page 55 Delay Time ..................... 2 Seconds F Rejection: 257.5 MHz at 154 MHz ................60 dB 21.4 MHz at 154 MHz ................100 dB IF Frequencies: 1st IF ....................257.5 MHz 2nd IF ....................21.4 MHz 3rd IF ....................455 kHz Squelch Sensitivity: Threshold (FM and AM) ................
- Page 56 Limited One-Year Warranty This product is warranted by RadioShack against manufacturing defects in material and workman- ship under normal use for one (1) year from the date of purchase from RadioShack company-owned stores and authorized RadioShack franchisees and dealers. EXCEPT AS PROVIDED HEREIN, Ra- dioShack MAKES NO EXPRESS WARRANTIES AND ANY IMPLIED WARRANTIES, INCLUDING THOSE OF MERCHANTABILITY AND FITNESS FOR A PARTICULAR PURPOSE, ARE LIMITED IN DURATION TO THE DURATION OF THE WRITTEN LIMITED WARRANTIES CONTAINED...
Need help?
Do you have a question about the PRO-2067 and is the answer not in the manual?
Questions and answers