Table of Contents
Advertisement
s
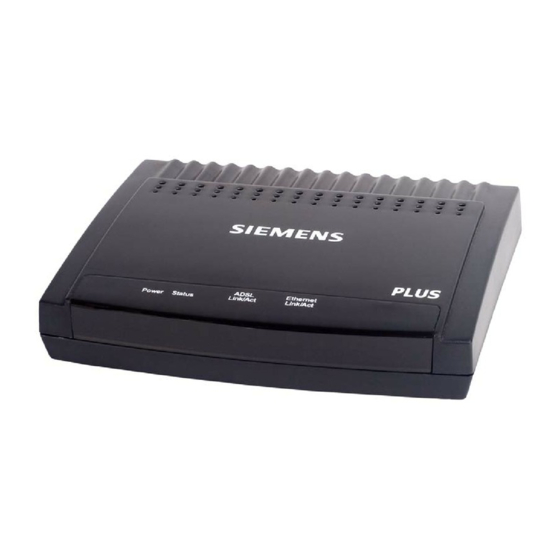
C2-010/C2-010-I ADSL2+
Router
User's Manual
Rev: 1.3
2005/1210
No part of this publication may be reproduced in any form by any means without the
prior written permission. Other trademarks or brand names mentioned herein are
trademarks or registered trademarks of their respective companies.
This manual currently suits for C2-010/C2-010-I.
Advertisement
Table of Contents

Related Manuals for Siemens C2-010


Summary of Contents for Siemens C2-010
- Page 1 No part of this publication may be reproduced in any form by any means without the prior written permission. Other trademarks or brand names mentioned herein are trademarks or registered trademarks of their respective companies. This manual currently suits for C2-010/C2-010-I.
-
Page 3: Table Of Contents
C2-010 / C2-010-I ADSL2+ Router User’s Guide Contents Device Introduction........................1-1 Features............................1-1 Packing List ..........................2-1 Interfaces Introduction ........................2-1 2.2.1 Front Panel..........................2-1 2.2.2 Rear Panel ..........................2-2 Cable Connections ........................2-2 2.3.1 Connecting the ADSL Line......................2-2 2.3.2... - Page 4 C2-010 / C2-010-I ADSL2+ Router User’s Guide Save ADSL2+ Router Configuration Settings................6-2 Restore Factory Default Settings....................6-3 Save Configuration File to PC ...................... 6-3 Load Saved Configuration Files ....................6-3 Firmware Update .......................... 6-3 Test ............................... 6-4 Device Info............................ 7-1 Log..............................
-
Page 5: Device Introduction
C2-010 / C2-010-I ADSL2+ Router User’s Guide 1. Overview The ADSL2+ Router provides integrated voice and data services over ADSL “Asymmetrical Digital Subscriber Loop” WAN (Wide Area Network) connection. Device Introduction The ADSL2+ Router is designed to provide a simple and cost-effective ADSL Internet connection for individual computers through the Ethernet ports, or use it to bridge your Ethernet LAN to the Internet. -
Page 7: Packing List
C2-010 / C2-010-I ADSL2+ Router User’s Guide 2. Installation Planning Before installing the ADSL2+ Router, you should gather information and equipment needed to install the device, then Install the hardware as instructed, connect the cables to the device and power on the ADSL2+ Router. -
Page 8: Rear Panel
C2-010 / C2-010-I ADSL2+ Router User’s Guide 2.2.2 Rear Panel Ethernet port Power input − − to your ADSL port − Connect power PC’s Connect to the Ethernet port adapter here ADSL line Factory Reset Button Figure 2-2 Rear Panel 2.3 Cable Connections... -
Page 9: Computer To Adsl2+ Router Connection
ADSL2+ Router User’s Guide 2.3.3 Computer to ADSL2+ Router Connection Cat 5 Ethernet Cable Figure 2-3 Computer to ADSL2+ Router Connection You can connect the ADSL2+ Router directly to a 10/100BASE-TX Ethernet adapter card (NIC) installed on a PC using the Ethernet cable provided as shown in this diagram. -
Page 10: Hub Or Switch To Adsl2+ Router Connection
C2-010 / C2-010-I ADSL2+ Router User’s Guide 2.3.4 Hub or Switch to ADSL2+ Router Connection Connect the ADSL2+ Router to an uplink port on an Ethernet hub or switch with a straight-through cable as shown in the diagram below: Figure2-5 Hub/Switch to ADSL2+ Router Connection If you wish to reserve the uplink port on the switch or hub for another device, connect to any on the other MDI-X ports (1x, 2x, etc.) with a crossed cable. -
Page 11: Set Up Tcp/Ip On Your Pc
C2-010 / C2-010-I ADSL2+ Router User’s Guide 3. Before Configuring ADSL2+ Router The factory default settings of ADSL2+ Router optimized all functions so as to enable it to operate on most network conditions. Usually, for the users with simple network topology, the default settings can meet the basic requirements and don’t need to change. -
Page 12: First Time Log On
C2-010 / C2-010-I ADSL2+ Router User’s Guide 3.4 First Time Log on After inputting the forgoing IP address on URL address bar, a new window appears prompting you for a user name and password needed to gain access the web configuration manager. -
Page 13: Summary
C2-010 / C2-010-I ADSL2+ Router User’s Guide 4. Web-based Management 4.1 Summary When you successfully login the Basic directory will display the ADSL2+ Router’s current connection status − both for the WAN (Internet) and LAN (your home network) connections, as shown below. You can begin the process of configuring your ADSL modem/ADSL2+ Router by clicking on the Advanced button in the upper left-hand corner of the first Web page displayed. -
Page 14: Configuring The Wan Connection
C2-010 / C2-010-I ADSL2+ Router User’s Guide Each tab displays menu buttons located in the left hand panel of the web interface. The table below lists the menus for each directory in the web manager. Directory Configuration and Read-only Menus... - Page 15 ADSL2+ Router User’s Guide Figure 4-3 WAN Current Settings Menu Select the connection type used for your account. The menu will display settings that are appropriate for the connection type you select. Follow the instruction below according to the type of connection you select in the WAN Settings menu.
-
Page 16: Configuring A Bridged Connection For The Wan
C2-010 / C2-010-I ADSL2+ Router User’s Guide 4.2.1 Configuring a Bridged Connection for the WAN A bridged connection between your ISP and your LAN (the computers in your house or office) is the simplest type of connection possible. The ADSL2+ Router will simply convert the incoming and outgoing packets to the correct format for each side of the connection (Ethernet for the LAN, ATM for the WAN). -
Page 17: Static Ip Address For Connection Wan
ADSL2+ Router User’s Guide 4. When you are satisfied that all the WAN settings are configured correctly, click on the Apply button. Note: Some accounts use PPP connection software for their Internet service connection. If you have been given a CD with PPP connection software, install this now as instructed by your service provider. After the ADSL2+ Router has rebooted it will negotiate the ADSL connection. - Page 18 C2-010 / C2-010-I ADSL2+ Router User’s Guide 3. Under the Static IP heading, choose the Connection Type from the pull-down menu. This defines both the connection type and encapsulation method used for your ADSL service. The available options are Bridged IP LLC, Bridged IP VC-MUX, Routed IP LLC, Routed IP VC-MUX or IPoA..
- Page 19 ADSL2+ Router User’s Guide Route Enabled/Disabled − this enables or disables NAT (Network Address Translation) on the router. This should normally be enabled. Enabled/Disabled − this enables or disables IGMP (Internet Group Management Protocol) on IGMP the router. This should normally be enabled.
-
Page 20: Dynamic Ip Address Connection For Wan
C2-010 / C2-010-I ADSL2+ Router User’s Guide 4.2.3 Dynamic IP Address Connection for WAN A Dynamic IP Address connection configures the Router to automatically obtain its global IP address from a DHCP server on the ISP’s network. The service provider assigns a global IP address from a pool of addresses available to the service provider. - Page 21 ADSL2+ Router User’s Guide 5. NAT should remain enabled. If you disable NAT, you not be able to use more than one computer for Internet connections. NAT is enabled and disabled system-wide, therefore if you are using multiple virtual connections, NAT will disabled on all connections. 6.
-
Page 22: Pppoe And Pppoa Connection For Wan
C2-010 / C2-010-I ADSL2+ Router User’s Guide 4.2.4 PPPoE and PPPoA Connection for WAN Follow the instructions below to configure the Router to use a PPPoE or PPPoA for the Internet connection. Make sure you have all the necessary information before you configure the WAN connection. - Page 23 ADSL2+ Router User’s Guide 7. NAT should remain enabled. If you disable NAT, you not be able to use more than one computer for Internet connections. NAT is enabled and disabled system-wide, therefore if you are using multiple virtual connections, NAT will disabled on all connections. 8.
-
Page 24: Dhcp Configuration
C2-010 / C2-010-I ADSL2+ Router User’s Guide 4.3 DHCP Configuration To display the DHCP Server menu, click the DHCP button in the Home directory. Active DHCP Clients appear listed in the DHCP Client Table below the configuration menu. Information about DHCP clients includes the IP address, MAC address, host name and lease time are displayed in the list. -
Page 25: Disabling The Dhcp Server
ADSL2+ Router User’s Guide 4.3.3 Disabling the DHCP Server To disable DHCP, click to select the No DHCP radio button and click on the Apply button. 4.4 DNS Server Setting The ADSL2+ Router is configured by default to forward the DNS server address you enter in the DNS page, shown below, to all DHCP clients on your LAN. - Page 26 C2-010 / C2-010-I ADSL2+ Router User’s Guide So, if you want to use an IP addressing scheme that is different from the 192.168.1.x/255.255.255.0 scheme, you will need to give the ADSL2+ Router ADSL router a new IP address. This is done on the LAN Settings page, as shown below.
-
Page 27: Advanced Configuration
C2-010 / C2-010-I ADSL2+ Router User’s Guide 5. Advanced Configuration This chapter introduces and describes the management features that have not been presented in the previous chapter. These include the more advanced features used for network management and security as well as administrative tools to manage the ADSL2+ Router, view statistics and other information used to examine performance and for troubleshooting. -
Page 28: Upnp Configuration
C2-010 / C2-010-I ADSL2+ Router User’s Guide expose it under insecurity risk; thus suggest not use this option unless no other alternatives. DDNS This page allows you to configure the ADSL2+ Router to use the DYNAMIC Domain Name Service (Dynamic DNS), if you have a previously established account. -
Page 29: Virtual Server Configuration
ADSL2+ Router User’s Guide 5.2 Virtual Server Configuration To view the following window, click on the Advanced tab at the top of the window and then click the Virtual Server button to the left. The Virtual Server will allow remote users access to various services outside of their LAN through a public IP address, such as FTP (File Transfer Protocol) or HTTPS (Secure Web). -
Page 30: Snmp Configuration
C2-010 / C2-010-I ADSL2+ Router User’s Guide circumstances. Destination Enter the port number of the device on the WAN side of the network that will be accessing Port the Virtual Server currently being configured. Commonly, this port number is identical to the Private Port number. -
Page 31: Outbound Ip Filter Configuration
ADSL2+ Router User’s Guide 5.4 Outbound IP Filter Configuration Packet filtering is a basic security measure that should be used on any network that is exposed to a security risk. A packet filter system examines data packets and scrutinizes them in order to control network access. -
Page 32: Inbound Ip Filter Configuration
C2-010 / C2-010-I ADSL2+ Router User’s Guide Filter Description Settings Src IP Select Any IP, Single IP, or IP Range from the drop-down menu and then enter the appropriate IP address or addresses that will be the source of packets this filter will act Address upon. - Page 33 ADSL2+ Router User’s Guide Filter Description Settings Src IP Select Any IP, Single IP, or IP Range from the drop-down menu and then enter the appropriate IP address or addresses that will be the source of packets this filter will act Address upon.
-
Page 34: Firewall
C2-010 / C2-010-I ADSL2+ Router User’s Guide 5.6 Firewall This Router comes equipped with a firewall. The Firewall configuration screen allows the Router to enforce specific predefined policies intended to protect against certain common types of attacks. To configure the Router’s firewall, click the Advanced tab at the top of the screen and then the Firewall tab to the left. -
Page 35: Dmz
ADSL2+ Router User’s Guide The Service Filtering options allow you to block FTP, Telnet response, Pings, etc, from the external network. Check the category you want to block to enable filtering of that type of packet. When you have selected the desired Firewall policies, click the Apply button to enforce the policies. 5.7 DMZ Click on the DMZ menu button to display the DMZ menu. -
Page 36: Rip
C2-010 / C2-010-I ADSL2+ Router User’s Guide 5.8 RIP Figure 5-9. RIP menu RIP can be enabled on any existing WAN or LAN interfaces. It may be specified to receive RIP requests and reply to them, it can be specified to send RIP queries, or to both receive and send RIP packets. -
Page 37: Ppp
ADSL2+ Router User’s Guide 5.9 PPP When the WAN connection is configured for either PPPoA or PPPoE, you can configure the Router’s PPP session to remain on all the time, or to disconnect after some period of no activity. You may also choose to instruct the Router to connect each time you want to access the WAN or the Internet. -
Page 38: Adsl
C2-010 / C2-010-I ADSL2+ Router User’s Guide 5.10 ADSL The ADSL Configuration page allows the user to set the configuration for ADSL protocols. For most ADSL accounts the default settings Multi-mode will work. This configuration works with all ADSL implementations. If you have been given instructions to change the Modulation method used, select the desired option T1.413,... -
Page 39: Atm Vcc
ADSL2+ Router User’s Guide 5.11 ATM VCC The ATM Virtual Circuit connection menu is used to configure the WAN connection. If you are using multiple PVCs, you can change the configuration of any PVC in this menu. To create new or additional PVCs, read the section below on Multiple PVCs. -
Page 41: Administrator's Settings
C2-010 / C2-010-I ADSL2+ Router User’s Guide 6. Tools Click the Tools tab to reveal the menu buttons for various functions located in this directory. These menus are used to change the system password used to access the web manager, to save or load ADSL2+ Router configuration settings, upgrade the device firmware, save current configuration settings, restore default settings, and to perform miscellaneous actions such performing Ping tests. -
Page 42: Configure System Time
C2-010 / C2-010-I ADSL2+ Router User’s Guide 6.2 Configure System Time Use the Time menu to configure the ADSL2+ Router’s system time manually or from an SNTP server or your computer’s system clock. Figure 6-2. Time Settings Menu If you opt to use the Automatic option you must have an IP address of an available SNTP server. Date settings use the format Year/Month/Date, Time settings use the format Hour (24 hour clock)/ Minute/ Second. -
Page 43: Restore Factory Default Settings
ADSL2+ Router User’s Guide Restore Factory Default Settings To reset the ADSL2+ Router to its factory default settings, click the Restore button. You will be prompted to confirm your decision to reset the ADSL2+ Router. The ADSL2+ Router will reboot with the factory default settings including IP settings. -
Page 44: Test
C2-010 / C2-010-I ADSL2+ Router User’s Guide Figure 6-5. Firmware Upgrade To upgrade firmware, type in the name and path of the file or click on the Browse button to search for the file. Click the Apply button to begin copying the file. The file will load and restart the ADSL2+ Router automatically. -
Page 45: Device Info
C2-010 / C2-010-I ADSL2+ Router User’s Guide ADSL2+ Router Status Information Use the various read-only menus to view system information and monitor performance. 7.1 Device Info This page displays the current information for the AVA-2425S. It will display the LAN, WAN, Wireless 802.11g, NAPT Session and Disk Information statistics. -
Page 46: Traffic Statistics
C2-010 / C2-010-I ADSL2+ Router User’s Guide The log menu buttons in this function as follow: First Page Display the first page of the log. Last Page Display the last page of the log. Previous Moves back one log page. -
Page 47: Adsl Status
ADSL2+ Router User’s Guide 7.4 ADSL Status Use the ADSL Status information and the Test page for troubleshooting the ADSL connection. Figure 7-4. ADSL Status... -
Page 49: Technical Specifications
C2-010 / C2-010-I ADSL2+ Router User’s Guide 8. Attachments Technical Specifications Hardware One ADSL port RJ-11, inner pair (pin 2,3) ADSL Standards: ANSI T1.413 Issue 2 Standard ITU G.992.1 (G.dmt) AnnexA Compliance ITU G.992.2 (G.lite) Annex A ITU G.994.1 (G.hs) ADSL2 Standards: ITU G.992.3 (G.dmt.bis) Annex A... - Page 50 C2-010 / C2-010-I ADSL2+ Router User’s Guide Spanning Tree IEEE 802.1d Dynamic Up to 1000 MAC addresses Learning Bridged/Routed Ethernet over ATM (RFC1483/2684) Encapsulation Classical IP over ATM (RFC1577) TCP/UDP IPv4 RARP ICMP IP Routing RIP v1 (RFC 1058), RIP v2 (RFC 1389)
- Page 51 For more detailed information about disposal of your old appliance, please contact your city office, waste disposal service, the shop where you purchased the product or your SIEMENS partner. The statements quoted above are only fully valid for equipment which is installed in the countries of the European Union and is covered by the directive 2002/96/EC.
Need help?
Do you have a question about the C2-010 and is the answer not in the manual?
Questions and answers