Avermedia dVD EZMaker 7 Quick Installation Manual
Hide thumbs
Also See for dVD EZMaker 7:
- Quick installation manual (73 pages) ,
- Manual (4 pages) ,
- Quick manual (85 pages)

Related Manuals for Avermedia dVD EZMaker 7


Summary of Contents for Avermedia dVD EZMaker 7
-
Page 1: Quick Installation Guide
Quick Installation Guide Quick Installation Guide ® AVerMedia DVD EZMaker 7 C039 English Deutsch Français Italiano Español Português P/N 300AC039-DBS M a d e i n T a i w a n... - Page 2 The information contained in this documentation is subject to change without notice. In no event will AVerMedia be liable for direct, indirect, special, incidental, or consequential damages arising out of the use or inability to use this product or documentation, even if advised of the possibility of such damages.
-
Page 3: Package Contents
Quick Installation Guide Package Contents ® AVerMedia DVD EZMaker 7 Quick Installation Guide CyberLink DVD Suite CD Installation CD USB Cable System Requirements ® ® Intel Pentium 4, 2.4 GHz or higher or equivalent AMD processor. 512 MB RAM or above USB 2.0 port... -
Page 4: Hardware Installation
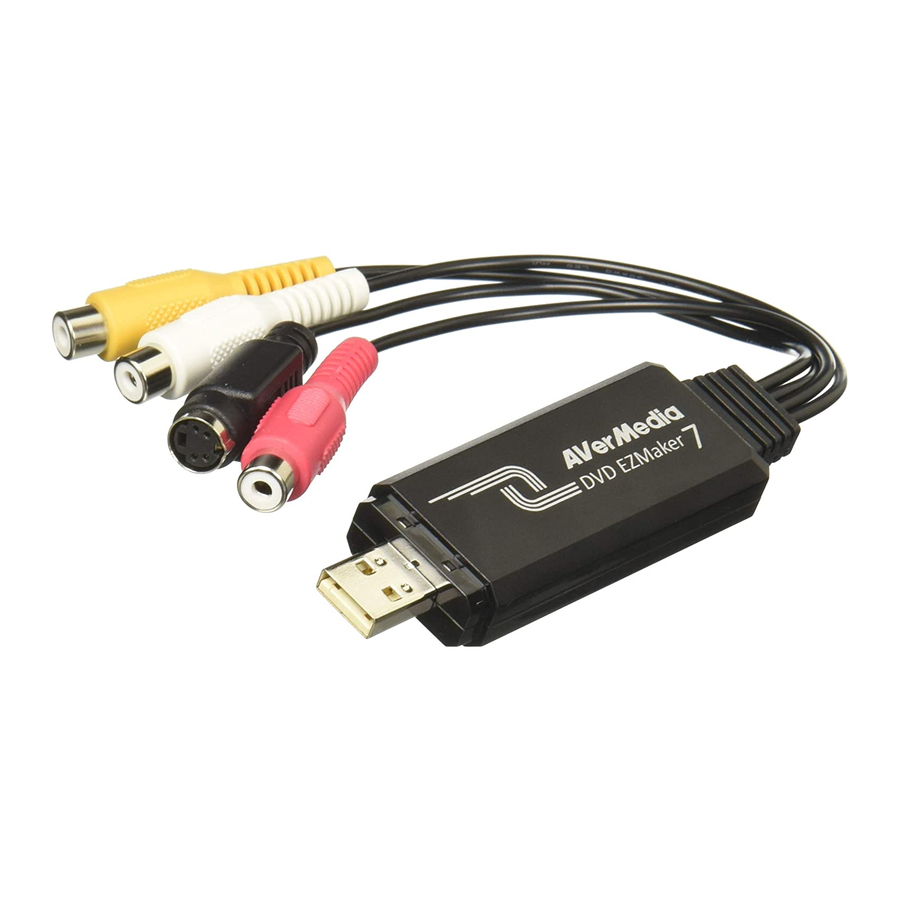
Hardware Installation Connecting AVerMedia DVD EZMaker 7 Use the figure below to connect your AVerMedia DVD EZMaker 7. To record video with sound, you need to specify the audio input source and make sure the sound is NOT muted and have enough volume. -
Page 5: Installing The Driver
Quick Installation Guide Installing the Driver After you have properly installed your AVerMedia DVD EZMaker 7, turn on your computer. The system will automatically detect the newly installed device on the first time you reboot your computer. Simply skip the wizard, and insert the accompanying installation CD to install the driver. -
Page 6: Windows Vista
® Windows Vista 1. The “Found New Hardware Wizard” dialog box will appear. Just click Cancel to skip the Wizard installation procedures. 2. Place the installation CD into the CD-ROM drive. 3. When the “AutoPlay” dialog box appears, select Run Autorun.exe. 4. -
Page 7: Uninstalling The Driver
1. Click Start, point to Settings, and then click Control Panel. 2. Double-click Add / Remove Programs icon. 3. In the add/remove programs list, select AVerMedia C039 USB Capture Card and then click on the Change/Remove or Add/Remove button. Note: AVerMedia DVD EZMaker 7 requires the system to support isochronous transfer. At present, VIA KT400, KT333 and K266A chipset motherboards are not supported;... - Page 8 ® ® Windows Vista / Windows 1. Click on the START button and go to Control Panel. 2. Double-click Programs and Features icon. 3. Select AVerMedia C039 USB Capture Card and click on the Uninstall/Change button. English-6...
-
Page 9: Hardware Installieren
Schnellinstallationsanleitung Packungsinhalt ® AVerMedia DVD EZMaker 7 Schnellinstallationsanleitung CyberLink DVD Suite CD Installations-CD USB Kabel Hardware installieren ® ® Intel Pentium 4, 2.4 GHz oder höherer gleichwertiger AMD Prozessor 512MB RAM oder mehr USB 2.0-Eingang Soundkarte mit Line-in-Anschluß Grafikkarte mit 256 MB Speicher CD- oder DVD-Brenner Benötigter Speicherplatz auf Festplatte: 1 GB für VCD / mindestens 5 GB für DVD... - Page 10 Systemanforderungen Anschließen des AVerMedia DVD EZMaker 7 Schließen Sie den AVerMedia DVD EZMaker 7 entsprechend der folgenden Abbildung an. Um Video mit Sound aufzuzeichnen muß die Audioquelle eingeschaltet sein, und über einen entsprechend starken Signalpegel verfügt. Hierzu gehen Sie mit Doppelklick auf das gelbe Lautsprechericon der Taskleiste oder klicken auf Start, zeigen auf Programme >...
-
Page 11: Installation Des Treibers
Schnellinstallationsanleitung Installation des Treibers Nachdem Sie den AVerMedia DVD EZMaker 7 installiert haben, starten Sie Ihren Rechner. Das System sucht automatisch nach dem neu installierten Gerät wenn Sie das erste Mal Ihren Computer hochfahren. Überspringen Sie einfach den Hilfsassistenten und legen Sie die beiliegende CD ein, um den Treiber zu installieren. - Page 12 ® Windows Vista 1. Die Dialogbox “Assistent für das Suchen neuer Hardware” erscheint. Klicken Sie auf Abbrechen, um den Installationsassistenten zu beenden. 2. Legen Sie die Installations-CD in Ihr CD-ROM-Laufwerk ein. 3. Wenn die “AutoPlay” Anwendung erscheint, wählen Sie Run Autorun.exe. 4.
- Page 13 1. Klicken Sie auf Start, zeigen auf Einstellungen und klicken dann auf die Systemsteuerung. 2. Doppelklicken Sie den Software Icon. 3. Wählen Sie in der Liste Programme hinzufügen/ entfernen AVerMedia C039 USB Capture Card und klicken dann auf die Schaltfläche Ändern/ Entfernen oder Hinzufügen / Entfernen.
-
Page 14: Windows ® Vista / Windows
1. Klicken Sie auf die Schaltfläche START und öffnen Sie die Control Panel (Systemsteuerung). 2. Doppelklicken Sie auf das Symbol Programs and Features (Programme und Funktionen). 3. Wählen Sie AVerMedia C039 USB Capture Card und klicken Sie dann auf die Schaltfläche Uninstall/Change (Deinstallieren/Ändern). Deutsch-6... -
Page 15: Contenu De L'emballage
Guide d’installation rapide Contenu de l’emballage ® AVerMedia DVD EZMaker 7 Guide d’installation rapide CyberLink DVD Suite CD CD d’installation Câble USB Configuration minimale requise ® ® Intel Pentium 4, 2.4 GHz ou supérieur ou processeur AMD équivalent. 512Mo RAM ou plus Port USB 2.0... -
Page 16: Installation Du Matériel
Installation du matériel Connecter AVerMedia DVD EZMaker 7 Suivez le schéma ci-dessous pour connecter votre AVerMedia DVD EZMaker 7. Pour enregistrer une vidéo avec du son, vous devrez spécifier l'entrée audio source et vérifiez que le son n'est pas sur muet, et avoir suffisamment de volume. Pour cela, double-cliquez sur l’icône jaune du volume haut-parleur, dans la barre des tâches, ou cliquez sur Démarrer, pointez sur... -
Page 17: Installation Du Pilote
Guide d’installation rapide Installation du pilote Après avoir installé correctement votre AVerMedia DVD EZMaker 7, allumez votre ordinateur. Le système détecte automatiquement le périphérique nouvellement installé la première fois que vous réinitialisez votre ordinateur. Passez l’assistant d’installation et insérez directement le CD d’installation accompagnant le produit pour installer le pilote. - Page 18 ® Windows Vista 1. La boîte de dialogue “Assistant du nouveau matériel trouvé” apparaît. Cliquez simplement sur Annuler pour passer les procédures d’installation de l’assistant. 2. Placez le CD d’installation dans votre lecteur CD-ROM. 3. Lorsque la boîte de dialogue “AutoPlay” apparaît, sélectionnez Run Autorun.exe.
-
Page 19: Désinstallation Du Pilote
1. Cliquez sur Démarrer, pointez sur Paramètres, puis cliquez sur Panneau de configuration. 2. Double-cliquez sur Ajout/Suppression de programmes. 3. Dans la liste ajout / suppression de programmes, sélectionnez AVerMedia C038 USB Capture Card et cliquez sur le bouton Changer/Supprimer ou Ajouter/Supprimer. - Page 20 ® ® Windows Vista / Windows 1. Cliquez sur le bouton DEMARRER et aller au Panneau de configuration. 2. Double-cliquez sur l’icône Programmes et fonctions. 3. Sélectionnez AVerMedia C039 USB Capture Card et cliquez sur le bouton Désinstaller/Changer. Français-6...
-
Page 21: Contenuto Della Confezione
Guida di installazione rapida Contenuto della confezione ® AVerMedia DVD EZMaker 7 Guida di installazione rapida CyberLink DVD Suite CD CD di installazione Cavo USB Requisiti di sistema ® ® Processore Intel Pentium 4, 2,4 GHz o superiore, o equivalente processore AMD. -
Page 22: Installazione Dell'hardware
Installazione dell’Hardware Collegamento di AVerMedia DVD EZMaker 7 Per collegare AVerMedia DVD EZMaker 7 consultare l’illustrazione in basso. Per registrare i video con audio, è necessario specificare la fonte di ingresso audio e assicurarsi che l'audio non sia disattivato e abbiano un volume sufficiente. Fate doppio clic sull’icona dell’altoparlante giallo dalla barra delle applicazioni o fate clic su avvio, scegliete programmi >... -
Page 23: Installazione Del Driver
Guida di installazione rapida Installazione del driver Dopo avere installato in modo appropriato AVerMedia DVD EZMaker 7, accendere il computer. Al primo riavvio, il sistema rileverà automaticamente la nuova periferica appena installata. Ignorare la procedura guidata ed inserire il CD d’installazione fornito in dotazione per installare il driver. - Page 24 ® Windows Vista 1. Appare la finestra di dialogo “Installazione guidata nuovo hardware”. Basta fare clic su Annulla per ignorare le procedure di installazione guidate. 2. Inserite il CD di installazione nell’unità CD-ROM. 3. Quando appare la finestra di dialogo “AutoPlay”...
- Page 25 3. Nell’elenco visualizzato selezionare AVerMedia C039 USB Capture Card quindi fare clic sul pulsante Cambia/Rimuovi o Aggiungi/Rimuovi Nota: AVerMedia DVD EZMaker 7 richiede che il sistema supporti il trasferimento sincronizzato. Al momento i chipset VIA KT400, KT333 ed K266A non sono supportate; solo I chipset VIA 8235 ®...
-
Page 26: Contenido Del Paquete
Guía de instalación rápida Contenido del paquete ® Guía de instalación rápida AVerMedia DVD EZMaker 7 CyberLink DVD Suite CD Guía de instalación rápida Cable USB Requisitos del Sistema ® ® Intel Pentium 4, 2.4 GHz o superior o procesador AMD equivalente. -
Page 27: Instalación Del Hardware
Instalación del Hardware Conectar AVerMedia DVD EZMaker 7 Utilice la imagen siguiente para conectar su AVerMedia DVD EZMaker 7. Para grabar video con sonido, usted necesita especificar la fuente de entrada de audio y estar seguro que el sonido NO está en modo Silencio y con bastante nivel de volumen. Para hacerlo, pulse dos veces en el icono del altavoz de la barra de tareas o pulse Inicio y vaya a Programas >... -
Page 28: Instalación Del Controlador
Guía de instalación rápida Instalación del Controlador Después de conectar AVerMedia DVD EZMaker 7 a un puerto USB 2.0 disponible, su ordenador deberá automáticamente detectar el nuevo dispositivo. Simplemente salte el asistente e inserte el CD de instalación facilitado, y ejecute la instalación desde el CD. - Page 29 ® Windows Vista 1. Aparecerá el “Asistente de Nuevo Hardware encontrado”. Simplemente presione Cancelar para omitir el asistente de instalación. 2. Ponga el CD de instalación en su unidad de CD-ROM. 3. Cuando aparezca el cuadro de diálogo de “reproducción automática” (“Autoplay”), seleccione ejecutar Autorun.exe.
- Page 30 1. Haga clic en Inicio > Panel de Control. 2. Doble-clic en el icono Agregar o Quitar Programas. 3. En la lista de añadir o quitar programas, seleccione AVerMedia C039 USB Capture Card y luego haga clic en el botón Cambiar o Quitar.
- Page 31 Quick Installation Guide FCC NOTICE (CLASS B) This device complies with Part 15 of the FCC Rules. Operation is subject to the following two conditions: (1) this device may not cause harmful interference, and (2) this device must accept any interference received, including interference that may cause undesired operation.
-
Page 32: Conteúdo Do Pacote
Guia de Instalação Rápida Conteúdo do Pacote ® AVerMedia DVD EZMaker 7 Guia de Instalação Rápida CD CyberLink DVD Suite CD de instalação Cabo USB Requisitos do Sistema ® ® Processador Intel Pentium 4, 2,4 GHz ou superior ou AMD equivalente. -
Page 33: Instalação Do Hardware
Instalação do Hardware Ligação do AVerMedia DVD EZMaker 7 Utilize a figura em baixo para ligar o AVerMedia DVD EZMaker 7. Para gravar vídeo com som, é necessário especificar a respectiva fonte de entrada de som e assegurar que o mesmo NÃO foi silenciado e dispõe de volume suficiente. -
Page 34: Instalação Do Controlador
Guia de Instalação Rápida Instalação do Controlador Após instalar correctamente o AVerMedia DVD EZMaker 7, ligue o computador. O sistema detecta automaticamente o novo hardware instalado aquando do arranque do computador. Salte o Assistente de Instalação e insira o CD de instalação para instalar o controlador. - Page 35 ® Windows Vista 1. Aparecerá a caixa de diálogo “Assistente para adicionar novo hardware”. Clique em Cancelar para ignorar o assistente de instalação. 2. Coloque o CD de instalação na unidade do CD-ROM. 3. Quando surgir a caixa de diálogo “AutoPlay”...
- Page 36 2. Clique duas vezes no ícone de Adicionar / Remover Programas 3. Na lista de ‘adicionar / remover programas’, seleccione o controlador AVerMedia C039 USB Capture Card e a seguir clique no botão de Mudar/Remover ou no botão de Adicionar / Remover Nota: O AVerMedia DVD EZMaker 7 exige que o sistema suporte transferências isócronas.
Need help?
Do you have a question about the dVD EZMaker 7 and is the answer not in the manual?
Questions and answers