Panasonic EASA-PHONE KX-T1450 Operating Instructions Manual
Auto-logic automatic telephone answering system
Hide thumbs
Also See for EASA-PHONE KX-T1450:
- Operating instructions manual (24 pages) ,
- Operating instructions manual (15 pages)
Table of Contents

Related Manuals for Panasonic EASA-PHONE KX-T1450


Summary of Contents for Panasonic EASA-PHONE KX-T1450
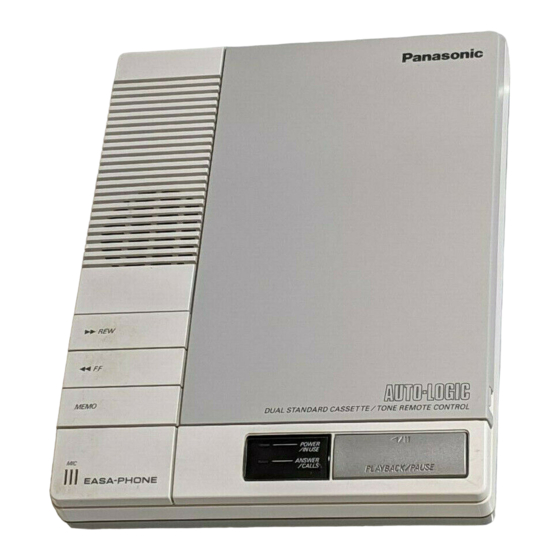
- Page 1 Panasonic Automatic Telephone Answering System KX-T1450 KX-T1451 EASA-PHONE MODEL NO. unit in this picture is the KX-Ti 450. La refrencia rapida en espatiol puede encontrada en las peginas 21-23. (Spanish Quick Reference can be found on pages 21-23.)
-
Page 2: Table Of Contents
Table of Contents Locations of the Controls ....Introduction ....... Preparation CONNECTION ......INITIAL SETTINGS ....TOLL SAVER ......CASSETTE TAPE INSTALLATION ..How to Record an Outgoing Message (OGM) RECORDING THE OGM CHECKING YOUR OGM SAMPLE OGMS . . . Setting Prior to Leaving RECORDING THE CALLERS’... -
Page 3: Locations Of The Controls
Location of the Controls Rewind (REW) Button Fast Forward (FF) Button (page MEMO Button RING Selector (RINGS) POWER ON/OFF Switch ANSWER/CALL Indicator (pane (page 10) PLAYBACK/PAUSE Button (page VOLUME CONTROL REMOTE CODE Selector Telephone Jack (page Telephone Line Jack (page Selector (page Keep this overleaf... -
Page 4: Introduction
Introduction Thank you for purchasing the Panasonic Telephone Answering System. You can use this Model KX-T1450/KX-T1451 w Answer calls and record messages when you cannot answer the telephone or do not want to be disturbed n Monitor (screen) calls Record your personal... -
Page 5: Preparation
CONNECTION Power Outlet (AC1 20 V, 60 Hz) Do not connect the AC adaptor .USE ONLY PANASONIC AC ADAPTOR KX-All. oThe unit must not be connected to a coin operated line. If you are on a party line, check with your local telephone company. -
Page 6: Initial Settings
Preparation INITIAL SETTINGS Calling Party Control (CPC) Setting Set to “A”. (no call waiting service line.) If you have call waiting service or some Incoming Messages interrupted, set to “B”. 02 __.... The unit will answer a call on the AUTO.. -
Page 7: Cassette Tape Installation
Preparation CASSETTE TAPE INSTALLATION 1 Open the panel, and insert the Outgoing Message (OGM) and Incoming Message (KM) tapes as shown. TWO cassette tapes are included. Cl5 for OGM and C60 for ICM. @Do not use endless loop cassette tape. 2 Connect the AC adaptor to the AC outlet. -
Page 8: How To Record An Outgoing Message (Ogm)
How to Record an Outgoing Message (OGM) Before operating your unit, you must record an Outgoing Message (OGM). The OGM will inform the calling party of your absence and your message. RECORDING THE OGM 1 Push OGM REC until a long beep is heard, then release 2 After the long beep, speak clearly and loudly into the microphone... -
Page 9: Checking Your Ogm
Thank you for calling.” “This is the Panasonic (your name or business) Sales Company. We are glad that you called but our office is closed until 9 o’clock in the morning. -
Page 10: Setting Prior To Leaving
Setting Prior to Leaving RECORDING THE CALLERS’ MESSAGES 1 Push POWER ON/OFF to ON. The POWER indicator will light. NOTES: The unit will automatically switch itself to the Answer mode 7 seconds after you set the POWER ON/OFF switch or you complete some other operations. -
Page 11: Listening To The Recorded Messages
Listening to the Recorded Messages l When Incoming Messages have been recorded, the ANSWER/CALL indicator will flash. (Three flashes followed by a pause means that 3 messages were recorded.) l ln case of a power interruption, the ANSWER/CALL indicator will flash slowly after the power is restored. -
Page 12: Other Features
Other Features RECORDING A PERSONAL MESSAGE (MESSAGE MEMO) You may record a personal message any time at home on the ICM tape. It will be heard by anyone retrieving messages from the unit. Push MEMO until a beep is heard. 2 Speak into the MIC. -
Page 13: Saving The Recorded Messages
SAVING THE RECORDED MESSAGES You can save the desired messages. 1 Play back the tape through the message you want to save. 2 Push PLAYBACK/PAUSE to pause. The IN USE indicator will flash. 3 Push PLAYBACK/PAUSE and REW simultaneously. The IN USE indicator will stop flashing. -
Page 14: Erasing The Recorded Messages
ERASING THE RECORDED MESSAGES After you have played back the recorded messages, you can erase them by simply pushing the KM ERASE button. 1 Push ICM ERASE until a beep is heard. The unit will erase the recorded messages while the tape is rewinding. NOTE: The tape can be erased even if the... -
Page 15: How To Operate From A Remote Phone
How to Operate from a Remote Phone On the following pages, we explain how to: SETTING THE REMOTE CODE w PLAYING BACK MESSAGES PLAYING BACK NEWLY-RECORDED MESSAGES (MEMORY PLAYBACK) H REWINDING/FAST FORWARDING TAPE WHILE HEARING THE MESSAGES RECORDING A MARKER MESSAGE RESETTING THE ICM TAPE FOR FUTURE... -
Page 16: Playing Back Messages
How to Operate from a Remote Phone PLAYING BACK MESSAGES You can listen to the recorded messages by simply pushing your own code number. Call your unit, and push the Code No. (2 digits) during the OGM. A beep will sound, then other beeps will sound to tell you the number of recorded messages, up to 8 times. -
Page 17: Rewinding/Fast Forwarding Tape
HOW 10 uperare from a nemore rnone REWINDING/FAST FOR WARDING TAPE WHILE HEA RING THE MESSAGES 1 To Back Space 1 Push “1”. The tape will be rewound for approximately 15 seconds corresponding to the playback time. 1 To Skip Forward lo>... -
Page 18: Resetting The Icm Tape For Future Messages
RESETTING THE ICM TAPE FOR FUTURE MESSAGES To record new Incoming Messages from the beginning of the tape, after the recorded messages are played back or while they are being played; 1 Push “3”. The unit will rewind the tape to the beginning and a beep tone will be heard when the tape has been reset. -
Page 19: Changing The Outgoing Message
How to Operate from a Remote Phone CHANGING THE OUTGOING MESSAGE You can re-record the Outgoing Message from a remote phone. Call your unit, and push the Code No. during the OGM. Push “7” right after you hear the beep tones indicating number of recorded messages. -
Page 20: Setting/Cancelling The Answer Mode
How to Operate from a Remote Phone SETTINGXANCELLING THE ANSWER MODE You can easily set or cancel the Answer mode from a remote phone. Call your unit. I ..Wait for 15 rings. OGM will be heard, then hang up. The unit will be ready to answer the next phone call. -
Page 21: Troubleshooting Guide
Troubleshooting Guide Cause & Remedy Problem The unit does not work when I push any Plug in the AC adaptor then switch buttons. the power on. 01 cannot remove the cassette from the unit. (The unit has been set to the Answer mode, The OGM or KM cassette is cut or \ but no Incoming... - Page 22 Referencia Rbpida Cinta del Mensaie de Salida fOGM) Cinta del Mensaje de Entrada (ICM)--\ Both de rebobinado (REW) Both de avance rapid0 (FF) Both de memorizaci6n (MEMO) Both ICM ERASE Mickfono Conmutador de alimentacih ON/OFF Both (ENCENDIDO/APAGADO) Both PLAY Both de reproduccihlpausa (PLAYBACK/PAUSE) PUESTA...
- Page 23 PA RA ESCUCHA R LOS MENSA JES Cuando el telefono suene, la unidad reproducira el mensaje de salida (OGM) y luego grabara el mensaje de la persona que llama en la cinta. 1 Presione el PLAYBACK/PAUSE (Reproduction/Pause). Auto-Lbgico (Funcibn de un solo toque) Un solo toque del baton PLAYBACK/PAUSE hate posible que la unidad...
- Page 24 PARA ESCUCHAR MENSAJES DESDE OTRO TELEFONO A DISTA NCIA No. de codigo es de dos digitos. REMOTE CODE El primer digit0 es preajustado en la fabrica y el Segundo lo seleccionar seleccionable Control Remoto del Tono 1 Marque el nlimero de telefono con solo un tono telefonico.
-
Page 25: Maintenance
FOR TONE REMOTE CONTROL Should the cassette tape break or become worn, replace it with a high quality “NORMAL” tape. Use Panasonic (C30, C60, C90), TDK or MAXELL cassette tape. Metal or chrome tape cannot be used. oNever... -
Page 26: Others
If the known working phone operates properly, have your Panasonic unit repaired by one of the specified Panasonic Factory Service Centers. the known working telephone does not operate... -
Page 27: Important Information
Important Information If requested by the Telephone Company, inform them as follows: FCC Registration No. . (found on the bottom of the unit) Ringer Equivalence 0.4 B @The particular telephone line to which the equipment is connected. In the event terminal equipment causes harm to the telephone network,... - Page 28 COLORADO 206-872-7922 1640 South Abilene Suite D Aurora. CO 80012 303-752-2024 Service in Puerto Rico MATSUSHITA ELECTRIC OF PUERTO RICO, INC. Panasonic Sales Company/Factory Servicenter San Gabriel lndustrlal Park, 65th Infantry Avenue KM 9.5 Carolina, Puerlo RICO 00630 (809) 750.5135...
- Page 29 (West) of America or Panasonic Sales Company (collectively referred to as “Panasonic”) will repair this product with new or rebuilt parts, free of charge, in the U.S.A. or Puerto Rico for one (1) year from the date of original purchase in the event of a defect in material or workmanship.
- Page 30 Serial No. Name of Dealer Date of Purchase Dealer’s Address Panasonic Company, Division of Matsushita Electric Corporation of America One Panasonic Way, Secaucus, New Jersey 07094 Panasonic Company (West) of America, Division of Matsushita Electric Corporation of America 6550 Katella Avenue,...
Need help?
Do you have a question about the EASA-PHONE KX-T1450 and is the answer not in the manual?
Questions and answers