DSC PowerSeries PC1616 User Manual
V4.6 and higher security system
Hide thumbs
Also See for PowerSeries PC1616:
- Installation manual (73 pages) ,
- User manual (28 pages) ,
- Installation procedures (4 pages)
Table of Contents
Advertisement
Advertisement
Table of Contents

Related Manuals for DSC PowerSeries PC1616


Summary of Contents for DSC PowerSeries PC1616
- Page 1 WARNING: This manual contains information on limitations regarding product use and function and information on the limitations as to liability of the manufacturer. The entire manual should be carefully read. PC1616/PC1832/PC1864 User Manual v4.6 and higher...
-
Page 3: Table Of Contents
Table of Contents About Your Security System ..........1 PowerSeries System Keypads . -
Page 4: Important Safety Instructions
IMPORTANT SAFETY INSTRUCTIONS To reduce the risk of fire, electric shock and/or injury, observe the following: Do not spill any type of liquid on the equipment. • Do not attempt to service this product yourself. Opening or removing the cover may expose •... -
Page 5: About Your Security System
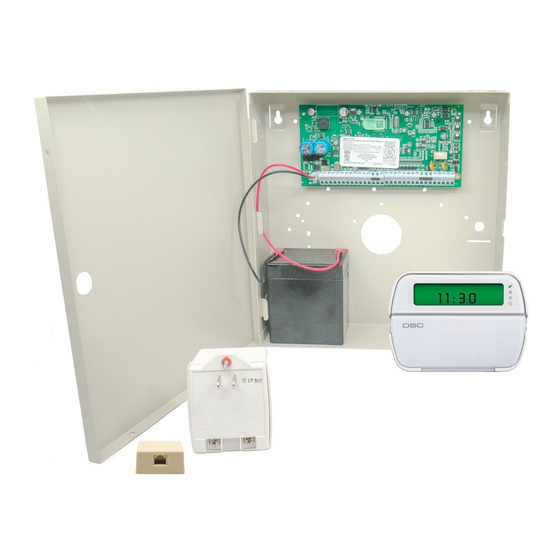
General System Operation Your security system is made up of a DSC control panel, one or more keypads and various sensors and detectors. The control panel will be mounted out of the way in a utility closet or in a basement. -
Page 6: Powerseries System Keypads
PowerSeries System Keypads PK5508/PK5516/RFK5508/RFK5516 PC1555RKZ Status Lights Number Zone Lights PK5500/PK5501/RFK5500/RFK5501/RFK5564 Emergency Keys Stay Away Chime Reset Quick Exit LED5511 LCD5511 Display System Lights Number... -
Page 7: Keypad Display Symbols
Keypad Display Symbols LCD5501 Fixed Message LCD5501 ICON PK5501/RFK5501 LCD5511 PK5508/5516/RFK5508/5516 LED5511 Clock Digits 1, 2 – These two 7 segment clock digits indicate the hour digits when the local clock is active, and identify the zone when the OPEN or ALARM icons are active. These two dig- its scroll one zone per second from the lowest zone number to the highest when scrolling through zones. -
Page 8: Pk5500/Rfk5500/Rfk5564 Language Selection
IMPORTANT NOTICE A security system cannot prevent emergencies. It is only intended to alert you and, if included, your central station of an emergency situation. Security systems are very reliable but they may not work under all conditions and they are not a substitute for prudent security practices or life and property insurance. -
Page 9: Stay Arming (Partially Turning On / Part Setting)
Disarming Error If your code is invalid, the system will not disarm and a 2-second error tone will sound. If this hap- pens, press [#] and try again. Stay Arming (Partially Turning On / Part Setting) Ask your alarm company if this function is available on your system. Stay arming will bypass the interior protection (i.e. -
Page 10: When Alarm Sounds
When Alarm Sounds The system can generate 4 different alarm sounds: • Temporal / Pulsed Siren = Fire Alarm • 4 beeps, 5-second pause, 4 beeps = Carbon Monoxide Alarm • Continuous Siren = Intrusion (Burglary Alarm) NOTE: The priority of signals is fire alarm, carbon monoxide alarm then burglary alarm. Intrusion (Burglary) Alarm Continuous Siren f you are unsure of the source of the alarm approach with caution! If the alarm was acciden- tal, enter your Access Code to silence the alarm. - Page 11 Bypassing Zones with a PK5500/RFK5500/RFK5564 Start with disarming the system. 1. Press [,] to enter the function menu. The keypad will display “Press , for < > Zone Bypass”. 2. Press [1] or [,], then your [access code] (if required). The keypad will display “Zone Search < > Zone Name”.
-
Page 12: Trouble Conditions
Trouble Conditions When a trouble condition is detected, the Trouble ( ) or System indicator will turn on, and the key- pad will beep every 10 seconds. Press the key to silence the beeps. Press [,][2] to view the trouble condition. -
Page 13: Access Codes
When using the PK5500/RFK5500/RFK5564, use the [<][>] keys to find the specific code and press [,] to select. Enter the new 4 or 6-digit access code, or press [,] to erase it. When programming is complete, enter another 2-digit code to program or press to exit. -
Page 14: Bell Squawk Attribute
Bell Squawk Attribute This attribute is used to determine whether an access code should generate an arming/disarming Bell Squawk upon entry of the code for Away arming. The wireless keys with access codes associated with them may generate Arming/Disarming Bell squawks. If desired, this option may be used with codes that are manually entered. -
Page 15: Changing Brightness/Contrast
At the selected auto-arm time, the keypad buzzers will sound for a programmed amount of time (programmable by the installer only) to warn that an auto-arm is in progress. The bell can also be programmed to squawk once every 10 seconds during this warning period. When the warning period is complete, the system will arm with no exit delay and in the Away Mode. -
Page 16: Changing The Buzzer Level
PK5501/PK5508/PK5516/RFK5501/RFK5508/RFK5516 keypads When this option is selected, the keypad will allow you to scroll through 4 different backlighting lev- els. A level of 0 disables the backlighting. 1. Press [,][6][Master Code]. 2. Use the [>] right scroll key to move through the 4 different backlighting levels. 3. -
Page 17: Testing Your Keypad Sounder And Siren
Testing Your Keypad Sounder and Siren The System Test provides several system tests, and a two-second check of the keypad sounder and bell or siren. 1. Press [,][6][Master Code][4]. 2. The following will occur: - The system activates all keypad sounders and bells or sirens for 2 seconds. All keypad lights turn ON. - PK5500/RFK5500/RFK5564 keypads will light all pixels - The Ready, Armed, and Trouble LED’s will flash for the duration of the test 3. -
Page 18: Reference Sheets
Reference Sheets Fill out the following information for future reference and store this guide in a safe place. System Information Enabled? FIRE AUXILIARY PANIC The Exit Delay Time is _______ seconds. The Entry Delay Time is _______ seconds. For Service Central Station Information Account#: ___________________ Telephone#: __________________ Installer Information :... - Page 19 PC1832/PC1864 Code Access Code Code Access Code Code Access Code Code Access Code PC1864 Code Access Code Code Access Code Code Access Code Code Access Code Sensor / Zone Information Sensor Protected Area Sensor Type Sensor Protected Area Sensor Type...
-
Page 20: Guidelines For Locating Smoke Detectors And Co Detectors
Sensor Protected Area Sensor Type Sensor Protected Area Sensor Type Guidelines for Locating Smoke Detectors and CO Detectors The following information is for general guidance only and it is recommended that local fire codes and regulations be consulted when locating and installing smoke and CO alarms. Smoke Detectors Research has shown that all hostile fires in homes generate smoke to a greater or lesser extent. -
Page 21: Carbon Monoxide Detectors
Where required by applicable laws, codes, or standards for a specific type of occupancy, approved single- and multiple-station smoke alarms shall be installed as follows: (1) In all sleeping rooms and guest rooms. (2) Outside of each separate dwelling unit sleeping area, within 6.4 m (21 ft) of any door to a sleeping room, the distance measured along a path of travel. -
Page 22: Household Fire Safety Audit
Household Fire Safety Audit Read this section carefully for important information about fire safety. Most fires occur in the home. To minimize this danger, we recommend that a household fire safety audit be conducted and a fire escape plan be developed. 1. -
Page 23: Keypad Quick Guide
Keypad Quick Guide The following table summarizes the keys, indicators, and most often used commands of the keypad. Status Lights Ready - Must be on to arm system. All zones must be secured or bypassed and the system disarmed for this light to activate. Armed - Indicates system is armed. - Page 24 Press [<][>]buttons to scroll to user code. Enter [Master Code][9][xx] to enter the user code (xx = 1-16). [1] Supervisor’s Code [2] Duress Code Program User Codes [3] Zone Bypassing Change Attributes [4] Remote Access [5]-[6] Future Use [7] Bell/Siren Squawk Output [8] One Time Use Code User Commands Event Buffer...
-
Page 25: Warning Please Read Carefully
WARNING Please Read Carefully N o te t o Insta llers positioned. Smoke may not be able to reach the smoke detectors, such as when the fire is in a chimney, walls or roofs, or on the other This warning contains vital information. As the only individual in side of closed doors. -
Page 26: Important Information
DSC c/o APL Logistics 757 Douglas Hill Rd, Lithia Springs, GA 30122 - Re-orient the receiving antenna. Additional Information - Increase the separation between the equipment and receiver. -
Page 27: New Zealand Telecom Network
Decadic signalling should not be used as it is being progressively phased out of (f) Termination - Without prejudice to any other rights, DSC may terminate this EULA if You fail to the network. DTMF dialling is 100% available and it should always be used. - Page 28 Product offerings and specifications are subject to change without notice. Actual products may vary from photos. Not all products include all features. Availability varies by region; contact your sales representative. © 2012 Tyco International Ltd. and its Respective Companies. All Rights Reserved Toronto, Canada www.dsc.com Printed in Canada...
Need help?
Do you have a question about the PowerSeries PC1616 and is the answer not in the manual?
Questions and answers