Table of Contents
Advertisement
Quick Links
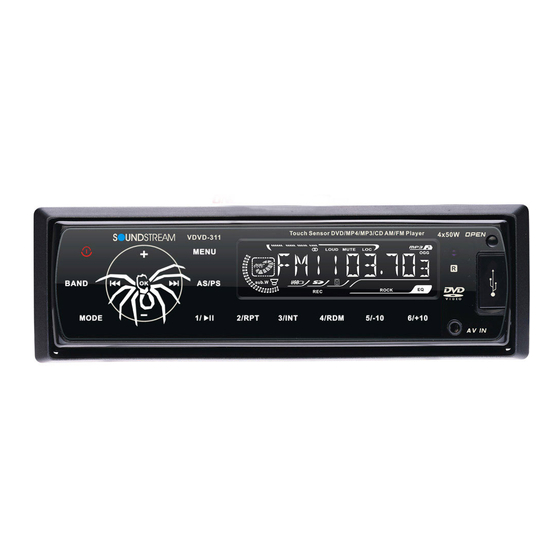
VDVD-311/ VDVD-311T
Single-DIN A/V Multimedia Source
Touch Sensor
DVD/CD/MP3/MP4
AM/FM Radio
Built-in TV tuner
Owner's Manual
Take the time to read through this owner's manual.
Familiarity with installation and operation procedures will help you obtain the best
Performance from your new DVD-receiver.
Advertisement
Table of Contents

Subscribe to Our Youtube Channel
Related Manuals for Soundstream VDVD-311T


Summary of Contents for Soundstream VDVD-311T
- Page 1 VDVD-311/ VDVD-311T Single-DIN A/V Multimedia Source Touch Sensor DVD/CD/MP3/MP4 AM/FM Radio Built-in TV tuner Owner’s Manual Take the time to read through this owner’s manual. Familiarity with installation and operation procedures will help you obtain the best Performance from your new DVD-receiver.
-
Page 2: Table Of Contents
Table of Contents Table of Contents........................1 Important Safeguards.........................2 Accessories ........................3 Installation/Un-Installation ......................4 Wiring Connections........................5 Detachable Control Panel ......................6 Panel Controls……………......................7 IR Remote Controls ........................8 General Operations........................9 Digital Tuner..........................10 SD/MMC Cards/ USB Operations .....................11 Disc operations........................13 MP3 overview........................16 Setup MENU..........................17 Anti-theft system..........................20 Note on Discs.......................... -
Page 3: Important Safeguards
Important Safeguards Using the device at temperature below -10 may cause the breakage of the device. BEFORE ℃ USING PLEASE HEAT UP THE PASSENGER COMPARTMENT TO THE RECOMMENDED TEMPERATURE! Read carefully through this manual to familiarize yourself with this high-quality sound system. Disconnect the vehicle's negative battery terminal while mounting and connecting the unit. -
Page 4: Accessories
Accessories Package contains the following accessories for installation and operation of the unit. (1) Washer, Spring 1 each Washer, M5 Nut (2) Mounting Strap (3) Screw (4) Bolt (5) Mounting Collar (6) Release Key (7) Rubber Cushion Owner’s Manual Remote Controller Panel Carrying Case AUX IN Cable Page- 3... -
Page 5: Installation/Un-Installation
Installation/Un-Installation First complete the electrical connections, and then check them for correctness. Installation This unit can be installed in any dashboard having an opening as shown on the picture. The dashboard should be 4.75 – 5.56 mm thick in order to be able to support the unit. 1. -
Page 6: Wiring Connections
Function Connector A Connector B Rear Right(+)---Purple Rear Right(-)---Purple/Black Stripe Front Right(+)---Grey Battery 12V (+)/yellow Front Right(-)---Grey/Black Stripe Auto Antenna/blue Front Left(+)---White Front Left((-)---White/Black Stripe ACC+/red Rear Left(+)---Green Ground/black Rear Left(-)---Green/Black Stripe **TV antenna is for VDVD-311T only. Page- 5... -
Page 7: Detachable Control Panel
Caution: Do not interchange the connection of the wiring!!! For some car models you may need to modify wiring of the supplied power cord. Contact your authorized car dealer before installing this unit. Remark: When you back a car, screen display switch to Rear Camera automatically Detachable Control Panel Detaching the control panel Turn the Power off. -
Page 8: Panel Controls
Panel Controls 1. Power/Mute 14. PRESET 1/play pause 2. BAND 15. PRESET 2./RPT 3. PREVIOUS 16. PRESET 3./INT 4. VOL + 17. PRESET 4/RDM 5. NEXT 18. PRESET 5/STOP 6. DISP 19. PRESET 6/MENU 7. AS/PS 20.AUX IN JACK 8. LCD 21.USB SLOT 9. -
Page 9: Ir Remote Controls
IR Remote Control 1. MODE 2. POWER 3. BND/RDM 4. ENTER 5. Cursor / / / 6. STEREO/MONO 7. LOC/ PROG 8. P.SCN/RPT 9. SEEK-/ 10. LOUD 11. OSD 12. STOP/ PBC 13. Digit 0-9 15. MUTE 16. MENU 17. SUB-T 18. -
Page 10: General Operations
General Operations Reset the Unit In case the unit is malfunctioned or need to reset to factory default setting, press RESET button in inner panel then the unit will be reset. Power on/off Press POWER key button to turn on the unit. Long press POWER key on front panel or press POWER button on RC to power off the unit. -
Page 11: Digital Tuner
Digital Tuner Band selection Press MODE button to select the RADIO mode. Press the BAND button to select the desired band: FM1=> FM2 => FM3 => AM1=>AM2 STEREO/MONO In FM mode, press SETREO/MONO button on remote control to select stereo or mono sound reception. -
Page 12: Sd/Mmc Cards/ Usb Operations
SD/MMC Cards & USB Operations USB Flash Memory To play MP3/ MP4/ WMA files from a USB flash memory, insert a USB flash memory into the USB port on the right side of the unit. The unit will start playing MP3/MP4/ WMA files on the USB flash memory automatically. -
Page 13: Intro Playback
Repeat Press the RPT button on remote control or the panel for RPT1 (repeat the current playing file) => RPT ALL (repeat all folders) => RPT folder (repeat current folder) => RPT OFF. Repeat A-B Function 1. Press A-B button on the remote at the starting point of the section you want to repeat (point A). 2. -
Page 14: Disc Operations
Discs operations Glossary PBC (Play Back Control) Play Back Control is a menu recorded on the disc with SVCD or VCD2.0 format. For the discs contained PBC, it can playback interactive software with the menu displayed on TV. And if the disc contains still images, it can playback high definition of still image. -
Page 15: Repeat Playback
Playing/pausing To ensure good system performance, wait until the unit finishes reading the disc information before proceeding. Press the PLAY/ PAUSE button to start/ pause the playback. In pause mode press it again to resume the playback. Stop During playback press the STOP button on the RC or on the panel. Playback will be stopped. Press the PLAY/ PAUSE button again to start playback from the position at which it was stopped. - Page 16 PBC (Playback Control) function (for VCD only) If you insert a VCD with PBC, playback starts from the beginning of the 1st track automatically. 1. Long press PBC/STOP button to activate interactive menu on screen during playback. 2. If the menu consists of titles, you can select a desired one using the 0-9 buttons.
-
Page 17: Mp3 Overview
MP3 overview Notes on MP3: MP3 is short for MPEG Audio Layer 3 and refers to an audio compression technology standard. This product allows playback of MP3 files on CD-ROM, CD-R or CD-RW discs. The unit can read MP3 files written in the format compliant with ISO 9660. However it does not support the MP3 data written by the method of packet write. -
Page 18: Setup Menu
Setup Menu • Press SETUP button to enter the system settings main menu; • Press cursor buttons to move along icons on the top navigation bar on settings main menu. Select one of the setup pages: General, Speaker, Downmix, Audio; •... -
Page 19: Video Settings
Dolby settings Menu entry With this menu item you can select the type of Left and Right channel audio output. Stereo is normal Stereo, Mono L is all sound Dual on the Left Audio output, mono Mono R is all sound on the Right channel. - Page 20 Menu Function entry This setting enables the selection of the appropriate TV standard. PAL is the customary standard in Europe. NTSC is the customary standard in the US and Japan. Only select TV Type the MULTI option if your TV can play back both formats. Here the output signal is automatically adjusted to the standard of the inserted DVD.
-
Page 21: Anti-Theft System
TV OPERATIONS (TV function is for VDVD-311T only) Connect TV antenna as it is shown on electrical connection diagram. Switch to TV mode Press MODE button repeatedly to select the TV mode, and press BAND select TV system: PAL DK →PAL I→PAL BG→PAL M→PAL N→SCEAM DK→SCEAM BG→NTSC M... -
Page 22: Note On Discs
Note on Discs Only use groundless loudspeakers. Use only loudspeakers of minimal 40 Watt, using fewer watts may result in damaging your loud speakers at higher volumes. Use 4~8 Ω (Ohm impedance) loudspeakers only; using higher or lesser impedance may damage the unit. -
Page 23: Troubleshooting Guide
Troubleshooting guide Symptom Cause Solution If the power supply is properly connected to the The car ignition is not General No power accessory switch the ignition key to “ACC”. The fuse is blown. Replace the fuse. Disc Presence of disc inside Remove the disc in the player then put a new Disc cannot be the player... -
Page 24: Specification
Specification General Power supply: 12 V DC Current consumption: max. 10 A Maximum power 40W x 4 channels output: Compatible formats: DVD/SVCD/VCD/HDCD/MP3/MP4/WMA/CDDA/Picture-CD/JPEG/ CD-R/ -RW/DVD±R/±RW playback Dimensions 178 x 175 x 50 mm / 1.8 kg (W x D x H) / weight: ESP function: 40 sec.
Need help?
Do you have a question about the VDVD-311T and is the answer not in the manual?
Questions and answers